

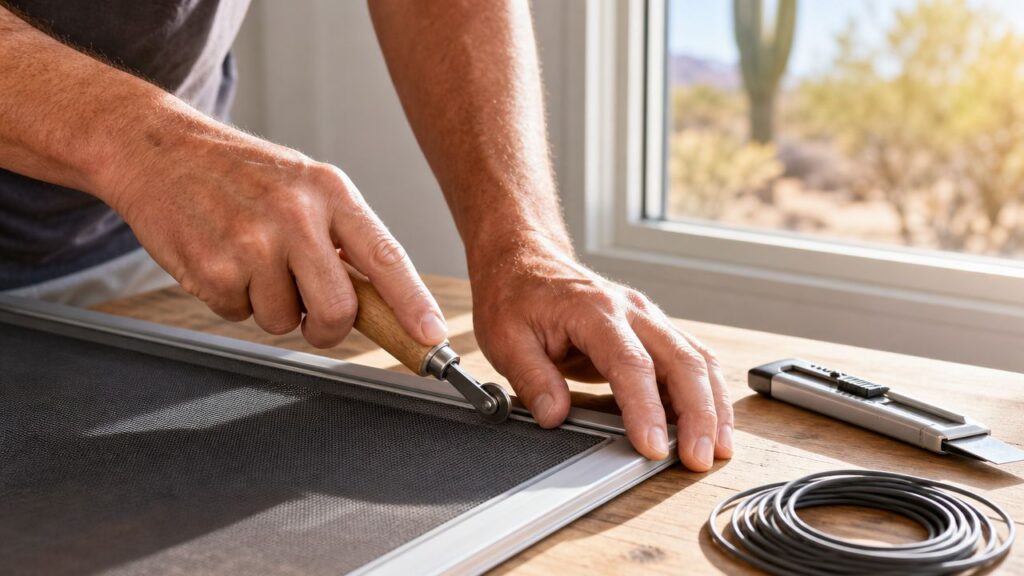
Repairing a window screen is often the cheaper move. Small repairs commonly run about $20 to $70 per screen, while full replacement averages about $317 per screen, which is why learning a solid DIY fix can save real money.
If you're staring at a torn screen right now, you're probably deciding between three things: patch it, re-mesh it, or pull the whole thing out and start over. In Phoenix, that decision gets harder because sun, heat, and UV exposure don't just tear mesh. They dry it out, shrink parts, weaken corners, and turn a simple fix into a short-lived one if you miss the underlying issue.
A lot of window screen repair guides stop at the basic spline-and-roller method. That works for many jobs, but it doesn't answer the questions Arizona homeowners run into. What if the frame is bowed from heat? What if it's a solar screen, not standard bug mesh? What if the patch holds in the garage but fails after a week in direct west-facing sun?
This guide is built around what lasts.
Is Your Window Screen Worth Saving
The first thing to check isn't the hole. It's the overall condition of the screen assembly.
A torn spot in otherwise healthy mesh is usually worth fixing. A torn spot in brittle, sun-cooked mesh usually isn't. I see homeowners patch one corner, then another tear opens the next time they remove the screen. That isn't bad luck. That's material at the end of its life.

Start with a fast damage check
Set the screen on a flat surface and look at these parts separately:
Mesh condition
Look for a single puncture, long tears, frayed strands, fading, or areas that feel dry and brittle.Spline condition
The spline is the rubber cord that locks mesh into the frame. If it's cracked, flattened, loose, or shrinking back from the corners, the mesh may not stay tight after repair.Frame condition
Check for bends, twisted corners, cracked frame joints, or a frame that rocks on a flat table.Fit in the opening
If the screen pops out, binds, or leaves visible gaps, the problem may be frame shape, not just torn mesh.
A simple repair versus replace test
Use this flow when you're deciding what to do:
- Small isolated hole and frame is straight. Patch it.
- Large tear but frame is still solid. Re-mesh it.
- Loose mesh plus old spline. Re-mesh with new spline.
- Multiple tears, fading, and brittle mesh. Replacement starts making more sense.
- Warped or badly bent frame. Treat it as a frame problem first.
Practical rule: Minor damage usually justifies repair, but once wear stacks up across the mesh and frame, replacement becomes the smarter call.
Industry guidance from Screen Mobile says window screens generally last about 8 to 10 years before wear, fading, stretched mesh, or repeated tears make replacement more appropriate, especially as deterioration builds over time (Screen Mobile on repair versus replacement).
What Phoenix heat changes
In Arizona, visual damage often shows up late. A screen can look acceptable from inside the house and still fail the moment you handle it. Sun-exposed mesh gets brittle. Aluminum frames can bow slightly. Corner tension changes. West-facing windows usually show it first.
Watch for these heat-related signs:
| Sign | What it usually means |
|---|---|
| Mesh snaps when touched | UV damage and brittleness |
| Corners wrinkle after reinstall | Uneven frame shape or poor tension |
| Screen won't sit flat on the floor | Frame twist or bow |
| Spline pulls loose at corners | Shrinkage, wear, or wrong spline fit |
If you can already see fading, feel dryness, and find more than one weak area, don't expect a patch to turn it into a long-term fix. A lot of failed DIY window screen repair jobs happen because the homeowner repairs the tear they can see and ignores the aging material around it.
Gathering Your Repair Kit and Materials
A repair usually goes sideways before the new mesh ever touches the frame. The wrong spline rolls out of the package. The frame is hot from sitting in the driveway. The mesh gets cut on a rough patio table and starts fraying before install.
Set up your tools and materials in the shade first. In Phoenix, that matters more than people expect. Hot aluminum moves a little, solar screen fabric gets less cooperative, and a rushed install in direct sun often ends with loose corners or a wavy finish after the screen cools off.

The core tools that actually matter
A basic screen job does not require a big tool collection. It does require a few tools that fit the work.
Spline roller
Use a roller with a wheel that matches the groove and spline size. A cheap roller still works, but a worn wheel can jump the channel and slice fresh mesh at the corners.Fresh utility knife blades
Change blades often. In fiberglass mesh, a dull blade drags. In solar screen fabric, it can leave fuzzy edges that make the finished job look sloppy.Heavy-duty scissors
Use these for rough cuts before the final trim. They are especially helpful with thicker pet mesh and solar fabrics that fight a standard utility cut.Work gloves
Old aluminum frames can have sharp burrs. Heat-dried spline can crack into stiff little pieces that are rough on your hands.Cleaning rag, pick, or small brush
The spline channel has to be clean. Packed dust, old spline crumbs, and oxidation keep the new spline from seating fully, and that is a common reason corners lift later.
If you want a practical buying list, this guide to window screen repair tools covers the basics clearly.
Materials that make or break the repair
Material choice decides whether the repair lasts through one summer or several.
Screen mesh
Match the new mesh to the screen you are replacing, not just to what the home center has on the shelf. Standard fiberglass works fine for many insect screens. Aluminum mesh stays crisp but can kink. Pet mesh holds up better to claws, though it puts more strain on light frames. Solar screen fabric cuts glare and heat, but it is thicker, darker, and less forgiving if your frame is even slightly out of square.
That last part matters on newer homes and big west-facing windows. I see plenty of frames that look straight in place but show a slight bow once they are on the table. Standard mesh can hide a little of that. Solar fabric usually will not.
Spline
Spline size has to match the groove and the mesh thickness. Reusing the old spline is where a lot of DIY repairs start to fail, especially in Arizona. Heat cooks rubber and vinyl over time. It comes out stiff, flattened, or shrunken, then goes back in without enough grip.
Keep the old spline as a sample until you buy replacement. If you are switching from standard insect mesh to pet mesh or solar screen, expect the spline size to change too.
Arizona-specific setup tips
Work on a flat surface. Keep the frame out of direct sun while you install the mesh. If the frame is already hot to the touch, let it cool before you tension anything. A screen assembled in extreme heat can relax once it is back indoors or after sunset, and that is when homeowners notice ripples.
Modern homes add a few wrinkles here. Some screens use thicker solar materials. Some have tighter frame tolerances. Some large openings need more care than a basic bathroom bug screen. The kit is still simple, but the material match needs to be exact.
Buy for the screen type, the frame condition, and the exposure on that side of the house. That is the difference between a repair that stays flat and one that starts looking temporary in a month.
Patching Small Holes and Tears Like a Pro
A small hole doesn't need a full re-screen. If the frame is sound and the surrounding mesh still has some life in it, patching is the fastest fix.
The difference between a clean patch and an ugly one usually comes down to prep. Most bad patch jobs happen because the homeowner tries to cover a ragged tear as-is. Loose strands keep lifting, the patch line looks messy, and the repair draws your eye every time sunlight hits it.

Square the damage before you patch
Home Depot's repair guidance recommends measuring the damaged area, cutting the hole into a neat square, then applying a patch about 1/2 inch larger than the hole on every side so the patch fully covers the defect. The same guidance notes that patching is best for small, isolated damage, not screens with widespread brittleness (Home Depot window screen repair steps).
That square-cut method works because it gives you a clean edge and a consistent overlap. On a jagged tear, you never get even coverage.
The patch process that looks cleaner
Use this sequence:
Remove the screen if possible
You can patch in place, but it's easier to work flat.Trim the damaged spot into a square
Don't leave frayed strands hanging loose.Cut your patch larger than the opening
Keep the overlap even all the way around.Dry-fit first
Make sure the patch sits flat without curling corners.Attach gently and evenly
Press from the center out so you don't trap bubbles or twist the mesh.Let it set before reinstalling
Rushing this step is how edges lift.
What works and what doesn't in Phoenix heat
A patch can hold well on the right screen. It can also fail quickly if the surrounding material is already cooked by UV.
Here's the practical difference:
Works well
One puncture, one tear, healthy surrounding mesh, straight frame, low handling.Usually disappoints
Dry mesh, multiple weak spots, edge tears near the frame, or a screen that gets removed often for cleaning.Looks bad even if it holds
Mismatched patch material on highly visible front windows or solar screens.
A patch is for localized damage. It isn't a rescue plan for a screen that's aging out everywhere else.
Make the repair disappear as much as possible
For a cleaner-looking patch, pay attention to the grid line of the mesh. If the patch is rotated slightly off pattern, the eye catches it immediately. Line up the weave before you press it down.
Also keep the patch modest. If you're covering a larger area just to avoid re-meshing, you're usually making the screen uglier and weaker at the same time.
A patched screen should do one job first. Keep bugs out. If it also looks tidy from the curb, that's a good repair. If the tear is already large enough that you're trying to hide it with an oversized patch, skip ahead to a full re-mesh.
A Step-by-Step Guide to Re-Meshing a Screen
When the tear is too big to patch, re-meshing is the fix that restores the whole screen without replacing the frame. This is the part of window screen repair that rewards patience. The job itself isn't complicated. The technique matters.
For a durable re-mesh, Phifer's installation guidance recommends removing the screen frame, extracting the old spline and mesh completely, laying the frame flat, then installing new mesh with about 1/2 inch (1.3 cm) overlap on all sides before rolling in new spline. The biggest failure point is poor tension control during spline installation (Phifer screen installation guidance).

Remove the old mesh without damaging the frame
Lay the screen flat on a table or clean floor. Start at a corner and lift the old spline carefully. Once it's out, the old mesh should peel off easily.
Then clean the groove. Dust, old rubber bits, and packed debris stop the new spline from seating evenly.
Check the frame before you continue
Before you install anything new, do a quick fit check:
- Set it on a flat surface and look for rocking.
- Inspect the corners for looseness or separation.
- Look down the rails to spot a bow or twist.
If the frame shape is off, a perfect mesh install won't fix the final fit.
A lot of homeowners skip measuring too. If the screen is an odd size or you're replacing several at once, this guide on how to measure window screen size helps prevent ordering or cutting mistakes.
A visual walkthrough helps here before you start rolling spline.
Lay the new mesh the right way
Set the new mesh over the frame with even overlap on all sides. Keep it square to the frame. If it's skewed now, you'll fight wrinkles the rest of the way.
Don't pull it drum-tight before you begin. That's a common DIY mistake. You want it straight and controlled, not stretched hard enough to bow the frame.
Roll in the spline with controlled tension
Most jobs go wrong at this point.
Start on one side and press the spline into the groove while holding the mesh flat and aligned. Move to the opposite side and keep the tension even. Then finish the remaining sides.
Use steady pressure with the roller. Don't jab at the corners or force the spline in at awkward angles.
Tension rules that keep the screen flat
Use these practical checks while you work:
Watch the frame rails
If they start bowing inward or outward, you've pulled too hard.Check the mesh pattern
If the grid starts leaning, the mesh isn't square.Pause at each corner
Corners are where pull-out starts if the spline isn't fully seated.Keep your hands moving lightly
Small adjustments beat one hard tug.
Phifer and Lowe's guidance also emphasizes keeping the mesh uniformly taut, pressing spline securely into corners, and trimming near the outside edge of the spline groove to avoid cutting the new mesh. Lowe's also recommends 45-degree corner overlaps for cleaner corners and less bunching. Those little geometry details make a noticeable difference on residential aluminum and vinyl screen frames.
Keep the mesh straight and taut, not stretched to the point that the frame fights back.
Trim for a clean finish
Once the spline is fully seated, use a fresh utility blade to trim the excess mesh. Cut along the outside edge of the spline groove. Slow is better than fast here. One slip can slice the new screen or nick the spline.
Then reinstall the screen and check these three things:
| Final check | What you want to see |
|---|---|
| Surface | Smooth mesh with no ripples |
| Corners | No loose bunching or pull-out |
| Fit | Screen sits in place without force |
If you see a wrinkle right away, fix it right away. Don't assume it will flatten out later. It won't. In Arizona heat, small installation errors usually become more visible after the screen cycles through hot afternoons and cooler nights.
Fixing Bent Frames and Handling Special Cases
You finish a re-mesh job, the screen looks good on the table, then it goes back into a west-facing Phoenix window and shows a gap by late afternoon. That usually points to a frame problem, not a mesh problem.
In Arizona, screen frames take a beating from heat, repeated removal, pressure during washing, and large modern window openings that ask a lot from light aluminum. Standard repair advice usually stops at mesh and spline. Real jobs here also involve heat-warped frames, solar screens, pet mesh, clip-in systems, and oversized panels that go out of square fast.
Minor frame bends you can usually correct
A small bow in one side can often be improved if the corners are still tight and the frame has not cracked.
Set the screen on a flat surface first. Press lightly on the high spot, then check the frame again. Work in small corrections. If you try to bend aluminum back in one shot, it often kinks, and once that happens the screen rarely sits right again.
Use this quick read before you spend more time on it:
- One rail has a light bow. Usually repairable enough for normal use.
- The frame twists corner to corner. Harder to correct and easy to make worse.
- Corner keys are loose, cracked, or separating. Re-meshing will not solve the underlying problem.
- The frame rocks hard on a flat table. Expect fit issues even if the mesh goes in clean.
If the frame is only slightly out and the opening is forgiving, a DIY repair can still make sense. If you want a realistic price comparison before buying new parts, this guide on window screen repair cost helps set the line between fixing and replacing.
Heat changes the outcome
Heat affects more than comfort while you work. It changes how the repair behaves after installation.
A screen that fits inside an air-conditioned room can loosen or gap once it goes back into a hot window channel. Worn spline grooves show up faster in summer. Frames that already have a little memory from sun exposure tend to move back toward that shape after you reinstall them. I see this a lot on south and west exposures in Phoenix, especially on older builder-grade frames.
That is why some DIY repairs fail even when the mesh work looks decent. The frame was the weak point all along.
Special screen types need different judgment
Modern homes bring more specialty screens, and each one has its own limits.
Solar screens
These are common in Arizona for a reason. They cut glare and heat gain, but patching them can leave an obvious color and openness mismatch. On front-facing windows, a full panel replacement usually looks better than a patch.Pet-resistant mesh
Stronger mesh sounds like an upgrade until it starts pulling a light frame out of square. On thin aluminum frames, heavy mesh can create a bow if you tension it like standard fiberglass.Magnetic or clip-in screens
The attachment hardware matters as much as the mesh. If clips are bent or magnets are pulling unevenly, the screen may never sit flush until that hardware is corrected.Oversized screens
Big horizontal spans magnify every mistake. A little wave in the mesh or a slight bend in the frame becomes obvious fast, especially in bright sun.
Troubleshooting common failures
When a repair goes sideways, match the symptom to the cause before pulling everything apart.
| Problem | Likely cause | Better fix |
|---|---|---|
| Wrinkles through the center | Mesh went in out of square or tension is uneven | Pull spline from the affected sides and reset the mesh straight |
| Spline lifts out later | Groove is dirty, worn, or paired with the wrong spline size | Clean the groove and match the spline to the frame |
| Frame bows after re-meshing | Mesh is too tight for that frame | Reinstall with less tension, especially with pet mesh or solar mesh |
| Screen fits loose in the opening | Frame shape or corner hardware issue | Correct the frame or replace damaged corners before blaming the mesh |
| Screen looked fine indoors but gaps outside | Heat exposure reveals warp or poor fit | Test fit in the actual window, preferably before the hottest part of the day |
Screens also get bent during removal and reinstall, especially when someone is trying to clean windows quickly from the outside. If you already use a professional window cleaning service, ask them to flag warped frames before the next wash. Catching that early is cheaper than re-meshing a frame that should have been replaced.
A good repair sits flat, fits the opening cleanly, and still looks right after a few Phoenix afternoons. If the frame cannot hold shape in heat, new mesh will not rescue it.
When DIY Window Screen Repair Is Not the Answer
Some repairs save money. Some just waste a Saturday and leave you ordering parts twice.
According to Angi's 2026 pricing guide, screen repair commonly costs about $20 to $70 per screen, while full replacement averages about $317 per screen, and replacement is often recommended when repair costs approach or exceed 50% of replacement cost (Angi screen repair and replacement costs). That's the clearest cost line most homeowners need.
Cases where DIY still makes sense
DIY is usually worth it when the job is straightforward:
- Single small tear in otherwise healthy mesh
- One standard frame with no visible bend
- Basic re-mesh job where the screen sits flat and the corners are solid
If you're already cleaning windows and maintaining your exterior, screen repair can fit into the same routine. Homeowners who hire a professional window cleaning service often notice screen damage during that work, which is a good time to decide whether the screen needs a patch, a re-mesh, or a full replacement.
Cases where it's better to call a pro
DIY usually stops making sense when the issue is structural, hard to access, or easy to botch.
Second-story screens
The repair itself may be easy. Safe access isn't.Severely bent or broken frames
Mesh replacement won't solve a shape problem.Custom or oversized screens
These are less forgiving and harder to fit cleanly.Solar screens on visible elevations
Cosmetic mismatch matters more, and material choice matters more.Repeated failed repairs
If the same screen keeps loosening or tearing again, the underlying problem probably wasn't fixed.
For homeowners trying to compare effort, parts, and service cost, this breakdown of the cost to repair a window screen gives a practical reference point.
One more thing matters in Phoenix. Heat exposes bad installs fast. If a frame is already warped, if the mesh type is specialized, or if the fit has to be exact for appearance and airflow, a pro repair often costs less than doing the job twice.
If you're in Phoenix or anywhere in Arizona and you'd rather skip the trial-and-error, Sparkle Tech Window Washing handles window screen repair, rescreening, and replacement for standard bug screens and sun screens. If your frame is warped, your mesh is brittle, or you just want the screen to fit right the first time, it's a practical option.