


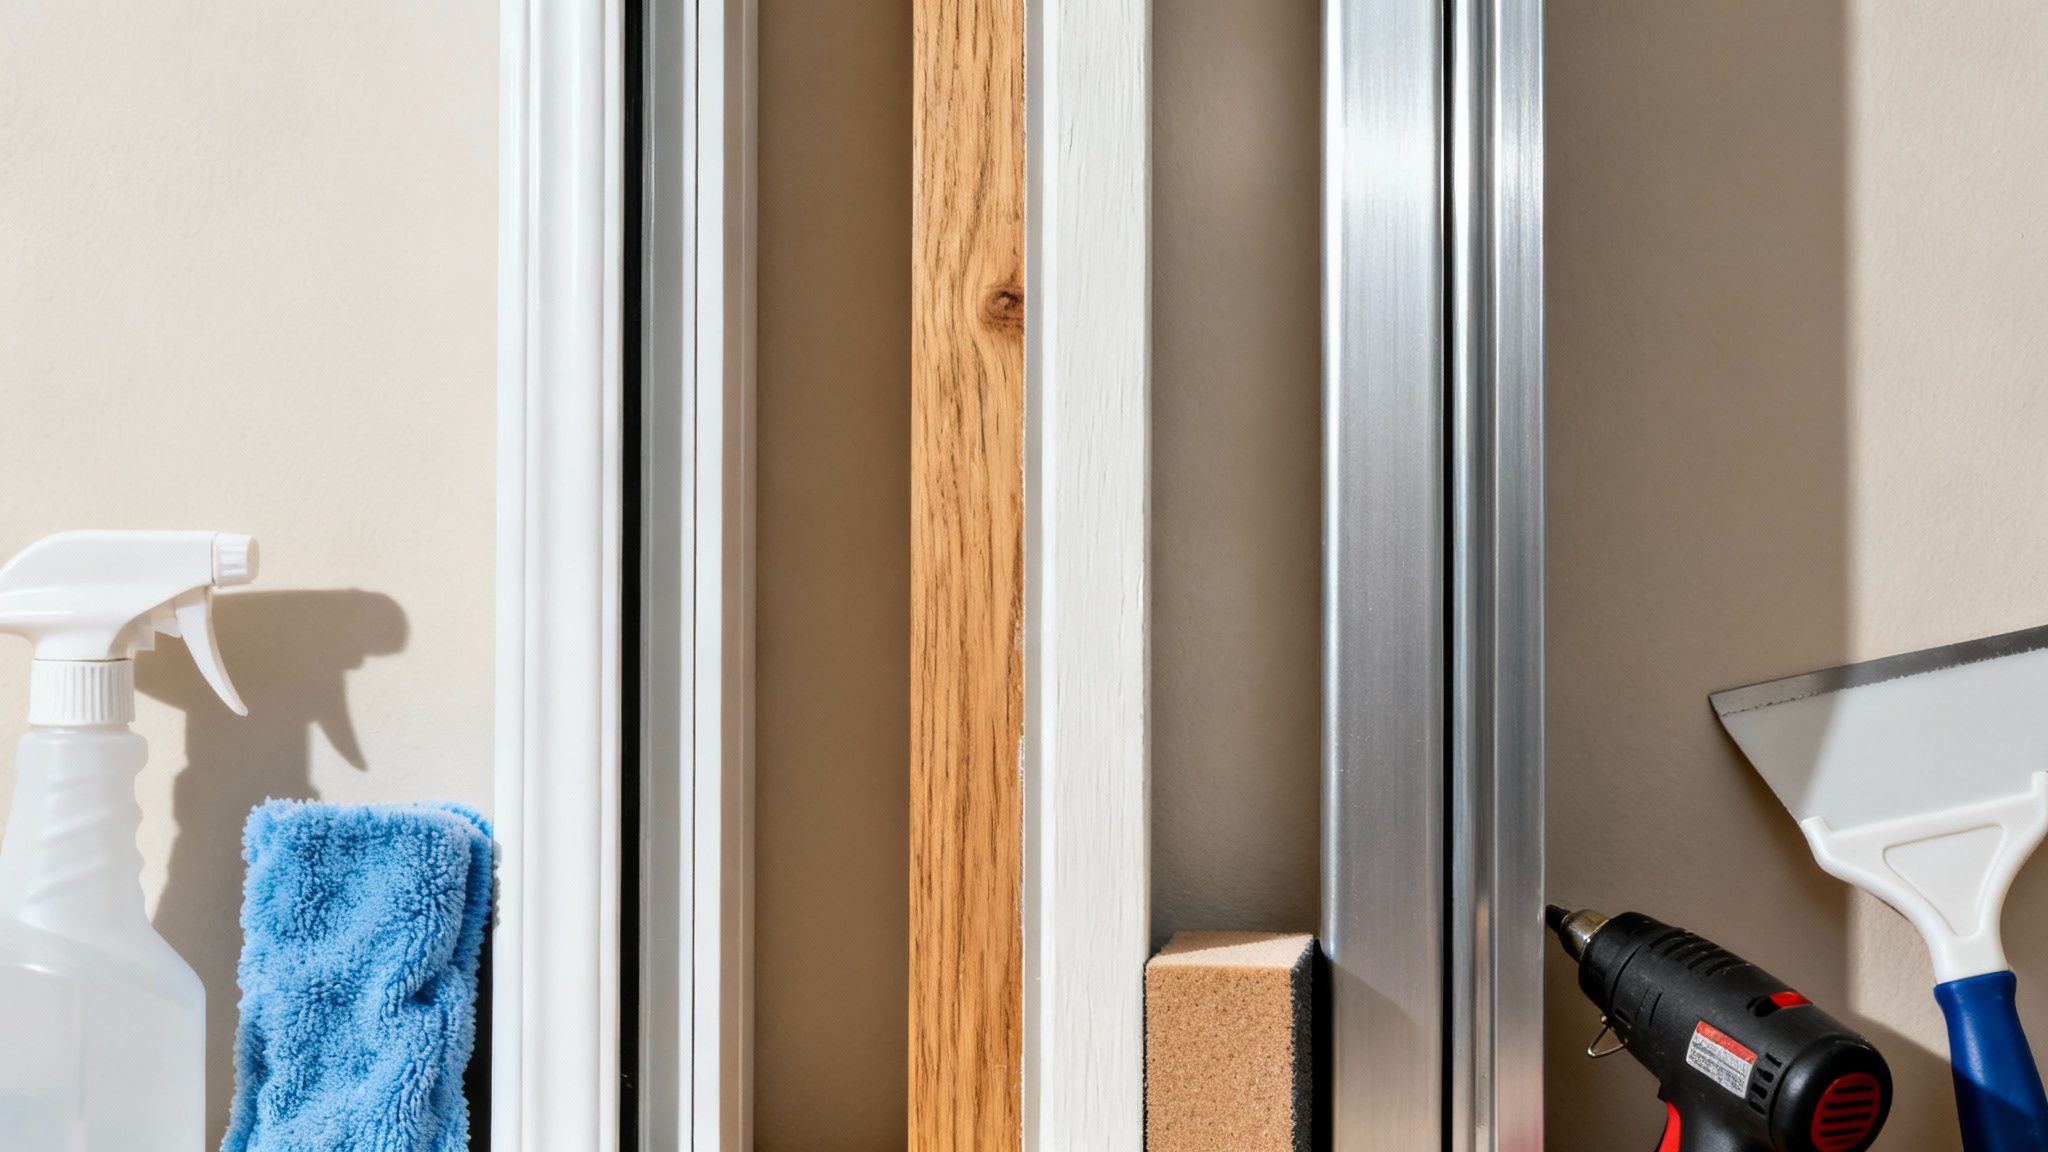
Before you even think about touching a scraper to glass, a little prep work can be the difference between a pristine, professional-looking window and a scratched-up mess. Getting your tools and a game plan together first is the secret sauce. It’s all about working smart, not hard, and protecting your windows in the process.
Gathering Your Tools and Safety Essentials
The first thing I do on any paint removal job is get my workstation set up. Having everything you need right there not only saves you from running back and forth but also helps contain the mess. This isn't just about grabbing a razor blade; it's about creating a safe, efficient setup.
Your whole approach will hinge on what kind of paint you're up against. So, let's figure that out first.
Identifying the Paint Type
You absolutely have to know if you're dealing with latex (water-based) or oil-based paint. The tools and techniques are completely different. Thankfully, there’s a simple trick for this.
Just grab a cotton ball, soak it in a bit of rubbing alcohol, and press it against a small spot of paint for about 30 seconds.
- Latex Paint: If the paint gets a little gummy and some of it transfers to the cotton ball, you’ve got latex paint. That's good news—it’s much easier to deal with.
- Oil-Based Paint: If nothing happens, you're looking at oil-based or enamel paint. This means you'll need to bring out the stronger stuff or rely more on elbow grease.
Matching Paint Type to the Right Removal Method
Use this quick guide to identify the paint on your window and select the most effective tools and removal strategy for the job.
| Paint Type | How to Identify | Best Removal Method | Essential Tools |
|---|---|---|---|
| Latex Paint | Softens or comes off with rubbing alcohol. | Lubricate with soapy water and scrape carefully. | Razor scraper, soapy water, microfiber cloths. |
| Oil/Enamel Paint | Unaffected by rubbing alcohol; has a hard, glossy finish. | Requires a specialized paint remover or mineral spirits. | Paint solvent, chemical-resistant gloves, putty knife. |
Once you know what you're up against, pulling together the right kit is straightforward.
Essential Tools for the Job
Now that you know the enemy, you can assemble your arsenal. The core tools for a clean job are pretty consistent, even if your solvent changes.
Here’s what I always have on hand:
- A 1.5-inch Razor Scraper: This size gives you the perfect balance of coverage and control. The golden rule? Always start with a brand-new blade. A dull blade will make you push harder, and that’s how you get scratches.
- Painter's Tape: This is your best friend for protecting window frames, especially if they’re wood or vinyl. Its gentle adhesive won’t damage the finish when you pull it off later.
- Spray Bottle with Soapy Water: A few drops of dish soap in water is the perfect lubricant. It helps the razor glide right over the glass instead of chattering and potentially scratching it.
- Microfiber Cloths and Paper Towels: You can never have too many of these for wiping up paint gunk and giving the glass a final polish.
Pro Tip: I always keep a small, lined trash can right next to me. Tossing paint flakes and used towels into it as I go makes cleanup a breeze and keeps the work area from getting chaotic.
Prioritizing Your Safety
The moment you bring chemical removers into the picture, safety has to be your top priority. Ventilation is non-negotiable. Throw open some windows, get a fan going to pull fumes away from you, and create some airflow.
And please, wear your personal protective equipment (PPE):
- Safety Glasses: A tiny fleck of paint or a splash of solvent in the eye is a trip to the emergency room you don’t want to make.
- Chemical-Resistant Gloves: Standard latex gloves won't cut it. You need nitrile or butyl gloves to protect your skin from the harsh chemicals in paint removers.
Thankfully, the market has been shifting toward safer products, driven by a boom in home renovations and stricter environmental rules. You can dig into the trends by reading up on the global paint remover market. But knowing which chemicals are safe for your windows is just as important—our guide on which window cleaning chemicals to avoid is a great resource for that.
Wet Drips vs. Dried Splatters: A Tale of Two Messes
Not all paint mistakes are the same. A fresh, wet drip is an entirely different beast than a sun-baked splatter that’s been part of the scenery for months. Knowing what you're up against is the first—and most important—step. It dictates your tools, your technique, and whether you'll be done in a minute or an hour.
Catching a paint drip while it's still wet is a huge advantage. The key is to act fast but with finesse. Your goal is to lift the paint clean off the glass, not smear it into a translucent, sticky film that’s ten times harder to deal with later.
Tacking Fresh, Wet Paint
When you see a wet drip, your gut instinct might be to grab a rag and wipe it away. Don't do it. A frantic wipe is the fastest way to spread the problem. Think "blot and lift," not "smear and regret."
If it's a small drip of latex paint, grab a damp paper towel or a microfiber cloth. Gently blot the very center of the paint drop to soak up the excess. Then, using a clean part of the cloth, carefully wipe from the outside edge of the paint inward. This pulls the remaining paint into itself, lifting it cleanly.
Dealing with oil-based paint follows the same principle, but you’ll need a different tool. Dampen a clean cloth with a bit of mineral spirits or turpentine and use that same gentle blotting motion. The solvent breaks down the oil, helping you lift it off without a fight. A word of caution: always test any solvent on a hidden spot first, especially near painted or vinyl frames, to make sure it doesn't cause damage.
My Golden Rule: The most important thing to remember for wet paint is to blot, never wipe. A quick wipe can easily turn a one-minute fix into a frustrating thirty-minute cleanup, all because the pigment gets smeared across a much larger surface.
The flowchart below is a great way to visualize that first crucial decision.
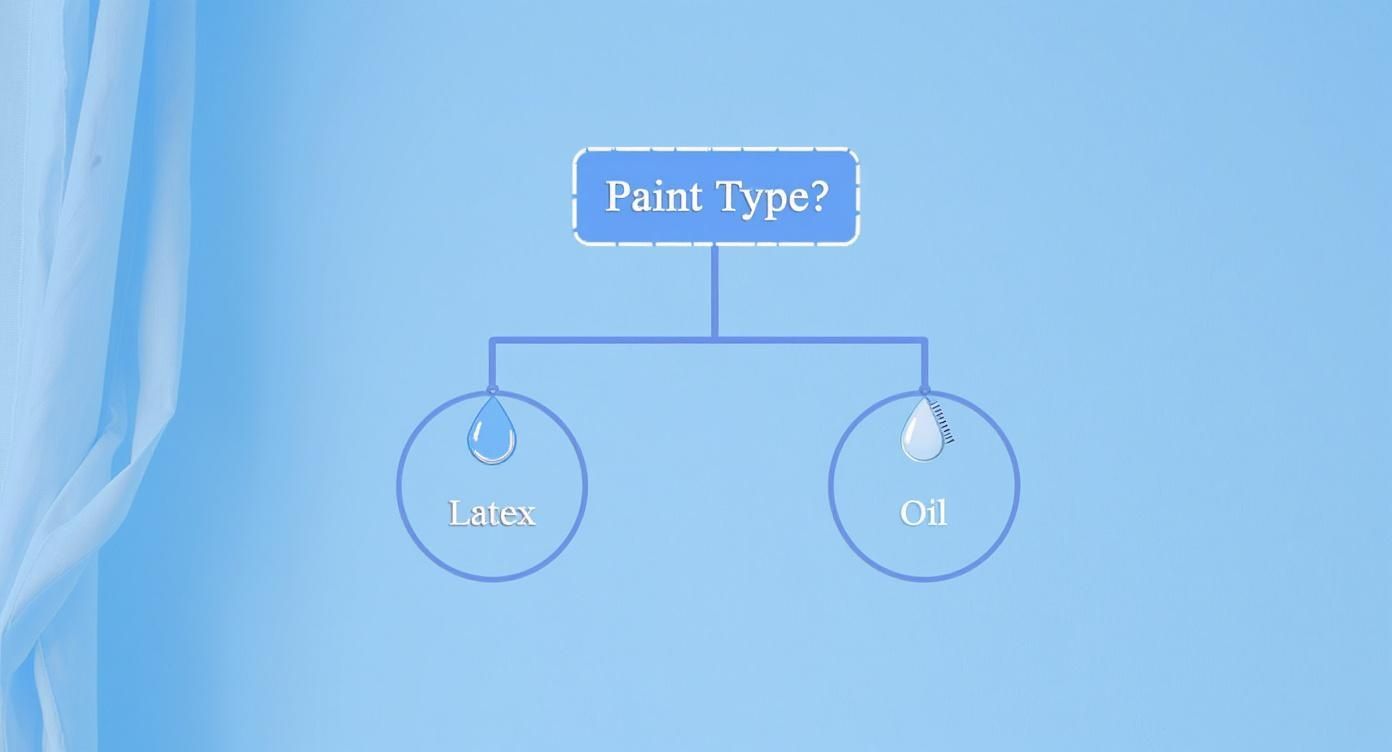
As you can see, figuring out if you have a water-based or oil-based product on your hands is the fork in the road that determines your entire approach.
Removing Cured and Dried Paint Splatters
Once the paint has fully dried, blotting is useless. Now it’s time to bring in the real hero: the razor scraper. But using it correctly is everything. A dry scraper on dry glass is a surefire way to leave a permanent scratch. The secret is lubrication.
Start by generously spraying the paint splatters with a simple mix of warm water and a few drops of dish soap. Let this solution sit for a minute or two. It won't remove the paint, but it will soften it just enough and give your blade a slippery surface to glide on.
Here’s the right way to use that scraper:
- Keep the Angle Low: Hold the razor blade at a shallow 30 to 45-degree angle against the glass. If you go any steeper, you risk the edge digging in and gouging the surface.
- Use Gentle, Steady Pressure: A sharp blade is all you need. Let it do the work. Push the blade forward in one smooth, consistent motion to lift the paint. There's no need to muscle it.
- Lift, Don't Drag: This is a big one. Scrape in one direction, then lift the blade completely off the glass before returning for the next pass. Dragging the blade backward can pull a hard chip of paint across the window, creating a nasty scratch.
This technique works like a charm for almost any dried latex paint. But for those really stubborn, thick globs of old enamel, you might need to bring in the heavy artillery.
When to Break Out the Heat Gun
A heat gun can be a lifesaver for thick, ancient layers of paint that laugh at your scraper. But it comes with a serious warning: applying too much heat, too quickly, can cause thermal shock, which will crack the glass. This is especially risky on a cold day when the temperature difference is more extreme.
If you have to use one, proceed with caution:
- Start on the Lowest Setting: You can always add more heat, but you can't undo a crack.
- Keep It Moving: Never let the heat linger on one spot. Hold the gun several inches away from the glass and sweep it back and forth continuously.
- Scrape While It's Soft: Watch the paint closely. As soon as it softens and starts to bubble, get your scraper in there (at that proper low angle) and lift the pliable paint away.
This method is fantastic for old homes with decades of paint buildup on the windows, but it demands a steady hand. If you're working with delicate, antique, or historical glass, it’s much safer to skip the heat and stick to chemical removers and a whole lot of patience.
So, you’ve managed to get the paint off the glass. Great job! But don't put your tools away just yet. The next crucial step is dealing with the window frames themselves. A wrong move here—a careless scrape or a harsh chemical—can quickly turn a successful cleanup into a costly mistake. The technique that works wonders on a modern vinyl frame could easily ruin a beautiful, historic wood one.
Every frame material plays by its own rules. Knowing the difference is what separates a professional-looking finish from a DIY disaster.
Strategies for Vinyl Window Frames
Vinyl is a fantastic low-maintenance material, but at the end of the day, it's a type of plastic. That means it’s surprisingly vulnerable to aggressive solvents and sharp tools. The wrong chemical can easily cause discoloration, warping, or even melt the surface. A gentle touch is your best friend here.
For those little splatters of latex paint, you can often get them off with just a microfiber cloth and a bit of warm, soapy water. If the paint is being stubborn, try using a plastic putty knife or even an old credit card to gently lift it off. You'll be surprised how effective this can be without leaving a single scratch.
For tougher spots, you have a few options:
- Isopropyl Alcohol: A little bit on a clean cloth can dissolve fresh latex paint beautifully without harming the vinyl.
- Citrus-Based Cleaners: Products like Goo Gone are a safe bet. They're effective but gentle enough for plastics.
- Avoid Acetone: Whatever you do, stay away from acetone or nail polish remover. It will almost certainly damage the vinyl's finish.
A pro tip? Always test your cleaning solution on a hidden spot first, like the underside of the windowsill, just to be sure there’s no unexpected reaction.
Caring for Wooden Window Frames
Wood frames, especially the ones you find on older homes, are a whole different ballgame. They can stand up to more aggressive techniques, but you still have to be careful not to gouge the wood or strip away its character. For many people, bringing old wooden windows back to life is an incredibly rewarding project.
It’s no surprise that the paint remover market is booming, with the U.S. market alone expected to hit USD 336.57 million by 2025. This growth is heavily driven by the DIY craze—over 60% of homeowners in the U.S. have taken on at least one window renovation project. If you're curious, you can discover insights on the paint remover market and see the trends for yourself.
When you're tackling painted wood, here's what works:
- Careful Scraping: A sharp pull scraper is perfect for peeling layers of paint off flat surfaces. For intricate trim and molding, look for specialized scrapers designed to fit those unique contours. They’re a lifesaver.
- Heat Application: A heat gun is an amazing tool for softening up thick, old paint, making it easy to lift right off. Just be extremely careful—keep the gun moving constantly to avoid scorching the wood or, worse, starting a fire.
- Chemical Strippers: For really stubborn, multi-layered paint jobs or detailed woodwork, a chemical stripper is often the most efficient path. Modern gel formulas, like Citristrip, are great because they cling to vertical surfaces and are much less harsh than old-school strippers.
Once the paint is gone, a quick pass with fine-grit sandpaper will smooth everything out, leaving you with a perfect surface for new paint or stain.
Crucial Safety Note: If your home was built before 1978, there’s a good chance your window frames are coated in lead-based paint. Do not sand or scrape this without proper safety gear. Lead dust is incredibly toxic. It’s always smart to use an EPA-approved lead test kit before you start.
Removing Paint from Metal and Aluminum Frames
Metal frames, like the common aluminum ones, are tough, but they can be surprisingly easy to scratch, which can ruin their clean, factory finish. Using a metal blade to scrape them is almost always a bad idea unless you want a network of fine scratches.
Your best bet here is to use solvents that are safe for metal. Mineral spirits often work well on oil-based paints. For tougher jobs, grab a paint remover specifically made for metal surfaces. Just apply the solvent, give it time to work its magic, and then use a nylon brush or plastic scraper to remove the softened paint.
Taking the time to protect your frames is just as important as cleaning the glass. It ensures the entire window looks finished and professional. This kind of attention to detail is key to overall window maintenance, much like the special care needed when cleaning double-pane windows to keep them in top shape.
Advanced Solutions for Stubborn Paint Removal
Sometimes, you come up against a paint problem that a simple razor scraper just can’t touch. You might be staring at layers of sun-baked enamel or thick, ancient paint that seems like it’s become one with the glass. For these really tough jobs, it's time to bring out the heavy hitters.
These methods demand a bit more patience and a steady hand, but they can save you from a world of frustration. The key is knowing which technique to use for the specific challenge you're facing.
Harnessing the Power of Steam
One of the most effective—and surprisingly gentle—methods for stubborn paint is a household steam cleaner. A steamer uses focused, high-temperature moisture to soften multiple layers of paint at once, making them pliable and much easier to lift away.
This technique is a lifesaver for:
- Thick, built-up layers that would take forever to chip off manually.
- Delicate or older glass, where you want to minimize the force and pressure from scraping.
- Avoiding harsh chemicals, which makes it a fantastic option for indoor projects where ventilation is a concern.
To get started, hold the steamer’s nozzle a few inches from the paint and move it slowly across the surface. You'll actually see the paint start to wrinkle and soften. Once it looks ready, grab your scraper and gently lift it away. The paint often comes off in satisfyingly large strips instead of tiny, frustrating flakes.
Navigating Chemical Paint Strippers
When steam doesn't quite cut it, a chemical paint stripper is your next line of defense. Don't worry—modern formulas are much safer and more user-friendly than the harsh, caustic products from back in the day. For window glass, you'll want to find a gel or paste-style stripper that clings to the vertical surface without dripping all over the place.
The two main types you’ll find are:
- Citrus-Based Strippers: These use natural citrus oils as the solvent. They work a little more slowly but have fewer fumes and are generally safer for indoor use.
- Soy-Gel Strippers: Made from soybeans, these are also low-odor and biodegradable. They’re known for being incredibly effective at removing many layers of paint with just a single application.
No matter what, always follow the manufacturer's directions. Apply the stripper, let it sit for the recommended time, and then use a plastic scraper or putty knife to remove the softened mess. Afterward, give the glass a thorough cleaning with soapy water to get rid of any residue.
Expert Insight: No matter which chemical remover you choose, meticulous prep is non-negotiable. Use high-quality painter's tape and plastic sheeting to completely cover and protect the window frame and sash. One small drip can easily damage vinyl or strip the finish right off a wooden frame.
For particularly challenging jobs where standard methods fall short, you might need to consider more specialized solutions. Here’s a quick rundown of some advanced options.
Comparing Advanced Removal Methods
| Method | Best For | Pros | Cons and Risks |
|---|---|---|---|
| Infrared Heat Guns | Removing multiple layers of thick, old paint, especially on wood frames. | Very effective and fast; creates less toxic dust than traditional heat guns. | Can still scorch wood if held too close; risk of cracking glass from thermal shock. |
| Laser Ablation | High-value historic restoration projects with delicate surfaces. | Extremely precise, no chemicals, minimal damage to the substrate. | Very expensive equipment; requires a highly trained professional. |
| Hybrid Systems | Industrial-scale projects or severe, multi-layered paint on durable surfaces. | Combines the speed of one method (e.g., chemical) with the precision of another. | Complex, costly, and typically only available through specialized commercial services. |
While you're unlikely to be using a laser in your living room, it's good to know what's possible for those truly impossible-seeming paint problems.
Addressing Special Situations
Not every paint removal job is straightforward. You might run into unique materials or potential hazards that require a completely different approach.
The Critical Lead Paint Warning
If your home was built before 1978, you have to assume that any old, cracking paint on your window frames or sills could contain lead. Lead paint is only dangerous when it's disturbed—sanding, scraping, or using a heat gun can create toxic dust that is extremely hazardous if inhaled.
Before you start any project on an older home, use an EPA-approved lead test kit. If it comes back positive, stop. Do not proceed with your usual removal methods. The only safe course of action is to hire a certified lead abatement professional.
Removing Paint from Window Screens and Plexiglass
Abrasive methods are a huge no-go for delicate surfaces like window screens or plexiglass. A razor blade will shred a screen in seconds and leave permanent, ugly scratches on plexiglass.
For window screens, gently dab the paint spot with a cloth soaked in isopropyl alcohol (for latex paint) or a tiny amount of an appropriate solvent for oil-based paint. For plexiglass, your best bet is a plastic razor blade paired with a gentle, plastic-safe remover.
It's fascinating to see how the demand for these kinds of specialized products is growing worldwide. Asia Pacific now accounts for over 43% of the global paint remover market, thanks to renovation trends and new technologies. Innovations like hybrid laser-chemical systems are making it easier than ever to get paint off windows safely. If you're curious, you can explore more about these global market trends to see how the industry is evolving.
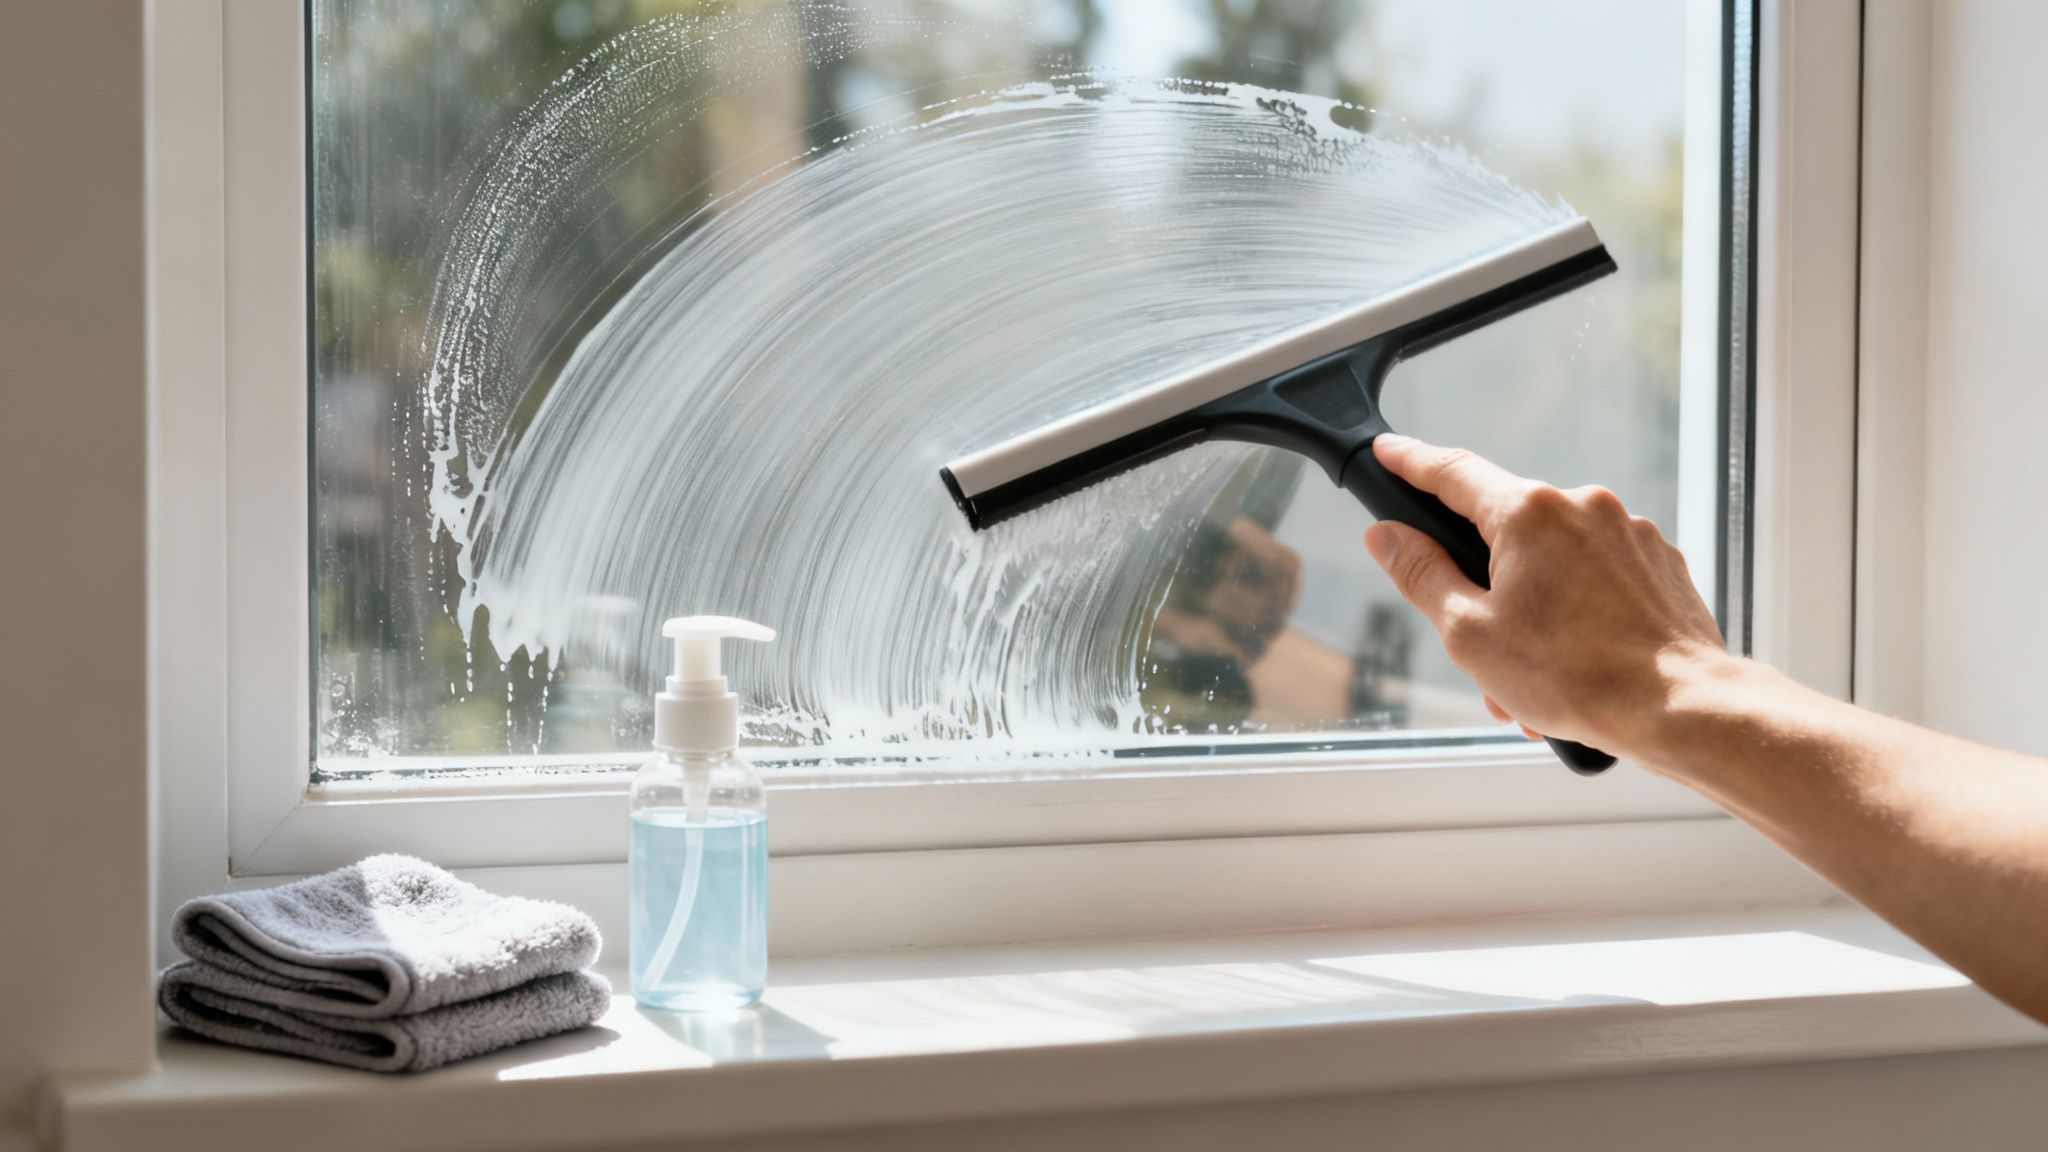
Achieving a Streak-Free Finish and Avoiding Mistakes
Getting the paint off is the main battle, but don't pack up your tools just yet. The final cleanup is what really makes the difference between an okay job and a truly professional-looking result. This is your chance to wipe away any leftover solvent haze, smudges, and streaks for a pane of glass that's perfectly clear.
Think of this as the final polish that makes all your hard work shine. It’s all about using the right cleaning solution and, more importantly, the right technique.
Polishing Your Work for a Perfect Shine
After all that scraping and scrubbing, your window is probably coated in a fine film of paint dust, solvent residue, and soap. A quick spray and a wipe with a paper towel just won’t cut it.
You can actually whip up a great DIY cleaning solution yourself. I often recommend a simple mix of one part distilled white vinegar to about ten parts warm water. The vinegar’s acidity is fantastic for cutting through the greasy film that paint removers can leave behind.
If you want that truly professional, invisible-glass look, you need to get comfortable with a squeegee.
- Get it Soapy: Don't be shy with the cleaning solution. Spray the entire pane so the squeegee can glide smoothly.
- Set Your Angle: Start at a top corner, tilting the squeegee blade slightly so only the edge makes contact.
- Overlap Your Passes: Pull the squeegee down in one continuous motion. After each pass, wipe the blade clean and overlap your next stroke by about an inch. This is the secret to avoiding those annoying lines.
Mastering this is the key to a flawless finish. If you really want to perfect your technique, we have a whole guide on how to clean windows streak-free with more in-depth tips.
Common Mistakes That Can Ruin Your Windows
Even if you do everything else right, a few simple slip-ups can cause some serious, irreversible damage. Knowing what not to do is just as important as knowing the right steps.
The number one mistake I see is people using a dull razor blade. I know it sounds backward, but a fresh, sharp blade is your best friend. It glides over the glass and requires very little pressure. A dull blade, on the other hand, will skip and chatter, forcing you to push harder and leaving a trail of permanent scratches.
Using a heat gun incorrectly is another big one. Blasting the glass with high heat, especially on a cold day, can cause thermal shock and crack the pane right down the middle. Always start on the lowest heat setting and keep the gun in constant motion to warm the area gradually.
Crucial Takeaway: More than 70% of DIY window damage comes from three preventable mistakes: using a dull blade, applying excessive heat, or using the wrong chemicals on frames and seals. Patience is your most valuable tool.
Finally, watch out for the seals around your glass. Harsh chemical strippers can dissolve the rubber or silicone, destroying your window's insulation and leading to fogging between the panes. Always tape off these sensitive areas. A little precaution goes a long way in making sure your project to remove paint from windows ends with a crystal-clear view, not a call for a costly replacement.
Common Questions About Removing Window Paint
Even with the best game plan, you're bound to run into a few head-scratchers when tackling window paint. That's perfectly normal. I've heard just about every question in the book from homeowners trying to get this project done right. Here are my go-to answers for the most common issues that pop up.
Can I Use a Razor Blade on Any Window Glass?
This is a big one, and the answer is a hard no. Not all glass is the same.
On standard annealed glass—the kind you’ll find in most older homes—a fresh, sharp razor blade is your best friend. It’s tough stuff and, with a bit of soapy water for lubrication, paint scrapes off beautifully.
But you have to be incredibly careful with tempered glass. This is safety glass, often used in doors, bathrooms, or windows low to the ground. The tempering process can leave microscopic debris on the surface. A metal blade will catch on these tiny imperfections and leave a permanent, ugly web of scratches. If you even suspect you have tempered glass, test a tiny, hidden corner first or just skip the metal blade altogether. A good plastic razor blade or a chemical solvent is a much safer bet.
What Is the Safest Paint Remover for Vinyl Frames?
Vinyl is tough, but it's no match for harsh chemicals. You need something that will dissolve the paint without wrecking the frame.
I always recommend starting with the gentlest options, like citrus-based removers (Citristrip is a popular one) or soy-gel products. They work slower than the heavy-duty strippers but are far less likely to discolor, warp, or weaken the vinyl.
Precision is everything here. Use high-quality painter's tape to mask off the vinyl frame, creating a clean barrier. Apply the remover only to the glass. Whatever you do, stay away from anything containing aggressive solvents like acetone or methylene chloride—they will absolutely ruin a vinyl finish.
How Do I Know if Old Window Paint Contains Lead?
If your house was built before 1978, you have to work under the assumption that there’s lead in the paint. There’s no way to tell just by looking at it. The only way to know for sure is to grab an EPA-recognized lead test kit from your local hardware store.
If that test comes back positive, stop. Do not scrape, sand, or take a heat gun to that paint. Doing so will release toxic lead dust into the air, which is extremely dangerous to breathe. Dealing with lead paint requires special containment procedures and protective gear. Honestly, it's a job best left to a certified professional to keep your family safe.
A key thing to remember: Lead paint is only a hazard when it's disturbed. If the paint is in good shape—not chipping or flaking—the safest move is often to just encapsulate it with a good primer and a fresh coat of paint.
Can I Scrape Paint Off a Tinted Window?
Absolutely not. Please don't even try it. Taking a metal razor blade or anything abrasive to a window with aftermarket tint or a factory-applied low-E film will permanently gouge the coating. It's an expensive mistake, as the only fix is replacing the entire film.
For these delicate surfaces, you have to go the non-abrasive route.
- Start with a soft microfiber cloth and some warm, soapy water.
- If that doesn't work, dab a little isopropyl alcohol on the paint spot.
- Let it sit for a minute to soften the paint, then gently wipe it away.
Always test any chemical—even something as simple as rubbing alcohol—on a small, out-of-the-way spot first to make sure it doesn’t react poorly with the film.
Beyond just doing the work, some of you might be thinking about turning this skill into a business. If that's you, learning about effective marketing for window cleaning businesses is a great next step to attract customers.
When a project feels too big or you just want a guaranteed perfect result, don't hesitate to call in the pros. The team at Sparkle Tech Window Washing has the right tools and years of experience to handle any paint removal job, leaving your windows spotless and your frames pristine. Visit us at https://sparkletechwindowwashing.com to get a free estimate today.