


Let's be honest, getting truly streak-free windows can feel like an impossible task. But the secret isn't about scrubbing harder. It's about having the right gear, the right cleaning mix, and a technique that actually works. If you've been fighting with paper towels and spray bottles, it's time for a new approach. A high-quality squeegee and a couple of good microfiber cloths are the real game-changers for that professional, invisible-glass finish.
The Real Secret to Perfectly Clear Windows
Those frustrating streaks you see after all your hard work aren't a sign of failure. They're just a clue that something in your process is off. It usually comes down to one of three things: your tools, your cleaning solution, or your actual method. Window cleaning is more of a science than a chore, and once you nail the fundamentals, you’ll leave hazy, streaky glass in the past.
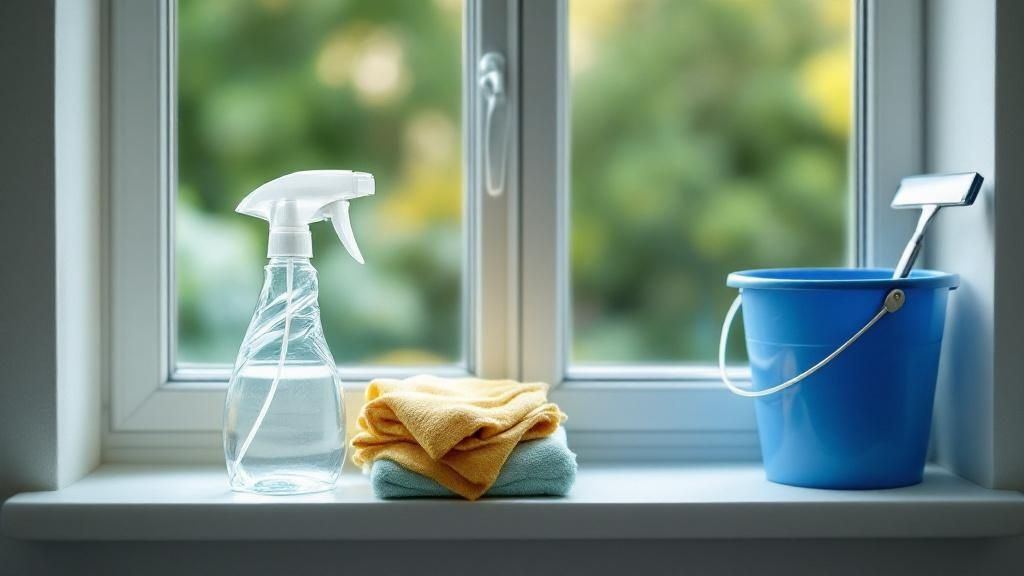
Many of us grew up using old rags or paper towels, but these are often the source of the problem. Paper towels fall apart when they get wet, leaving a trail of linty fibers all over the glass. The single most important tool you can own for this job is a professional-grade squeegee with a fresh, sharp rubber blade. It’s what delivers that coveted, flawless look.
The Three Pillars of Success
To get that crystal-clear view, you need to focus on three core components. Getting these right is what separates a frustrating Saturday afternoon from a genuinely satisfying result that looks professionally done.
- Professional Tools: Don't even start without a great squeegee and at least two microfiber cloths. One cloth is for the initial wash and scrub, while the other dry one is for detailing the edges and catching any drips.
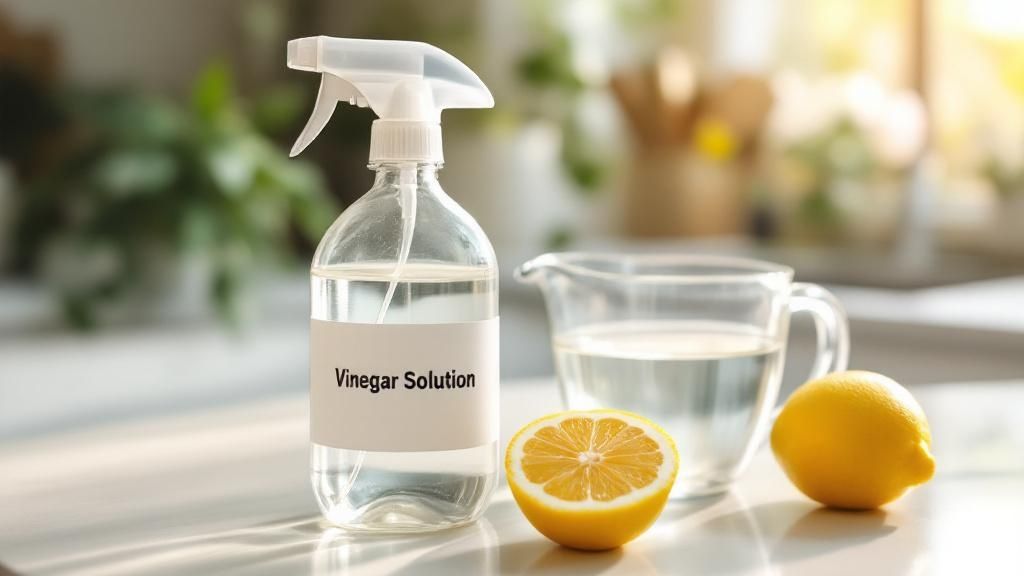
- The Right Solution: Your cleaning solution needs to do one job perfectly: provide enough "slip" for the squeegee to glide without friction. A simple mix of distilled water and a single drop of dish soap is often all you need. The key is that it shouldn't dry too fast.
- A Proven Technique: Wiping randomly is a guaranteed recipe for streaks. The pros use a specific, overlapping motion—often called the "S-Pattern"—to pull all the dirty water off the glass in one smooth, continuous movement.
There's a reason people are willing to pay for this service. The North American window cleaning market is expected to reach $2.9 billion in 2024, with over 35,000 businesses making a living from it. Homeowners will pay an average of $260 to have a professional clean the windows of a 1,500-square-foot house. It just goes to show how much we value a perfectly clear view. You can dig deeper into the window cleaning industry statistics on GetJobber.com.
Pro Tip: Hard water is the silent killer of a streak-free shine. The minerals it contains (like calcium and magnesium) get left behind when the water evaporates, creating a stubborn film. Always use distilled water in your cleaning solution to completely sidestep this issue.
Before we dive into the step-by-step process, let's quickly summarize what you need for success.
Quick Guide to Streak-Free Window Cleaning
Here’s a quick-reference table that breaks down the most important parts of the process. Getting these three things right will solve 99% of your window-cleaning woes.
| Component | Why It's Critical | Pro-Tip |
|---|---|---|
| High-Quality Squeegee | A sharp, flexible blade removes water in a single pass, preventing new streaks. | Check the rubber blade for nicks or stiffness before each use. A fresh blade is cheap insurance. |
| The Right Solution | It must provide enough lubrication or "slip" for the squeegee to glide smoothly. | A drop or two of Dawn dish soap in a gallon of distilled water is a classic pro-level formula. |
| Proper Technique | Overlapping, consistent strokes ensure no dirty water is left behind on the glass. | Always keep a dry microfiber cloth in your back pocket for wiping the blade after each pass. |
Mastering these elements is the foundation for achieving that perfectly clear, satisfying finish every single time.
Why Your Current Method Is Failing
Still seeing streaks after all that effort? It's probably one of two classic mistakes.
First, never wash windows in direct, hot sunlight. The heat causes your cleaning solution to evaporate almost instantly, before you have a chance to squeegee it away. This leaves behind all the soap scum and mineral deposits you were trying to remove.
The other common culprit is a bad squeegee blade. If the rubber is nicked, worn out, or has hardened over time, it won't make perfect contact with the glass. This is what causes those annoying little lines of water to be left behind with every pull. Don't worry—this guide will show you exactly how to fix these issues and finally get the job done right.
Building Your Professional Cleaning Toolkit
The secret to a crystal-clear, streak-free view often isn't the technique—it's the tools. It’s so tempting to just grab a roll of paper towels and a random spray cleaner, but trust me, investing in a few specific items will completely change your window cleaning game. It's not about spending a fortune; it's about being smart with your choices.
If you buy only one thing, make it a high-quality squeegee. This is the single most important piece of gear you can own. You're looking for one with a sharp, flexible rubber blade. The cheap ones are often too stiff or have tiny nicks that leave those frustrating, dirty water lines behind. A good squeegee blade, on the other hand, just glides, pulling all the grime and water off in a single, clean pass.
This is exactly why the pros get that flawless finish every time. The squeegee ensures no dirty residue gets left behind to dry into a smeary mess.
Your Core Cleaning Gear
Beyond the squeegee, what you use to scrub and dry makes all the difference. Ditch the paper towels for good. They fall apart, leave lint everywhere, and just can't compete with microfiber.
- Microfiber Scrubber: Get yourself a dedicated microfiber cloth or, even better, a strip washer (sometimes called a wand). Its texture is fantastic for loosening stubborn dirt without any risk of scratching the glass.
- Microfiber Detailing Cloths: You’ll want a few of these, kept perfectly dry and clean. Their job is to wipe your squeegee blade between passes and to catch any drips along the edges and corners for that perfect, crisp finish.
- A Simple Bucket: A rectangular bucket is your best friend here. It’s wide enough to dunk your whole scrubber and squeegee, which is way more efficient than trying to spray down a large window.
Key Takeaway: Choosing the right tools is the first step toward a flawless finish. A sharp squeegee and quality microfiber aren't just accessories; they are fundamental to preventing streaks and achieving professional-level clarity.
When it comes to the cleaning solution itself, simple is almost always better. For years, my go-to has been a gallon of distilled water with just one single drop of dish soap. That’s it. It creates the perfect amount of "slip" for the squeegee to do its job. If you’re building out a more comprehensive kit, you might also consider solutions that align with green cleaning practices for a healthier home environment.
Mastering the Pro Window Cleaning Method
Alright, you've got the pro-grade tools, and now it's time to use them like one. Getting that invisible, perfectly clear finish isn't about frantic wiping; it's a specific, methodical process that separates the pros from the amateurs. This is where your gear and a bit of know-how come together to banish streaks for good.
First things first, and this is a step people always skip: prep your area. Before any cleaning solution even thinks about touching the glass, lay down a couple of old towels on the floor and windowsill. Trust me, this simple move saves you from water-damaged wood floors, stained carpets, or just a bigger mess to clean up later.
Next, get rid of the loose stuff. Grab a dry microfiber cloth or a soft-bristled brush and give the window frame, tracks, and the glass a quick wipe-down. You're just knocking off the cobwebs, dust, and any other debris that will turn into a gritty, muddy mess the second it gets wet.
The Wash and Squeegee Technique
Now for the main event. Dip your microfiber scrubber into your bucket of cleaning solution, then give it a good wring. You want it damp, not sopping wet and dripping everywhere. Scrub the entire glass surface, giving a little extra attention to stubborn spots like bird droppings or greasy kid fingerprints. The goal here is just to lift all that grime off the glass.
The real secret, the part that makes all the difference, is in your squeegee work. This is what delivers that flawless, professional result.
- Create a Dry Edge: Take a clean, dry microfiber cloth and wipe a one-inch strip down the side of the window, from top to bottom. This "dry zone" is your starting line. It lets you place the squeegee without the rubber blade immediately skipping or grabbing on a wet edge.
- Position Your Squeegee: Place your squeegee blade at the very top of the window, with the edge resting in that dry strip you just made. Tilt the squeegee to about a 30-degree angle against the glass.
- Apply Consistent Pressure: In one smooth, continuous motion, pull the squeegee straight down. Let the tool do the work; you don't need a death grip. The pressure should be light but firm and, most importantly, consistent from top to bottom.
After that first pull, wipe the rubber blade clean with your detailing cloth. This is non-negotiable. If you skip this, you’re just dragging a line of dirty water right across the next section.
Here's a visual breakdown of how that professional workflow comes together.
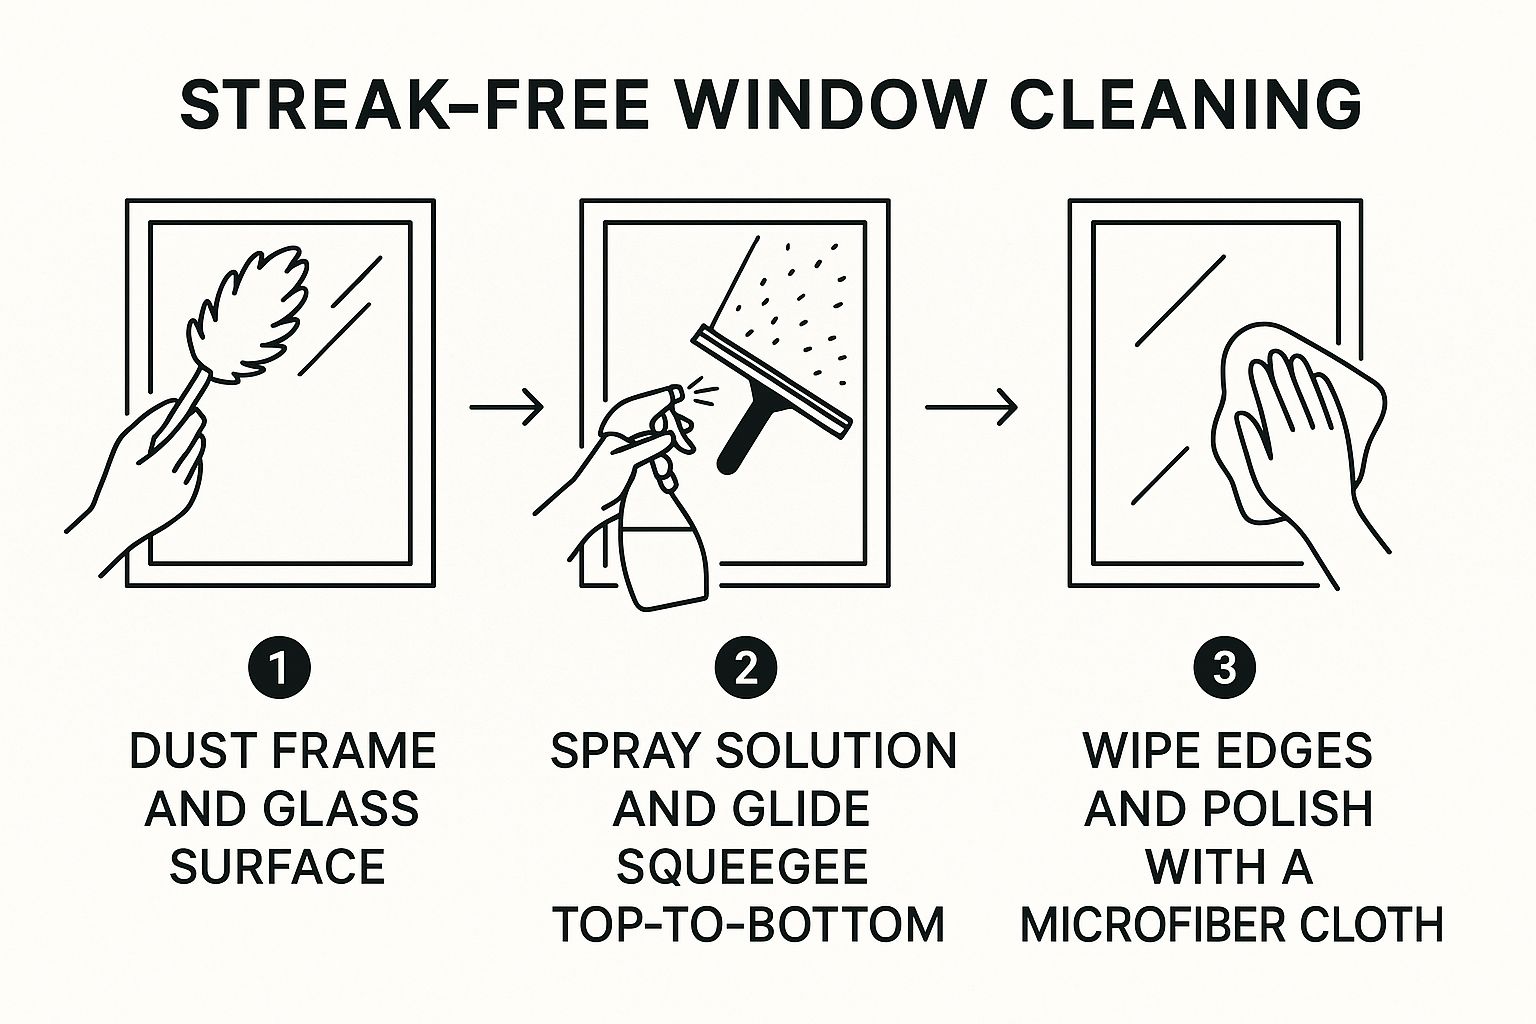
The takeaway here is the systematic flow. You're always moving from a dirty area to a clean one, never backtracking or spreading grime.
Perfecting Your Overlapping Strokes
For your next pull, you’ll want to overlap the first one by about an inch. Place your squeegee back at the top, making sure the blade covers a small part of the section you just dried. This overlap is what prevents those frustrating little vertical water lines from being left behind.
Expert Insight: The secret to a perfect squeegee pull is a consistent angle and steady speed. If you hear the blade "chattering" or skipping across the glass, it's a tell-tale sign. You're either holding it at too steep of an angle, or the glass simply isn't wet enough.
Keep this rhythm going across the whole window: pull down, wipe the blade clean, overlap, and repeat.
Once the main pane is done, take a fresh, dry detailing cloth and carefully wipe any last little beads of moisture from the corners and along the edges of the frame. This final touch-up is what really gives you that crisp, professionally finished look. For an even deeper dive, check out these 3 proven ways to dry windows without leaving streaks to help you refine your drying technique.
Troubleshooting Common Window Cleaning Issues
It happens to the best of us. You’ve put in the work, followed all the steps, but your windows still look… off. Streaks, a weird haze, or stubborn lines can be incredibly frustrating when you’re aiming for perfection. Don't throw in the towel just yet. Nine times out of ten, these issues come down to a few common culprits that are surprisingly easy to fix.
One of the biggest mistakes I see people make is trying to clean windows in direct, hot sunlight. The heat bakes your cleaning solution onto the glass almost instantly, leaving behind soap residue and mineral deposits before you can even get your squeegee on it. This is a surefire recipe for streaks. For best results, always work on an overcast day or when the windows are in the shade.
Another sneaky problem is hard water. If your tap water has a high mineral content, it will leave behind chalky white spots or a hazy film as it dries. The easiest fix? Use distilled water when mixing your cleaning solution. It’s a simple switch that completely eliminates the problem.
Diagnosing and Solving Specific Problems
Let's get into the nitty-gritty. Pinpointing the exact issue is the first step toward that crystal-clear finish you’re after.
- Lingering Streaks or Haze: This is almost always a soap or speed issue. Either your solution is drying too fast, or you've used too much soap. Cut back to just a single drop of dish soap per gallon of water and make sure you’re working out of direct sunlight.
- Stubborn Spots (Bird Droppings, etc.): Don't go to town scrubbing these with your washer sleeve—you'll just smear them around. Instead, pre-treat the spot. Dab it with your cleaning solution, let it soak for a minute to soften up, and then proceed with your regular wash.
- "Squeegee Chatter" or Skipping: Hear that awful skipping sound? That's your squeegee telling you there’s too much friction. The blade is likely too dry or held at too steep of an angle. Try lowering your squeegee to about a 30-degree angle against the glass and be liberal with your cleaning solution to keep things lubricated.
My Two Cents: Most window cleaning headaches aren't about a lack of effort. They’re about small, correctable errors in timing or your materials. Once you identify the real cause—whether it’s the sun, your soap ratio, or the water itself—you’re well on your way to a perfect result.
Sometimes you'll run into tougher challenges like deep-set mineral deposits. If you need to figure out how to remove stubborn hard water stains, you'll likely need a more specialized approach, as these can etch into the glass over time.
A crystal-clear view is something people are willing to pay for. The global window cleaning services market was valued at a huge $4.12 billion in 2024 and is expected to climb to $6.57 billion by 2033. That growth shows just how much we all value a streak-free finish.
In the end, troubleshooting is all about observation and small adjustments. Check your squeegee blade for tiny nicks, always wipe it clean after every single pull, and never forget to detail the edges with a dry microfiber cloth to catch any last drips.
Pro Tips for a Flawless Finish
After years in the business, you pick up a few tricks that make all the difference between a good-enough job and a truly spectacular one. These are the little details that separate the pros from the amateurs.
https://www.youtube.com/embed/T-wdnPvHRJ8
The S-Curve Technique for Squeegee Masters
For larger panes of glass, ditch the simple top-to-bottom pulls. The real secret is the "S-Curve" or "swivel" technique. It’s what professional window cleaners use, and for good reason—it keeps the leading edge of the squeegee blade wet, preventing those annoying start-and-stop lines.
Here’s how it works:
- Start at a top corner, angling your squeegee slightly.
- Pull it across the top, then turn it downwards in a smooth, continuous "S" motion all the way down the pane.
- This method effectively herds all the water to one side, leaving the rest of the window perfectly dry and clear.
It takes a little practice to get the wrist movement right, but once you do, you'll never go back.
The Power of Detail Work
A perfectly clean pane of glass can be ruined by a dirty frame or a messy sill. Don't forget the finishing touches.
After you've squeegeed the glass, take a separate, dry microfiber cloth and wipe down the window frame, sill, and tracks. This not only looks much cleaner but also prevents dirt from washing back onto the glass the next time it rains.
Pro Tip: Use a detailing towel or a dry huck towel to wipe the edges of the glass where water tends to collect. This simple 2-second step, often called "edging," is the key to preventing drips and ensuring a truly flawless frame around your crystal-clear view.
Beyond the Glass: A Holistic Approach
Think of window cleaning as part of a larger cleaning project, especially if you're tackling something like an end-of-tenancy clean. Dusting blinds and vacuuming sills before you spray a single drop of cleaner is crucial. Otherwise, you're just making mud.
For major cleaning jobs, having a system is essential. Many people find that using comprehensive cleaning checklists helps them stay organized and ensures no detail, like the windows, gets overlooked.
A little extra prep work always pays off with a better, longer-lasting result. For more insider tips, check out our guide on achieving streak-free windows.
Your Window Cleaning Questions Answered
No matter how many times you've done it, a few questions always seem to pop up when you're trying to get that perfect, streak-free shine. It usually comes down to the little details. Let's walk through some of the most common things people ask so you can get over those final hurdles.
Is a Simple Vinegar Solution Really Enough?
I get this one all the time. For most day-to-day cleaning, the answer is a big yes. A simple mix of one part white vinegar to ten parts warm water is fantastic for cutting through the typical layer of grime and dust. The vinegar's natural acidity works like a charm, breaking down greasy films without leaving that soapy residue that causes so many headaches.
Now, if you're tackling something a bit more challenging—think greasy kitchen windows or glass that hasn't seen a good cleaning in years—you might need a little extra muscle. Just a single drop of dish soap in your bucket can give you that boost. The key word here is single. Too much soap is the number one cause of streaks, so less is definitely more.
How Often Should I Actually Be Cleaning My Windows?
Honestly, there’s no magic number here; it really depends on where you live. Your environment plays the biggest role.
- Suburban Homes: If you're in a standard neighborhood with average traffic and trees, cleaning your windows twice a year is a great rule of thumb. A solid spring cleaning to get rid of pollen and a fall cleaning to clear away summer dust usually does the trick.
- Urban or High-Traffic Areas: Living in the city or near a busy road means your windows get bombarded with pollutants and grime. To keep them clear, you'll probably want to clean them every 3-4 months.
- Coastal or Dusty Regions: Salt spray from the ocean is relentless, and desert climates mean a constant battle with grit. In these spots, cleaning every 2-3 months is often necessary to stop buildup from permanently etching the glass.
Expert Takeaway: Forget the calendar and just look at your windows. When the sun hits the glass just right and you can see a visible film of dirt, it's time to clean. It's that simple.
What If I Don't Have a Squeegee?
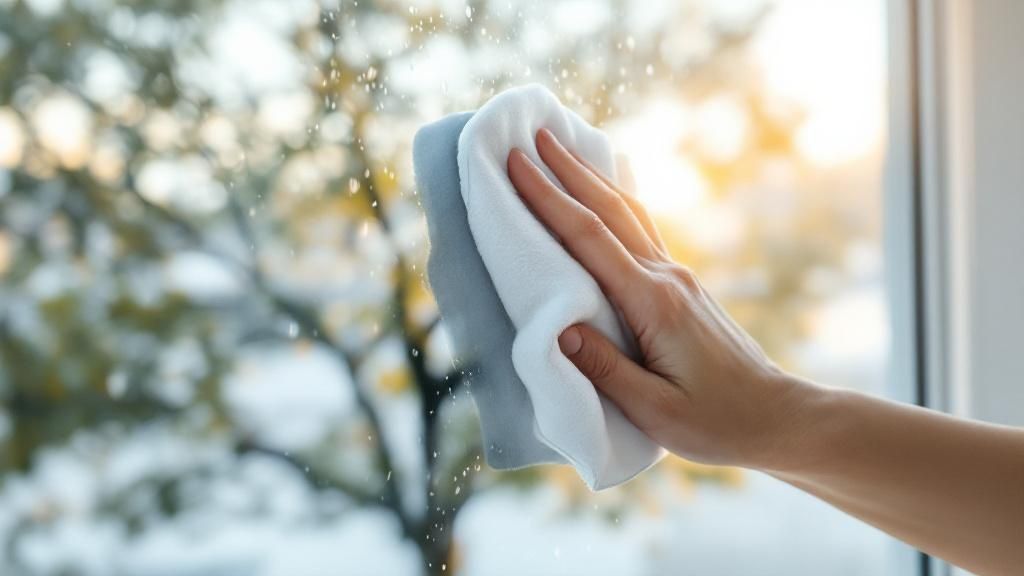
A squeegee is the pro's choice for a reason, but don't worry—you can still get a beautiful, streak-free finish without one. The trick is to use two high-quality microfiber cloths.
Here's how you do it:
- The "Wet" Cloth: Get one cloth damp with your cleaning solution. Use this one to do all the scrubbing, working to lift every bit of dirt off the glass.
- The "Dry" Cloth: This is your finishing tool, and it must stay completely dry. After you've washed the pane, take your dry cloth and wipe the window clean. Start from the top and work your way down in a steady Z-pattern.
The secret weapon here is constantly folding the dry cloth to a fresh, clean section for each wipe. This stops you from just smearing dirty water around. It takes a bit more elbow grease than a squeegee, but the two-cloth method is the next best thing for a flawless result. For a deeper dive into more troubleshooting, check out our guide covering common questions about window cleaning.
If you'd rather have a truly professional, worry-free shine without lifting a finger, you can always trust the experts at Sparkle Tech Window Washing. We have the right tools and years of experience to make your windows practically disappear. Book your service with us today
Article created using Outrank