



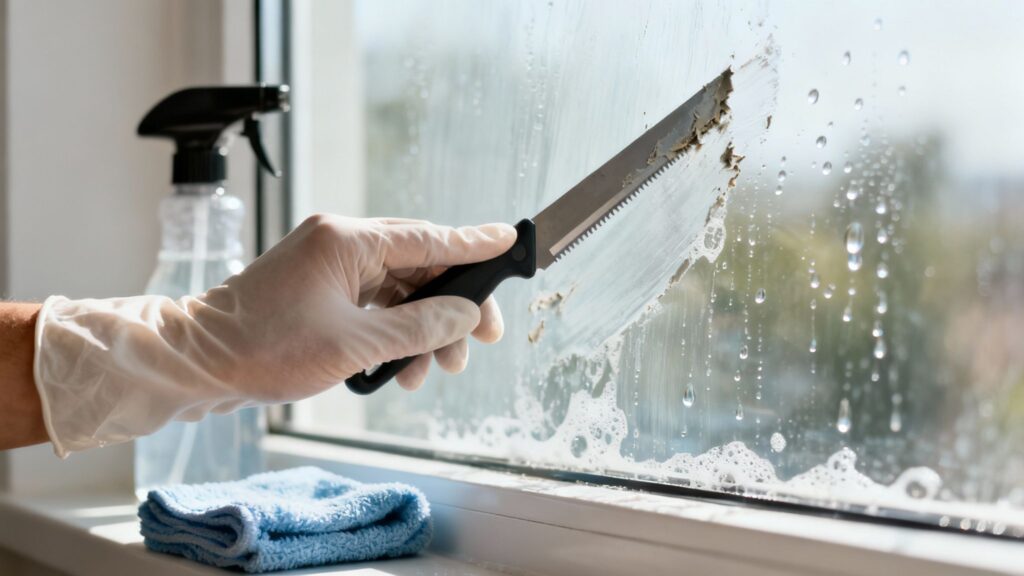
Tackling paint on glass seems daunting, but it’s actually a pretty straightforward fix if you have the right gear. The secret really boils down to two things: a fresh razor blade and a good lubricating spray like soapy water. This combo lets you lift the paint right off without leaving a single scratch, giving you that crystal-clear, professional look. It's all about a little prep and the proper tools.
Gathering Your Tools for a Perfect Finish
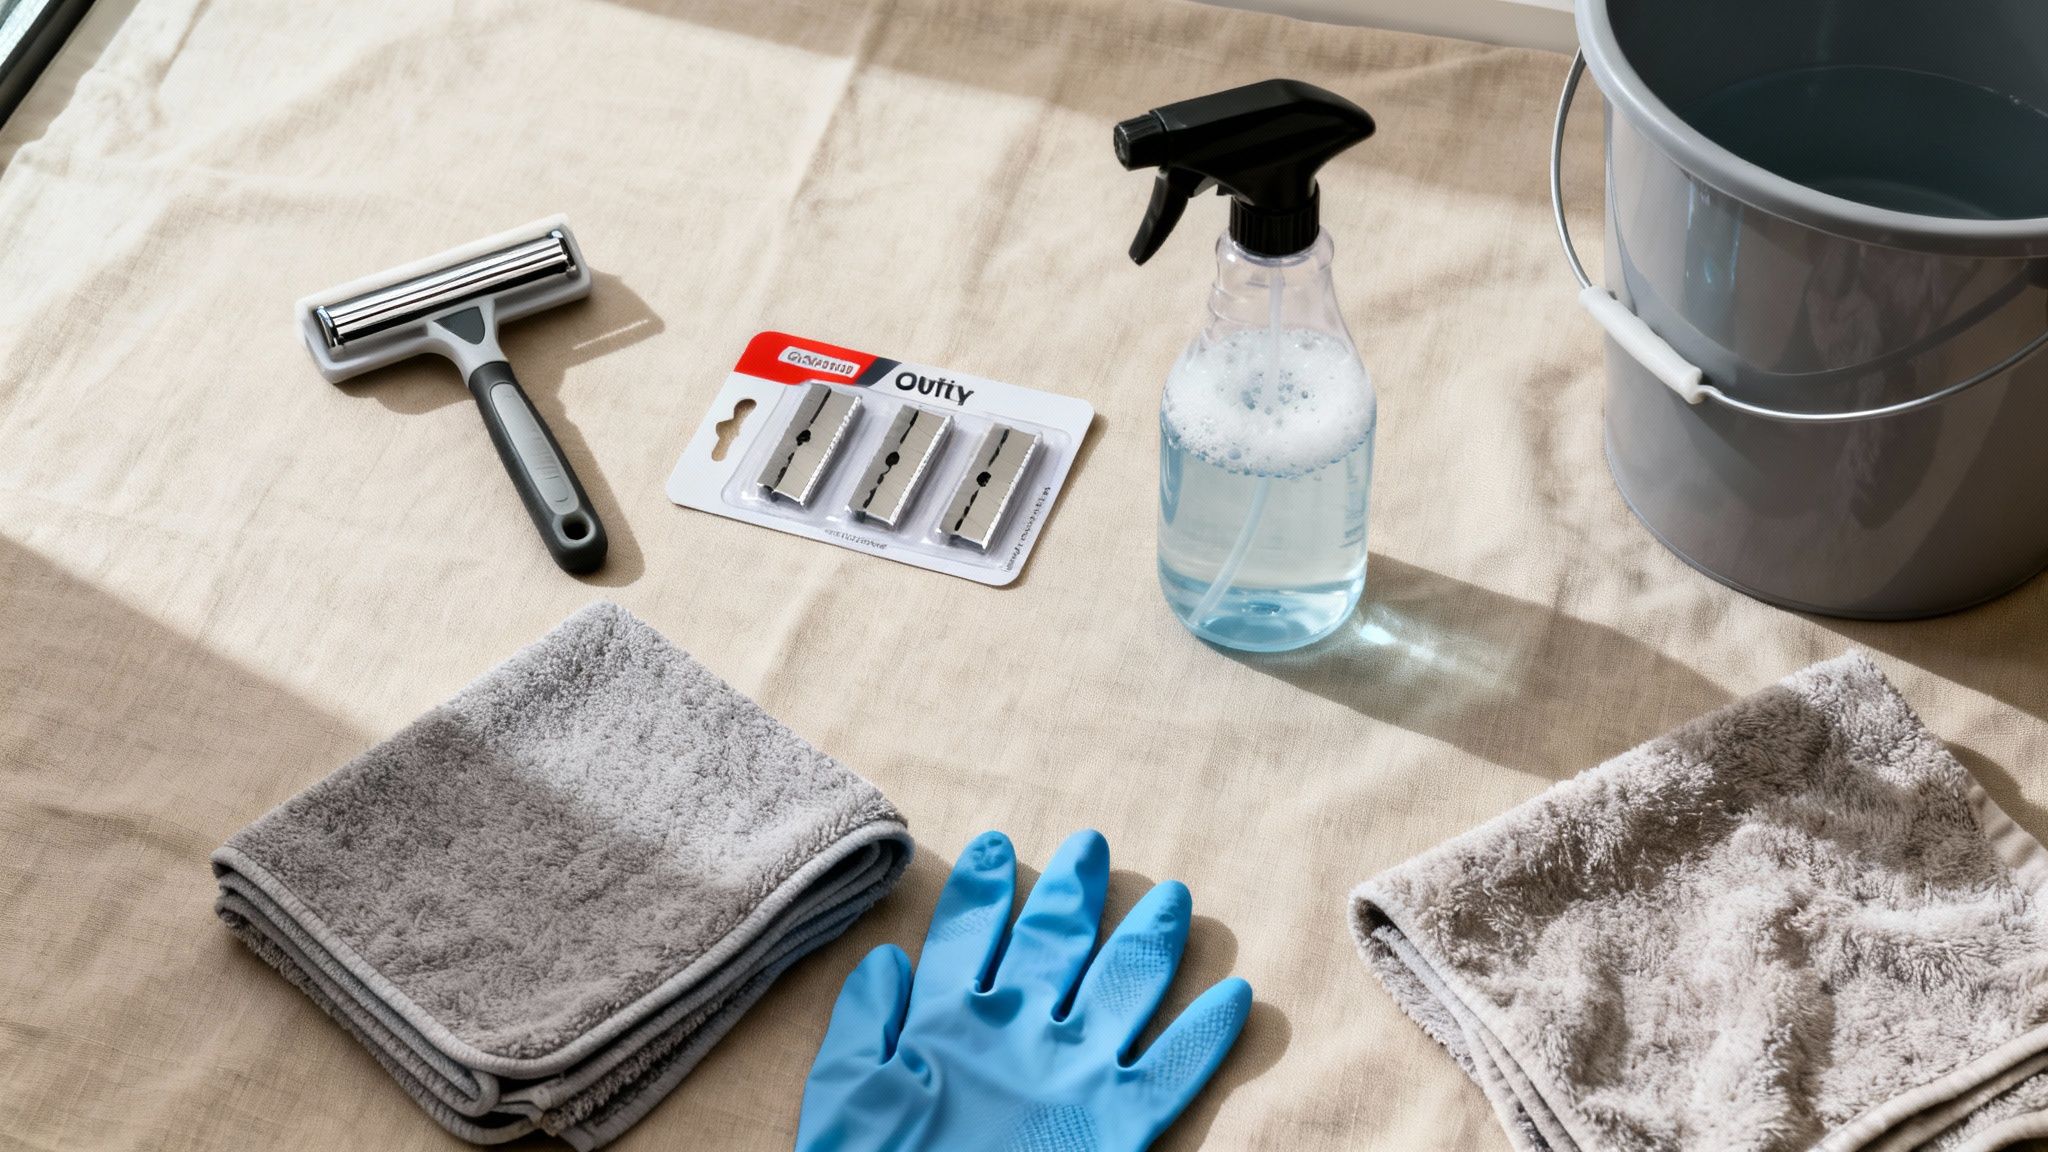
Before you even think about touching a blade to the glass, let's talk about your setup. Getting your tools in order is the single most important step. This isn't just about working faster; it's about protecting your windows from permanent damage. A well-prepared toolkit is what turns a frustrating chore into a surprisingly simple project.
Think of it like cooking a great meal—you get all your ingredients prepped and ready first. Each tool I'm about to list has a specific job, and together, they ensure the paint comes off cleanly while the glass stays pristine.
Essential vs Optional Paint Removal Tools
To make it clear what you absolutely need versus what's just nice to have, here's a quick reference table. This helps you gather your gear without overcomplicating things.
| Tool Category | Essential Items | Why It's Essential | Optional Upgrades |
|---|---|---|---|
| Scraping | Single-edge razor blades (new) & blade holder | A brand-new blade is sharp and clean, preventing scratches. The holder adds control. | Small plastic scraper, multi-size blade holders |
| Lubrication | Spray bottle with soapy water | Keeps the glass slick, allowing the blade to glide smoothly instead of dragging. | Commercial window cleaning solution concentrate |
| Personal Safety | Nitrile gloves | Protects hands from cuts and keeps your grip firm, even when wet. | Safety glasses |
| Cleaning & Cleanup | Microfiber cloths | Perfect for wiping away paint flakes and polishing the glass for a streak-free finish. | Paper towels, small bucket, painter's drop cloth |
Having the essentials is non-negotiable, but those optional upgrades can really make the job feel easier, especially if you're tackling multiple windows.
The Core Toolkit: Your Non-Negotiables
Your primary toolkit is small but mighty. Trying to skip any of these is a recipe for scratched glass or a huge mess, which just creates more work.
- Single-Edge Razor Blades: This is your workhorse. I can't stress this enough: always use a brand-new blade. A dull, rusty, or nicked blade is the #1 reason people end up scratching their windows.
- A Quality Blade Holder: A sturdy holder gives you far better control over the blade’s angle and pressure. This is what separates a clean scrape from a dangerous slip.
- Spray Bottle: You’ll fill this with warm water and just a few drops of dish soap. You need to keep the glass wet at all times while you work.
- Nitrile Gloves: These give you a great grip and protect your hands from the blade.
- Microfiber Cloths: Keep a few clean ones handy. You'll use them for wiping away the scraped-up paint sludge and for the final polish.
A common mistake I see is people grabbing an old blade from a utility knife. Those blades are often thicker and have tiny, invisible nicks from past use that will absolutely gouge your glass. Start fresh, every time.
Gear for Protection and Easy Cleanup
Just as important as the tools for the job are the items that keep your home clean and safe. A little prep here saves a massive cleanup headache later.
A few old towels or a painter's drop cloth laid across the window sill and the floor below is a must. This will catch all the wet, flaky paint and soapy drips. Simple, but effective.
I also like to keep a small bucket nearby to hold my soapy water and act as a mini trash bin. It's the perfect spot to toss used blades and soggy paper towels so your workspace stays tidy and safe. If you want to see what the pros carry in their kits, checking out a guide on the best window cleaning tools can give you some great ideas for high-quality squeegees and scrapers that make a real difference: https://sparkletechwindowwashing.com/best-window-cleaning-tools/
A Few Extras to Make the Job Easier
While not strictly necessary, a couple of other items can make the process go a lot smoother, especially for bigger jobs or stubborn, thick paint splatters.
A small plastic scraper is great for gently pushing off bigger chunks of paint once they've been softened, saving some wear on your razor blade. And honestly, a roll of paper towels is always useful for wiping up excess water and getting the gunk off your blade between scrapes. Having this stuff ready to go is the secret to keeping your project clean, organized, and safe from start to finish.
Prepping Your Workspace for a Mess-Free Project
I can't tell you how many times I've seen a simple paint removal job turn into a disaster that stains floors or gouges expensive window frames. It's tempting to just grab a scraper and go to town, but that's a classic rookie mistake. Trust me, spending 15 minutes on prep will save you an hour of headaches and cleanup later.
Getting your area set up correctly means you can focus on the real task—getting paint off the glass—without creating a bigger problem. It’s all about working smart, not hard.
Protect Your Surfaces
First things first, you need to protect everything around the glass. Once you start scraping and spraying, you'll have wet, gummy paint flecks flying everywhere. They can make a stubborn, grimy mess on sills and floors.
- Cover the Window Sill: Lay a thick, folded towel right on the sill. It’s perfect for absorbing drips and catching the bulk of the paint flakes as they come off.
- Protect the Floor: Underneath the window, spread out a painter's drop cloth or even just a few old towels. This creates a wide safety net for anything that misses the sill.
This little barrier system keeps the mess contained. When you're done, you can just carefully fold up the towel and cloth, take them outside, and shake them out. Easy.
I’ve seen it happen: one tiny paint fleck falls onto a light-colored carpet, gets stepped on, and becomes a permanent stain. A drop cloth is cheap insurance against that kind of accident.
Mixing Up the Perfect Lubricant
You don't need to buy some fancy, expensive chemical for this part. In fact, what most of us in the business use is a simple, homemade mix that’s cheap, safe, and works like a charm. The whole point is to make the glass slick so your razor blade can glide smoothly instead of skipping or dragging.
Grab a spray bottle and mix this up:
- Fill it about 90% of the way with warm water. The warmth helps soften certain paints just a little.
- Add a few drops of dish soap. And I mean a few—no more than a teaspoon for a standard spray bottle. Go overboard, and you'll have a sudsy, streaky mess that’s a pain to clean off later.
Give the bottle a gentle shake to combine everything. This simple solution gives you just the right amount of slip without getting in the way of the blade or damaging the window seals.
The Single Most Important Prep Step
If you only do one thing from this list, make it this. The most critical, and most frequently skipped, step is pre-cleaning the glass. Trying to scrape a dirty window is the number one cause of deep, ugly scratches.
Think about it: any tiny bit of grit or dirt on that pane can get caught right under the edge of your razor blade. As you push, you're basically dragging a tiny, sharp rock across the glass, gouging a line into the surface.
To avoid that nightmare, spray your soapy water solution generously all over the window. Wipe it down thoroughly with a clean microfiber cloth, focusing on the edges and corners where grime loves to hide. This quick wipe-down gets rid of any scratching hazards and makes sure your blade is only touching paint and smooth glass. It’s the secret to a perfect, scratch-free finish.
The Pro's Go-To: The Razor Blade Technique
When you see a professional tackle dried paint on a window, they almost always reach for a razor blade. It might seem intimidating—taking a sharp blade to glass feels risky—but it's hands-down the most effective way to get a perfectly clean finish without harsh chemicals. The secret isn't brute force; it's all about finesse.
The difference between a beautifully clear window and one marred by permanent scratches comes down to getting a few key details right. Once you get the hang of it, you’ll understand why this is the gold standard.
This diagram lays out the essential prep work. Think of it as setting the stage for a flawless result.
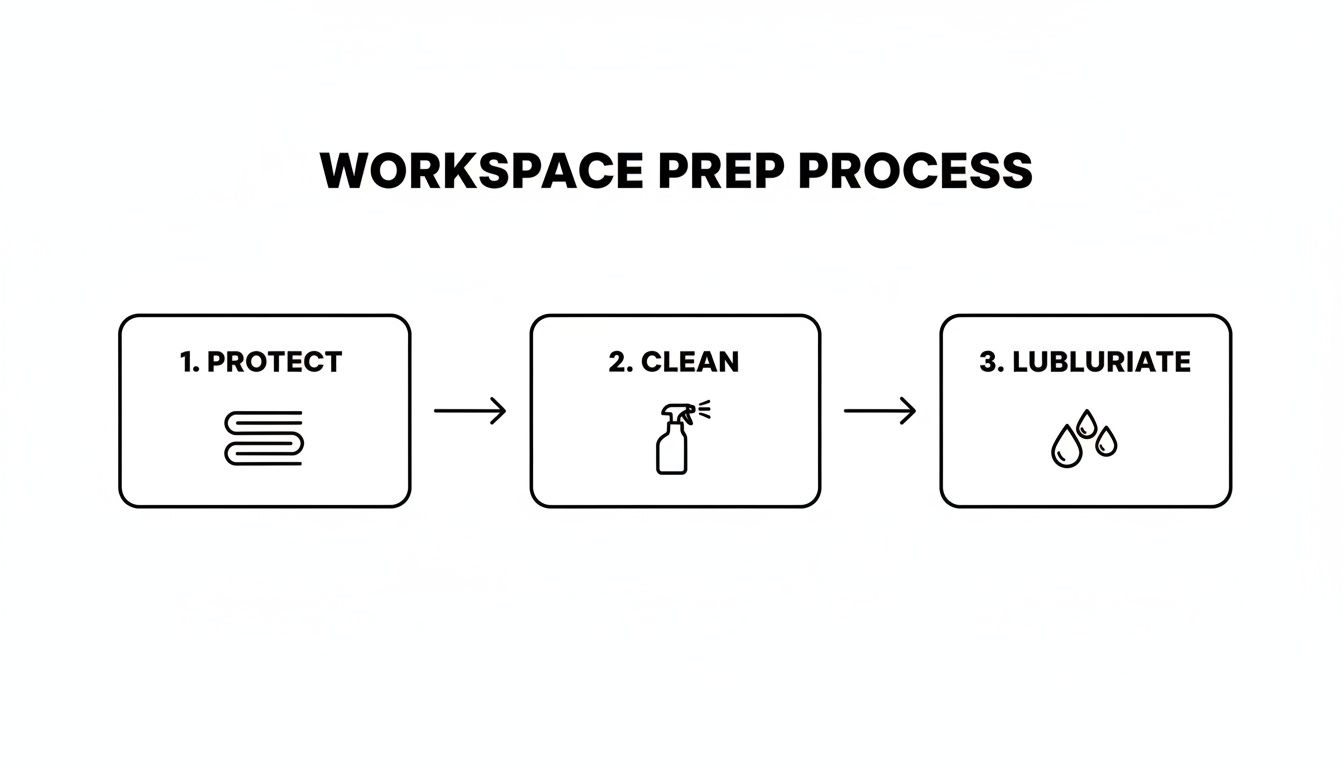
Nailing this prep means you can focus entirely on removing the paint, without worrying about making a mess or accidentally scratching the glass with hidden dirt.
The Golden Rule: It's All in the Angle
If you take away only one thing, let it be this: the angle of your blade is everything. You absolutely must hold the blade at a shallow 30 to 45-degree angle to the glass. No exceptions.
Think of it like shaving. If you press the razor straight down, you’re going to get cut. But if you hold it at a slight angle, it glides. The same logic applies here. A steep angle (anything close to 90 degrees) will cause the blade’s edge to dig in and gouge the glass. A shallow angle lets the blade slip right under the paint, lifting it off in satisfying sheets.
Your goal is not to "cut" the paint off the window but to "lift" it. This mental shift is key. A 45-degree angle ensures the blade's edge is acting as a tiny wedge, prying the paint away from the smooth, non-porous glass.
This isn’t just my experience talking. Improper blade use is the cause of visible scratches in about 31% of DIY paint removal jobs. In stark contrast, professional window cleaners who stick to the 45-degree angle and always work on a wet surface report damage rates of only 2-3%. That massive difference shows just how critical technique is. In the Phoenix area alone, roughly 4,200 homeowners file claims each year for window damage from DIY attempts. You can learn more about these professional safety standards from the experts at Window Genie.
Lubrication Is Not Optional
Here's the second unbreakable rule: always work on a wet surface. I can't stress this enough. A dry blade on dry glass is a recipe for disaster. It will skip, chatter, and drag, leaving a web of fine scratches that you can’t undo.
Your spray bottle filled with soapy water is your best friend. Before you even think about touching the blade to the glass, give the section you're working on a generous spritz. The soap and water create a slick film that lets the blade glide like it’s on ice.
Keep that spray bottle handy. If you notice an area starting to dry, stop what you’re doing and spray it again. You want a visible layer of moisture on the glass at all times.
Master the Motion
With the right angle and plenty of lubrication, the last piece of the puzzle is the motion itself. It’s simple but requires precision.
- Push Forward, Always: Only apply pressure as you push the blade in a forward motion. This is what cleanly lifts the paint.
- Lift, Don't Drag: After each forward stroke, lift the blade completely off the glass before repositioning for the next pass. Never, ever drag the blade backward. A backward drag is the fastest way to trap a piece of grit under the edge and carve a deep scratch into your window.
- No Side-to-Side: Don't wiggle the blade sideways while it’s on the glass. This can easily chip a corner off the blade, creating a tiny, sharp point that will instantly damage the surface.
Work in short, controlled, slightly overlapping strokes. This methodical approach ensures you don't miss any spots or make a costly mistake.
Listen to What You're Doing
Here’s a tip that separates the amateurs from the pros: use your ears. A sharp blade on properly lubricated glass makes a clean, crisp shing sound as it peels the paint away. It's a smooth, oddly satisfying noise.
If you hear a gritty, grinding, or scraping sound, stop immediately. That sound is a warning. It could mean:
- Dirt or debris is trapped under your blade.
- The glass isn't wet enough.
- Your blade has a nick or has gone dull.
When you hear that grinding, lift the blade, wipe it on a cloth, re-spray the area, and inspect the blade's edge. If the sound continues, it’s time for a fresh blade. Trusting your ears is one of the best ways to prevent damage before it happens.
Alternative Methods for Stubborn or Delicate Jobs
A razor blade is a window cleaner's go-to tool, but it's not a silver bullet. Sometimes you run into paint that’s been baked on for decades, or you’re dealing with glass that’s too delicate or textured for a sharp edge. When a blade won't cut it, you need to have a few other tricks up your sleeve.
Knowing how to pivot to a different technique is what separates the pros from the amateurs. Whether you're up against antique wavy glass, frosted privacy panes, or just incredibly stubborn splatters, there’s a better, safer way to get the job done.
Using Chemical Paint Strippers Safely on Glass
When you're facing thick, layered paint, a chemical stripper can be your best bet. It does the hard work for you, breaking down the paint's bond to the glass so you don't have to scrape as hard. But this is a method that demands caution.
You can't just grab any can off the shelf. Look for products specifically marked as "safe for glass," or opt for less aggressive citrus-based or soy-gel formulas. I find the gel-like strippers work best because they cling right to the window without dripping all over the place.
Here’s the right way to approach it:
- Get the Air Moving: First thing's first: ventilation. These products have strong fumes, so open up every window you can and get a cross-breeze going. A box fan pointing out the window is a great idea.
- Protect Your Surfaces (and Yourself): Don't skip the prep. Tape off the window frame, sill, and any surrounding walls with painter's tape. And make sure you're wearing chemical-resistant gloves and safety glasses.
- Apply a Thick Coat: Use a cheap, disposable brush to slather on a thick, even layer of the stripper. Don't try to spread it thin; you want a good coat that can sit and work its magic.
- Let It Work: Now, you wait. The time will vary based on the product, anywhere from 20 minutes to a few hours. Just follow the directions on the can. You’ll know it’s working when you see the paint start to bubble up and wrinkle.
- Scrape Gently: Once the paint has turned into a soft, gooey mess, use a plastic scraper or a putty knife to carefully lift it away. Stay away from metal tools here—the glass is still vulnerable to scratches.
After the gunk is gone, you'll need to clean off the residue. Use whatever the manufacturer recommends (like a neutralizer or mineral spirits), then follow up with a standard wash to get the glass sparkling.
Buffing Away Paint with Super-Fine Steel Wool
What about glass that a razor blade could ruin? I'm talking about historic wavy glass, or those frosted and textured panes you see in bathrooms. A blade can easily snag on an uneven surface and leave a permanent scratch. This is where #0000 super-fine steel wool becomes your most valuable tool.
And I mean super-fine. This isn't the coarse stuff you'd use on a rusty grill. Grade #0000 is so fine it almost feels like cloth, and it's perfect for gently abrading paint without damaging the glass underneath.
The secret is lubrication. Lots of it.
- Drench the glass with your soapy water solution. You want it dripping wet.
- Soak the steel wool pad in the same solution. Never, ever use it dry.
- Using light pressure, work in small, circular motions. Let the steel wool and the soapy water do the work. The paint will start to break down into a thin slurry.
- Wipe the area with a clean cloth every so often to check your progress and clear the mess away. Re-wet the area and keep going until the paint is gone.
This method definitely takes more elbow grease than using a razor, but for delicate or irreplaceable glass, it's the only way to go. It gives you a level of control a sharp blade just can't offer. If you're looking for other blade-free techniques, check out our guide on removing paint on glass without razors for more expert tips.
Softening Stubborn Paint with a Heat Gun
For that ancient, sun-baked oil-based paint that feels like it’s become part of the glass itself, sometimes you need heat. A heat gun can soften the paint just enough to make it pliable and easy to scrape off.
But be careful—this technique comes with a major risk: thermal shock. Heating one spot on the glass too quickly can make it crack instantly. The key is to use low, even heat.
Here’s how to pull it off safely:
- Start Low and Slow: Set your heat gun to its lowest temperature. You can always turn it up if you need to, but you can’t un-crack a window.
- Keep It Moving: Hold the nozzle about 6-8 inches from the glass and keep it in constant motion. Sweep back and forth over the paint spot as if you were spray painting. Never hold it still.
- Watch for a Change: Keep a close eye on the paint. After a few seconds, you’ll see it start to soften, blister, or change texture. That's your cue.
- Scrape While It's Soft: As soon as the paint softens, set the heat gun down and immediately use your scraper to lift the paint while it's still pliable.
This heat-and-scrape combo is a lifesaver for thick, stubborn drips that would otherwise take ages to remove.
Paint Removal Method Comparison
Choosing the right tool for the job is crucial. A method that works wonders on one window could be a disaster on another. This table breaks down the best uses for each technique, along with their pros and cons, to help you make the smartest choice.
| Method | Best For | Pros | Cons & Risks |
|---|---|---|---|
| Chemical Stripper | Thick, multiple layers of old paint; large coverage areas. | Requires less physical effort; highly effective on stubborn paint. | Strong fumes require good ventilation; can damage frames if not masked properly. |
| #0000 Steel Wool | Delicate, antique, textured, or frosted glass. | Very low risk of scratching when used wet; excellent control. | Slower and more labor-intensive; not efficient for heavy paint coverage. |
| Heat Gun | Fossilized, sun-baked oil-based or enamel paints. | Quickly softens incredibly hard paint, making it easy to scrape. | High risk of causing thermal shock and cracking the glass if used improperly. |
Ultimately, the goal is to remove the paint without leaving a trace—on the glass or the surrounding frame. By understanding the strengths and weaknesses of each method, you can tackle any paint problem safely and effectively.
That Final Touch: Getting a Professional, Streak-Free Shine
You've done the heavy lifting—the paint is finally off the glass. But hold on, don't put those tools away just yet. This last part of the process is what truly separates an okay DIY job from a spectacular, professional-looking result. It’s all about the details of the final cleanup.
Believe me, spending this last 10% of your effort makes 90% of the difference. If you skip this, you’ll likely be left with a hazy film or tiny paint flecks that catch the light just right, ruining all your hard work. Let's get that glass looking invisible.
Handling the Aftermath: Paint Flakes and Used Blades
By now, your work area is probably a minefield of wet paint flakes and you've got a used razor blade to contend with. A little care here goes a long way.
- Contain the Debris: The easiest way to handle the mess is to carefully fold your drop cloth or towel inward, trapping all the paint flakes inside. Take it straight to the trash bag and shake it out to keep those bits from scattering everywhere.
- Dispose of Blades Safely: A loose razor blade in the trash is a serious hazard. Never just toss it in. I always wrap mine securely in a few layers of painter's tape or, even better, drop it into a small, sealed container before throwing it away.
Taking a moment to properly dispose of everything keeps your space clean and, more importantly, keeps everyone safe from a nasty cut.
It's a simple but crucial habit. I keep an old pill bottle in my tool kit specifically for used blades. It's quick, easy, and completely safe.
The Art of the Squeegee Finish
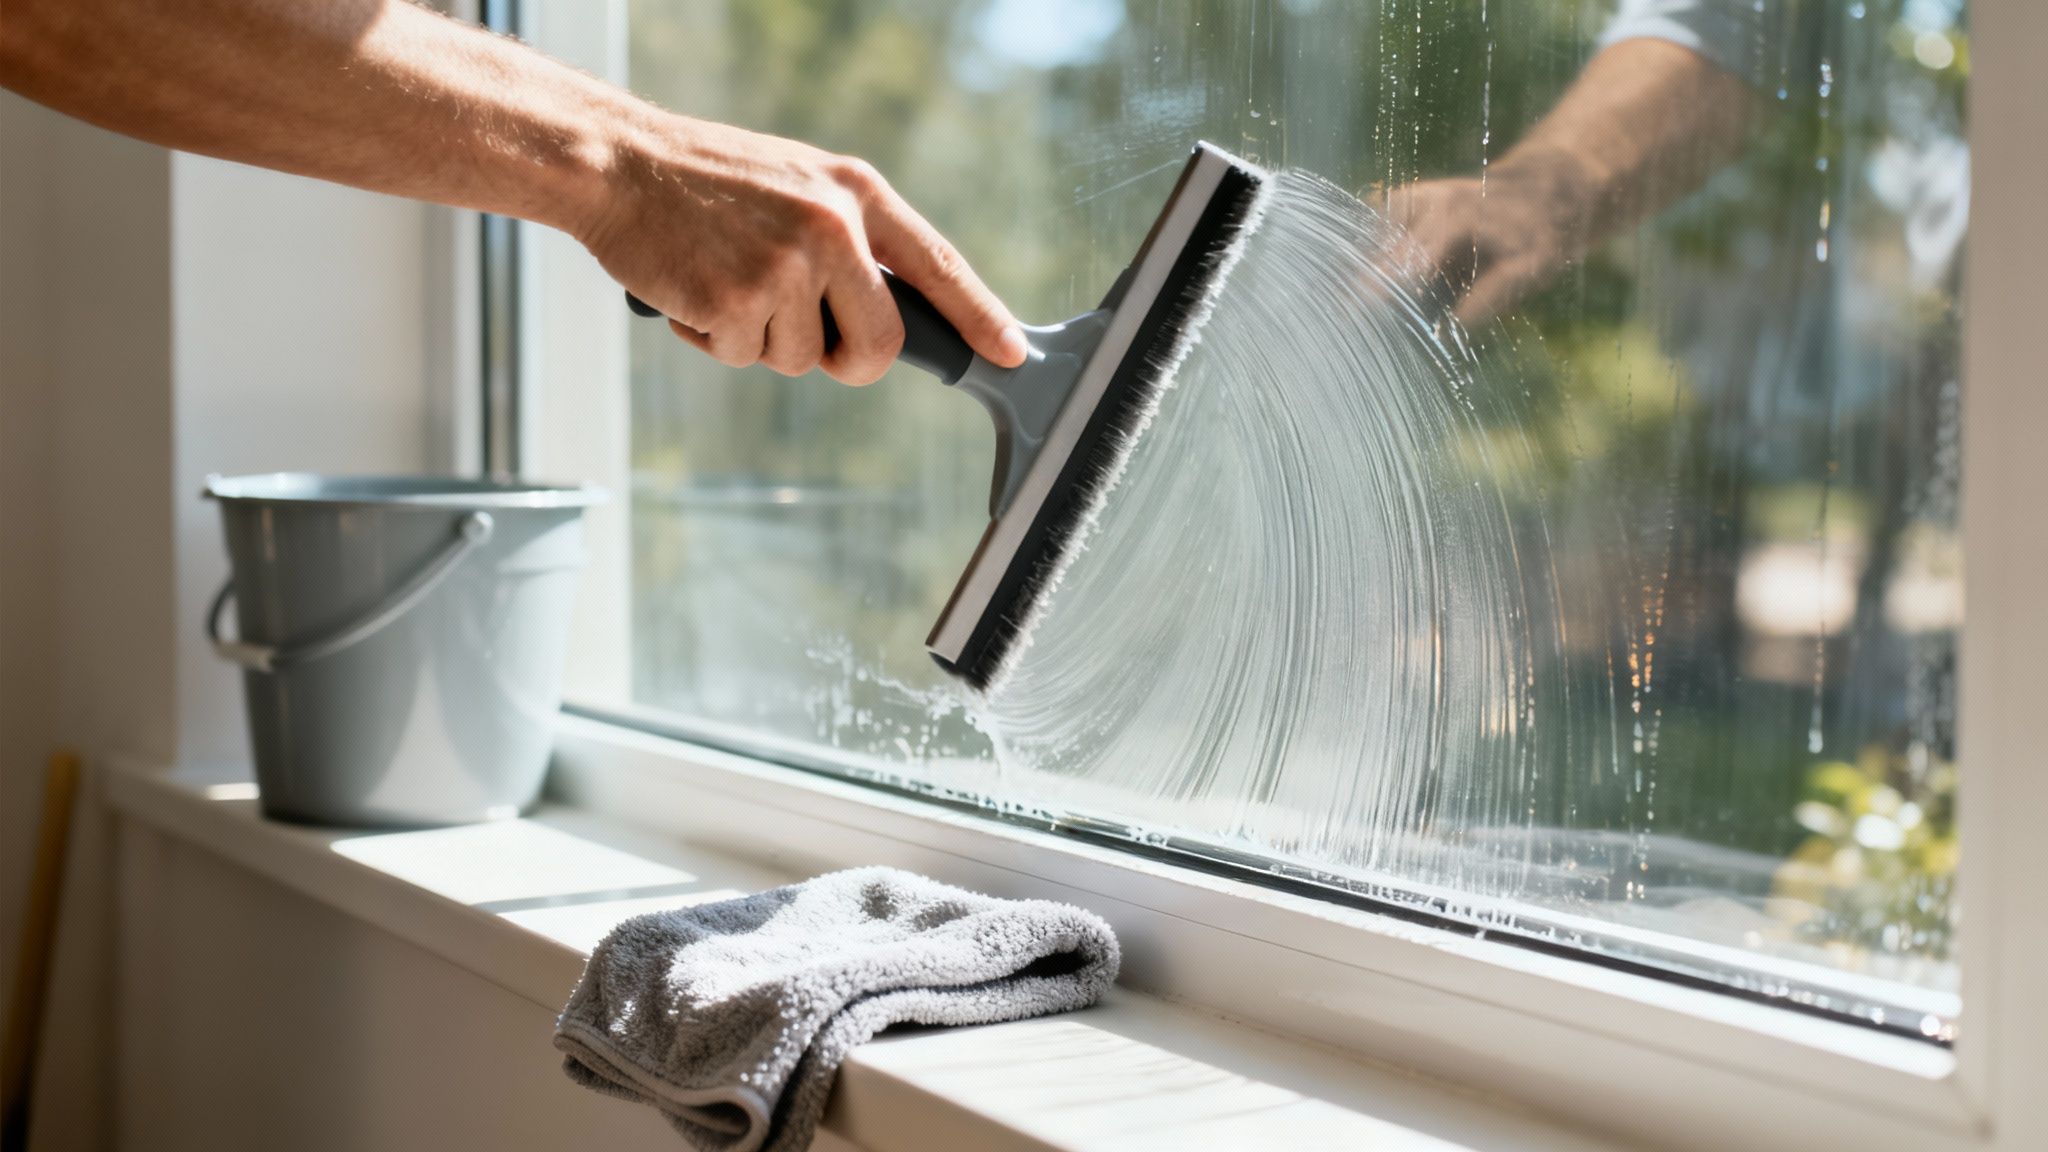
Okay, time for the final wash. This step is what will blast away any lingering soapy residue, smudges, or microscopic paint particles to give you that truly streak-free shine. You'll need your squeegee and a clean microfiber cloth.
Start with one last, generous spray of your soapy water solution across the entire pane.
- Create a Dry Edge: Before you start pulling, use a corner of your microfiber cloth to wipe a clean, one-inch strip down one side of the window. This "dry zone" prevents the squeegee from leaving a watery line at the end of each stroke.
- Make Your First Pull: Press your squeegee blade firmly against the top of the glass, overlapping that dry edge by about an inch. Angle the squeegee slightly and pull it straight down in one smooth, confident motion.
- Wipe the Blade: This is the secret sauce. After every single pull, wipe the rubber blade clean with your microfiber cloth. A dirty blade will just drag a line of grime right back onto your clean glass.
- Overlap Each Stroke: For the next pull, overlap your previous stroke by about an inch and a half. This simple technique is the key to avoiding those annoying thin lines of water between passes. Keep going until the whole pane is done.
- Detail the Edges: Finally, take a dry part of your microfiber cloth and quickly wipe any leftover drips from the corners of the glass and off the window sill.
For a deep dive into mastering this skill, check out our complete guide on how to clean windows streak-free.
When to Wave the White Flag and Call a Pro
Sometimes, the smartest move is knowing when to hand the job over to an expert. If you run into any of these situations, it’s probably a good idea to pause and think about hiring a professional window cleaning service.
- You Find Deep, Pre-Existing Scratches: If you uncover some nasty scratches that were hiding under the paint, continuing to scrape could make them much worse or even weaken the glass.
- You Encounter Stubborn Fabricating Debris: This is a tricky one. Sometimes, tiny glass particles from the manufacturing process are fused to the window surface. Trying to scrape these off will cause a disaster of fine scratches.
- You Just Feel Out of Your Depth: If the job feels bigger than you expected or you're just not confident you can get it done without causing damage, there's no shame in calling for backup.
The demand for professional paint removal services is growing by 15-20% each year, and a big reason is that DIY jobs can go sideways. In fact, research shows that around 73% of homeowners who attempt this themselves end up causing some minor damage. Improper blade technique is the culprit in about 42% of these cases, with replacement costs for a single window often running $800-$1,200. Suddenly, hiring an expert seems like a pretty smart investment. You can get more professional insights over on FISH Window Cleaning's blog.
Frequently Asked Questions About Getting Paint Off Glass
Even when you know the basic steps, some situations can be real head-scratchers. Let's tackle some of the most common questions people have when paint ends up on their window panes. A little expert advice here can save you a lot of frustration down the road.
Can I Use Acetone or Nail Polish Remover on a Glass Window?
Technically, yes, but I almost always advise against it. While acetone is a beast at dissolving tough stuff, it's often too aggressive for this job. The glass itself can handle it, but the real risk is to everything around the glass.
Acetone can be a disaster for vinyl window frames, rubber gaskets, and painted sills. One little drip can melt or strip the finish in an instant, causing permanent damage. It's just not worth the risk when a simple razor blade and some soapy water work so well for most situations.
If you find yourself in a really tough spot and feel like a chemical solvent is your only option, look for a paint stripper specifically designed for this purpose. Even then, test it on a tiny, inconspicuous spot first to make sure it plays nice with your window materials.
What’s the Best Way to Remove Old, Sun-Baked Paint from Glass?
Ah, the classic problem: paint that’s been baked on by the sun for years and feels more like cement than paint. For this, your secret weapon is a bit of controlled heat.
Grab a heat gun and set it to its lowest setting. The trick is to keep it moving, holding it a good few inches away from the glass to warm the area gently and evenly. You're not trying to cook an egg here; you just want to soften the paint's grip on the glass. Once it's pliable, a well-lubricated razor blade should lift it off with surprisingly little effort.
Expert Tip: The goal is to make the paint flexible, not to melt it into a gooey mess. Focusing too much heat on one spot can cause thermal shock, which is a fancy way of saying your window could crack. Low and slow is always the safest bet.
How Can I Remove Paint Without Using a Razor Blade?
Not everyone is comfortable taking a razor blade to their windows, and that's perfectly fine! Especially if you're dealing with old, delicate glass or a textured surface, a blade might not be the right tool anyway.
In these cases, your go-to alternative is #0000 super-fine steel wool. I can't stress the "0000" grade enough—anything coarser will absolutely leave scratches.
The key here is lubrication, and lots of it. Drench the glass and the steel wool pad in your soapy water solution. Then, using light pressure, work in small, gentle circles. For stubborn latex paint, you can also try holding a hot, wet cloth against the spot for a few minutes. This often softens it enough to be wiped away or gently pushed off with a plastic putty knife.
When a DIY project starts to feel overwhelming or you're worried about damaging expensive windows, calling a professional is the smartest move. The crew at Sparkle Tech Window Washing has the right tools and deep experience to get your windows looking pristine without any risk to the glass or surrounding frames. Contact us today for a flawless finish.