


When it comes to cleaning solar panels, the right tools make all the difference. You'll want a soft-bristle brush and a good squeegee, both attached to a long extension pole. Grab a bucket of clean water, add just a tiny bit of non-abrasive soap, and you're almost ready.
But first, safety. Always shut down your entire system before you start. It’s also best to clean on a cool, overcast day—this prevents the water from evaporating too quickly and leaving spots, and it protects the panels from thermal shock. A little prep work here goes a long way in boosting your system's output.
Why Cleaning Your Solar Panels Is a Genius Move
It's easy to look at cleaning solar panels as just another weekend chore. They're up on the roof, seemingly doing their thing. But thinking of it as a simple task is missing the bigger picture. In reality, it's one of the smartest things you can do to protect your home's energy investment. This isn't about aesthetics; it's about performance and getting every dollar of savings you were promised.
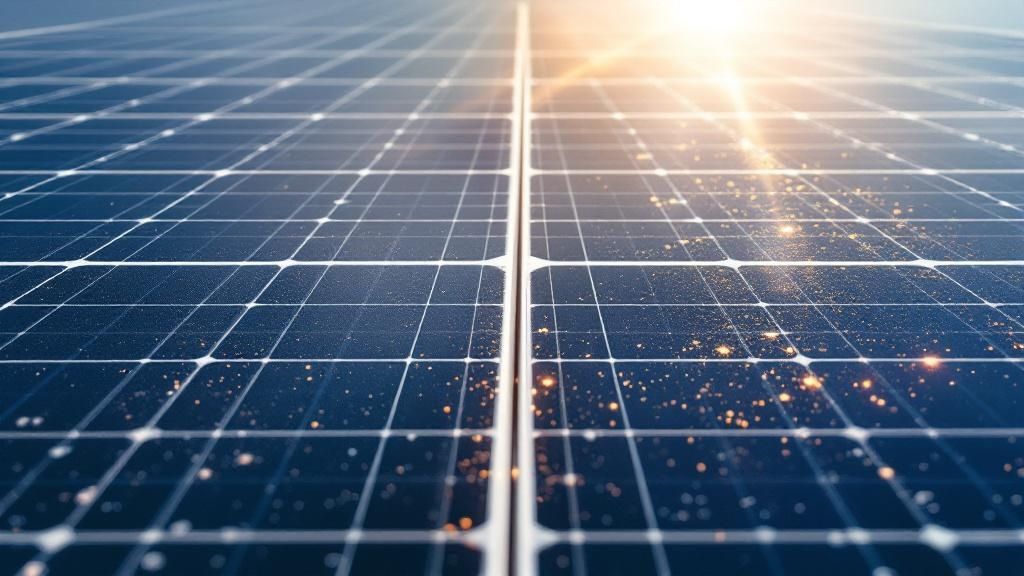
Every single day, a thin, almost invisible layer of grime builds up on your panels. It could be dust, pollen, bird droppings, or even salty air if you're near the coast. This accumulation does more than just make them look dirty; it actively undermines your system's efficiency in a process known as soiling loss. This silent thief can seriously cut into your energy production over time.
The Real-World Cost of a Dirty Panel
Soiling loss isn't just a minor issue. Research has shown a direct link between panel cleanliness and energy output, with grime causing energy losses that can climb past 30% if the panels are neglected. In especially dusty or dry climates, that kind of efficiency drop can happen in just a matter of weeks.
Here's a quick look at common culprits and their potential impact on your energy generation to show why regular cleaning is crucial.
How Common Grime Impacts Your Solar Panel Output
| Type of Soiling | Potential Efficiency Loss | Recommended Cleaning Frequency |
|---|---|---|
| Light Dust & Pollen | 3-7% | Every 6-12 months |
| Bird Droppings | 10-15% (can be higher) | As needed, immediately if possible |
| Heavy Urban Soot | 15-25% | Every 3-6 months |
| Coastal Salt Spray | 20-30% | Every 3-6 months |
| Agricultural Dust | 25-35% | Seasonally, after planting/harvest |
This means a dirty panel isn't just underperforming—it's actively costing you money every time the sun is out. Where you live plays a huge role in how quickly this happens.
- Live Near a Busy Road? Fine dust and exhaust fumes create a sticky film that’s tough to wash away with just rain.
- In a Farming Community? Agricultural dust can blanket your panels, especially during planting and harvest seasons.
- Close to the Coast? Salty air leaves behind a corrosive residue that doesn't just block sunlight but can also degrade the panel components over time.
Preventing Hot Spots and Protecting Your Investment
Beyond just losing efficiency, that layer of grime can lead to a much more serious problem: "hot spots."
Think about it—when a specific area of a panel is completely blocked, like where a bird dropping has caked on, that little section stops producing power. The cells around it, however, are still working hard, trying to push current through that dead zone. This resistance causes the blocked area to dangerously overheat.
These hot spots can permanently reduce a panel's output. In the worst-case scenarios, they can cause irreversible damage to the solar cells themselves. A simple cleaning prevents these blockages from ever forming.
Ultimately, keeping your solar panels clean is a direct investment in their lifespan and your financial return. It ensures your system is working at its absolute peak, turning every ray of sunshine into real savings for your home.
If you really want to maximize your solar investment and learn how to spot performance issues, getting familiar with tools for Solar PV diagnostics using clamp meters can be incredibly helpful.
Getting Your Solar Cleaning Kit Together
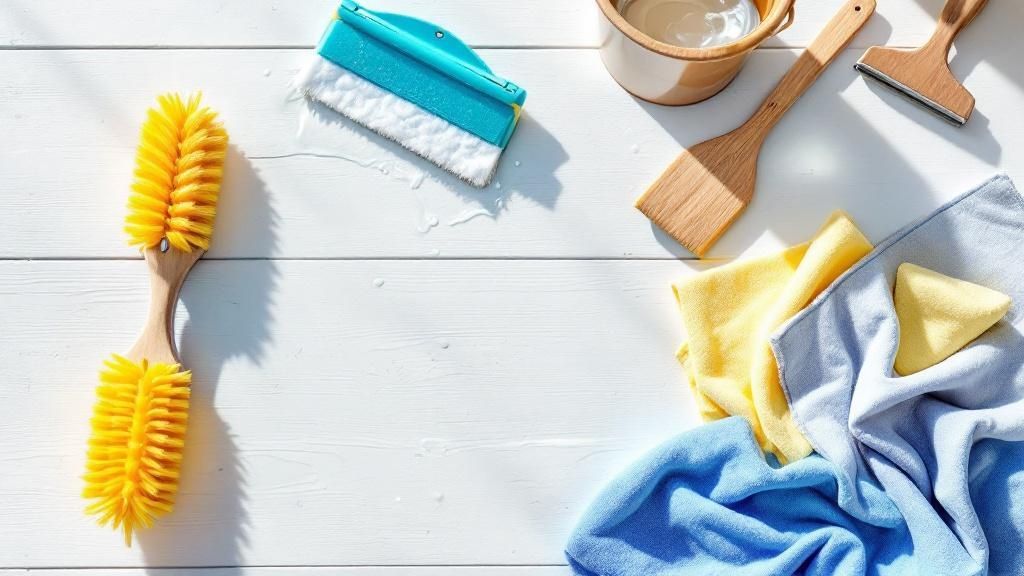
Before you even think about getting on the roof, let’s talk gear. Having the right equipment is about more than just making the job easier—it's about protecting your investment and keeping yourself safe. Grabbing the wrong brush or using too much pressure can turn a routine cleaning into a costly mistake.
Think of your panels as having a delicate, high-tech coating designed to soak up as much sun as possible. The entire goal is to clean them without scratching or damaging that surface. This means anything abrasive is completely off the table.
The Tools You'll Need for a Perfect Clean
You don't need a truck full of fancy equipment, but every item in your toolkit serves a purpose. Most of these things are probably at your local hardware store, or you can find a dedicated solar panel cleaning kit that has everything bundled up.
Here’s what I recommend having on hand:
- A Soft-Bristle Brush: This is the most critical tool. You need a brush with soft, non-abrasive bristles, ideally on a long extension pole to help you reach. Never, ever use a stiff-bristled brush or anything like a kitchen scourer. You’ll create tiny scratches that permanently hurt your panels’ output.
- A High-Quality Squeegee: A good squeegee is your best friend for avoiding those annoying water spots left behind by mineral deposits. Look for one with a flexible, soft rubber blade that will give you a clean, streak-free finish.
- A Standard Garden Hose: Put the pressure washer away. Seriously. High-pressure water can sneak past the seals on the panel frames, letting moisture in and causing all sorts of long-term problems. A regular hose with a decent spray nozzle is all you need.
- Buckets and a Gentle Soap: A couple of buckets will do the trick—one for your cleaning solution and another with clean water for rinsing your brush. As for soap, less is more. A tiny bit of mild, biodegradable dish soap is usually enough. Honestly, most of the time, plain water works just fine.
If you’re dealing with a large array or a property without easy water access, you might need a better storage solution. It’s worth looking into options like vertical water storage tanks to have enough clean water ready to go.
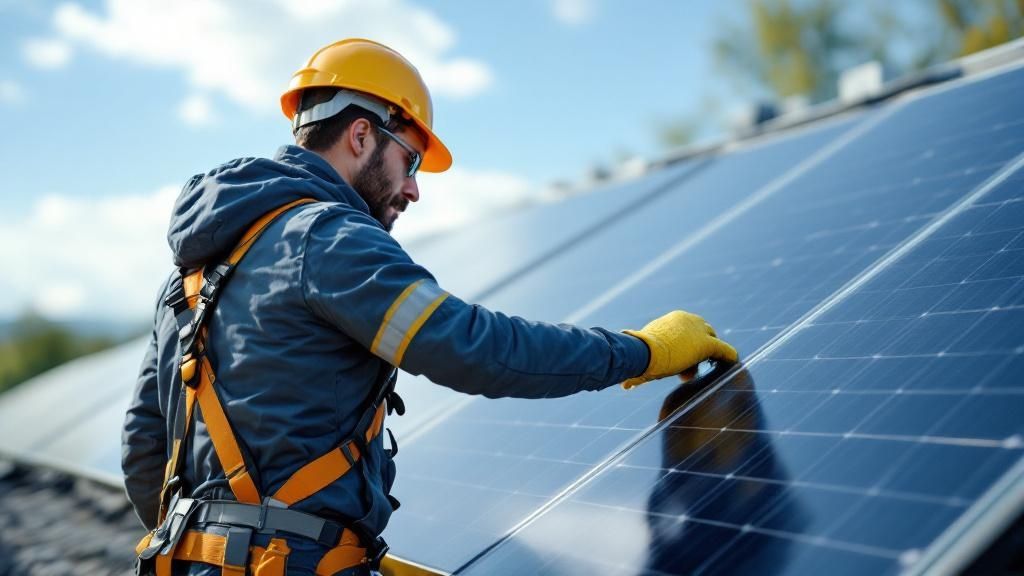
Don't Forget Your Safety Gear
Let's be real: cleaning solar panels often means you’re working up high, and that comes with risks. Your personal protective equipment (PPE) is just as important as your cleaning tools. This is the one area you absolutely can’t afford to skimp on.
Safety isn't just a recommendation; it's the very first step. A fall can have devastating consequences, so gearing up properly before you even touch the ladder is non-negotiable.
Make sure you have this gear ready:
- Grippy, Non-Slip Shoes: Roofs get slippery, especially when they’re wet. A pair of sturdy, soft-soled shoes with excellent traction is a must.
- A Safety Harness: If your roof has any kind of slope, a properly fitted safety harness connected to a solid anchor point is essential. If you haven't used one before, take the time to learn how it works first.
- A Sturdy Ladder: Check your ladder to make sure it’s in good shape and place it on firm, level ground. For roof access, it should extend at least three feet above the edge.
- Work Gloves: A decent pair of gloves will protect your hands and give you a better grip on your tools and the ladder.
Getting all this organized before you start makes the whole process smoother and, most importantly, safer. With the right gear in hand, you’re all set to get your panels back to peak performance without causing any damage.
The Safe and Effective Solar Panel Cleaning Process
Alright, you've got your tools laid out and your safety gear on—now for the main event. Getting solar panels clean is less about brute force and more about technique and a little patience. If you rush it or cut corners, you’ll end up with streaks, missed spots, or worse, you could accidentally damage a panel. Let's walk through this the right way, focusing on a safe approach that gets you sparkling results and peak energy production.
First things first, and this is non-negotiable: shut the system down completely. Before a single drop of water hits those panels, head to your circuit breaker box and flip the AC disconnect for your solar system. This kills the power, making sure you aren't mixing live electricity and water. It's a simple step that protects both you and your investment.
Setting the Stage for Success
Believe it or not, timing is everything. The perfect time to clean your panels is on a cool, overcast morning or in the early evening.
Why? If you try to clean them under a blazing midday sun, the water will evaporate almost instantly. This leaves behind a nasty film of soap scum and mineral deposits, which can be just as bad for efficiency as the dirt you were trying to remove in the first place.
Cooler temps also prevent something called thermal shock. Hitting a scorching hot panel with cold water can cause tiny micro-cracks in the glass. It's like pouring cold water on a hot glass pan from the oven—a recipe for disaster. Working on a cool day is just smart.
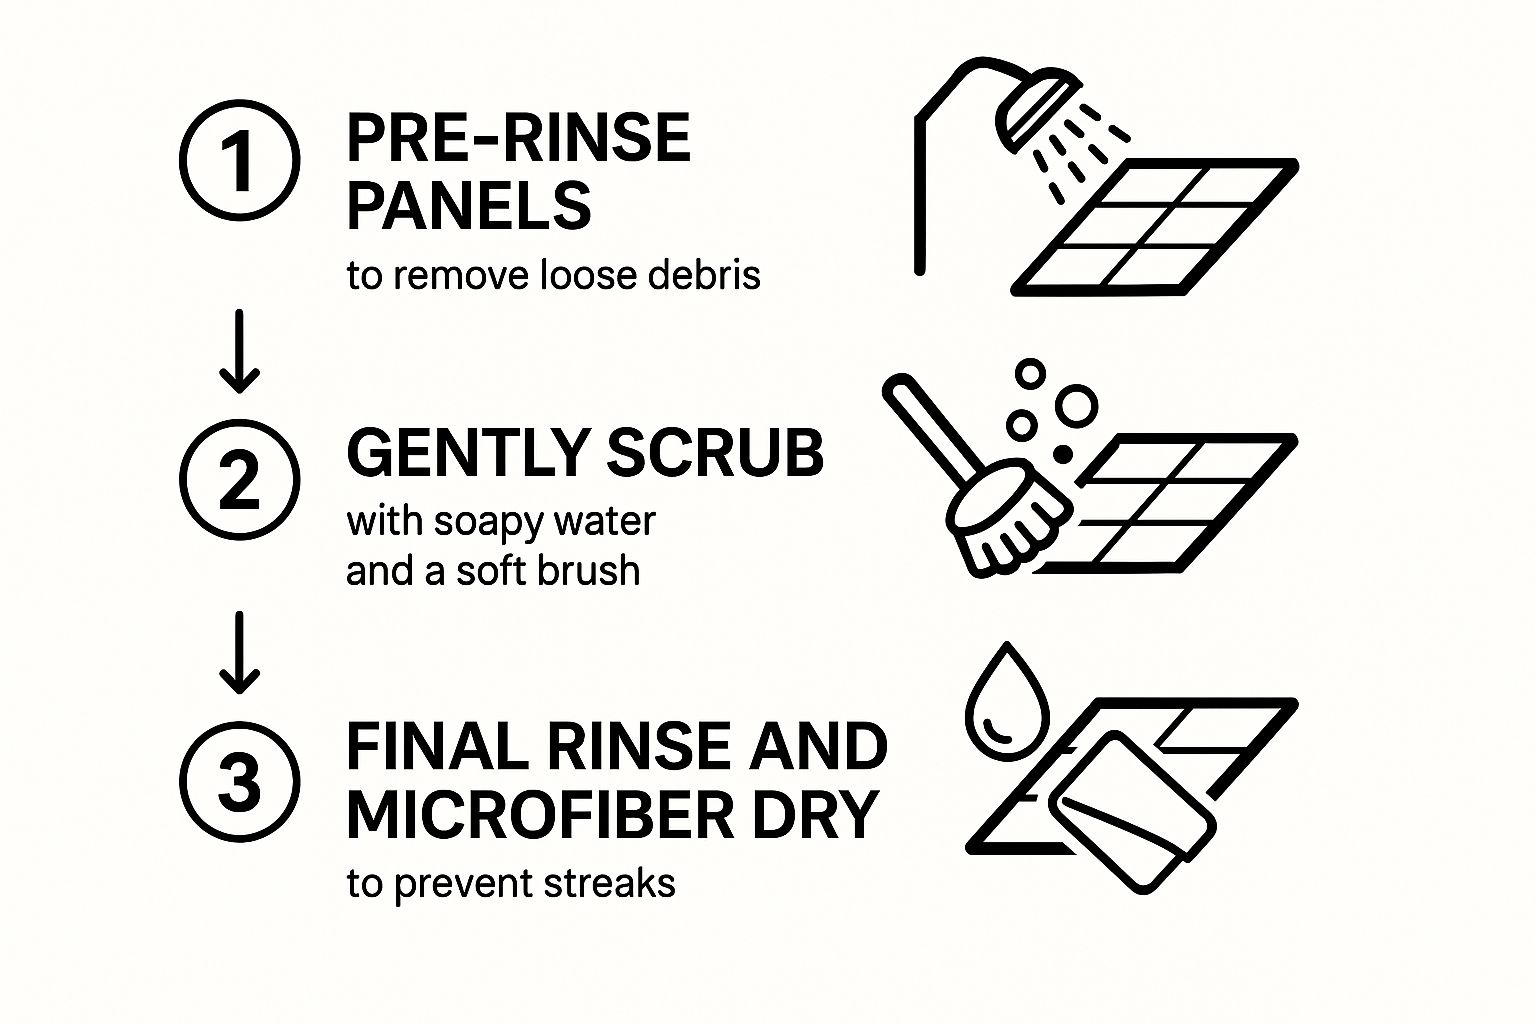
The Initial Rinse-Down
Your first move is a gentle pre-rinse. Grab your garden hose with a standard spray nozzle—not a high-pressure jet—and give all the panels a good soaking. The goal here isn't to blast anything off. You're just softening up that top layer of dust, pollen, and grime.
This simple rinse does a surprising amount of the heavy lifting. It’s especially helpful for stubborn messes like bird droppings. Let those spots get a little extra water to soften them up, which will make them much easier to deal with later without having to scrub aggressively.
The Gentle Scrubbing Technique
Now it's time to break out the brush. Dip your soft-bristle brush into your bucket of clean water. If you’re dealing with some serious grime, a tiny amount of soap is okay, but often plain water is all you need.
Start at the top of a panel and work your way down in long, overlapping strokes, almost like you're mowing a lawn. This methodical pattern ensures you cover every square inch.
Keep dipping the brush back into your bucket often. This rinses the dirt off the brush so you aren't just pushing grime around from one spot to another.
The real key here is to let the brush do the work. You should never feel like you need to apply a lot of pressure. If you hit a tough spot that the pre-rinse didn’t quite loosen, just work on it gently with the wet brush. A little patience goes a long way and is much safer for the panel than aggressive scrubbing.
This simple rinse-scrub-rinse process is the foundation of a proper cleaning. It gets the job done right while protecting the surface of your panels.
The Final Rinse and Dry
As soon as you finish scrubbing a panel (or a small group of them), it’s time for the final rinse. Immediately rinse it from top to bottom, washing away all the dirt and any soap you might have used. The last thing you want is for soapy water to dry on the surface, as it will leave a hazy film.
This is where the squeegee becomes your best friend. For that perfect, streak-free finish, nothing beats it. Start at the top and pull the squeegee straight down in one smooth, continuous motion. Overlap each stroke by about an inch and wipe the blade clean with a microfiber cloth after every pass. If you want to master this, the technique is very similar to how you’d achieve streak-free windows in your home.
For any little drips left behind, especially around the edges of the panel frame, just use a clean microfiber cloth to gently pat them dry. This quick touch-up prevents mineral spots from forming as the water evaporates.
Adapting to Different Setups
How you tackle the job might change a bit depending on where your panels are.
- Ground-Mounted Arrays: These are the easiest by far. You can work safely from the ground and probably won't even need an extension pole for your brush.
- Slightly Pitched Roofs: For roofs with a low slope, you can often work from a securely placed ladder, using an extension pole to reach the whole array.
- Steep Roofs: This is where you need to be extremely careful. A proper safety harness is an absolute must. If you feel even the slightest bit unsure or uncomfortable, this is the time to call a professional. No amount of extra energy production is worth a fall.
The principles of good DIY maintenance aren’t just for solar panels. Taking care of other critical home systems, like learning some safe and effective DIY cleaning tips for dryer vents, reinforces how important routine care is for protecting your investments and keeping your home running efficiently.
Once you’re all done and safely back on the ground, don't forget the final step: turn your system back on at the breaker. Now you can sit back, relax, and watch your production meter tick up, knowing your panels are working at their absolute best.
Common Cleaning Mistakes That Can Damage Your Panels
Learning from someone else's expensive mistake is always better than making it yourself. When you're dealing with an investment as significant as your solar array, a simple cleaning job can quickly go wrong if you aren’t careful.
Many homeowners accidentally grab tools and cleaners that cause irreversible harm. We're not just talking about a few surface scratches—the wrong approach can degrade the anti-reflective coating, void your warranty, or even create a serious electrical hazard. Let's walk through the most common pitfalls so you can clean with confidence.
The Problem with High-Pressure Washers
I get it—blasting away dirt with a power washer seems like the quickest, most satisfying solution. But it's one of the absolute worst things you can do to your solar panels. The intense, focused stream of water is simply too aggressive for their delicate construction.
That powerful jet can easily force water past the seals around the panel's frame, letting moisture seep inside. This leads to corrosion, electrical shorts, and total failure of the solar cells. Worse, the force can create invisible micro-cracks in the glass, which will quietly kill your system's efficiency over time.
Stick with a standard garden hose and a gentle spray nozzle. It provides more than enough water to rinse away dirt without putting your panels at risk.
Choosing the Wrong Cleaning Solutions
Reaching for that bottle of Windex or all-purpose cleaner under the sink feels logical, but it’s a recipe for disaster. Most household cleaners are loaded with harsh chemicals, ammonia, and abrasive agents that will strip away the panel's anti-reflective coating.
That coating is crucial for maximizing sunlight absorption. Once it's gone, your panels become permanently less efficient. Using the wrong soap can also leave behind a sticky film that actually attracts more dust, undoing all your hard work. The same logic applies to other sensitive glass surfaces; you can learn more about which window cleaning chemicals to avoid to get a better sense of what’s safe.
The gold standard for cleaning solar panels is plain, deionized water. If you're up against stubborn grime like baked-on bird droppings or tree sap, a drop or two of highly diluted, pH-neutral soap is the only additive you should ever consider.
Ignoring the Danger of Thermal Shock
When you clean is just as important as how you clean. Hitting a scorching hot solar panel with cold water can trigger thermal shock—a rapid, damaging change in temperature.
Think about what happens when you pour cold water into a hot glass pan; it can crack instantly. The same principle applies here. This sudden stress creates tiny, invisible fractures in the solar cells, causing a permanent and significant drop in your energy output.
The fix is simple: timing is everything.
- Clean early in the morning before the sun has had a chance to really heat things up.
- Wait until the early evening once the panels have cooled down for the day.
- An overcast, cool day is absolutely perfect for the job.
Never, ever clean your panels in the middle of a hot, sunny afternoon. A little bit of patience goes a long way in protecting the health and performance of your investment. By sidestepping these common blunders, you can be sure your cleaning efforts are actually helping, not hurting.
Now, let's talk about a big question that comes up: should you do this yourself or bring in a professional?
Deciding Between DIY Cleaning and Hiring a Pro
The choice between tackling the job yourself and calling in an expert really depends on your specific situation—your roof's pitch, your comfort level with heights, and how much time you have. Both paths have their merits.
This table breaks down the key factors to help you make the right call for your home.
| Consideration | DIY Cleaning | Professional Service |
|---|---|---|
| Cost | Minimal cost—just water and basic tools you likely already own. | Higher upfront cost, but includes all labor, equipment, and insurance. |
| Safety | You assume all the risk, especially on steep or multi-story roofs. | Professionals are trained, insured, and have proper safety gear. |
| Equipment | Requires a soft brush, squeegee, and a hose with a spray nozzle. | Pros use specialized tools like water-fed poles and deionized water systems. |
| Effectiveness | Good for routine cleaning but may struggle with stubborn grime or hard water spots. | Guarantees a spotless, streak-free finish using purified water systems. |
| Time & Effort | Can take several hours, depending on the size and accessibility of your array. | The job is completed quickly and efficiently, saving you time. |
| When It's Best | For easily accessible, ground-mounted, or single-story arrays with light soiling. | For steep roofs, multi-story homes, or systems with heavy, caked-on dirt. |
Ultimately, if your panels are easy to reach and you feel confident with the safety precautions, a DIY clean is perfectly fine for light maintenance. However, if your roof is steep, high, or you just want the peace of mind that comes with a flawless, risk-free job, hiring a professional is a smart investment.
A Year-Round Maintenance Plan for Your Panels
Cleaning your panels once is a great start, but the real magic happens with consistency. To keep your solar array working at its peak, you need to shift from a reactive mindset—"Wow, those look filthy"—to a proactive, scheduled approach. This is how you protect your investment and squeeze every last drop of energy out of the sun, year after year.
There's no single magic number for how often to clean. The ideal frequency really comes down to where you live. A home surrounded by trees dropping pollen all spring is going to have different needs than one in a dry, dusty climate. The goal is to build a simple routine you can stick to, heading off major grime before it ever has a chance to drag down your production.
Finding Your Cleaning Rhythm
For the average home, a good, thorough cleaning once or twice a year is a solid baseline. But you'll want to adjust that based on what's happening in your own backyard.
Think about your specific environment to dial in the right schedule:
- Dusty or High-Pollen Areas: Live near a farm, a desert, or just a place with a massive spring pollen dump? You’ll probably want to clean your panels every three to six months.
- Bird Hotspots: It’s surprising, but a single bird dropping can significantly block the light to a solar cell. If your roof is a popular hangout spot, you might need to do quick spot-cleans more often.
- Coastal or Industrial Zones: Salt spray from the ocean and pollution from urban areas can create a hazy, sticky film. A cleaning every four to six months is a good idea to keep this gunk from building up.
A great habit to get into is doing a quick visual check from the ground once a month. It only takes a minute. You can easily spot new issues like a patch of bird droppings or a pile of leaves before they become a real performance-killer.
Let the Seasons Be Your Guide
Why not let nature tell you when it’s time to clean? Tying your maintenance schedule to the changing seasons is an easy way to stay on top of things. This way, your panels are always primed and ready to capture as much sunlight as possible, no matter the time of year.
My rule of thumb is simple: clean your panels right after a major "soiling event." Did a huge dust storm just blow through? Was the spring pollen particularly bad this year? Getting that layer of grime off quickly prevents it from baking on and becoming a much bigger problem.
Here’s what a typical seasonal schedule might look like:
- Late Spring: Once the trees are done releasing all that yellow dust, it’s the perfect time to wash it all away.
- Late Fall: Clear off all the fallen leaves, twigs, and other gunk before the winter weather arrives.
Keeping panels efficient isn't just a concern for homeowners; it's a huge focus for the entire energy sector. The global solar panel cleaning market is booming, driven by the massive need to keep solar farms running efficiently.
A common headache, especially if you have hard water, is the white, chalky spots left behind after rinsing. These mineral deposits can be tough. If you're seeing them on your panels, the techniques are very similar to what you'd use on glass—check out our guide on how to remove hard water stains from windows for some helpful tips. At the end of the day, a simple, repeatable routine is what will guarantee you the best long-term results.
Your Top Solar Panel Cleaning Questions Answered
Even with a step-by-step guide, it's normal to have a few more questions pop up. Your solar array is a significant investment, so you want to be 100% certain you’re taking care of it the right way. I’ve rounded up some of the most common questions I hear from homeowners to give you straight, practical answers.
Let's clear up any lingering doubts so you can tackle this job with confidence.
Does Rain Actually Clean My Solar Panels?
This is probably the number one question people ask, and it makes sense—why do the work if nature will do it for you? Unfortunately, rain just doesn't cut it. Think of it like washing your car. A quick rain shower might rinse off some loose dust, but it won’t do a thing for the sticky, baked-on grime that really impacts performance.
In fact, rainwater often brings its own airborne dust with it. As the water evaporates, it can leave a new layer of dirty film behind. It’s also completely useless against stubborn stuff like bird droppings or tree sap, which require a bit of gentle scrubbing to remove.
Is It Ever Safe to Walk on My Solar Panels?
I'll make this one easy: no, absolutely not. Never walk, lean, or put any direct, concentrated weight on your solar panels. They're built tough to handle things like hail and heavy snow loads, but that's very different from the focused pressure of a person's body weight.
Walking on them can cause invisible micro-cracks in the solar cells under the glass. You won't see them, but they're there.
These tiny fractures are a huge problem. They interrupt the electrical pathways, which can seriously tank your system's efficiency over time. An unseen crack can lead to a very real drop in your energy savings and ultimately shorten the panel's lifespan.
The only safe way to work is from a sturdy ladder or from the ground with a long extension pole. It's simply not worth risking thousands of dollars in hidden damage.
What Kind of Soap Can I Use on Solar Panels?
The best approach is often the simplest one. For routine cleaning to get rid of everyday dust and pollen, plain water is almost always enough to do a fantastic job.
If you’re dealing with something more stubborn, a tiny amount of highly diluted, pH-neutral, and biodegradable soap is okay. A very gentle dish soap is a good example. The trick is to use as little as possible and, most importantly, rinse it off completely.
Here’s what you must avoid, no exceptions:
- Harsh Chemical Cleaners: Products like Windex or other household detergents can damage the anti-reflective coating on your panels, which is crucial for maximizing light absorption.
- Abrasive Powders: Anything gritty will leave permanent scratches on the glass.
- Hard Water: If you live in an area with hard water, the minerals can leave chalky spots behind as it dries. These deposits block sunlight just like dirt. If this is you, using deionized or distilled water is a much better option.
Following these simple rules will ensure your cleaning efforts are actually helping your system, not accidentally hurting it.
If you'd rather have insured professionals with the right equipment handle the job, Sparkle Tech Window Washing is here to help. We offer safe and thorough solar panel cleaning services across Arizona to keep your system running at peak performance. Contact us today for a free estimate!