


When it comes to getting rid of hard water stains on windows, the simplest approach is often the best. A go-to solution is a mix of equal parts white vinegar and distilled water. The natural acidity in the vinegar works wonders at breaking down the mineral deposits—those pesky white spots of calcium and magnesium.
For stains that have really set in, a simple paste made from baking soda and a little water can act as a gentle abrasive to help lift them off.
What's Really Behind Those Stubborn Hard Water Stains
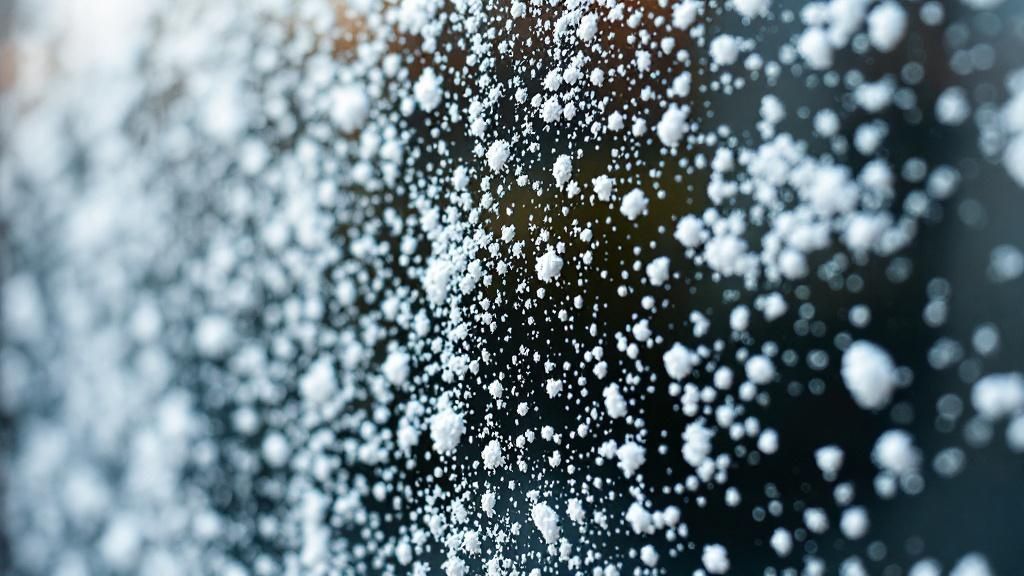
Before you grab a sponge, it helps to understand what you’re actually dealing with. Those frustrating, cloudy marks aren't just everyday grime. They’re mineral residue, mostly calcium and magnesium, that gets left behind as water evaporates off the glass. It’s the exact same stuff you see building up inside your tea kettle.
This process is what turns a crystal-clear window into a cloudy eyesore. The minerals literally bond with the glass, which is why regular soap and water barely make a dent. Let it sit for too long, and the buildup gets thicker and tougher to remove. In really bad cases, the minerals can permanently etch the glass, causing physical damage.
Where Is the Hard Water Coming From?
Figuring out the source is half the battle. Your windows are probably getting hit with mineral-heavy water from a few usual suspects:
- Misaimed Sprinklers: This is the most common culprit I see. If your sprinkler system is drenching your windows every morning, you're essentially giving them a daily hard water bath.
- Rain Runoff: Water that rolls off your roof or siding can collect all sorts of minerals and dirt before it streams down your windows and dries.
- Washing the House: Hosing down your home's exterior with untreated tap water is a sure-fire way to splash hard water onto your windows, leaving spots behind.
Sometimes, the issue isn't so obvious. It could be related to your home's upkeep, like issues stemming from overflowing gutters that constantly drip mineral-laden water onto the glass below.
Here's the bottom line: Hard water stains aren't just dirt; they're mineral deposits chemically bonded to the glass. That's why you need a specific acidic cleaner or a mild abrasive to actually break them down.
Understanding this difference is key. It explains why removing these stains is a much bigger job than a standard window cleaning. In fact, most professional window cleaners I know treat hard water removal as a separate, specialized service because it takes so much more time and specific products. Knowing this upfront sets realistic expectations and helps you tackle the job the right way.
Gathering Your Cleaning Toolkit and Safety Gear
Before you even think about tackling those stubborn hard water spots, take a few minutes to get your gear in order. Trust me, there's nothing worse than getting halfway up a ladder only to realize you left the squeegee on the ground. A little prep work now saves a ton of frustration later and ensures you get the job done right without damaging your glass—or yourself.
Think of it as setting up your battle station. Having everything you need within arm's reach turns this chore into a smooth, efficient process.
Your Go-To Cleaning Supplies
The tools you use are just as critical as the cleaning solution itself. Grabbing the wrong kind of scrubber can easily turn a cleaning project into a costly repair job by etching new scratches into the glass. Here’s a rundown of what you absolutely need to have on hand.
- Spray Bottles: You'll want at least two. One is for your cleaning solution, and the other should be filled with distilled water for rinsing. Using regular tap water to rinse just re-deposits the very minerals you're trying to remove.
- Non-Abrasive Scrub Pads: This is key. Look for pads specifically made for glass or other delicate surfaces. A white, non-scratch sponge is perfect. Whatever you do, stay far away from those green scouring pads—they will ruin your windows.
- A Stack of Microfiber Cloths: These are non-negotiable for getting that perfectly clear, streak-free finish. I like to use one for the initial wipe-down and keep a second, bone-dry one ready for the final buff. Their tiny fibers are incredible at trapping residue without leaving any lint behind.
- A Good Squeegee: For larger windows, a high-quality squeegee is your best friend. It’s the fastest way to whisk away all the liquid and dissolved minerals for a truly professional look.
Always Put Safety First
When you’re learning how to remove hard water stains from windows, it's easy to get so focused on the glass that you forget about your own safety. This is especially true when you're working with acidic solutions like vinegar or even stronger commercial-grade cleaners.
Don't skip the rubber gloves. Even a "natural" cleaner like vinegar is acidic and will dry out and irritate your skin after a while. And safety goggles are a must. It's surprisingly easy to get an accidental splash in the eye, and that’s a situation nobody wants to be in.
A quick word of advice: The whole point is to clean your windows, not create a bigger problem. A few seconds spent putting on gloves and goggles can save you from a nasty chemical burn or a trip to the eye doctor.
Now, let's talk about what you're actually going to spray on the glass. Should you mix up a simple home-brew solution, or do you need to bring in the heavy hitters?
DIY vs Commercial Cleaning Solutions
Choosing the right cleaner really depends on how bad the staining is. For light, fresh spots, a simple DIY mix often does the trick. But for stains that have been baking in the sun for months, you might need something with a little more punch.
Here’s a quick comparison to help you decide.
| Solution Type | Best For | Pros | Cons & Safety Notes |
|---|---|---|---|
| DIY Vinegar Mix | Light, recent spots | Inexpensive, non-toxic, and you probably already have it. | Might not cut it for old, thick stains. The acid can also damage window frames if not rinsed off completely. |
| Commercial Cleaner | Stubborn, aged stains | Specially formulated to dissolve minerals for powerful results. | Can be harsh and often contains strong chemicals. Good ventilation is a must, and you have to follow the instructions to the letter. |
Ultimately, the best approach is to start with the mildest option first. You can always move on to a stronger commercial product if your vinegar solution doesn't get the job done.
Simple DIY Methods for Light Water Spots
If you've just started noticing those faint, chalky spots on your windows, I’ve got good news. You can likely skip the heavy-duty chemicals for now. When you catch hard water stains early, your kitchen pantry probably has everything you need to get your glass looking pristine again.
These simple, household solutions are perfect for tackling light mineral buildup before it digs in and becomes a real headache. The whole idea is to use a gentle, natural acid to dissolve the calcium and magnesium deposits without damaging your window glass.
The Go-To Vinegar and Water Solution
The classic white vinegar and water mix is a go-to for a reason—it just plain works. The acetic acid in vinegar is a champ at breaking down the alkaline mineral deposits that create those frustrating white spots. Honestly, this is the first method you should always try.
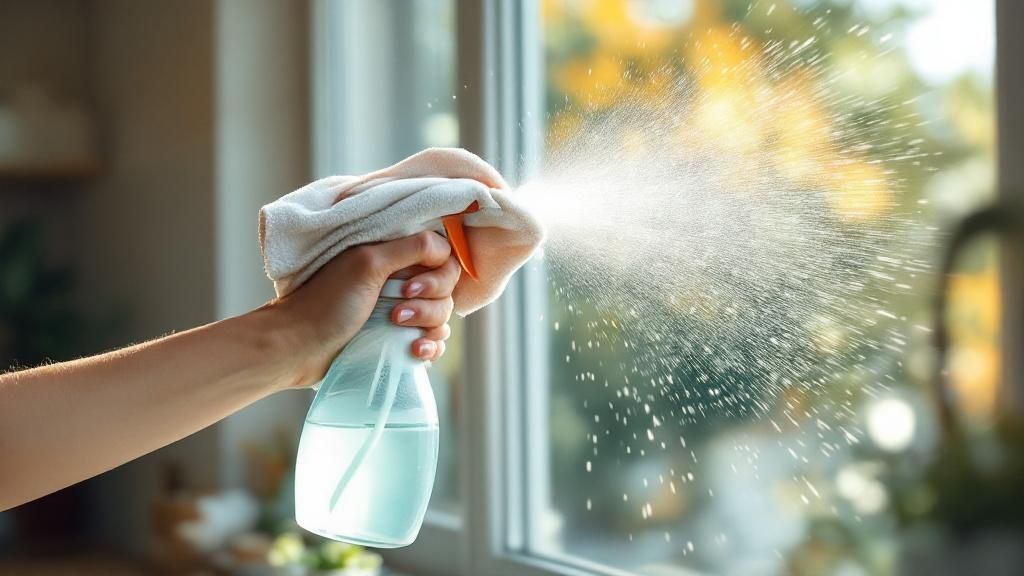
For this cleaner, you'll want a simple 1:1 ratio. Just mix one part distilled white vinegar with one part distilled water in a spray bottle. Using distilled water is a non-negotiable part of the process; if you rinse with regular tap water, you’re just putting those same minerals right back on the glass.
Spray the solution generously over the stained areas and let it sit for about 10-15 minutes. You have to give it time to work its magic. This dwell time allows the acid to really break down the mineral bonds. After it sits, gently scrub the area with a non-abrasive sponge or microfiber cloth, rinse with more distilled water, and dry it completely.
Pro Tip: If you're dealing with stubborn spots on a vertical window, soak a few paper towels in your vinegar solution and press them right onto the glass. They'll cling to the surface, letting the vinegar work on the stain for much longer without dripping away.
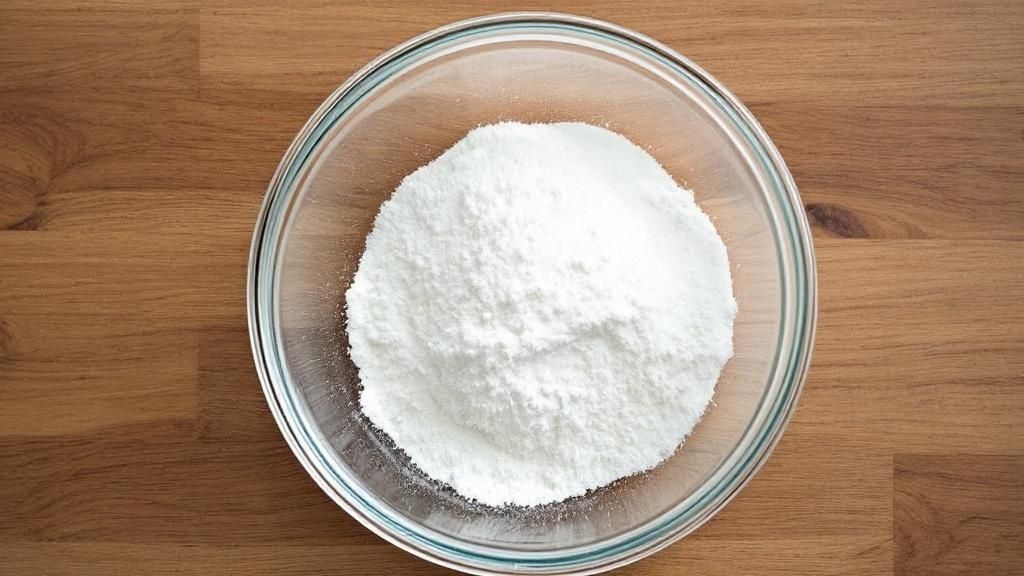
Creating a Gentle Abrasive Paste
Sometimes, a liquid solution needs a bit of a boost from a mild abrasive. That’s where baking soda comes into play. It’s gentle enough that you don’t have to worry about scratching the glass but has just enough grit to help scrub away those loosened mineral deposits.
Making a paste couldn't be easier:
- Start with a few tablespoons of baking soda in a small bowl.
- Slowly add a little water, mixing until you get a thick paste—think toothpaste consistency.
- Apply this paste directly to the hard water stains and let it sit for a few minutes.
- Gently scrub in a circular motion with a soft cloth or sponge.
After scrubbing, you'll need to rinse the window thoroughly with distilled water. Getting that perfect, streak-free finish is the final, crucial step. To really nail this part, you can learn more about how to clean windows streak-free and make sure no residue gets left behind.
The visual below shows how you can even combine vinegar and baking soda for a really powerful DIY solution.
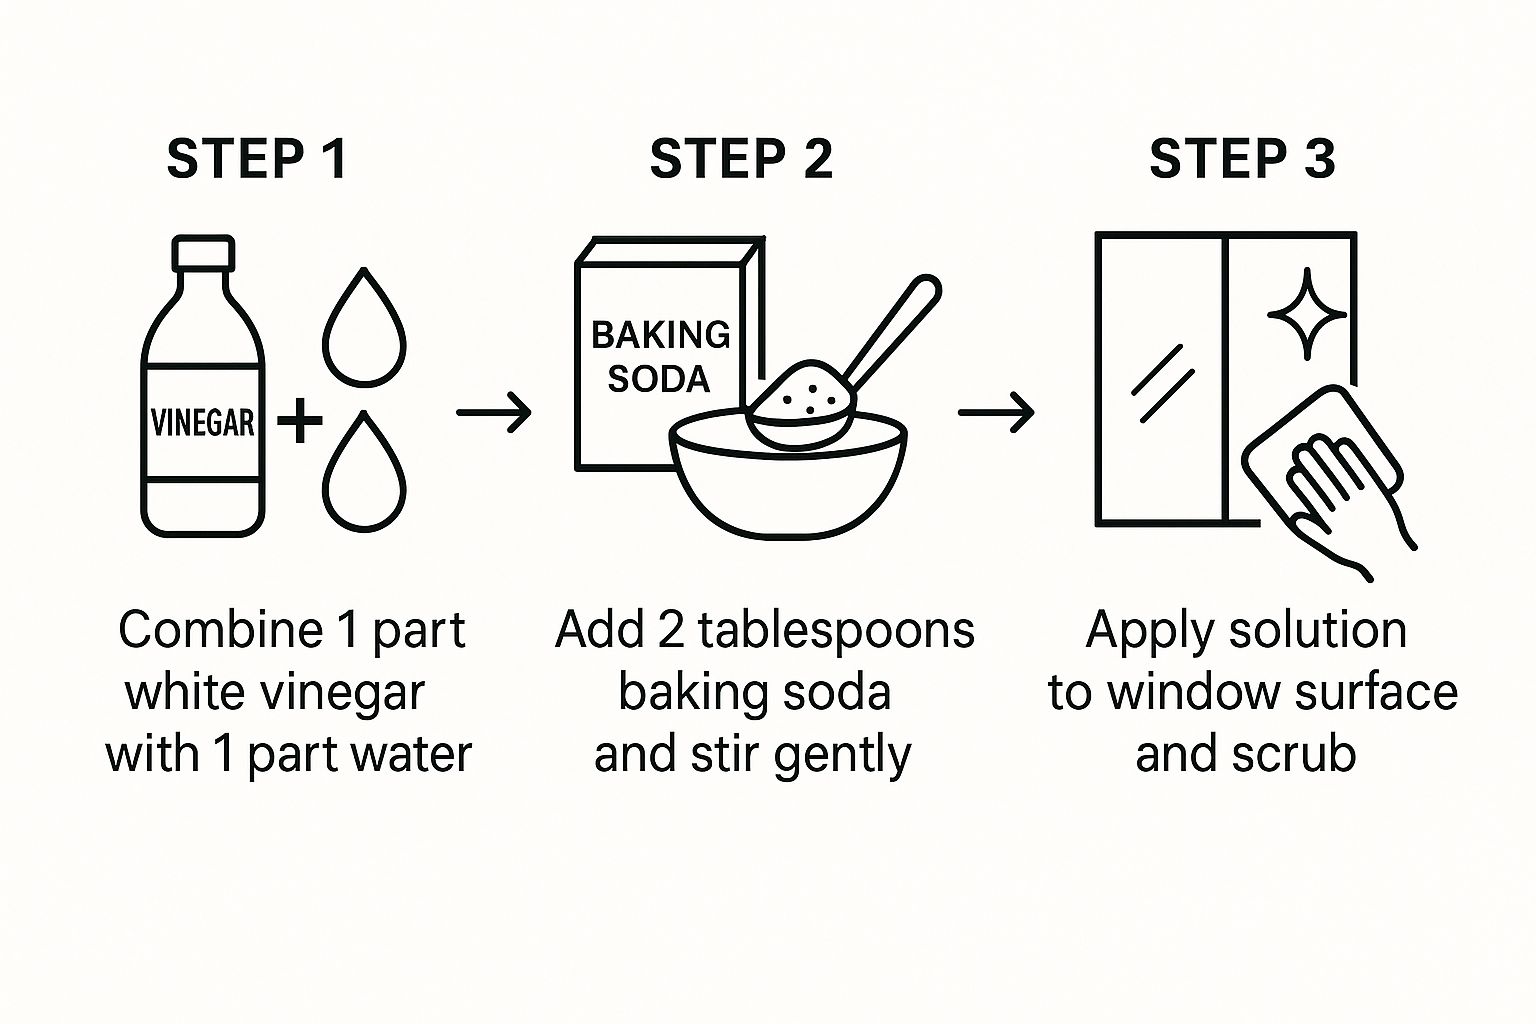
As you can see, mixing these common household items creates a multi-action cleaner that both dissolves and scrubs away tough stains.
Other Natural Options to Explore
Vinegar and baking soda are the heavy hitters of DIY stain removal, but they aren't your only choices. Another fantastic natural acid you probably have on hand is lemon juice. The citric acid works just like vinegar, breaking down mineral deposits beautifully. You can apply fresh lemon juice directly to the stain, let it sit for about 10 minutes, and then wipe and rinse clean.
Many of these cleaning techniques work on any kind of glass. For more practical tips, it's worth checking out these effective methods for removing water spots from glass surfaces like windshields, as the core principles are the same. No matter which DIY method you try, always test it on a small, hidden area first to make sure it’s safe for your specific windows and frames.
Tackling Severe Mineral Buildup on Windows
When you're up against years of mineral buildup baked onto your windows, a simple vinegar spray just isn't going to cut it. For glass that looks perpetually cloudy or has a thick, chalky film, you need to bring out the heavy hitters. These advanced techniques are for those really tough jobs where mineral deposits have had a long time to bond with the glass surface.
But first, a word of caution. The stronger cleaners we're about to discuss can easily damage vinyl frames, strip paint from sills, or discolor wood. Before you start, take a few minutes to carefully mask off all non-glass surfaces with painter's tape and plastic sheeting. This quick prep work can save you a ton of time and money on repairs later on.
Bring in the Commercial-Grade Cleaners
For really stubborn stains, your best bet is often a commercial hard water remover. These products are specifically formulated with mild acids and powerful detergents that work on a whole different level than vinegar. Look for products containing ingredients like sulfamic or phosphoric acid, as they are fantastic at dissolving tough calcium and magnesium deposits.
When you're ready to apply the cleaner, always read and follow the manufacturer's directions to the letter.
- First, apply the product to a non-abrasive scrub pad—not directly to the glass. This gives you more control and prevents messy drips.
- Work on one small, manageable section at a time using firm, circular motions.
- The key is to not let the chemical dry on the window.
- Once you've worked the area, rinse it thoroughly with distilled water and squeegee it dry immediately.
This is a much more intensive process, which is why professional services charge more for it. Depending on how bad the buildup is, contractors have reported charging anywhere from $8 to $30 per pane.
Polishing the Glass to Remove Etching
Sometimes, the stains have been there so long they've actually started to etch into the glass itself. At this point, you're not just cleaning the surface anymore; you're doing a minor restoration. This calls for a mechanical approach to gently polish away the microscopic damage.
For a DIY approach, your go-to tool is #0000 steel wool. This is the finest grade you can get, and it's specifically designed to be safe for glass if used correctly. The trick is to make sure both the glass and the steel wool pad are wet with your cleaning solution before you start scrubbing lightly. This lubrication is absolutely essential to prevent scratches.
In the most severe cases of etching, a professional will break out a slurry made from cerium oxide, a fine powder also known as "jeweler's rouge." They mix it with water to form a paste and apply it with a felt polishing pad on a low-speed polisher, carefully buffing out the damage. It’s a highly specialized technique that requires a skilled hand to avoid distorting the glass.
If you've tried everything and the glass still looks cloudy, it might mean the etching is too deep to be polished out. In those rare situations, the only real solution is to replace the windowpane. If hard water has permanently damaged the glass beyond repair, it might be time to look into professional window replacement services.
How to Keep Your Windows Spotless Long Term
You’ve put in the work to get your windows sparkling, and the last thing you want is for those chalky hard water stains to come right back. The real secret to keeping that crystal-clear view isn’t more scrubbing—it's all about prevention.
With a few smart adjustments, you can stop mineral buildup before it even gets a chance to start. This is about shifting from a reactive cleaning cycle to a proactive maintenance plan. Trust me, a little foresight now will save you countless hours of tough cleaning later.
Adjust Your Water Sources
More often than not, the biggest cause of hard water stains is water hitting your windows when it shouldn't be. Your home's sprinkler system is usually the prime suspect. If it’s drenching your windows every morning, you're basically giving them a daily mineral bath.
Take a few minutes to walk your property and check your sprinkler heads. Adjusting them to spray away from the house is a simple fix that makes a massive difference. The same goes for other tasks—after washing your car or hosing down the patio, give any affected windows a quick wipe with a dry microfiber cloth. This stops water spots from forming as the droplets evaporate.
Implement a Quick-Dry Routine
Being proactive doesn't have to feel like a huge chore. The main goal after a rainstorm or a quick rinse is to get the water off the glass before it can dry and leave those telltale mineral deposits behind.
Here’s a simple but effective routine:
- Grab a Squeegee: A high-quality squeegee is your best friend for whisking water off exterior glass in seconds. A few quick, overlapping swipes will prevent spots from ever forming.
- Wipe Down Frames and Sills: Don't neglect the areas around the glass! Wiping down the window frames and sills keeps water from pooling and dripping back onto your perfectly clean panes.
For those in areas with notoriously hard water, consistency is everything. For more tips tailored to challenging environments, check out this comprehensive guide on maintaining sparkling windows in Phoenix.
Key Takeaway: The less time water sits on your glass, the less chance minerals have to bond to the surface. A simple drying routine is the most effective defense against future hard water stains.
Apply a Protective Sealant
For the ultimate long-term defense, I highly recommend applying a hydrophobic glass sealant. These products create an invisible, water-repellent barrier on your windows. Water can't cling to the glass; instead, it beads up and rolls right off, taking dirt and minerals along for the ride.
Applying a sealant might take an hour or two upfront, but the protection can last for months. It dramatically reduces how often you need to clean and makes the whole process of removing any future hard water stains from your windows significantly easier. This one step can be a total game-changer for keeping your view pristine.
Common Questions About Removing Hard Water Stains
Even when you have a solid plan, questions always come up in the middle of a tough job. Dealing with stubborn mineral deposits can be a real headache, so it’s best to get some clear answers before you start scrubbing. Let's walk through some of the most common things people ask when figuring out how to remove hard water stains from windows.
Knowing the answers to these questions can be the difference between a frustrating afternoon and a perfectly clear finish. These insights will help you handle common roadblocks and tackle the job like a pro.
Can Hard Water Permanently Damage Windows?
Unfortunately, the short answer is yes. If you let hard water stains sit on your glass for too long, the minerals—calcium and magnesium—can actually begin to etch the surface. This goes beyond a simple stain; it’s physical damage that leaves a permanent cloudy or hazy look that no amount of cleaning can fix.
Once glass is etched, typical cleaners won't cut it, not even the strong stuff. At that stage, the only real solution is a professional polishing process, which often involves using a special compound like cerium oxide to grind down and resurface the glass. This is exactly why it's so critical to deal with hard water spots as soon as you see them.
The longer hard water stains sit, the greater the risk of permanent etching. Regular cleaning is your best defense against irreversible damage, saving you from a much more expensive problem down the line.
How to Tell If It Is a Hard Water Stain
Figuring out if you're dealing with mineral buildup or just regular window grime is pretty simple once you know what you’re looking for.
- What It Looks Like: Hard water stains usually appear as chalky, white, or semi-transparent spots. You’ll often see them in patterns that follow water drips, like from a sprinkler or rain runoff.
- How It Feels: Try running your fingernail gently across one of the spots. If it feels a little rough or gritty compared to the smooth glass next to it, you're likely dealing with mineral deposits.
- The Vinegar Test: A great little trick is to dab a bit of white vinegar on the spot. If it’s a mineral deposit, it will start to fizz or dissolve slightly. Other gunk, like tree sap or paint specks, won’t react to the acid.
This quick check helps make sure you're using the right cleaning method for the problem. We dive into all sorts of window cleaning topics, and you can find more answers in our article about common questions about window cleaning.
Are Strong Cleaners Safe for Window Frames?
This is a really important question, and something you need to be careful about. While strong acidic cleaners work wonders on glass, they can be a disaster for the materials around it. You have to be extremely cautious to keep these cleaners from dripping onto your window frames.
Acidic solutions can permanently discolor vinyl, eat away at the finish on wood frames, and even strip paint right off the sill. Always protect yourself with gloves and safety glasses, and make sure to rinse the entire window area—both glass and frame—with clean, distilled water as soon as you’re done. A smart move is to always test any new cleaner on a small, hidden spot first, just in case.
When hard water stains are just too tough for a DIY approach, it's time to bring in a professional. The experts at Sparkle Tech Window Washing have the specialized tools and experience to safely restore your view. Contact us today for a free estimate!