

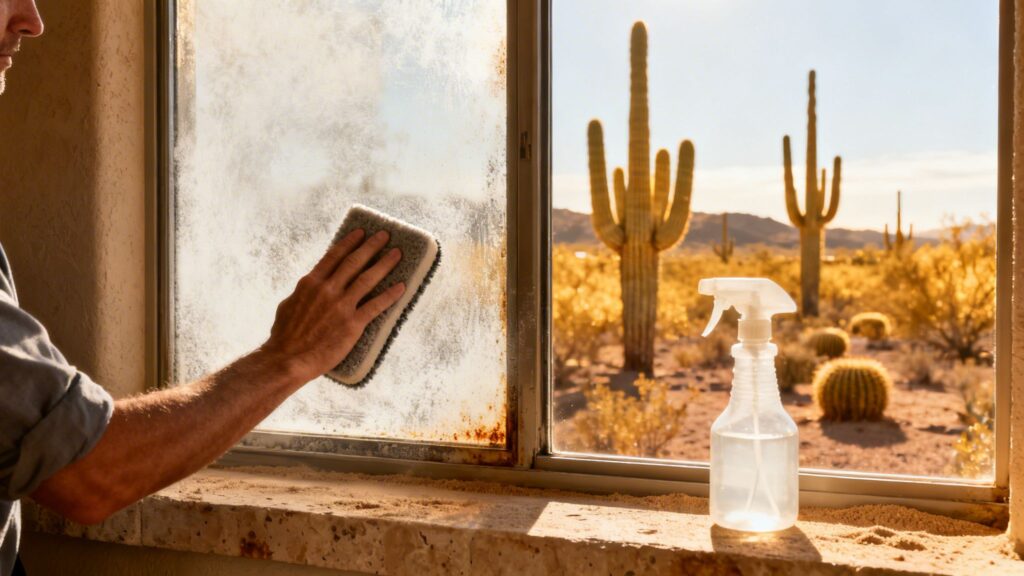
If you’ve tried everything to get your windows clean but they still have a frustrating, milky haze, you’re not just dealing with dirt. That chalky film is a sign of oxidation, a chemical process that's especially common for homeowners in Phoenix, Tucson, and across Arizona.
Understanding Window Oxidation in Arizona

Simply put, oxidation is a reaction where the materials on your glass are chemically changed by the environment. It’s not a stain you can just wipe off. Think of it more like a permanent alteration to the glass surface itself, and here in the desert, our environment is particularly harsh on windows.
The biggest factor? Our relentless Arizona sun. The constant barrage of UV radiation actually accelerates the breakdown of mineral deposits and pollutants that settle on your windows. Day after day, these elements are essentially baked onto the glass, etching into the surface and creating that cloudy, opaque look.
Key Takeaway: Oxidation isn't just a stubborn stain; it's a physical and chemical change to the glass. Reversing it requires more than just standard window cleaner—it calls for specific restoration techniques.
Knowing how to handle oxidized windows is a crucial piece of home maintenance in this climate. It's an issue that goes beyond looks, potentially affecting your home's resale value and even its energy efficiency.
What Causes Oxidation on Glass
The Arizona climate creates a perfect storm for window degradation. Once you understand the root causes, it's easier to see why it happens and how to prevent it from getting worse.
Here are the main contributors we see every day:
- Intense UV Exposure: The desert sun acts like an oven, baking mineral deposits from hard water and dust directly into the pores of the glass.
- Alkaline Dust and Hard Water: Our soil and water are naturally high in alkaline minerals. When sprinklers hit the windows or dust settles, these minerals don't just sit there—they slowly bond with and etch the glass.
- Low Humidity: In a drier climate, there isn't enough moisture to help wash away corrosive dust and pollutants. They just sit, accumulate, and cause damage much faster.
The result is a window that looks permanently dirty, blocking your view and hurting your home's curb appeal. The damage can be pretty significant. Imagine trying to enjoy a beautiful Phoenix sunset, but the view is obscured by a hazy film. That's oxidation in action, and it can reduce a window's clarity by up to 40%. Because of Arizona's dry climate, this process can happen twice as fast here than in more humid parts of the country.
It's important to know the difference between oxidation and simple hard water spots. True oxidation often feels slightly rough to the touch and won't budge with a standard vinegar spray or even a razor blade. The problem is made worse by the harsh weather effects on windows in Phoenix, AZ, which create a relentless cycle of damage. If left untreated for too long, the etching can become so severe that the only option is a costly full window replacement.
Assembling Your Window Restoration Toolkit
Before you even think about tackling that hazy, chalky buildup on your windows, you need to get your toolkit in order. From years of experience, I can tell you that having the right gear on hand makes all the difference. It’s the line between a frustrating afternoon and a job that leaves your glass looking brand new.
Rushing into this without the proper supplies is a recipe for disaster. You might have to stop midway, leaving a half-cleaned, streaky mess, or worse, you could end up using something that scratches the glass permanently. We'll break down what you need for a simple DIY job versus a more serious restoration project.
Core Safety and Cleaning Essentials
First things first: safety. You're going to be working with cleaners that can be rough on your skin and eyes, so don't skip this part.
- Safety Glasses and Gloves: I never start a job without them. A simple splash of cleaner in your eye can ruin your day.
- Microfiber Cloths: Get a good stack of clean ones. You’ll use some for applying cleaners and others for that final, streak-free buff.
- Two Buckets: One is for your cleaning mix, and the other should be filled with clean, purified water for rinsing. This keeps you from wiping dirt right back onto the glass.
- Non-Abrasive Scrub Pads: Stick to the white pads made specifically for glass. Anything more aggressive, like a green kitchen scrubber, will leave you with a web of fine scratches.
Here's a pro tip that has saved countless windows: Always test your cleaning solution on a small, out-of-the-way spot first. This quick check makes sure the cleaner won’t cause a bad reaction with your glass or frames. It takes 30 seconds and can prevent a major headache.
Tools for Different Oxidation Levels
The level of oxidation you're dealing with dictates your game plan. A light, powdery film often comes off with some elbow grease and a simple cleaner. But if you’re facing a rough, deeply etched surface, you’ll need to bring in the heavy hitters. Knowing what to grab is a big part of what we cover in our guide to the best window cleaning tools.
To give you a clearer picture, here’s a look at how the toolkits differ.
Oxidation Cleaning Toolkit DIY vs Advanced
This table breaks down the essentials for a basic cleaning job compared to what you’ll need for a full-on restoration of heavily oxidized windows.
| Tool/Material | DIY Method (Light Oxidation) | Advanced Method (Heavy Oxidation) |
|---|---|---|
| Primary Cleaner | Mild acidic solution (e.g., vinegar/water mix) | Cerium oxide polishing compound |
| Application Tool | Spray bottle and microfiber cloth | Electric polisher with a felt or foam pad |
| Water Source | Tap water is acceptable, but purified is better | Purified or distilled water is essential |
| Scrubbing | Non-abrasive white scrub pad | The polishing pad does the work |
| Final Polish | Clean, dry microfiber cloth | Fresh microfiber cloth for buffing |
So, why the big jump in equipment? It’s all about getting a flawless finish.
Using purified or distilled water is one of those professional secrets that makes a huge difference. Especially here in Arizona, our tap water is loaded with minerals that leave spots and streaks, basically undoing all your hard work. When you're mixing a powdered compound like cerium oxide, pure water is non-negotiable.
And that electric polisher? It’s not just for speed. It delivers the consistent pressure needed to gently grind away the oxidized layer with a specialized compound. It restores the glass to a smooth, factory-clear finish that you simply can't get by scrubbing by hand.
Proven Methods for Removing Window Oxidation
Alright, you've got your gear ready. Now for the real work. Getting oxidation off your windows isn't a one-size-fits-all job. A light, powdery haze is one thing; a thick, crusty film that's been baking in the sun for years is a whole different beast.
We're going to walk through two field-tested approaches. The first is a simple DIY solution that works wonders on early-stage oxidation. The second is a more powerful method for tackling the stubborn, etched-in damage that requires some real elbow grease and specialized tools.
This graphic breaks down the different paths you can take, from a simple spray-and-wipe to a full-on professional polishing job.

The takeaway here is pretty clear: matching the right tool to the job is everything. Sometimes a spray bottle is all you need, but for heavy-duty restoration, an electric polisher is your best friend.
The Gentle Vinegar Solution for Light Haze
If you've caught the oxidation early, you're in luck. You probably won't need to break out the power tools. A simple mix of vinegar and water can often dissolve the mineral deposits causing that initial cloudy look. This is the perfect starting point for that light, chalky film that hasn't had a chance to dig into the glass itself.
The science is simple: the acetic acid in vinegar goes to work on the alkaline mineral buildup, like calcium and magnesium, that’s clinging to your window. For a similar, natural approach, some people have great success using citric acid for cleaning, which also helps break down those tough deposits.
Here’s how I recommend mixing and using it:
- The Mix: In a clean spray bottle, combine one part distilled white vinegar and one part purified water. Don't use tap water—it's full of minerals and you'll just be putting the problem right back on the glass.
- Application: Generously spray a small section of the window. Let it sit for at least a minute. This "dwell time" is crucial for letting the acid do its job.
- The Scrub: With a non-abrasive white scrub pad, gently work the solution into the glass using small, circular motions. You don't need to muscle it; let the cleaner break down the film.
- The Finish: Squeegee the liquid off, or rinse the area with more purified water and immediately dry it with a fresh, lint-free microfiber cloth.
A Pro's Tip: Never, ever do this in direct sunlight or on a hot window. The heat will flash-evaporate the solution, leaving behind an even more concentrated residue that's a nightmare to remove. Stick to the shade or work in the cooler morning hours.
This method is always my first step for minor cases. If you scrub a test spot and see zero improvement, it’s a sure sign the oxidation is more advanced and needs a more aggressive treatment. Oftentimes, what looks like oxidation is actually a combination of issues. For a deep dive on a related problem, check out our guide on how to remove hard water stains from windows.
The Cerium Oxide Polish Method for Deep Etching
So, the vinegar didn't touch it. That means you're dealing with advanced oxidation where the glass surface itself has become physically etched. At this point, you have to shift from chemical cleaning to mechanical polishing. We need to physically buff away a microscopic layer of the glass to restore its smooth, clear finish. The industry standard for this is cerium oxide.
Cerium oxide is an incredibly fine powder that we pros use to polish out scratches, stains, and severe oxidation. Think of it as a super-gentle liquid sandpaper that smooths the glass surface without creating new scratches.
This is a more involved process, no doubt, but the results can be stunning. It can save windows that most people would assume need to be replaced. Here in Arizona, where 75% of windows show oxidation within just five years thanks to our alkaline dust and brutal sun, this method is a game-changer.
We see the best results starting with a fine-grade 3000 grit cerium oxide powder mixed into a slurry. When buffed with an electric polisher at around 1000 RPM, this can clear up to 98% of the haze in about 20 minutes per window pane. It's so much safer than messing with harsh acids, which have a 15% risk of pitting the glass permanently.
Executing the Polishing Process
Success here is all about proper technique. If you rush it or get sloppy, you'll end up with an uneven, wavy finish.
1. Mix the Slurry
In a small cup or bowl, mix your cerium oxide powder with a little purified water. You're aiming for a paste-like consistency, something like toothpaste. It needs to be thick enough to stick to the pad but wet enough to spread easily.
2. Prep Your Polisher
Attach a felt or foam polishing pad to your polisher or drill. Dab a small amount of the slurry right onto the pad. It's always better to start with less and add more if you need it.
3. Polish with Precision
Set your polisher to a low speed. To avoid a huge mess, place the pad flat against the glass before you turn it on. I recommend working in small, manageable sections, about 2×2 feet at a time.
Use slow, overlapping motions, either in circles or a back-and-forth grid pattern. The key is to keep the pressure and movement consistent for a uniform finish. If the slurry starts to dry out, give it a quick spritz with purified water from a spray bottle to keep things moving smoothly.
4. Check Your Work
After a few minutes of polishing a section, stop. Wipe the area clean with a microfiber cloth and look at the glass from a few different angles. You should see the haze disappearing and clarity returning. If you still have stubborn spots, just reapply a little slurry and give it another pass.
5. The Final Clean
Once you're satisfied and the oxidation is gone, give the entire window a final, thorough cleaning. A standard window cleaner or even another pass with your vinegar-water mix will remove any leftover polish residue. Buff it dry with a clean microfiber cloth, and you'll be left with a brilliant, streak-free shine.
Protecting Your Glass from Future Damage

You’ve put in the hard work to get your windows sparkling again. Now what? The last thing you want is to see that chalky, white haze creep back in just a few months down the road.
Getting your windows clean is a huge accomplishment, but keeping them that way is the real win. This is where a little proactive maintenance makes all the difference, especially here in Arizona where relentless sun and alkaline dust are constantly working against you. Think of your freshly cleaned glass as a blank slate. Its microscopic pores are now open and ready for minerals and pollutants to take hold.
To stop that from happening, you need to create a shield. A good protective barrier will prevent hard water spots and dust from bonding to the glass in the first place, stopping the oxidation cycle before it even starts.
The Power of Glass Sealants and Hydrophobic Coatings
Applying a protective layer is, without a doubt, the most important step you can take. Your two main options are glass sealants and hydrophobic coatings. They sound pretty similar, but they protect your glass in slightly different ways.
A quality glass sealant is designed to fill in those tiny, invisible pores in the glass, leaving behind an ultra-smooth surface. This gives water and dust nothing to grip onto, so they slide right off instead of sticking around and baking in the sun. It’s a lot like waxing your car—you’re applying an invisible layer of defense against the elements.
Hydrophobic coatings take a different approach by changing the surface tension of the glass. "Hydrophobic" literally means "water-fearing." These products force water to bead up into tight little droplets that roll away, taking dirt and mineral particles with them. This creates a fantastic "self-cleaning" effect that drastically cuts down on residue left by sprinklers or the occasional rainstorm.
Key Insight: Whether you go with a sealant or a hydrophobic coating, the goal is the same: make the glass so slick that contaminants can't get a foothold. This is the secret to preserving all your hard work and making future cleanings much, much easier.
Choosing the Right Protective Product
Walking down the cleaning aisle can be overwhelming with all the different products promising the world. My advice? Don't just grab the cheapest bottle you see. The effectiveness and lifespan of these coatings vary dramatically.
Here’s a quick breakdown to help you decide what’s best for you:
| Feature | Consumer-Grade Sealant | Professional Hydrophobic Coating |
|---|---|---|
| Application | Usually a simple spray-on, wipe-off method | Often needs more intensive surface prep and buffing |
| Durability | Lasts 3 to 6 months on average | Can last 1 to 2 years or even longer |
| Performance | Good water beading and soil resistance | Superior water repellency and self-cleaning properties |
| Cost | Lower upfront cost per bottle | Higher initial investment for professional service |
For most homeowners, a quality DIY-friendly sealant applied a couple of times a year is a perfectly good, manageable approach. If you’re looking for the absolute best protection with the least amount of upkeep, investing in a professionally applied hydrophobic coating is well worth it. It’s the ultimate defense against our harsh Arizona climate.
A Sustainable Maintenance Schedule for Arizona Windows
Even with a great protective coating, a simple and consistent cleaning routine is your best friend. The trick is to be proactive, not reactive. Don't wait until you start seeing new spots form to take action.
Here’s a simple schedule that works wonders in our climate:
- Monthly Wipedown: Once a month, just give your windows a quick wipe with a pH-neutral glass cleaner and a fresh microfiber towel. This takes care of the top layer of dust before it builds up. Steer clear of ammonia or high-alkaline cleaners, as they can wear down your sealant over time.
- Bi-Annual Deep Clean: Twice a year—I always recommend spring and fall—do a more thorough cleaning. This is the perfect time to reapply your glass sealant if you're going the DIY route. Sticking to this schedule ensures your protective barrier is always strong.
This routine really doesn’t have to be a big production. A quick monthly wipe-down of your most exposed windows might only take 15-20 minutes, but it saves you from a world of hurt later. It prevents the kind of severe mineral buildup that requires another round of heavy restoration, saving you a ton of time, effort, and money in the long run.
When a DIY Fix Isn't Enough
You’ve put in the work. You’ve mixed the solutions, bought the polisher, and spent hours trying to get that stubborn, chalky film off your windows. But sometimes, especially under the relentless Arizona sun, that haze just refuses to cooperate. I’ve seen it countless times—homeowners doing everything right but still staring at cloudy glass.
Knowing when to hang up the towel isn't admitting defeat; it's making a smart decision to protect your investment. Pushing a DIY approach too far can do more harm than good. If you've polished a window with cerium oxide and it now has a wavy, distorted look, that's a tell-tale sign. The oxidation has likely created microscopic etches in the glass that consumer-grade tools just aren't powerful enough to smooth out evenly.
Recognizing You've Hit a Wall
So, how do you know you're fighting a losing battle? There are a few clear indicators that it's time to call for backup.
- The Touch Test: After a thorough cleaning, run your hand over the glass. If it still feels gritty or noticeably rough, you're dealing with severe etching that needs a professional-grade touch.
- Safety First: Are the problem windows on the second story or in a spot that requires teetering on a tall ladder? No project is worth a serious fall. Our professional crews come equipped with the right safety harnesses and equipment to tackle high-up jobs securely.
- The Point of Diminishing Returns: You’ve already sunk a whole weekend into this project with little to show for it. Your time is valuable. Sometimes, the most efficient and effective choice is to pass the baton to an expert who can guarantee results.
The Professional Difference: Tools and Technique
When you’ve exhausted your DIY options, that’s exactly where we come in. Here at Sparkle Tech Window Washing, we handle the tough oxidation jobs that are a daily reality for Phoenix-area homeowners. Our technicians arrive with equipment that you simply can't find at a big-box store, including industrial-grade polishers and specialized compounds formulated for deep restoration. We don't just clean your windows; we restore the glass itself.
The secret is in the equipment and the experience. Our variable-speed polishers, paired with the right pads and compounds, let us remove years of baked-on oxidation without distorting the glass. The goal is always a perfectly clear, flawless finish that’s just not achievable with a DIY kit.
Hiring a service like Sparkle Tech is also about peace of mind. As a fully licensed, bonded, and insured company, your property is completely protected while we work. You don't have to sweat the small stuff, like ladder slips or accidental damage.
It's More Than Just a Cleaning
Bringing in an expert is also a sound financial move. Our technicians are often able to save windows that many homeowners assume are a lost cause, heading off a full replacement. This can save you from potential window replacement costs that can easily exceed $500 per window.
Better yet, the benefits continue long after we leave. That hazy film you've been fighting actually traps heat. Professionally restoring your glass can cut down on energy loss through your windows by 15-25%. For the average family in Arizona, that translates to around $200 in annual savings on cooling costs. You can dive deeper into these window cleaning industry statistics and see how they impact your bottom line.
Don't risk the frustration and potential damage of a DIY project gone wrong. Let our experts bring back your crystal-clear views safely and effectively.
Ready to see what your windows are supposed to look like? Contact Sparkle Tech Window Washing today for a free, no-obligation estimate. We’ll come out, take a look at your windows, and give you a straightforward plan to restore their original brilliance.
Common Questions About Window Oxidation
You've read the guide, but now you're standing in front of your windows, and a few more specific questions have probably popped into your head. That's completely normal. The theory is one thing, but dealing with your own home's unique situation is another.
Let's walk through some of the real-world questions we hear all the time from homeowners. Getting these details right can be the difference between a beautifully restored window and an expensive mistake.
Can I Use Steel Wool to Scrape Off Stubborn Oxidation?
This is a question that makes every professional window cleaner cringe, and the answer is always a firm no. Using steel wool, a green kitchen scrubber, or even a razor blade is a fast track to permanently scratching your glass.
You might get the oxidation off, sure, but you'll replace it with a network of fine scratches that catch the light and look even worse. Scratches are a much bigger, more expensive problem to fix than oxidation.
Always start with the softest tool possible. A good microfiber cloth and the right cleaning solution should be your first attempt. If that doesn't cut it, move up to a non-scratch pad specifically designed for glass. For that really stubborn, hazy film, the next step is a chemical approach with a polish like cerium oxide, not brute force.
Does Cleaning Oxidized Windows Really Improve Energy Efficiency?
Yes, it absolutely makes a difference you can feel, especially here in sunny Arizona. That cloudy film on your glass does more than just ruin the view—it scatters sunlight and dramatically increases solar heat gain.
By restoring your glass to perfect clarity, you can reduce this unwanted solar heat by as much as 25%. While it won't be the same as installing new low-E windows, it's a huge improvement that helps your home run more efficiently.
Think of it this way: the oxidation acts like a dirty film that traps heat right against the glass, preventing any energy-efficient coatings or tints you already have from doing their job properly. Clean glass lets those features work as intended, which can lead to lower cooling bills.
How Often Should I Have My Windows Professionally Cleaned in Arizona?
For most homes in the Phoenix area, we at Sparkle Tech Window Washing find that a professional cleaning twice a year is the sweet spot. The intense UV rays, dry air, and fine, alkaline dust create a perfect storm for oxidation to build up fast.
A bi-annual cleaning schedule is so effective because it:
- Removes that damaging layer of minerals and pollutants before it gets a chance to truly bond with and etch the glass.
- Gives us a chance to apply a fresh, high-quality sealant, which is the real secret to preventing the problem from coming right back.
If you live near a new construction zone, a farm, or just an exceptionally dusty area, you might even consider a quarterly service to keep your windows protected and looking their best.
Is the White Film on My Window Frames Also Oxidation?
It sure is. That chalky, powdery stuff on your vinyl or aluminum frames is caused by the same culprits—sun and weather breaking down the material's surface. In the industry, we often call this "chalking."
But here's the critical part: you can't use the same products on the frames that you use on the glass. For vinyl frames, a simple solution of mild soap and a soft-bristle brush usually works wonders. For painted or anodized aluminum, you'll need a special cleaner made for aluminum that can remove the chalking without stripping the color. Whatever you do, keep glass polishes off your frames—they are far too abrasive and can permanently ruin the finish.
Feeling like the job is a bit more than you bargained for, or seeing signs of stubborn etching? Don't risk damaging your glass. The team at Sparkle Tech Window Washing has the right tools and years of experience to safely bring your windows back to life. Contact us today for a free, no-obligation estimate!