


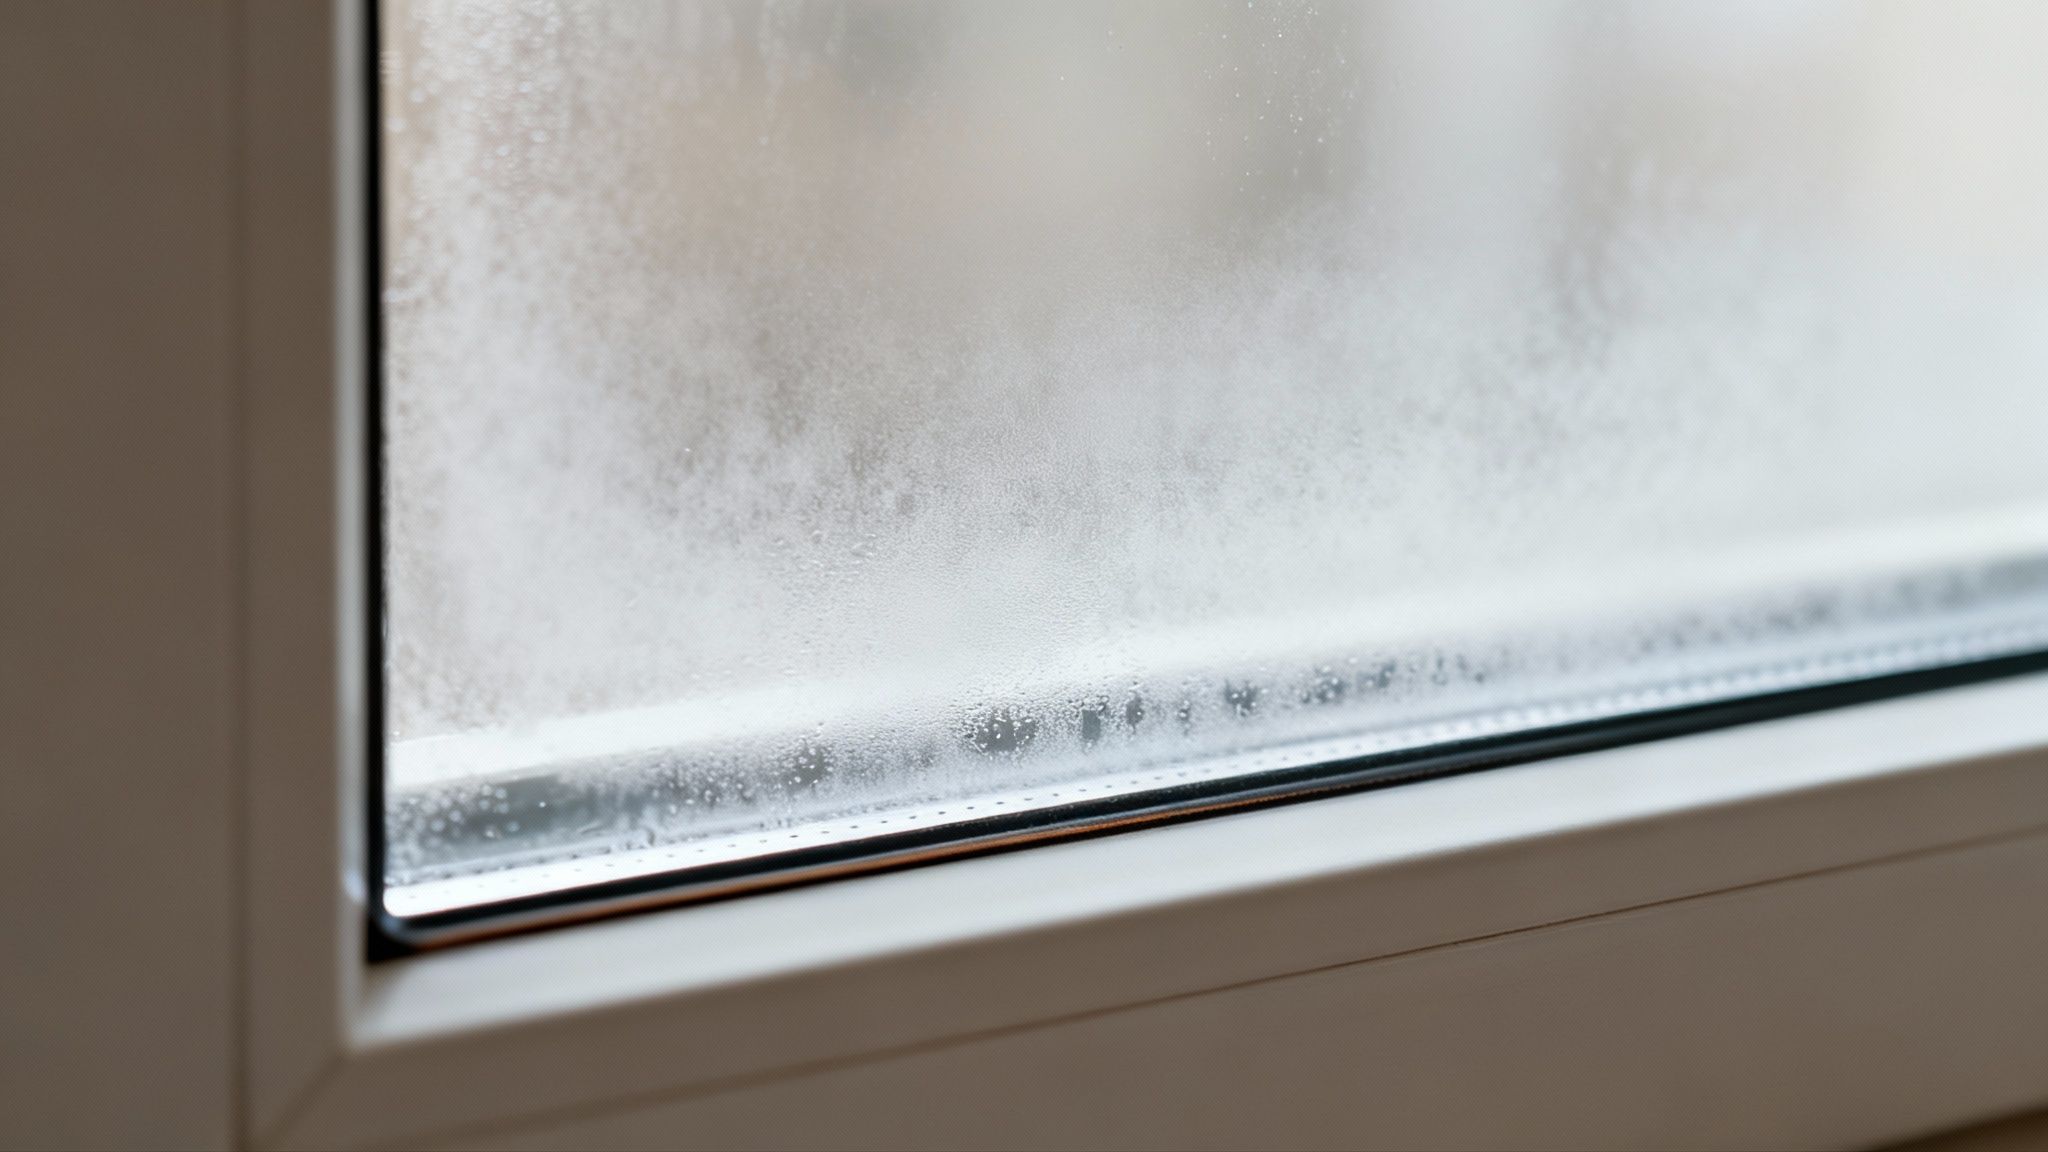
That stubborn haze trapped between your window panes is one of the most frustrating things to see. It’s not just dirt, and unfortunately, it’s usually a sign of a bigger problem.
If you have modern double-pane windows, that foggy look is almost always from a broken seal. This means moisture is trapped inside where you simply can't reach it. For much older, unsealed windows, however, you might just be in luck—it could be grime you can actually get to and clean yourself.
Understanding Why Your Windows Look Foggy
Before you even think about grabbing a bottle of Windex, let's figure out what you're really up against. That film isn't always something you can just wipe away. More often than not, it’s a clear signal that your window's seal has failed. Getting to the root cause will save you hours of wasted effort and point you toward the right solution.
The Two Types of Window Problems
When it comes to foggy windows, you're dealing with one of two distinct situations. Knowing which one applies to your home is the most important first step, because how you tackle the problem depends entirely on your window's construction.
- Failed Insulated Glass Units (IGUs): These are the modern, energy-efficient windows found in most homes, especially here in Phoenix. They’re made of two (or more) panes of glass separated by a spacer and hermetically sealed. This creates an airtight pocket, often filled with an inert gas like argon to improve insulation. When that seal fails, humid air seeps in, and the resulting condensation gets permanently trapped between the panes.
- Dirty Unsealed or Storm Windows: If you live in an older home, you might have windows with removable storm panels or older-style individual panes that aren't permanently sealed together. Over the years, dust, pollen, and everyday grime can find their way into the gaps. This is just a buildup issue, not a structural failure.
Figuring out which of these you have is everything. A failed IGU can't be cleaned with DIY methods; the only real fix is to replace the unit. On the other hand, dirty unsealed windows can often be a manageable weekend project.
Sealed vs Unsealed Windows Quick Diagnosis
Not sure what you're looking at? This quick table should help you figure it out. Identifying your window type is the key to knowing whether a DIY clean is even on the table.
| Characteristic | Sealed Insulated Glass Unit (IGU) | Older Unsealed/Storm Windows |
|---|---|---|
| Common Sign | Fog or condensation trapped inside | A dusty or dirty film between panes |
| Construction | A single, permanently sealed unit | Separate panes with removable frames or clips |
| DIY Cleaning? | No, the unit is sealed and inaccessible | Yes, if you can safely take the panes apart |
| The Fix | The sealed glass unit must be replaced | Disassemble, clean the panes, and reassemble |
| Found In | Most homes built or renovated since the 1980s | Typically pre-1970s homes |
Once you know you're dealing with a sealed unit, you understand that cleaning isn't the issue—the window itself has failed.
Why a Broken Seal Is a Bigger Deal
When an IGU's seal breaks, it's about more than just a foggy view. That insulating gas escapes, and your window immediately loses most of its energy efficiency. Your HVAC system has to work harder to keep your home cool in the summer and warm in the winter, which means higher energy bills.
The trapped moisture can also leave behind mineral deposits, creating a permanent hazy or rainbow-like film on the glass. We go into more detail on this in our guide on how to clean foggy windows.
A broken window seal is like a punctured tire. You can't just wipe away the problem; the fundamental integrity of the unit is gone, and a repair or replacement is necessary to restore its function.
It’s interesting—while a staggering 60% of homeowners clean their windows annually, many are completely stumped by this internal fog. Here in Arizona, where an estimated 75% of modern homes have sealed double-glazed units, people often get frustrated trying to clean between the panes.
Hiring a professional can reduce the risk of damage by 90% compared to amateur efforts, mainly because we can immediately diagnose a seal failure versus a simple cleaning job. This key distinction is what separates a quick, temporary fix from a lasting solution.
Figuring Out Your Window Situation: Can You Actually DIY This?
Alright, so you know the difference between a simple smudge and a full-blown window emergency. Now it's time to get your hands dirty—or at least, your eyes focused—and figure out what’s really going on with your glass. This little diagnostic step is crucial. It’ll stop you from wasting a Saturday trying to fix something that’s unfixable or, worse, breaking a window that just needed a pro's touch.
What we're after here is a simple "yes" or "no" on whether you can tackle this yourself. We'll go down two different paths: one for modern, sealed windows and another for the older, sometimes-accessible kind.
The Tell-Tale Signs of a Failed Sealed Window
If you've got modern, double-pane windows, which are technically called Insulated Glass Units (IGUs), you’re not really looking for dirt. You're hunting for evidence of a fatal flaw: a broken seal. If that seal is gone, there's no DIY fix. Grab a flashlight, get right up to the glass, and look for these dead giveaways.
- The Fog That Never Leaves: This is the big one. See that haze, condensation, or water droplets sandwiched between the panes? If it’s there day after day, regardless of the weather, that seal has failed. A little condensation on the outside of your window on a cool morning is totally normal, but anything trapped inside is a red flag.
- Weird, Wavy Reflections: Check out the reflection in the glass from a few different angles. When a seal breaks, the pressure changes and can cause the panes to warp or bow just slightly, making reflections look distorted. Sometimes you'll even spot a rainbow-like sheen, which is a sign that moisture has been reacting with the special coatings on the glass for a while.
- A Chalky White Film: As that trapped moisture bakes in the sun, it evaporates and leaves mineral deposits behind. This often looks like a chalky, white residue or a hazy film, usually creeping in from the edges of the window.
If you spot any of these signs, the verdict is in. A DIY cleaning is 100% off the table. The issue isn't grime you can wipe away; it’s a permanently compromised window unit.
The only real, lasting solution for a failed IGU is replacing the entire glass unit. Be wary of "defogging" services that drill tiny holes—they're often just a temporary band-aid that doesn't bring back the crucial insulating properties you've lost.
Checking Older Windows: Is There a Way In?
Now, if you’re looking at older storm windows or multi-pane setups, you might just be in luck. But don't assume "old" automatically means "easy to open." The next step is to figure out if you can safely take things apart without causing a disaster.
Your entire focus here should be on how the panes are held in place. Is there an obvious way to get them out?
- Hunt for Fasteners: Scan the window frame for anything that looks like it was meant to be removed. You’re looking for things like screws, little metal clips, or even hinged frames. If they look relatively clean and aren't rusted solid, your odds are looking good.
- Give it a Gentle Wiggle: And I mean gentle. Try to carefully jiggle the pane or the frame it sits in. Does it give a little, or is it absolutely rigid? If it feels like it's been welded in place by decades of paint or corrosion, trying to force it is just asking for cracked glass.
- Check the Glazing: The putty (or "glazing") that seals the glass against the frame should still have some pliability. If it's rock-hard, cracked, and crumbling to dust when you touch it, pulling that pane out could make the whole window unstable.
If the parts are painted shut, caked in rust, or the frame itself feels brittle and weak, just stop. Seriously. The risk of breaking the glass or wrecking the frame is way too high. This is where a simple cleaning project quickly spirals into a much more expensive replacement job.
After this inspection, you should have a clear answer. If you've got a failed sealed unit or an older window that’s practically fused together, it’s time to call a professional. But if you’ve confirmed you have unsealed panes that can be safely removed, you're cleared to move on to the next phase: the actual cleaning.
A Practical Walkthrough for Cleaning Accessible Panes
So, you've taken a close look and confirmed you're dealing with older, accessible panes. That's great news! Unlike the permanent fog you get with a failed modern window seal, what you're seeing is just plain old dirt. It's a solvable problem, and with a bit of patience and the right approach, you can get that crystal-clear view back.
This isn't a quick spray-and-wipe job, though. To do it right and save yourself a headache, you need to get your tools ready first. Having everything on hand before you start means fewer trips up and down a ladder and less time with a window sitting disassembled.
Gathering Your Cleaning Arsenal
Before you even think about touching a screwdriver, let's get your toolkit squared away. Using the wrong supplies is a surefire way to end up with streaks, scratches, or even a damaged window frame.
- The Right Cleaning Solution: A few drops of mild dish soap in a bucket of warm water is all you need. Steer clear of harsh cleaners with ammonia—they can damage older frames and leave a film that actually attracts more dust.
- Microfiber Cloths: Grab a few of these. They’re essential. You'll want one for washing, another for drying the frames, and a final clean one for polishing the glass. They're worlds better than paper towels, which just leave lint behind.
- A Quality Squeegee: For that perfect streak-free finish, a professional-grade squeegee is your best friend. Just make sure the rubber blade is fresh, clean, and has no nicks.
- Safety Gear: This is non-negotiable. Always wear protective gloves to protect your hands from dirt and any sharp edges. If you're working on an upper-story window, safety glasses are a must.
- Organizational Tools: A small container or a magnetic tray for screws is a lifesaver. I also recommend having painter's tape and a marker ready. This is a pro tip that prevents a world of confusion later.
This quick diagnostic process can help you figure out if your windows are even a candidate for this kind of cleaning.

This visual guide breaks down the decision-making, helping you see whether to dive into a DIY clean or recognize when it's time to call in a professional.
The Disassembly Process, Step-By-Step
Taking a window apart might seem daunting, but it's completely manageable if you're methodical. The name of the game is to work carefully and stay organized. Don't rush this part.
Start by carefully removing any screws, clips, or fasteners that hold the pane in place. As you take each piece off, drop it into your container. Here's that pro tip: if you're taking out multiple panes, use painter's tape to label everything—for instance, "Top Left Pane" and a corresponding "Top Left Screws" label on your container. This tiny step makes putting it all back together foolproof.
Now, gently lift the pane out. If it feels stuck, resist the urge to pry it with a screwdriver. Instead, grab a plastic putty knife and gently work it around the edges to break free any old paint or gunk that's making it stick. If you run into a more complex window design, our detailed guide on cleaning double pane windows has extra tips.
Achieving That Perfect, Streak-Free Clean
With the pane free, lay it down on a soft, protected surface—a table covered with a thick towel works perfectly. Now for the satisfying part.
Dip a clean microfiber cloth into your soapy water, wring it out well, and wash one side of the glass. I always work from top to bottom, paying special attention to the edges where dust loves to build up.
Next up, the squeegee. Start at a top corner and pull it down in one single, smooth motion. Overlap each pass just slightly. The most important trick? Wipe the blade with a clean cloth after every single stroke to avoid dragging dirt back across the clean glass.
Pro Tip: The squeegee is for gliding, not scrubbing. You want to let the blade do the work, pulling the water and dirt off in one clean sheet. Pushing too hard will cause it to skip and leave streaks.
Flip the pane over and do it all again on the other side. Once both sides are sparkling, use a dry microfiber cloth to wipe any last drops of moisture from the edges. Don't forget to wipe out the window frame channel itself before you put the glass back!
Reassembly and Final Touches
It's time to put it all back together. Carefully place the clean, dry pane back into its frame. Now you'll be thankful you labeled everything as you re-insert the screws or clips. Just be careful not to overtighten them; this can put too much stress on the glass and lead to a crack. The hardware should be snug, not cranked down.
The demand for professional window cleaning is booming for a reason. The industry is projected to more than double from $55.7 billion in 2020 to a massive $111.5 billion by 2030. Here in Arizona, where so many homes have solar, that need is even greater. In fact, homes with professionally cleaned windows can let in up to 15% more natural light. Modern tools like water-fed poles have seen a 50% adoption increase since 2015, making the job safer and more efficient while reducing ladder accidents by 40%.
Once the window is fully assembled, give the inside and outside one last wipe to get rid of any fingerprints from handling it. Now, stand back and enjoy that unobstructed view. It makes all the effort worth it.
Knowing When to Call a Window Professional
There's a great sense of accomplishment in a successful DIY project, but real wisdom lies in knowing your limits. When it comes to cleaning between window panes, some jobs are more than just difficult—they’re simply impossible to fix with standard tools and a bit of effort. Spotting these red flags early can save you a ton of time, frustration, and money.
The single biggest sign that you need to put down the tools and call a professional is a broken seal in a modern Insulated Glass Unit (IGU). If you're seeing persistent fog, condensation, or a chalky film trapped between the panes, cleaning isn’t the solution.
That haze isn't just stubborn dirt you can wipe away. It’s a clear symptom of structural failure. The airtight seal that once held insulating gas has been breached, letting humid air from outside seep in. As the temperature changes, this trapped moisture condenses, leaving behind ugly water stains and mineral deposits on the glass's internal surfaces. No amount of scrubbing from the outside will ever reach it.
The Myth of Window "Defogging"
You might stumble upon services online promising to "defog" your windows. The typical pitch involves drilling a tiny hole, spraying a cleaning solution inside, and then sealing the hole. While this can sometimes make the window look better for a short time, it's a band-aid fix that should be viewed with a healthy dose of skepticism.
This method does absolutely nothing to restore the window's insulating power. The argon or krypton gas that provided the thermal barrier is long gone, and the new patch is never as robust as the original factory seal. Almost without fail, the fog returns, and you're right back where you started, but now with a permanently compromised window.
The only real, long-term solution for a failed IGU is to replace the glass unit itself. A reputable window professional won't sell you a quick fix; they'll correctly diagnose the seal failure and recommend a proper replacement.
Knowing when to hand the job over to an expert isn't just about convenience; it's about protecting your home's value and energy efficiency.
Other Scenarios That Call for a Professional Touch
Beyond a broken seal, a few other situations make hiring a pro the smarter and safer move. Trying to tackle these yourself can easily lead to property damage or, worse, personal injury.
- Hard-to-Reach Windows: Any window on a second story or higher that requires getting on a ladder is a major safety risk. Professionals are trained, insured, and have specialized equipment like water-fed poles to handle these jobs safely and without a fuss.
- Fragile or Painted-Shut Frames: Old wooden windows can get brittle over the years. If a frame is painted shut or shows signs of corrosion, trying to force it open is a recipe for cracked wood or broken glass. A pro can assess the frame’s condition and use the right techniques to prevent costly damage.
- Lack of Time or Proper Tools: Let’s be realistic—disassembling, cleaning, and reassembling windows is a pretty big project. If you don't have the hours to spare or the right gear (like a quality squeegee and microfiber cloths), you’re likely to end up with a streaky, frustrating mess.
The window cleaning market is a huge part of the home services industry, reaching $10.5 billion globally back in 2020. Here in sunny Arizona, the demand for expert solutions is particularly high, thanks to our unique challenges with hard water and dust. About 65% of residential jobs are handled by independent companies like Sparkle Tech, which can offer a level of personalized service that bigger chains often can't.
For Arizona’s 2.5 million households, where an estimated 40% report issues with their panes from hard water, a professional can often resolve the problem in under 30 minutes per window using specialized tools. You can explore more about these industry trends and see how the pros handle the jobs that are too tough or risky for DIY.
How to Prevent Future Buildup Between Panes
So, you’ve just gone through the effort of cleaning between your window panes, or maybe you hired a pro to get that perfectly clear view back. The last thing you want is for the problem to return. The good news is, a little proactive maintenance goes a long way.
How you approach this really depends on your windows. If you're dealing with older, unsealed windows, your main job is to block the entry points for dust and moisture. For any home, though, managing the climate inside is just as important as protecting the windows from the outside.
Reinforce Your Window Seals and Frames
For those with older, single-pane storm windows or similar setups, your best defense is a solid barrier. Over the years, the seals that protect your windows from the elements start to break down, leaving tiny gaps that are an open invitation for Arizona’s dust and humidity.
Take a good look at the weather stripping around the window sash. It’s supposed to be a flexible seal, but if you see it’s cracked, brittle, or peeling, it’s not sealing much of anything. Swapping out old weather stripping is one of the easiest and most affordable ways to make a real impact.
Next, check out the caulk on the exterior of the window frame. That Arizona sun is brutal, causing caulk to shrink and pull away from the frame over time. Scrape out the old stuff and lay down a fresh bead of a high-quality, weatherproof caulk. This simple step can literally shut the door on invading dust and moisture.
Control Your Home’s Interior Climate
Moisture is the number one enemy of clear windows. A broken seal is what causes fogging in modern double-pane windows, but high indoor humidity can make things worse for all window types by encouraging condensation.
Getting a handle on your indoor humidity is a game-changer. Here’s what works:
- Run Those Exhaust Fans: Make it a habit. Flip on the bathroom fan during and after every shower. Do the same in the kitchen when you're cooking, especially if you have pots of water boiling on the stove.
- Keep the Air Moving: Stagnant air is moist air. Use ceiling fans or, on those rare low-humidity days, open up the house to get a cross-breeze. This simple act helps dry things out and prevents condensation from forming.
- Know Your Humidity Levels: A small, inexpensive hygrometer can tell you exactly what’s going on inside. You're aiming to keep the humidity between 30% and 50%. If you consistently find it's higher, a dehumidifier is a fantastic investment for your windows and your overall home health.
By managing the moisture inside, you take a lot of pressure off your window seals and make it much harder for that annoying fog and grime to form.
Preventing moisture buildup is like preventative medicine for your windows. A little bit of maintenance now—like checking seals and managing humidity—can save you from the major headache and expense of a full replacement down the road.
Don't Underestimate Routine Cleaning
Finally, one of the best preventative measures is also the most straightforward: keep the outside of your windows clean. A clean window is simply a healthier window.
That layer of dirt, dust, and pollen doesn't just sit there looking bad. Rain and wind can drive that grit into the tiny crevices around the frame and seals, slowly chewing away at them. Over time, this creates the very pathways you're trying to prevent.
This is why scheduling a professional cleaning with a service like Sparkle Tech Window Washing at least twice a year is more than just an aesthetic choice—it's a critical maintenance task. Our team doesn't just restore your view; we clear away the corrosive buildup that can lead to seal failure. We can also spot the early signs of wear and tear on your frames and seals before they turn into a much bigger, more expensive problem. It’s the smartest way to protect your investment and keep your windows crystal clear for years.
Your Top Questions, Answered by the Pros
Even after you figure out what kind of windows you're dealing with, you probably still have some questions. There's a ton of bad advice out there about cleaning between window panes, and some of the online "hacks" can wreck your windows for good. As window pros in the Phoenix area, we've heard it all. Here are the real answers to the questions we get asked most often.
Should I Drill a Hole to Clean My Foggy Window?
In a word: no. Please don't ever do this. We see this "trick" pop up on DIY forums, but drilling a hole into a sealed Insulated Glass Unit (IGU) is a surefire way to permanently ruin it.
The moment you drill that hole, you've destroyed the window's entire purpose. The insulating argon or krypton gas escapes, and your energy-efficient window is gone forever. You might get rid of the fog for a day or two, but new moisture will just get sucked right back in. Now you've got a window that's both foggy and structurally compromised. It's much smarter to have a professional take a look first.
The drilling "hack" is a classic example of treating the symptom, not the cause. It's a misguided attempt to clear the fog, but it ignores the broken seal that caused it and ends up damaging the glass beyond repair.
What's the Price Tag for Professional Window Pane Cleaning?
The cost really depends on what's going on with your specific windows. If you have older, single-pane windows in a storm-window setup that can be safely taken apart, we can often price that as an add-on to a standard cleaning. The final cost just reflects the extra time and care it takes to disassemble everything, clean it perfectly, and put it all back together.
But if we find that the seal is broken on a modern, double-pane window, cleaning simply isn't an option. Any honest professional will tell you the only real fix is to replace the glass unit. We always give free, clear quotes for any job we can actually do, so you'll know the exact cost upfront. No surprises, ever.
Can That Oily Rainbow Film on My Window Be Wiped Away?
That strange, rainbow-like film is a dead giveaway that the seal on your double-pane window failed a long time ago. When the seal breaks, moisture gets in and slowly reacts with the Low-E coatings on the glass. The intense Arizona sun basically bakes this reaction onto the glass, causing what's called film delamination.
Because this damage is happening on the inside surfaces of the sealed unit, there’s no way to clean it off. We can confirm this for you during an inspection and recommend a path forward, which almost always involves replacing the IGU to get your clear view and energy savings back.
How Often Should I Check My Windows for Seal Failure?
A good rule of thumb is to give your windows a quick inspection twice a year—think spring and fall. The best time to spot the early signs of a broken seal, like a little bit of condensation between the panes, is on a cool morning. That's when the temperature difference between your home and the outside is most dramatic, making the fog really stand out.
Catching it early means you can plan for a replacement before the problem gets worse and your energy bills start creeping up. Better yet, when you have a team like Sparkle Tech Window Washing handle your annual cleaning, you get an expert set of eyes spotting potential issues before you even notice them yourself. It's a simple way to stay ahead of the game.
Ready to get a clear, expert opinion on your windows? The team at Sparkle Tech Window Washing can quickly diagnose whether you need a deep clean or a professional replacement recommendation. Contact us today for a free, no-obligation quote and see why homeowners across Arizona trust us for a perfect view.