

Fixing a torn window screen yourself is one of those classic homeowner projects that delivers huge satisfaction for very little effort. For less than $15 in materials and about an hour of your time, you can knock out a repair that a professional might charge $45 to $80 for. It’s a simple fix that makes a big difference, both in how your home looks and in keeping pesky bugs outside where they belong.
Why Bother Fixing It Yourself?
Opting to repair your own window screens is a smart move for any homeowner. It's not just about patching a hole; it's about learning a practical skill that saves you real money. When you look at the cost of a roll of screen mesh and a cheap spline tool versus a handyman's quote, the financial benefit is crystal clear. If you have several damaged screens, those savings can easily climb into the hundreds.
But the payoff isn't just financial. A ripped screen is basically an open door for insects, dust, and pollen. Swapping it out for a taut, new one instantly sharpens up your home's curb appeal and lets you enjoy a fresh breeze without unwanted guests.
This kind of hands-on project is becoming more common. The do-it-yourself home improvement market is massive, valued at around USD 870 billion worldwide, and it's only getting bigger as professional labor costs rise. By learning to do this yourself, you're not just fixing a screen; you're joining a movement of homeowners taking charge of their own repairs. Mordor Intelligence has some interesting data on this growing DIY trend if you want to dig deeper.
Tackling a DIY window screen repair isn't just about saving money on a single project. It’s about building confidence and gaining a practical skill you'll use for years, turning a common household annoyance into a simple, manageable task.
If you get a taste for this kind of work, it can be a great gateway to bigger projects. Getting comfortable with a small task like this can build the confidence you need for more involved jobs, like replacing windows yourself. It's the perfect place to start—a low-risk project with a high-impact result.
Getting Your Tools and Materials Together
Any successful DIY project starts with having everything you need within arm's reach. Rushing to find a tool midway through can turn a simple fix into a frustrating ordeal. For window screen repair, you don’t need a massive workshop, just a handful of specific items that make all the difference.
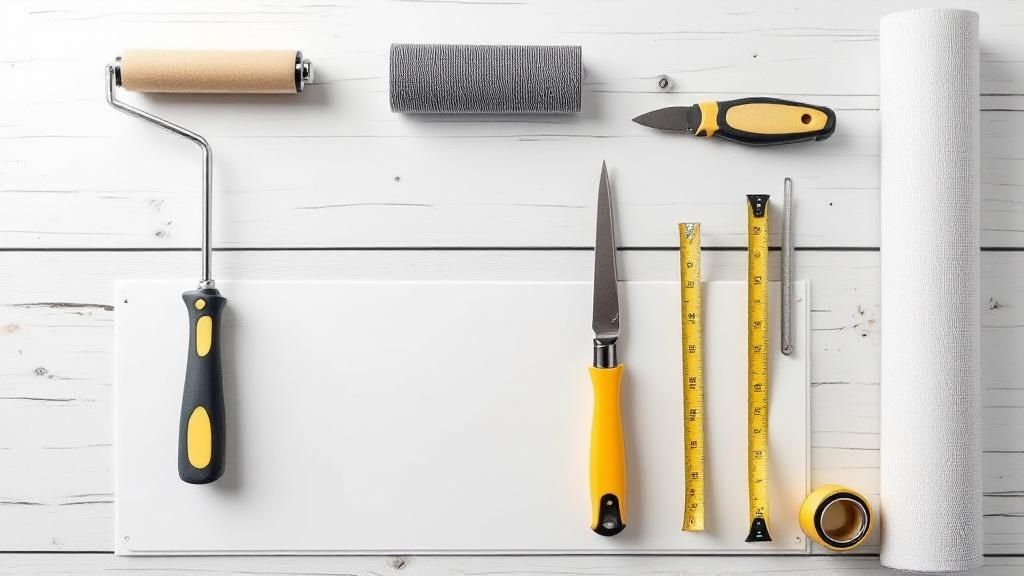
The one non-negotiable tool you'll need is a spline roller. Trust me on this one. It's a cheap little gadget with a wheel on each end, one concave and one convex, designed specifically to press the spline neatly into the frame's channel. Trying to improvise with a screwdriver is a recipe for disaster—you’ll end up with a torn screen and an uneven, saggy finish.
Your Go-To Toolkit
Besides the spline roller, the rest of your tool list is pretty basic. You probably have most of this stuff lying around the house already.
- Sharp Utility Knife: A fresh, sharp blade is crucial for trimming the excess screen mesh. A dull one will just snag and unravel your brand-new screen.
- Measuring Tape: The old carpenter's adage holds true: measure twice, cut once. A quick double-check here saves you from wasting your new roll of screen.
- Flathead Screwdriver or Awl: This is for the first step—prying out the old, hardened spline without gouging the aluminum frame.
For more delicate adjustments or stubborn corners, some folks find that multi-purpose precision kits with smaller tools come in handy.
Choosing the Right Screen and Spline
This is where a little know-how goes a long way. Selecting the right materials is just as important as having the right tools.
Most people will be perfectly happy with standard fiberglass mesh. It's affordable, flexible, and doesn't hold a crease, making it very forgiving if you're new to this. Aluminum is another option—it’s tougher and offers a clearer view, but if you accidentally fold it, that crease is there for good. And if you have a cat or dog that loves to climb, do yourself a favor and get the vinyl-coated, pet-resistant mesh. It’s built to withstand claws.
Choosing the Right Screen Mesh for Your Home
Not sure which material is right for your needs? This table breaks down the most common options to help you decide.
| Material Type | Best For | Pros | Cons |
|---|---|---|---|
| Fiberglass | General-purpose use, DIY beginners | Inexpensive, flexible, doesn't crease, easy to install | Less durable than other types, can tear over time |
| Aluminum | High-visibility needs, durability | Excellent visibility, won't sag, rust-resistant | Dents easily, can crease permanently if mishandled |
| Pet-Resistant | Homes with cats and dogs | Extremely durable, resists tears and punctures from claws | Thicker mesh can reduce visibility slightly, costs more |
| Solar/Sun-Control | Sunny climates, rooms that get hot | Blocks 65-90% of solar heat and UV rays, reduces glare | Darker screen significantly reduces incoming light |
Ultimately, your choice depends on balancing budget, durability, and your specific needs, like pets or sun exposure.
Now, for the spline.
The single most common mistake I see homeowners make is buying the wrong size spline. If it’s too thin, the screen will sag. If it’s too thick, you’ll never get it into the channel.
The foolproof way to get it right is to cut a small, one-inch piece of the old spline and take it with you to the hardware store. Match it up directly to the new rolls. This simple step will save you a return trip and guarantee a professional, tight fit for your new screen.
Once your new screen is in, keeping it clean will extend its life. You can find some great tips here: https://sparkletechwindowwashing.com/how-to-clean-window-screens/
Putting It All Together: A Full Screen Replacement
Alright, with your new screen material and tools laid out, you’re ready to get to the heart of the project. A full diy window screen repair isn't complicated, but it does require a bit of patience. Think of it as a methodical process—focusing on one step at a time is the secret to getting that clean, professional look.
First things first, you need to get the frame out of the window. Most have little pull tabs or springs on the side. Just pull the tabs or push in on the frame, and it should pop right out. Find a good, flat work surface like a garage floor or a sturdy table to lay it on.
Tearing Out the Old Screen
Before you can put the new screen in, the old stuff has to come out. Honestly, this part is pretty satisfying.
You’ll start by prying the old spline out of its channel, which is what holds the torn screen in place.
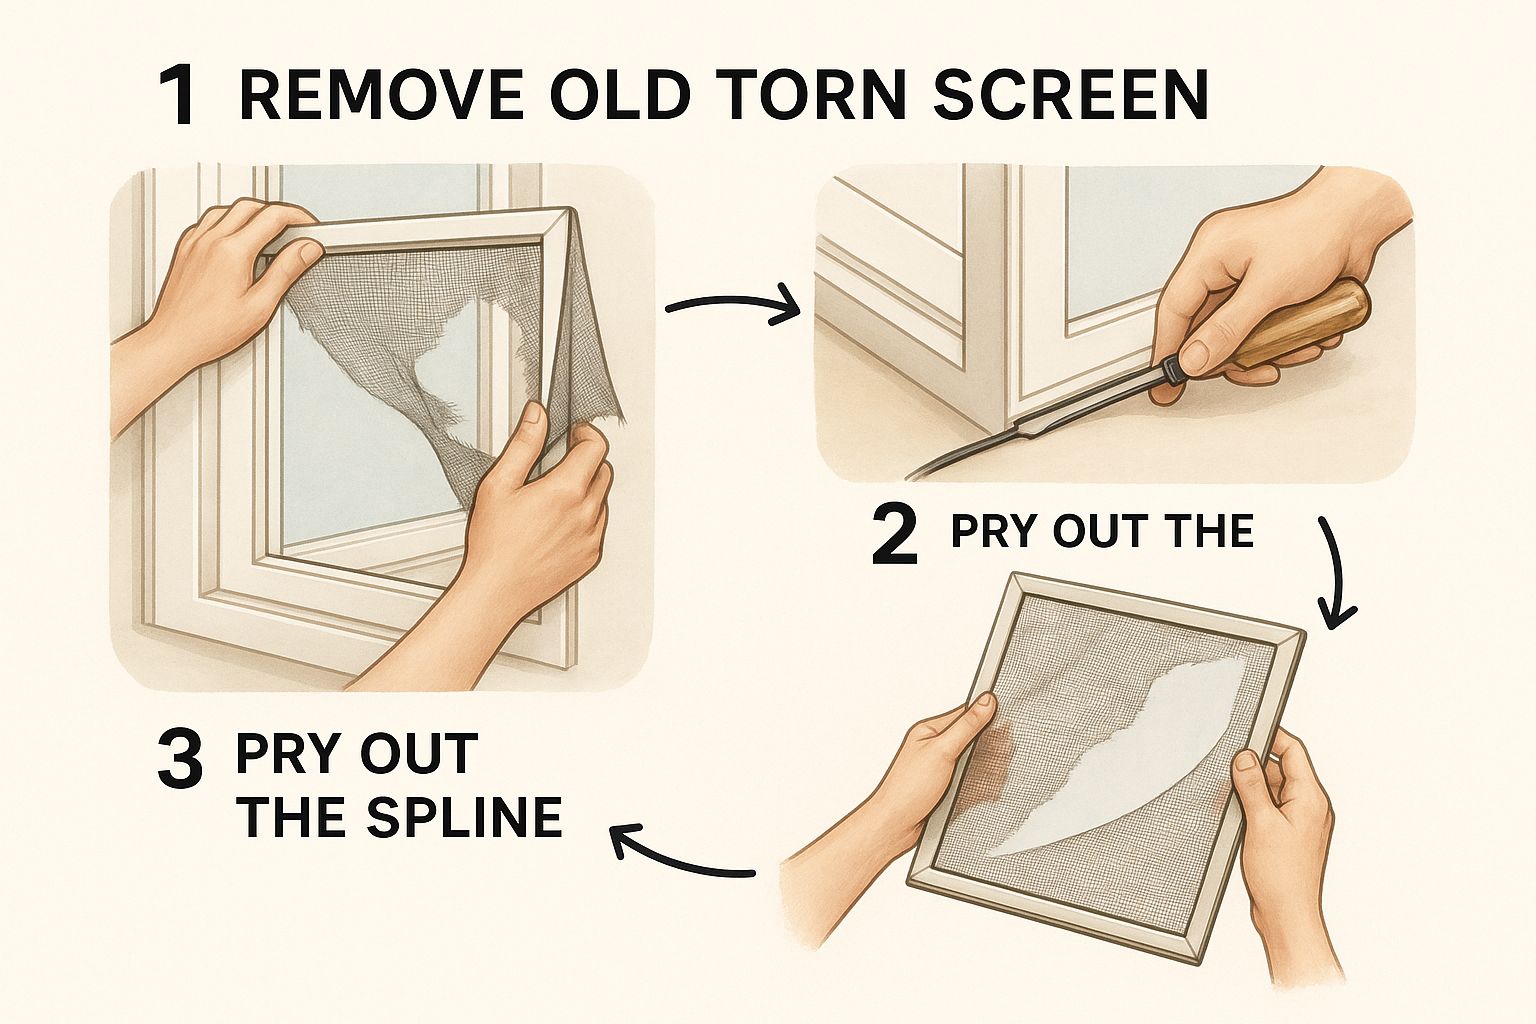
As you can see, a simple flathead screwdriver does the trick. Just get it under the old spline, and the rest is easy.
- Pry up a corner: Grab a flathead screwdriver, an awl, or even a sturdy pick. Dig it into a corner of the frame’s channel to lift the end of the old rubber spline.
- Pull the whole thing out: Once you’ve got a hold of it, the spline should pull out in one long, satisfying strip.
- Lift the old mesh: With the spline gone, the old, damaged screen material just lifts right off.
This is the perfect opportunity to give that frame channel a good cleaning. Over the years, it collects a surprising amount of gunk. A quick wipe with a brush or rag will clear out any debris, making it much easier to roll the new spline in.
Installing the New Screen Mesh
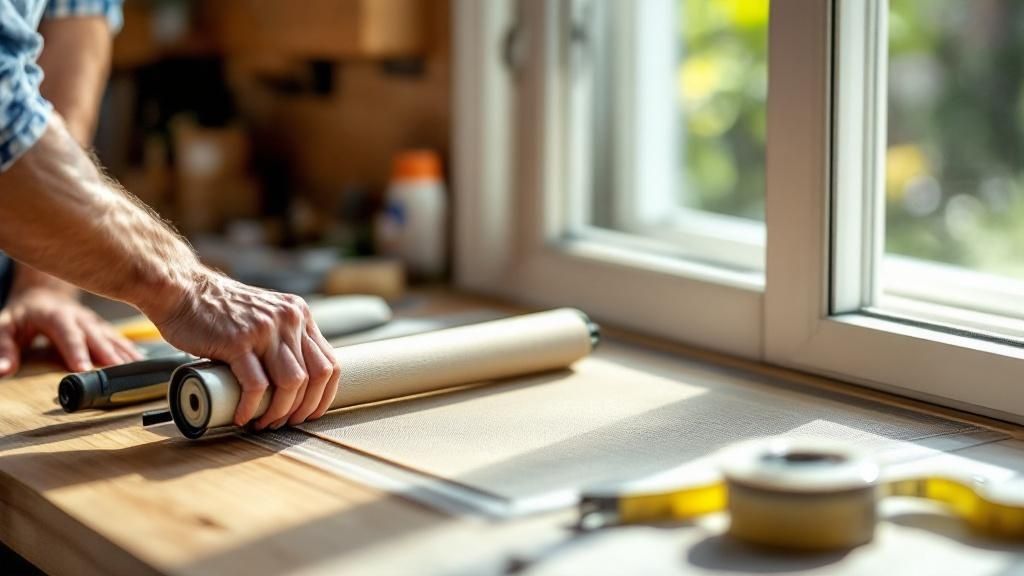
Now for the part where your technique really comes into play. Go slow here. Rushing is the number one cause of a saggy, wrinkled screen.
The key to a tight, smooth finish is keeping steady, gentle tension on the screen as you install the spline. You want it taut, not stretched tight like a drum. Just enough pull to eliminate any slack.
Lay your new roll of screen mesh completely over the frame. Make sure you have at least two inches of extra material hanging over all four sides. This little bit of overhang is crucial—it gives you something to grip and keeps the screen from accidentally coming up short on one side.
I always start on one of the long sides. Using the concave (grooved) wheel of your spline roller, press the new spline into its channel directly over the top of the mesh.
Next, move to the opposite long side. As you work, gently pull the screen mesh taut before rolling the spline into place. Then, finish up by doing the two shorter sides, always keeping that gentle tension. For a deeper dive into different methods, there are great guides that show you how to repair window screens with more advanced tips.
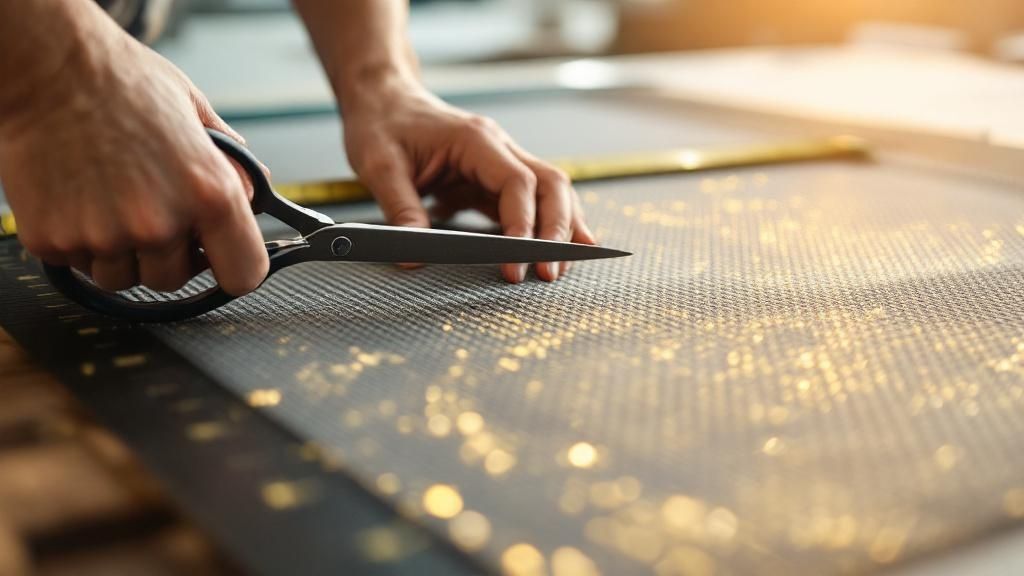
Once the spline is seated firmly all the way around, you’re on the home stretch. The last step is trimming off the excess mesh. Take a sharp utility knife and carefully run the blade along the outside of the spline. This creates a perfectly clean cut, leaving you with a screen that looks like it just came from the factory.
Troubleshooting Common Screen Repair Headaches
Even a seemingly simple DIY window screen repair can throw you a curveball. The most common frustration? A screen that ends up looking loose, wrinkled, or saggy. This almost always comes down to one thing: not keeping enough tension on the mesh as you roll in the spline.
The good news is that the fix is easy. Just pull the spline back out, smooth out the screen, and give it another go. This time, concentrate on maintaining a gentle but steady pull on the fabric ahead of the roller. It takes a little practice to get the feel for it, but you’ll get there.
Getting Specific With Repair Challenges
Sometimes, the issue isn't with your technique but with the parts you're working with. A slightly bent aluminum frame can often be carefully bent back into place, but if it's badly warped, you're better off just replacing it. Another classic mistake is grabbing the wrong size spline—if it's too thin, it’ll just pop out; too thick, and you'll never get it into the channel.
Here’s how to handle these common hiccups:
- Wrong Spline Size: Don't guess. The only surefire way to get it right is to take a small piece of the old spline with you to the hardware store and match it up perfectly.
- Small Punctures: For little holes smaller than a quarter, a simple screen patch kit is a great, quick fix that will hold up just fine.
- Large Rips: If you're dealing with a couple of big holes or a tear that's more than an inch or two long, it's time to replace the whole screen. Patching it just won't give you a clean, lasting result.
My best advice is to never force it. If the spline is fighting you every inch of the way or the frame looks off, stop. Take a breath and figure out the root cause before you accidentally make things worse.
The drive for homeowners to tackle these projects themselves makes a lot of sense, especially when you look at the cost of professional repairs. It's a massive industry, with the door and window repair market projected to hit around USD 1 billion by 2032. This growth is largely fueled by people maintaining older homes on their own. You can dig deeper into these market trends over at Business Research Insights.
Keeping Your New Window Screens in Top Shape
You’ve put in the work and fixed that screen yourself—nice job! Now, let's make sure it lasts. A little bit of upkeep goes a long way and keeps you from having to do this all over again anytime soon.
Your best bet for long-lasting screens is a simple cleaning routine. Just twice a year, give them a gentle wipe-down with a soft-bristled brush and some mild, soapy water. This is usually enough to clear away all the dust, pollen, and general gunk that builds up.
A word of caution: stay away from harsh chemical cleaners or power washers. That kind of high pressure can easily stretch, warp, or even tear the delicate screen mesh you just installed.
Stay Ahead of Problems with Quick Inspections
It’s a good idea to give your screens a quick once-over every now and then, especially after a big storm or when the seasons change. Just walk around and look for any small holes or check that the spline is still tucked firmly into the frame’s channel.
Catching these little things early is the secret. A tiny snag is an easy fix, but if you let it go, it can quickly become a huge, gaping tear that sends you right back to square one.
This mindset of smart maintenance over expensive replacement is catching on. More and more homeowners are learning that a little upkeep saves a lot of money in the long run, which is why the window repair market is seeing so much activity.
As you think about window care, it's also a good time to consider other hardware. For instance, things like sturdy window restrictors can add an extra layer of safety, especially in homes with kids.
For a deeper dive into this topic, be sure to check out our complete guide on maintaining screens and windows.
Your Window Screen Repair Questions, Answered
Any hands-on project is going to come with questions, especially when you're in the middle of it. I've been there. Let's walk through some of the most common snags people hit when they’re tackling a DIY window screen repair for the first time.
Getting these little details right can be the difference between a frustrating afternoon and a job well done.
How Do I Know What Size Spline to Buy?
This is, without a doubt, the number one question I get. The best way to get it right is also the simplest: pull out a small piece of the old spline.
Just pry out an inch or so of the old, cracked spline from the frame's channel. Take that little piece with you to the hardware store. You can physically hold it up against the new rolls and find a perfect match. No guessing required.
But what if the old spline is completely gone or crumbled to dust? In that case, you'll need to measure the channel in the frame itself. A good rule of thumb is to buy spline that's just a hair wider than the channel. That slightly larger diameter is what creates the tension you need for a tight, professional-looking screen.
Can I Repair a Metal Screen Like a Fiberglass One?
The basic steps are the same, yes, but the experience is completely different. Aluminum and other metal screens are stiff and have no memory—if you accidentally put a crease in it while pushing the spline in, that crease is there forever.
Working with metal mesh demands a very slow, steady hand. You need perfectly even pressure with the spline roller. It's not for the faint of heart.
Fiberglass, on the other hand, is a dream to work with for beginners. It’s flexible, forgiving, and won’t hold a crease. If you're new to this, I strongly recommend sticking with fiberglass. You'll get a fantastic result with a lot less stress.
For tiny punctures under an inch, a screen patch kit can be a decent quick fix. But for bigger rips, multiple holes, or if the screen is just old and brittle, you really should replace the whole thing.
A full replacement looks much cleaner and guarantees the tension is perfect across the entire frame. It saves you the headache of patching one spot only to have another tear open a few months later because the old material was just too weak.
If you’ve given it a shot and aren't happy with the results—or if you'd just rather have an expert handle it—Sparkle Tech Window Washing is here to help. We provide professional window screen services across the Phoenix valley. You can learn more by visiting us at https://sparkletechwindowwashing.com.