


Fixing a torn window screen is one of those classic DIY projects that's surprisingly satisfying. You can usually knock it out in under an hour with just a few simple tools. It's a quick win that saves you a bit of cash, keeps the bugs out, and makes your windows look a whole lot better.
Your Practical Guide to Flawless Screen Repair
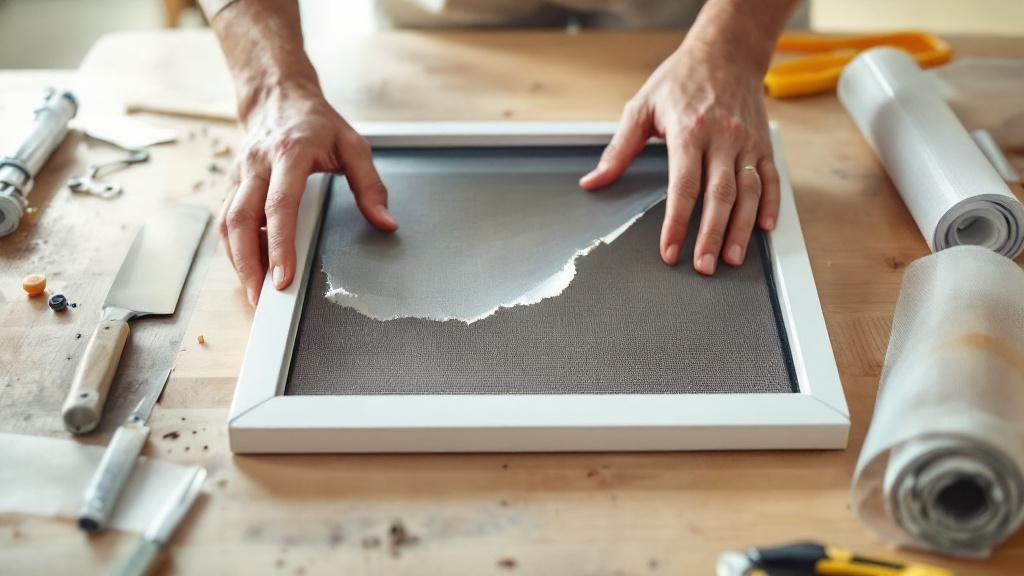
A ripped screen is more than just ugly—it's basically a welcome mat for mosquitoes and flies. This guide will walk you through fixing it the right way, whether you're dealing with a tiny puncture or a gaping hole. We'll skip the generic tips and get straight to the practical techniques the pros use for a repair that actually lasts.
Think of it this way: you're not just patching a hole. You're restoring an important part of your home's barrier against the outdoors. Knowing how to do this is a genuinely useful skill for any homeowner.
First, Figure Out How Bad It Is
Before you start buying materials, take a good look at the screen. Can you get away with a simple patch? Generally, if you have a single clean tear under three inches, a patch kit will do the trick.
But if you're looking at multiple rips, a massive tear, or a screen that's become brittle and saggy, it's time to replace the whole thing. Same goes for a bent or damaged frame. A quick assessment upfront saves you from a repair that fails a month later.
Why You Should Tackle This Yourself
Doing this project yourself is a smart move for a few reasons. You get to control the schedule and choose high-quality materials, but the biggest win is the cost savings. Hiring someone is always an option, of course, but the home improvement industry is big business. The global market for window repair services was valued at around USD 3.2 billion and is only getting bigger.
When you do the job yourself, that labor cost stays right in your pocket. You can read more about the window repair market's growth to see just how much people are spending.
Key Takeaway: A good screen repair is about more than just looks. It plays a real role in your home's energy efficiency. On a nice day, you can open the windows for a natural breeze instead of kicking on the AC.
Choosing the Right Screen Material
The success of your repair really comes down to using the right stuff. For most people in most situations, standard fiberglass mesh is the way to go. It's affordable, flexible, and very forgiving to work with, especially for a first-timer.
However, if you've got pets that love to climb or kids who aren't always gentle, you should seriously consider a pet-resistant screen. It’s much tougher and well worth the extra cost to avoid doing this job all over again next season. We’ll get into all the options so you can pick the perfect material for a professional-looking finish.
Choosing Your Tools and Screen Materials
https://www.youtube.com/embed/RdY5xNMSG_k
Getting a professional-looking repair really comes down to having the right gear on hand. Think of this as your definitive shopping list, covering everything from the absolutely essential spline roller to the best utility knife for making those perfectly clean cuts. I’ll walk you through why each tool matters and share a few pointers on what to look for at the hardware store.
The right equipment is what stands between a frustrating, sloppy job and one that gets done right the first time. You don't need a massive toolbox—just a few key items that make all the difference between a saggy, wrinkled screen and one that’s satisfyingly drum-tight.
Your Essential Toolkit for Screen Repair
Most of what you’ll need is easy to find at any home improvement store. Look at it as a small investment that will pay for itself every time a screen needs a quick fix.
- Spline Roller: This is the one tool you absolutely cannot skip. It’s got a convex (rounded out) wheel on one end to gently press the screen mesh into the frame's channel, and a concave (dished in) wheel on the other to push the spline in deep and secure.
- Utility Knife: A fresh, sharp blade is non-negotiable for trimming the excess screen. A dull knife will just snag and pull the fibers, leaving you with a frayed, messy edge that screams "amateur job."
- Flathead Screwdriver: A small, thin one works wonders for prying out that old, brittle spline without scratching or gouging the aluminum frame.
- Measuring Tape: Don't eyeball it. Accurate measurements are everything, especially for making sure you cut your new screen material with enough overhang to work with.
For bigger jobs that might involve frame adjustments or mounting, a good set of reliable construction tools always comes in handy.
Matching Screen Material to Your Needs
The screen mesh you pick will have a big impact on durability, how well you can see through it, and of course, the cost. There’s really no single "best" option—it all hinges on your specific needs. For instance, the screen on a back door that gets pawed at by a dog needs to be much tougher than one for a second-story bedroom window.
Pro Tip: When you buy your new screen material, always get about two inches of extra material on all sides. This little bit of buffer makes it so much easier to pull the screen taut during installation without the stress of coming up short.
What your screen is made of is just as important as the technique you use to install it.
Choosing the Right Window Screen Material
Let's quickly run through the most common choices. Fiberglass is the standard for most homeowners—it's forgiving, affordable, and easy to handle. But depending on your situation, other materials offer some pretty compelling benefits. This table should help you decide what's best for your home.
| Material Type | Key Benefit | Durability | Average Cost |
|---|---|---|---|
| Fiberglass | Flexible and affordable | Medium | $ |
| Aluminum | Excellent visibility and strength | High | $$ |
| Pet-Resistant | Resists tears from claws | Very High | $$$ |
| Solar Screen | Blocks heat and UV rays | High | $$$$ |
After you've picked your material, don't forget the final, critical piece: the spline. This is the rubbery cord that locks the screen into the frame's channel. It comes in different diameters, and getting the size exactly right is crucial.
The easiest, no-fail way to get a perfect match? Just snip off a small piece of your old spline and bring it with you to the store. A spline that's too thin won't hold the screen tight, and one that's too thick will be a nightmare to install—if you can get it in at all.
Prepping the Frame for a Perfect Fit
Before you can even think about that crisp new screen, the old, torn one needs to go. This is probably the most overlooked part of the job, but getting the prep work right is what separates a professional-looking repair from a saggy, frustrating mess. Rushing here is a recipe for a do-over.
First things first, get the entire screen frame out of the window. Most newer screens have little pull tabs or spring clips you can use to pop them right out. Just pull the tabs toward the middle and push the frame outward. If you're working with older windows, you might need to carefully pry the frame out of its channel—just be gentle so you don't bend the aluminum.
Removing the Old Screen and Spline
Once you have the frame on a flat surface, your focus shifts to the spline. That's the rubbery cord tucked into the groove that holds the screen material tight. After years of sun exposure, this stuff gets hard and brittle, so don't be surprised if it cracks and breaks as you pull it out.
Find an end of the spline—usually at a corner—and use a small flathead screwdriver or a pick to gently pry it up and out of the channel. Once you get a little bit loose, you can typically grab it with your fingers and pull the rest out in one long piece.
Key Insight: A perfectly clean frame is non-negotiable. If you leave even tiny bits of old spline or dirt in that channel, the new spline won't sit flush. This is the number one cause of annoying wrinkles and loose spots in the final product.
With the old mesh and spline gone, it's time for the most important part of the prep: cleaning that channel.
- Scrub the Groove: Grab a stiff brush (an old toothbrush is perfect for this) and really get in there to scrub out all the built-up dust and grime.
- Wipe Down the Frame: Use a damp cloth to wipe down the entire frame, paying special attention to the now-empty channel. A little mild soap and water can work wonders on stubborn gunk.
- Let It Dry Completely: Make sure the frame and especially the channel are bone dry before moving on. Any moisture can make installing the new screen a real headache.
Why This Step Is So Important
Think of the spline groove as the foundation for your new screen. If that foundation is lumpy or full of debris, the screen will never sit flat and tight. A clean channel lets the new spline push down evenly, creating the consistent tension you need for a taut, wrinkle-free finish.
This kind of simple maintenance is what makes your window components last. For more tips on keeping everything in great shape, have a look at our guide on preparing your windows and screens for winter. Taking just a few minutes to clean the frame properly now will make the installation go smoothly and ensure your repair holds up for years. With a spotless frame ready to go, you can finally lay down your new mesh.
Installing New Screen Mesh Like an Expert
This is where all your prep work really pays off. With a clean, ready frame, it’s time to lay in the new screen mesh. The technique you use here is everything—it's the difference between a saggy, wrinkled mess and a screen that’s perfectly tight and looks like a pro did it.
First things first, unroll your new screen material and lay it over the frame on a flat, sturdy surface. Give yourself a couple of inches of overhang on all four sides. This extra material is your best friend, giving you something to grip and pull to create tension as you work.
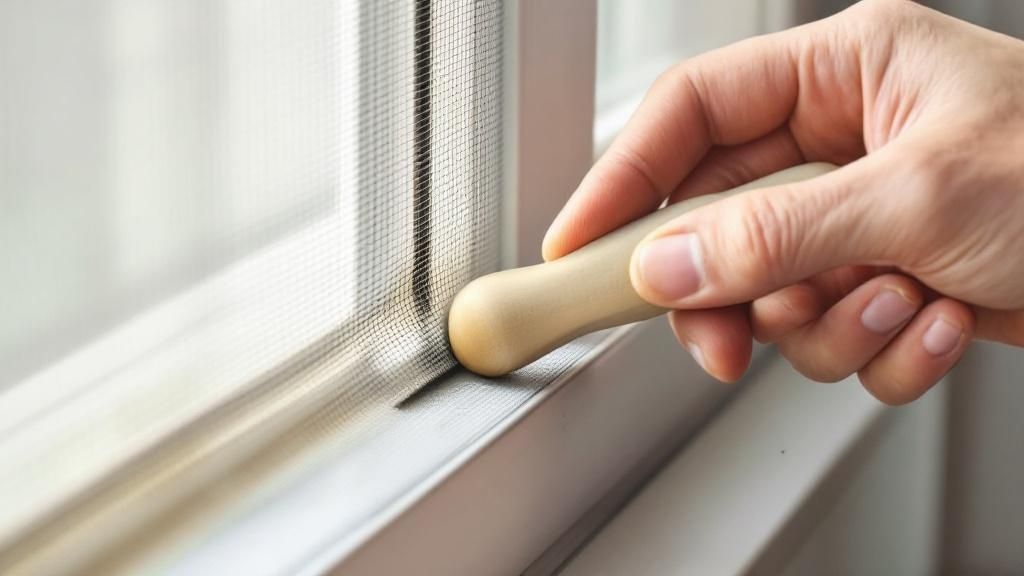
Mastering the Spline Roller
That little spline roller is your most crucial tool for this part of the job, and it has two different wheels for a reason. You'll want to start with the convex wheel—the rounded one. Pick a corner to begin and gently roll this wheel over the mesh, pressing it down into the frame’s channel. This creates a perfect little crease for the spline to sit in.
Focus on doing one entire side of the frame first. Don't worry about pulling the screen super tight yet. The only goal right now is to get the mesh seated in that groove. Once one side is creased, you're ready to start laying in the spline.
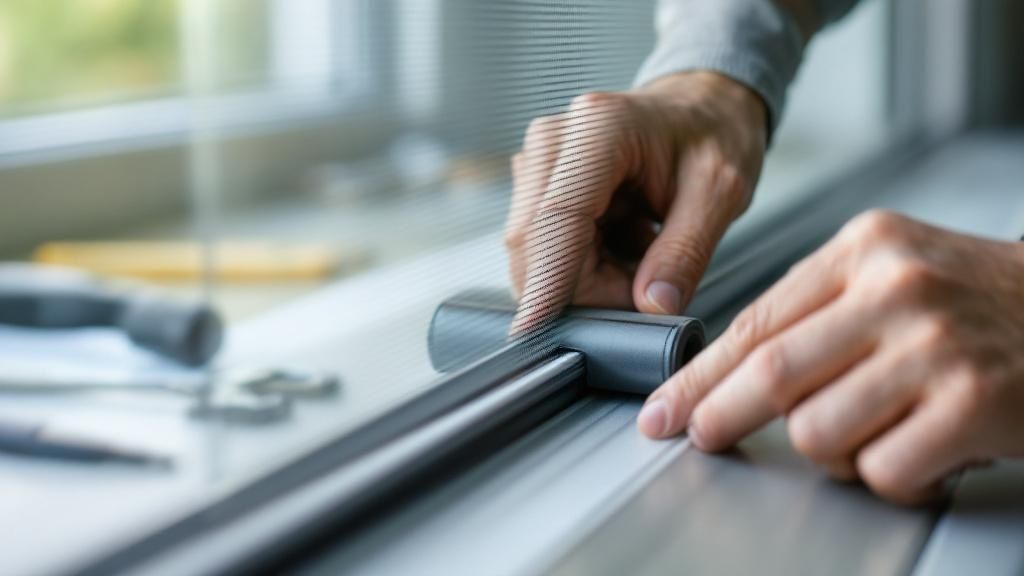
Now, flip the tool over to the concave wheel, the one with a groove in it. Take the end of your new spline and place it over the channel where you just creased the screen. Use the concave wheel to press the spline firmly down into the channel, which locks the mesh in place. The wheel’s groove is designed to hug the spline, keeping it from slipping off and accidentally tearing your brand-new screen.
This simple process is a big reason why DIY screen repair is so popular. Homes are always prone to accidental screen damage, making this a seriously useful skill for any homeowner. While big commercial and industrial glass installations are a fast-growing sector, the sheer number of home repairs keeps the residential market on top.
The Pro's Secret to a Drum-Tight Screen
Here’s a little trick that guarantees a tight, professional-looking finish every single time: the "bowing" technique. Once you've installed the spline on the first two adjacent sides (say, the top and the left side), it's time to create some tension.
Find a small block of wood or something similar and slide it under the middle of one of the long sides you haven't splined yet. This will cause the frame to bow up slightly in the middle. Now, when you install the spline along this bowed side, you’re locking the screen into place while the frame is flexed.

When you pull that block of wood out, the frame will flatten back to its normal shape, pulling the screen material incredibly taut in the process. It’s a simple physics hack that creates perfect, even tension across the entire surface and gets rid of any possibility of sags or wrinkles.
Expert Tip: The bowing technique is the single best way to avoid a saggy screen. By pre-tensioning the frame before you seat the last two sides of the spline, you’re basically making the screen pull itself tight for a flawless, long-lasting finish.
Trimming for a Clean Finish
With all four sides splined in, the last step is just trimming off the excess mesh. Grab your utility knife, but make sure it has a fresh, sharp blade. I can't stress this enough—a dull blade will snag and pull the screen fibers, potentially ruining all your hard work right at the end.
Angle the knife away from the spline you just installed and run it carefully along the outside edge of the channel, using the frame itself as a straightedge. Go slow, use a steady hand, and slice away the excess. You'll be left with a crisp, clean edge that looks perfect. And since a clean repair deserves a clean frame, check out our guide on how to clean window screens to keep it looking brand new.
Quick Fixes for Small Holes and Tears
Not every little bit of screen damage means you have to replace the whole thing. If you've just got a small hole or a clean tear, a quick patch-up job can be a smart, budget-friendly move. These simple fixes are great for stopping minor damage in its tracks, buying you plenty of time before a full replacement becomes unavoidable.
Choosing to repair instead of replace is becoming more and more common. The global market for door and window repair services, which includes screen work, was valued at around USD 0.6 billion in 2023 and is on the rise. This shows a real shift toward homeowners embracing more sustainable and cost-effective upkeep. You can dig into the numbers on this growing market trend if you're curious.
For those tiny pinholes—maybe from a stray spark from the grill—a dab of clear waterproof silicone or even clear nail polish works surprisingly well. It creates a nearly invisible seal that keeps bugs out and prevents the mesh from fraying and turning a small problem into a bigger one.
Using Pre-Made Adhesive Patches
For a super-fast fix, nothing beats pre-made adhesive patches. These are basically little screen-material stickers designed to be peeled and pressed right over the damage. They’re perfect for tears less than an inch long.
Just give the area around the hole a quick wipe with rubbing alcohol to get rid of any dust, let it dry, and then press the patch on firmly. They're incredibly convenient, but be warned, they can be a bit more noticeable than other types of repairs.
Expert Tip: To make an adhesive patch really stick, use one on each side of the screen. When you sandwich the tear between two patches, it creates a much stronger hold that stands up better to the elements.
When to Use a Screen Repair Kit
If you want a fix that’s both stronger and less obvious, a screen repair kit is the way to go. These usually include a small piece of screen mesh and a special waterproof adhesive. This method is great for slightly larger tears where a simple sticker patch just won't cut it.
You'll cut a piece of the new mesh to be just a bit larger than the hole. Then, run a thin line of the adhesive around the edges of your patch and press it firmly over the damaged area. This creates a really solid bond that blends in much better than a peel-and-stick patch.
- Best for Tears: Works well for clean tears up to three inches long.
- Less Visible: The glue and mesh combination is far less conspicuous.
- More Durable: A glued patch is a much more permanent solution than a sticker.
Ultimately, the best quick fix comes down to the size of the damage and how much you care about a perfectly seamless look. Taking care of these small repairs is a big part of smart home maintenance. You can learn more about maintaining screens and windows to keep them in great shape all year long.
Tackling Common Window Screen Repair Questions
Even the most straightforward DIY project can throw you a curveball. Learning how to fix a window screen is no exception. Let's walk through some of the most common questions that pop up, so you have the answers ready when you need them.
Think of this as your troubleshooting guide for those little "uh-oh" moments. Getting these details right is the difference between a repair that looks great and one that actually lasts.
I Have Pets—What's the Best Screen Material?
If you've got a cat that treats your screen like a climbing gym or a dog that scratches at the door, you need pet-resistant screen. This isn't your standard fiberglass mesh. It's a much tougher, vinyl-coated polyester that's built to take a beating from claws and paws.
Yes, it costs a little more, and the thicker material means it's slightly less transparent. But trust me, for any pet owner tired of constant patching and replacing, it's a worthwhile one-time investment that saves you a ton of hassle down the road.
Expert Tip: Investing in pet-resistant screen upfront is almost always cheaper than replacing standard fiberglass two or three times. For homes with active pets, the durability more than justifies the initial cost.
How Do I Figure Out the Right Spline Size?
This is one of those small details that can make or break the entire project. The absolute best way to get it right is to cut a small piece of the old, existing spline and bring it with you to the hardware store. You can physically match it up to the new rolls to find a perfect fit.
Don't have a piece of the old spline? Your next move is to measure the channel in the frame where the spline sits. Most home window frames use a spline somewhere in the .125" to .175" diameter range.
- If the spline is too thin: The screen will never get tight enough and will end up looking saggy and loose.
- If the spline is too thick: You'll fight to get it into the channel, and you could end up damaging the frame or even tearing your brand-new screen mesh.
Help! My New Screen Is All Wrinkled.
Wrinkles happen. It's almost always a sign that the screen wasn't pulled tight enough when the spline was installed. Luckily, it's a pretty simple fix.
Just grab a small flathead screwdriver and carefully pry the spline out from one or two sides of the frame. With the spline removed, gently pull the screen mesh taut across the frame until the wrinkles disappear. Now, just run your spline roller over it again to lock the tightened mesh back into place. Remember that "bowing" technique we talked about earlier? That's your best defense against wrinkles from the start.
At Sparkle Tech Window Washing, we understand that not everyone wants to tackle a DIY repair. If you're in Arizona and need professional window screen repair or replacement, we've got you covered. Contact us today for a perfect result without any of the work.