

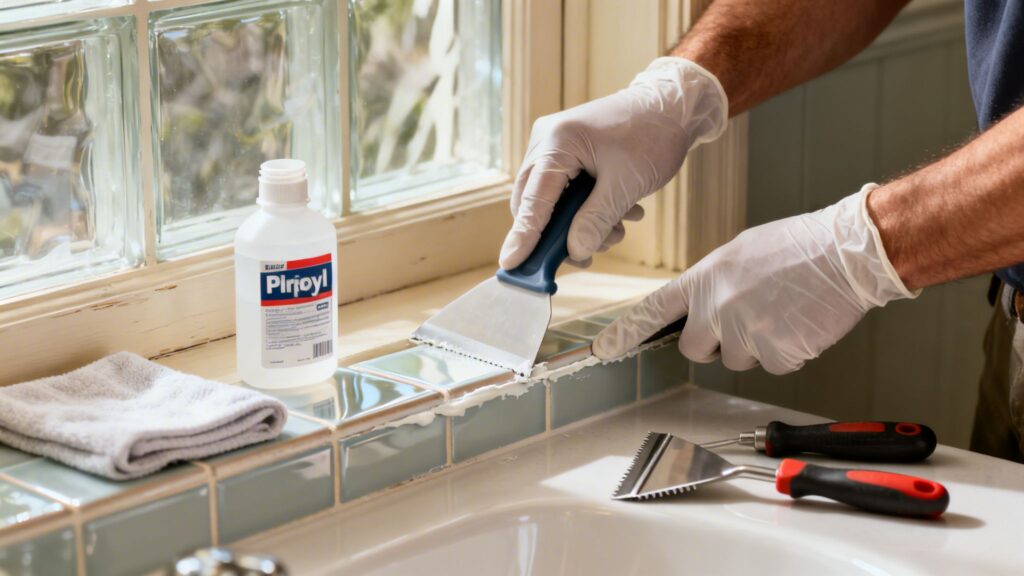
Anyone who's ever tried to remove old silicone caulk knows the real headache isn't prying off the big chunks. It's that stubborn, greasy film left behind that seems impossible to scrub away. The secret to getting a perfectly clean, ready-to-re-caulk surface isn't elbow grease—it's having the right toolkit assembled before you even start.
Gathering Your Essential Silicone Removal Toolkit

Think of this as setting up your battle station. Getting all your supplies in one place means you can work without interruption and, more importantly, avoid causing accidental damage. The right tools don't just speed up the process; they're your best defense against scratches, gouges, or chemical stains.
Scrapers: The Primary Removal Tools
Your main tool will be a scraper, but grabbing just any old one is a mistake. The surface you're working on dictates the tool you should use.
- Plastic Putty Knife or Scraper: This is your best friend for anything delicate. Think painted wood, vinyl window frames, or a fiberglass tub. Plastic is far less likely to leave a permanent scratch or take a chip out of the finish.
- Metal Razor Blade Scraper: Save this for the tough stuff, like glass and tile. The trick is to use a fresh, sharp blade every time. A dull blade will skip and dig in, causing nasty scratches. Always keep the blade at a low angle to the surface.
If you're serious about getting glass perfectly clean, our guide on the best window cleaning tools has some pro-level tips you'll appreciate.
Solvents: Dissolving Stubborn Residue
Once the bulk of the caulk is gone, you'll be left with that thin, slick residue. No amount of scraping will get it off. This is where a chemical solvent steps in to do the heavy lifting.
Pro Tip: Before you go all-in with a solvent, always test it on a small, hidden spot. You need to be sure it won't discolor paint or warp a plastic finish. A little test patch can save you from a big headache.
Two of the most effective and easy-to-find options are mineral spirits and isopropyl alcohol (rubbing alcohol). Just pour a little onto a clean cloth and work it into the residue with a circular motion. The solvent gets underneath the silicone, breaking its grip on the surface so you can finally wipe it away clean.
Essential Safety Gear
You're working with sharp blades and chemical fumes, so safety isn't optional. Taking a few moments to protect yourself is the most important step.
Make sure you have these items on hand:
- Nitrile Gloves: Solvents like mineral spirits will dry out your skin in a hurry. A good pair of gloves prevents irritation.
- Safety Glasses: It only takes one stray flick of a scraper or a tiny splash of solvent to cause a serious eye injury. Wear them.
- Proper Ventilation: This is a big one, especially indoors. Crack a window or set up a fan to keep the air moving and disperse any chemical fumes.
A Professional Method for Tough Residue Removal
Forget trying to muscle through stubborn caulk residue with endless scrubbing. In the field, we rely on a much smarter, two-phase approach to get surfaces perfectly clean without causing any damage. It’s all about breaking the job down into two distinct parts: mechanical removal, then chemical cleanup. Nailing this technique is the secret to a flawless finish every time.
The first phase is purely physical. We’re just trying to get the bulk of the old caulk off the surface. This isn't about aggressive scraping; it's about using the right tool for the job. The goal is to lift as much material as you can without gouging the surface underneath. For instance, on a glass window, you’d use a sharp razor blade held at a low angle, applying steady pressure to peel the caulk away.
Warming Up to the Task
Here’s a little trick I use on almost every job: gently warm the old caulk before you even think about scraping. Aged silicone can get incredibly brittle, and it will just chip off in frustratingly tiny pieces if you go at it cold.
Just a minute or two with a hair dryer on a low setting does the trick. That little bit of warmth softens the silicone, making it pliable and much easier to lift off in long, satisfying strips. This simple step means you use less force, which dramatically reduces the risk of scratching the surface.
The Two-Phase Removal Process
This systematic approach is what separates a frustrating DIY headache from a clean, professional result. Think of it as a one-two punch that gets rid of the chunky caulk and the slick, invisible film it always leaves behind.
- Mechanical Scraping: First, you focus on getting as much of the solid material off as possible. This is the heavy lifting, where a little patience really pays off.
- Chemical Dissolving: After the big pieces are gone, you bring in a solvent to break down that thin, oily residue. This is what allows you to wipe the surface completely clean.
A surface that looks clean can still have an invisible oily film that will cause new caulk to peel away within months. This professional two-step process is the only way to prevent adhesion failure with your new sealant.
This method works like a charm on most surfaces. We typically start by carefully scraping off 70-80% of the bulk residue. Then, we’ll apply a solvent like mineral spirits, let it sit for about 5-10 minutes to soften what's left, and use a scrub pad to lift it away. You can find more details on why this works so well on non-porous surfaces by exploring the data behind this removal method on tubotowels.com.
This kind of detailed work is a big part of any renovation cleanup. For a broader look at tackling tough residues after a project, this practical guide to post-build cleanup offers some great strategies. And if you're dealing with a bigger project, you might be interested in our professional construction clean-up services starting at $125. By following this proven method, you're creating the perfect foundation for a new, durable, and watertight seal.
Every surface has its own personality. What works on sturdy tile can easily ruin a painted windowsill. When you're dealing with leftover silicone residue, using the wrong method can turn a simple cleanup into a costly repair job. You might create permanent scratches on glass, strip paint from wood, or even damage delicate tile glaze.
The trick is to match your tools and your approach to the material you're working with. First, figure out what you're up against. Are you tackling thick, rubbery chunks of old caulk, or just a thin, greasy film?

As you can see, you always want to start by scraping or peeling off the bulky bits first. Only after the majority is gone should you move on to solvents for that thin film. Trying to dissolve a thick bead of silicone just creates a bigger, gooier mess.
To make things simpler, here’s a quick-reference table that I've found incredibly useful over the years. It breaks down the best tools and solvents for the most common surfaces you'll encounter.
Solvent and Tool Guide for Different Surfaces
| Surface Type | Recommended Scraper | Primary Solvent | Safety Precaution |
|---|---|---|---|
| Glass/Metal | New, sharp razor blade | Isopropyl Alcohol | Keep blade at a low angle (30-45°) and lubricate the surface |
| Porcelain/Ceramic Tile | Plastic scraper or putty knife | Isopropyl Alcohol | Avoid metal scrapers to prevent scratching the glaze |
| Painted Wood | Plastic putty knife | Mineral Spirits (test first!) | Always test solvent on a hidden spot to ensure it won't strip paint |
| Unfinished Wood/Grout | Stiff nylon brush | Mineral Spirits | Be cautious with solvents, as they can soak in and discolor the material |
This table is a great starting point, but let’s dive into the specifics for each material.
Glass Windows and Railings
Glass might seem tough, but it can scratch in a heartbeat. The secret weapon here is lubrication. Before you even think about scraping, generously spray the area with soapy water.
Now, grab a new, sharp razor blade. An old, dull blade will just skip and scratch. Hold it at a low angle—think 30 to 45 degrees—and use steady, smooth strokes to get under the residue and lift it. Never, ever scrape on a dry glass surface.
Here in the Phoenix Valley, where we work on solar panels and glass railings, we see a lot of silicone. In fact, about 45% of homes have silicone-sealed features that eventually need maintenance. For the stubborn film that’s left after scraping, we often turn to isopropyl alcohol. It’s fantastic on smooth surfaces and can dissolve up to 92% of the remaining residue without the risks of harsher chemicals.
A Tip from the Field: Using soapy water as a lubricant does more than just prevent scratches. It also makes the sticky silicone bits clump together, so you can wipe them away cleanly instead of smearing them all over the glass.
Bathroom Tile and Grout
Tackling tile is a two-part problem. You have the smooth, glazed tile face and the rough, porous grout lines. You can't treat them the same.
For the tile surface itself, a plastic scraper is your best friend. It has just enough of an edge to get under the silicone without gouging the finish. For the grout, switch to a stiff nylon brush dipped in a bit of isopropyl alcohol. The bristles are perfect for working the solvent into the grout's texture and scrubbing the residue out without causing damage.
Some materials, like handmade cement tiles, are extra sensitive. If you’re working with something special, it's always worth looking up specific advice, like this guide on cleaning cement tiles, to be safe.
Painted Wood Frames and Trim
Of all the surfaces, painted wood is probably the most delicate. One wrong move and you’ll be reaching for a paintbrush. Aggressive scraping will lift the paint right off, and a strong solvent can melt the finish in seconds.
Here’s how to approach it carefully:
- Scrape Gently: Start with a flexible plastic putty knife. If that’s not cutting it, you can very carefully use the sharp corner of a painter’s 5-in-1 tool, but apply almost no pressure. Let the tool do the work.
- Test Your Solvent: Always test your solvent on a hidden spot first! The inside of a window frame or a section of trim that’s usually behind furniture is perfect. Mineral spirits can be effective, but they can also be too aggressive for latex paint. It's often safer to start with something milder, like isopropyl alcohol, and see how it works.
This careful, test-first approach is something we use for many delicate cleaning jobs. If you find yourself doing a lot of cleanup around windows, our guide on how to remove paint from windows offers more tips on working safely with sensitive surfaces.
Troubleshooting Common Removal Problems
Even when you follow all the right steps, silicone can put up a fight. Sometimes you’re left with frustrating smears or a job that just doesn't feel finished. This is where a bit of troubleshooting experience really pays off, turning a potential disaster into a minor detour.
The most common complaint I hear is about that ultra-thin, almost invisible film that gets left behind after scraping. You know the one—it feels greasy and just seems to smear around no matter how much you scrub.
Another frequent headache is dealing with caulk that someone painted over, basically locking it under a hard shell. Trying to scrape this off often takes big chunks of paint with it, leaving you with a much bigger repair job than you bargained for.
Dealing with Stubborn Smeared Residue
When you're faced with that stubborn, smeared film, brute force is your worst enemy. Pushing harder with a scraper will only risk scratching the surface underneath. Instead, this is the perfect time to let a solvent and a little patience do the heavy lifting.
My favorite trick for these stubborn spots involves gentle heat. A hair dryer on a medium setting, held so the surface temperature is around 150-200°F, can work wonders. Just 3-5 minutes of heat can soften that residue enough to boost removability by as much as 75% without resorting to harsh chemicals. If you want to see how the pros use this method, the step-by-step caulk removal guide on gesealants.com is a great resource.
After warming the area, you can usually scrape away most of what’s left with a painter's tool. For the final traces, switch to a damp abrasive sponge or a cloth with some isopropyl alcohol.
Handling Caulk That Has Been Painted Over
This scenario calls for a delicate touch. The real goal is to break through the paint layer to get to the caulk without wrecking the surrounding paint job.
Start by carefully scoring the very top edge of the caulk line with a sharp utility knife. You aren't trying to cut the caulk out entirely—just slice cleanly through that paint layer. This creates a defined break and helps prevent the paint from peeling off in large, uncontrollable sheets.
Once you've scored it, try to gently pry the caulk bead out. If it resists, apply a small amount of a paint-safe caulk remover or mineral spirits directly onto the caulk line. Let it sit for several minutes to soften both the paint and the silicone before you try scraping again, preferably with a plastic tool.
Critical Mistake to Avoid: Never, ever use acetone on a painted surface. While it's a beast at dissolving silicone, it will also liquify most types of paint almost instantly. You'll be left with a melted, gummy mess that is far worse than the original problem.
Top Removal Mistakes to Sidestep
Learning from other people's mistakes is the fastest way to get a pro-level result. Keep these common blunders in mind to make sure your project goes smoothly.
- Applying Too Much Force: This is the number one cause of scratched glass, gouged wood, and chipped tile. Let your tools and solvents do the work for you. Patience is key.
- Using the Wrong Solvent: As mentioned, acetone on paint is a catastrophe. Similarly, using an oily substance like WD-40 might seem like a good idea, but it leaves behind a film that will prevent new caulk or paint from ever sticking properly.
- Skipping the Final Clean: That final wipe-down with isopropyl alcohol isn't optional. It removes any lingering oils and ensures the surface is perfectly clean, which is absolutely essential for getting the new sealant to adhere correctly.
Prepping the Surface for a Perfect New Seal

You’ve done the hard part—scraping and scrubbing away all that old, stubborn caulk. It feels like the job is done, but don't grab that new tube just yet. This next step is what separates a pro-level, long-lasting seal from one that fails in a matter of months.
To get a truly strong and watertight bond, the surface has to be perfectly clean. Even when you can't see it, a slick, invisible film of oils or leftover solvent can remain. In my experience, skipping this final cleaning is the number one reason new caulk beads refuse to stick.
The Final Degreasing Wipe-Down
The secret weapon for perfect adhesion is a final wipe-down with a degreasing agent. For this, your best friend is isopropyl alcohol (rubbing alcohol). It cuts through any lingering film and, more importantly, evaporates completely without leaving any residue of its own.
The process is simple but critical. Just grab a clean, lint-free cloth, dampen it with the alcohol, and wipe down the entire joint. Make sure you clean every surface the new caulk will touch.
As you wipe, you’ll probably see a slight haze on the cloth. That’s the oily film you’re defeating. To avoid just smearing it around, be sure to switch to a clean spot on your cloth as you go. This quick pass removes any lingering gunk from mineral spirits or other cleaners, creating the ideal canvas for your new silicone.
A new bead of silicone caulk will not stick to an old, slick silicone film. Think of it like trying to put a new sticker on top of a waxy, old one—it simply won't grab. The final alcohol wipe effectively "erases" that old surface.
Ensuring the Area Is Bone Dry
After that final cleaning, moisture becomes your enemy. Silicone simply will not cure correctly if the surface is wet or even just a little damp. Any water trapped under that fresh bead of caulk is a guaranteed path to mold, mildew, and adhesion failure down the road.
Look closely at corners, grout lines, and any little nooks where water loves to hide. The surface might feel dry to the touch, but microscopic moisture can still ruin your work. I always recommend waiting at least an hour after cleaning to be absolutely certain the area is ready.
If you're in a humid space like a bathroom or just short on time, a little forced air can do wonders. A hair dryer on a low, cool setting, waved over the joint for a few minutes, will help any remaining moisture evaporate. It’s a small bit of insurance that guarantees all your hard work pays off with a clean, durable, and perfectly watertight seal.
Common Silicone Removal Questions Answered
Even with the best guide, you’re bound to run into a few specific questions. Over the years, we’ve heard just about all of them. Here are our answers to some of the most common hurdles people face when trying to get rid of old silicone caulk.
Can I Just Use Vinegar or WD-40?
This is probably the most frequent question we get, and the short answer is no. You'll see these "hacks" all over the internet, but from our experience, they cause more problems than they solve.
Vinegar is a very weak acid. It just doesn't have the chemical muscle to break down cured silicone. You’ll spend ages scrubbing for little to no reward.
WD-40 is even worse for this job. It's a lubricant, not a solvent. While it might help you get under an old bead of caulk, it leaves a greasy, oily film behind. That oil is a dealbreaker because it will prevent any new silicone from adhering properly. Your brand-new seal is guaranteed to fail, and you’ll be right back where you started.
The Pro Tip: Stick with what works. Simple solvents like mineral spirits or isopropyl alcohol are designed to dissolve silicone residue without leaving behind an oily mess that sabotages your new caulking job.
How Do I Scrape Glass Without Scratching It?
The fear of scratching glass is real, but it’s also completely preventable if you use the right technique. It’s all about having a sharp tool and plenty of lubrication.
- Start with a Fresh Blade: Don't even think about using that old, rusty razor from the bottom of your toolbox. A new, sharp blade is your best friend here. Dull blades drag and skip, which is what actually causes scratches.
- Lubricate, Lubricate, Lubricate: Never, ever scrape a dry piece of glass. Spray the area generously with soapy water or the solvent you're using. This creates a slick surface for the blade to glide on.
- Keep a Low Angle: Hold your razor blade at a low 30- to 45-degree angle. Use smooth, controlled strokes in one direction. Avoid scrubbing back and forth.
- Finish Strong: After scraping, you'll likely have a faint haze left. A non-abrasive plastic scrub pad and a bit of isopropyl alcohol will lift those final traces without putting the glass at risk.
What’s the Best Way to Get Silicone Off My Clothes?
Getting silicone on fabric is frustrating, and honestly, it’s a tough one to beat. If it’s still wet, scrape off the excess immediately. The key is to lift it off without smearing it deeper into the fibers.
Once it's dried, your options are limited. You can try popping the clothing into the freezer for several hours. This makes the silicone brittle, and you might be able to crack and peel off the bigger chunks. For what's left, you can try dabbing it with mineral spirits, but you absolutely have to test it on a hidden spot first (like an inside seam) to make sure it doesn't ruin the fabric's color. Even with this method, complete removal is rare.
When Is It Time to Call a Professional?
Sometimes, the DIY route just isn't worth the risk. We always recommend calling in a professional for large-scale jobs, anything involving heights like second-story windows, or if you're dealing with a particularly delicate or expensive surface. Think custom glass railings, specialty coated windows, or even solar panels—a small mistake there can turn into a very costly replacement.
A professional team has the right tools, years of experience, and the insurance to back up their work. They can get the job done right and guarantee a perfectly prepped surface, saving you the headache and protecting your investment.
For those challenging jobs or when you simply want peace of mind, the team at Sparkle Tech Window Washing is here to help. Our technicians have the expertise to tackle any residue removal project, no matter how tough. Get a free, no-obligation quote by visiting us at sparkletechwindowwashing.com.