

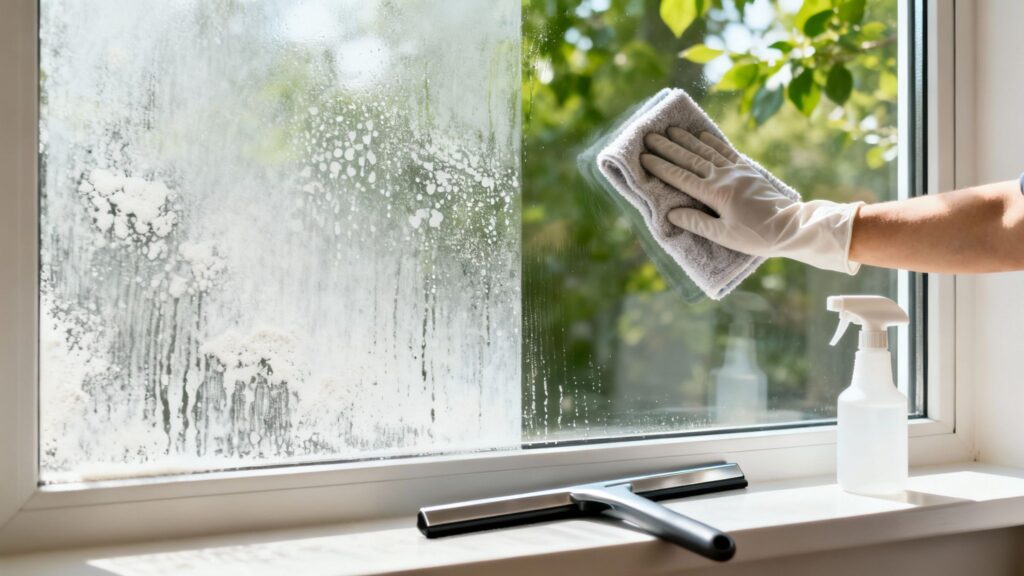
To really get rid of those stubborn water stains on your windows, you first need to understand what you’re up against. The main problem is almost always hard water. When water evaporates, it leaves behind minerals like calcium and magnesium, which are the source of those ugly, cloudy marks. Knowing the cause is the key to choosing the right battle plan for getting your glass crystal-clear again.
Uncovering the Root Cause of Window Water Stains
Before you grab the first spray bottle you see, let’s take a closer look at your opponent. Those chalky, milky spots aren't just dried water. They're the mineral deposits left behind after the H₂O has evaporated, and they’re the classic signature of hard water.
Think about it this way: when a water droplet dries on your window, the liquid vanishes, but the dissolved minerals have nowhere to go. They crystallize right onto the glass, forming a tough film that’s surprisingly hard to remove. With every sprinkle or splash, another layer builds up, and the stains become even more of a headache.
Common Sources of Stains
Figuring out where the water is coming from is half the battle, as it tells you how severe the staining is likely to be.
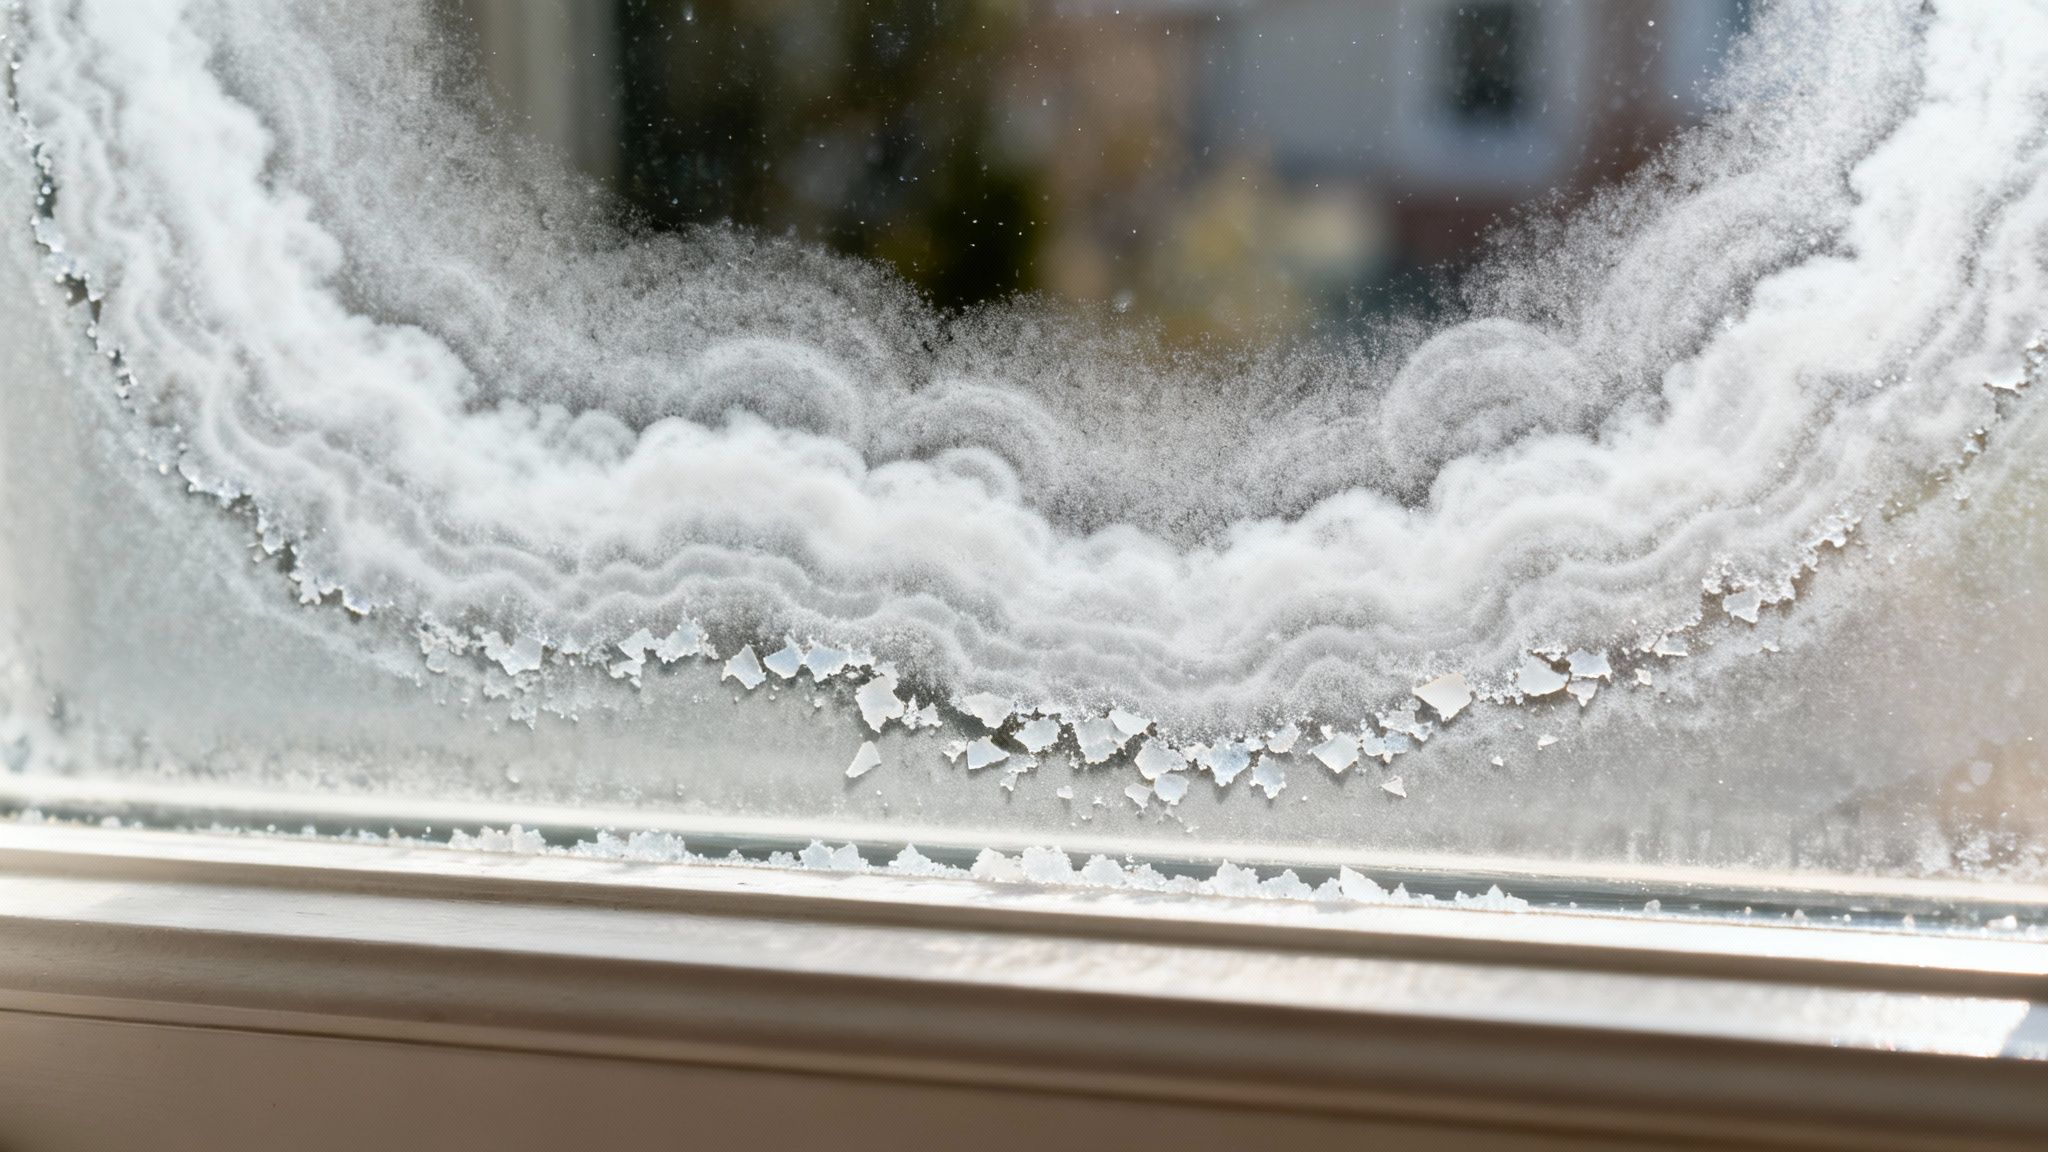
- Sprinkler Overspray: This is public enemy number one for window glass. If your sprinklers hit your windows day after day, you’re setting the stage for thick, baked-on layers of mineral deposits that can be a real pain to remove.
- Rainwater: Rain is usually softer than tap water, but it can still carry dust and pollutants that leave light spots on your glass once it dries.
- Window Washing: It’s ironic, but cleaning your windows the wrong way can make things worse. Using hard tap water and letting it air-dry is a surefire recipe for creating new stains. This is why pros always use a squeegee.
From Simple Spots to Serious Damage
Not all water stains are the same. A few spots from last night's rain can usually be wiped away with minimal effort. But stains that have been sitting there for months, or even years, are a whole different story.
The longer mineral deposits sit on glass, the more they can bond with the surface. In severe cases, this leads to etching, where the minerals permanently corrode the glass, making removal impossible without professional polishing.
The frustration these stains cause is real. It's no surprise that the glass cleaner market in the U.S. brings in around USD 1 billion. People are constantly searching for a solution that works. You can find more insights about the glass cleaner market on Grandview Research. This just goes to show how common this fight is. Knowing what you’re up against is the first real step to winning.
Assembling Your Window Cleaning Toolkit
Before you even think about tackling those water stains, let's talk about gear. Having the right supplies on hand is the difference between a frustrating Saturday afternoon and a genuinely satisfying project. Trust me, trying to get a streak-free shine with the wrong stuff is a recipe for disaster.
A well-stocked toolkit means you're ready for anything, from light, misty spots to those stubborn, chalky mineral deposits that have been there for ages. You wouldn't try to paint a room with a toothbrush, right? Same idea here. Preparation is everything.
Core Cleaning Essentials
For just about any window cleaning job, there are a few things you absolutely must have. Think of these as the workhorses of your window cleaning arsenal.
- Spray Bottles: Grab at least two. You'll need one for your cleaning solution and another one filled with plain water for rinsing.
- Microfiber Cloths: Don't skimp here; get a decent stack. Their magic lies in their ability to absorb, scrub, and dry without leaving behind annoying lint or fibers.
- A High-Quality Squeegee: This is the pro's secret to that perfect, streak-free finish. It pulls the water off the glass so cleanly and quickly that new water spots don't even have a chance to form.
Gear for Tougher Stains
Now, when you're up against those really caked-on mineral deposits, you need to bring in the heavy hitters. These tools give you the extra muscle you need to break through the grime without hurting the glass.
A critical piece of advice I always give: keep the glass wet when you're using anything abrasive. Whether it's steel wool or a scrubbing pad, dry scrubbing is a surefire way to etch permanent scratches into your window.
For a much deeper dive into the specific tools we trust on the job, check out our complete guide to the best window cleaning tools. We break down exactly what you need for different types of windows and stains.
Finally, a few things for safety and sanity. A good pair of rubber gloves will save your hands from getting dried out by cleaning solutions. And if you're tackling more than a window or two, a simple bucket is a lifesaver for holding your tools and rinsing cloths. It keeps your whole operation tidy and efficient.
Once you have these items laid out, you're ready to get to work.
Tackling Light Water Stains With DIY Solutions
When you're dealing with those faint, cloudy spots left behind by rain or sprinklers, there’s no need to jump straight to heavy-duty chemicals. The truth is, one of the most effective tools for the job is probably already in your kitchen pantry. A simple, homemade cleaner can make quick work of the light mineral deposits causing those common blemishes.
This approach is not only incredibly budget-friendly but also keeps harsh fumes out of your home. It's the perfect first line of defense for anyone wanting to get their windows looking crystal clear again.
The Classic White Vinegar and Water Trick
There's a reason this is the go-to method for window cleaners and homeowners alike: it just works. The magic lies in the mild acidity of white vinegar, which is fantastic at breaking down the alkaline mineral deposits—like calcium and magnesium—that create water stains.
Here’s how to do it right:
- Mix a 50/50 Solution: In a clean spray bottle, combine one part distilled white vinegar with one part distilled water. Using distilled water is a pro move because it's free of the very minerals that caused the stains in the first place.
- Spray and Saturate: Apply the solution generously to the stained areas. Don't be shy here; you want the glass thoroughly coated to let the solution do its job.
- Let It Dwell: This is the most crucial part of the process. Let the vinegar solution sit on the glass for at least 2-5 minutes. This "dwell time" gives the acetic acid a chance to dissolve the mineral bonds.
- Wipe and Squeegee: Use a clean microfiber cloth to wipe the solution away. For that perfect, streak-free finish, grab a squeegee and wipe the blade clean after each pass.
A Pro Tip from the Field: Try to clean your windows on an overcast day or when they're in the shade. Direct sun heats up the glass and makes your cleaning solution evaporate too quickly, which is a surefire way to end up with streaks and new residue.
This simple flowchart can help you visualize where this method fits into the bigger picture of stain removal.
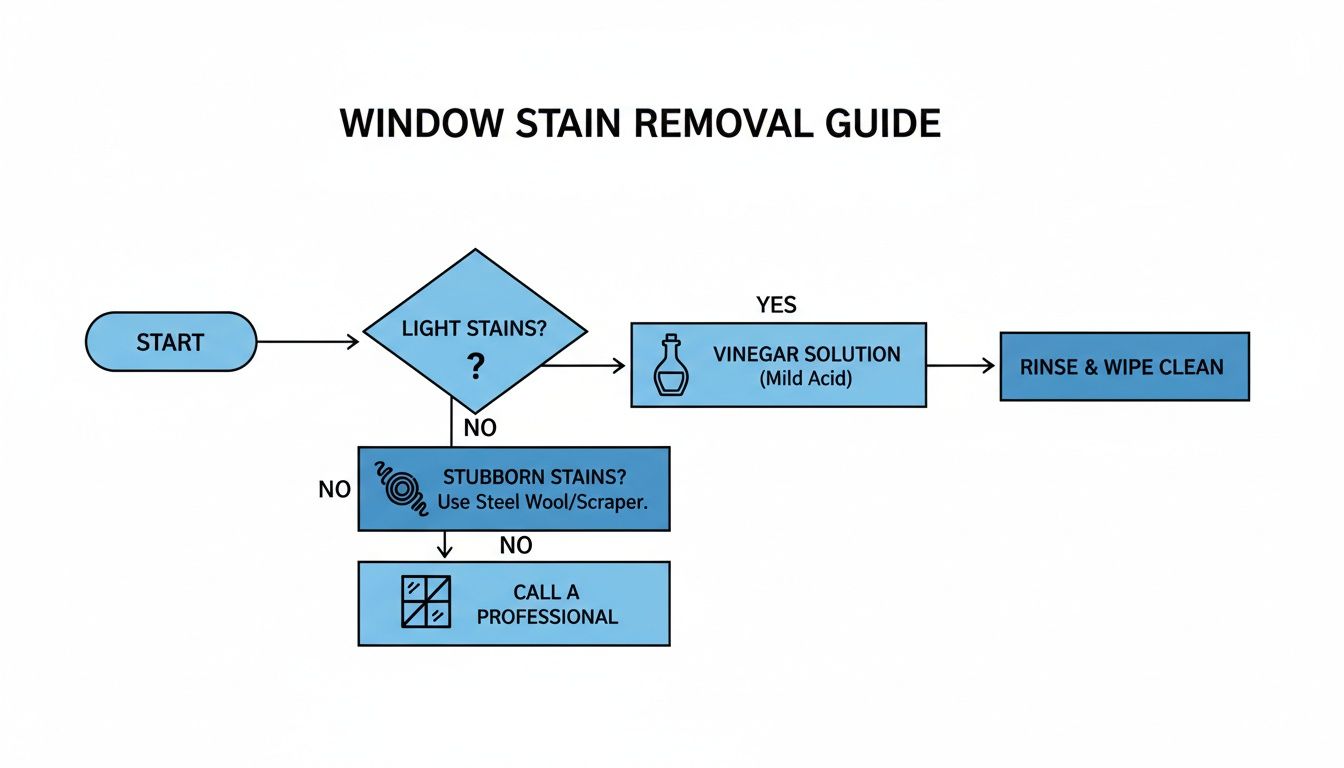
As you can see, for light and recent stains, a simple vinegar solution isn't just easy—it's the most logical place to start.
Comparing DIY Water Stain Removal Solutions
Vinegar is a top contender, but other household items can also be surprisingly effective. This table gives a quick rundown of your options for light to moderate stains.
| Solution | Effectiveness on Stains | Cost | Best For |
|---|---|---|---|
| White Vinegar & Water | High | Very Low | General, light mineral spots and everyday grime. |
| Lemon Juice & Water | Moderate-High | Very Low | Similar to vinegar; great for light deposits and leaves a fresh scent. |
| Baking Soda Paste | Moderate | Very Low | Slightly stubborn spots needing a gentle scrub. |
While these DIY solutions are great for many situations, always start with the least abrasive method first to protect your glass.
Other Household Heroes on Standby
If vinegar isn't quite cutting it or you just don't have any on hand, a couple of other pantry staples can step in.
Lemon juice works on the same principle as vinegar. Its citric acid is a natural enemy of mineral deposits. You can mix it 50/50 with water or even apply it directly for a bit more punch on stubborn spots.
For stains that have been sitting a little longer, a baking soda paste can work wonders. Just mix baking soda with a tiny bit of water to create a paste, apply it to the spot, and let it sit for a few minutes. Then, gently scrub with a soft cloth before rinsing everything off completely. A word of caution: baking soda is a mild abrasive, so be gentle to avoid scratching the glass. Knowing what's safe for your windows is key, which is why it's always good to review the dos and don'ts of window cleaning chemicals.
The growing popularity of these gentle, eco-friendly methods reflects a larger industry trend. The global cleaning services market is expected to hit USD 111.5 billion by 2030, partly driven by a demand for greener solutions that prevent mineral stains from happening in the first place. Your simple DIY mix taps into the exact same science—dissolving minerals without resorting to harsh chemicals.
Advanced Tactics for Stubborn Mineral Buildup
Sometimes, a simple vinegar solution just isn't going to cut it. If you've been scrubbing away at those milky, etched-in spots and getting nowhere, you're probably dealing with years of baked-on mineral buildup. This is where we graduate from basic cleaning to true window restoration.
When faced with these incredibly tough stains, you really have two paths forward: bring in a more powerful chemical cleaner or carefully use a bit of mechanical abrasion to physically break the deposits free. Both methods work wonders, but they demand a bit more care to protect your glass.
Choosing a Commercial Hard Water Remover
When it’s time to remove water stains from windows that have laughed off your DIY efforts, a commercial-grade cleaner is your best bet. These formulas are specifically engineered with mild acids or other compounds designed to dissolve stubborn calcium and magnesium much more effectively than household vinegar.
When you're at the store, look for products that contain ingredients like sulfamic or phosphoric acid—they're fantastic for breaking down minerals. It's no surprise there are so many options; hard water is a massive issue affecting an estimated 75% of households worldwide. This has driven a lot of innovation in cleaning products, and one of the fastest-growing categories is powder-based cleaners. They often have biodegradable formulas that can tackle stains 85% more effectively than some liquids, all while using less packaging. You can even learn more about trends in the water spot remover market to see how these products are changing.
Quick tip: Always, and I mean always, follow the manufacturer's directions to the letter. These products are much stronger than what you're used to, so that means wearing gloves and working in a well-ventilated area is non-negotiable.
The Gentle Power of Mechanical Abrasion
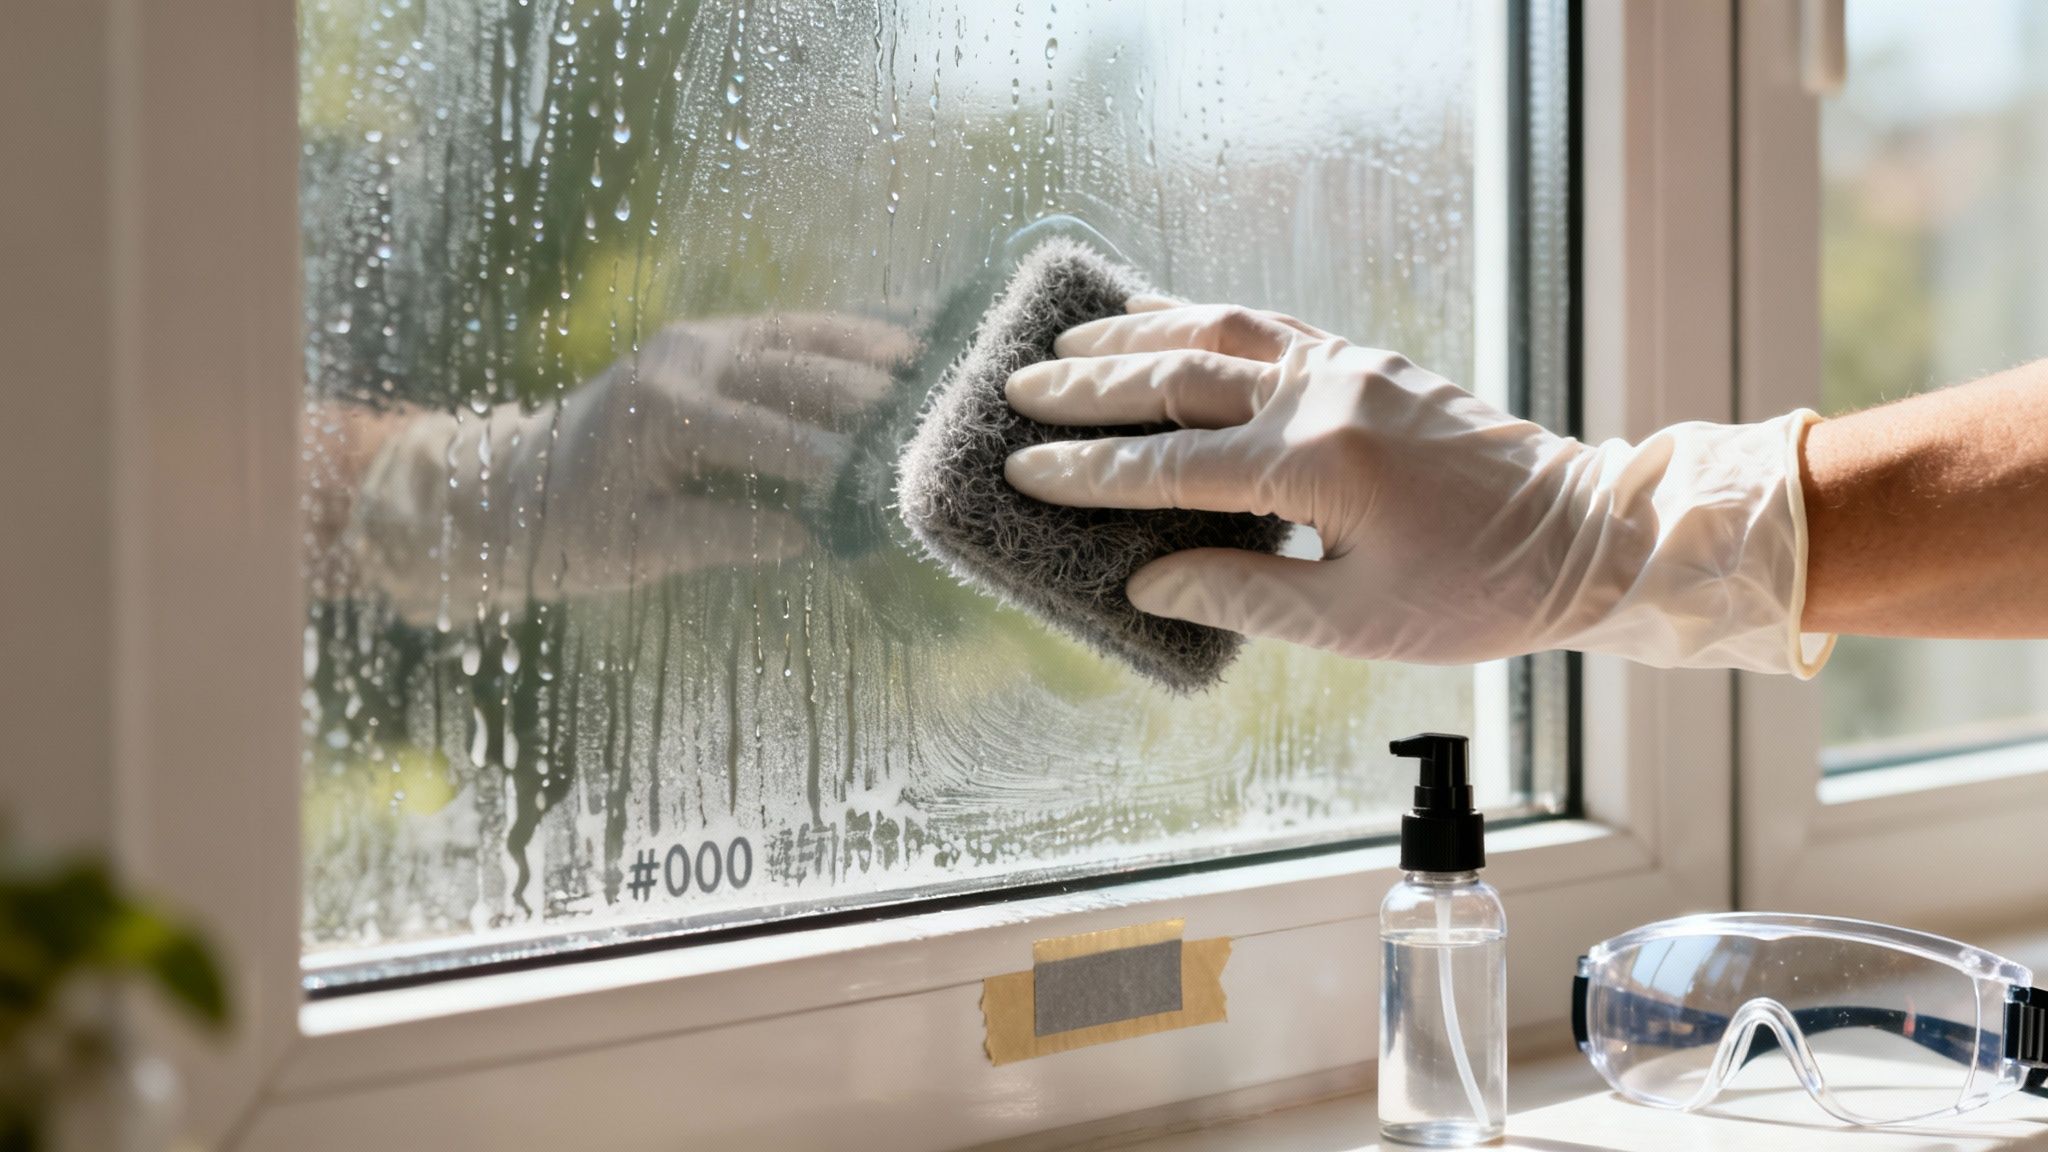
For the most stubborn, crusty buildup that seems almost fossilized onto the glass, you might need to physically scrub it off. I know, this sounds scary, but when you use the right tools, it's an incredibly effective and safe technique.
The secret is using an abrasive that is harder than the mineral deposit but softer than the glass. This simple principle lets you scour away the stain without leaving a permanent scratch behind.
Your two best friends for this job are:
- #0000 Steel Wool: You'll hear this called "four-ought" steel wool. It's a super-fine grade, and it's critical you use only this grade. Anything coarser will absolutely scratch your windows.
- Plastic Razor Blade: A plastic blade gives you a sharp, effective scraping edge but without the high risk of gouging the glass like a metal blade can.
How to Get It Done Safely and Effectively
No matter which tool you pick, the process is pretty much the same. The single most important rule to remember is to always keep the glass surface wet while you're working. A dry surface creates friction, and friction is what causes scratches.
Here’s a good workflow to follow:
- Lube It Up: Get your spray bottle and generously wet the window with your cleaning solution or even just plain water. You want the surface slick and lubricated so your tool can glide smoothly.
- Test First: Before you attack the main stain, find a small, out-of-the-way corner of the window. Test your tool there first to make sure it isn't causing any hazing or fine scratches.
- Use a Light Touch: With your #0000 steel wool or plastic blade, work in small, circular motions using light, consistent pressure. You don't need to muscle it. Let the tool do the work for you.
- Rinse and Check: After scrubbing a section, rinse it completely with clean water and squeegee it dry. Step back, look at it from a few angles, and see how you did. If the stain is still there, repeat the process before moving on.
Following this methodical approach gives you the control to safely erase even the most severe water stains, bringing back that crystal-clear view without having to make a call to the pros.
Proactive Strategies to Prevent Future Stains
Getting those tough water stains off your windows feels great, but the real win is making sure they never come back. If you can shift from a reactive cleaning mindset to a proactive one, you'll save yourself a ton of scrubbing down the road. The whole idea is to stop mineral-heavy water from ever drying on the glass in the first place.
This doesn't mean you need to completely change your routine. Most of the time, a few small tweaks around your property can make a world of difference. Think of these simple changes as your first line of defense.
Simple Adjustments for Lasting Clarity
First thing's first: figure out where the water is coming from. Nine times out of ten, the main culprit is a rogue sprinkler head that's been blasting your windows with hard water every morning.
- Redirect Your Sprinklers: Take a walk around your property while your irrigation system is running. You can often stop the problem just by adjusting the spray pattern on one or two heads so they don't hit the glass.
- Mind Your Hose: When you're washing the car or watering the garden, pay attention to where the overspray is going. If you do splash the windows, a quick pass with a squeegee can stop new spots from ever forming.
- Improve Drainage: Make sure your gutters and downspouts are clean and properly channeling water away from your house. This prevents muddy water from splashing up onto your lower windows during a downpour.
These might seem like minor habits, but keeping your windows dry is hands-down the most effective way to prevent mineral deposits from setting up shop.
Think of it like this: each water droplet is a tiny package of minerals waiting to be delivered. By preventing the delivery, you eliminate the problem at its source. It’s far easier to adjust a sprinkler than to repeatedly battle the stains it leaves behind.
Applying a Hydrophobic Glass Sealant
If you're looking for a more heavy-duty, long-term solution, a hydrophobic glass sealant is the way to go. These products create an invisible, super-slick barrier on your glass. Water can't cling to the surface; instead, it just beads up and rolls away, taking all those pesky minerals with it.
Putting one on is pretty simple. After giving your window a good, thorough cleaning, you just spray the sealant on and buff it out with a clean microfiber cloth. Always follow the manufacturer's directions, of course. Depending on the weather in your area, this protective coating can last for several months.
While stopping water spots is a big deal, don't forget about other things that impact your windows, like sun exposure. To give your glass even more protection and prevent your furniture from fading, you might want to look into how UV blocking window film can shield your home from the sun's harsh rays.
In the end, combining these simple strategies—managing water sources and applying a good sealant—can change the chore to remove water stains from windows from a constant headache into a quick, easy task you only have to do once in a while.
When It's Time to Call in the Pros
Look, I'm all for rolling up your sleeves and tackling a home project. Those DIY methods we've covered can work miracles on everyday water spots. But sometimes, you have to know when to fold 'em.
Putting down the spray bottle and calling a professional window cleaner isn't admitting defeat—it's just being smart. It can save you a ton of time, protect your windows from accidental damage, and get you a flawless finish, especially when things get a little tricky.
Beyond Your Reach and Risk Tolerance
The most obvious reason to call for backup? Height. If you're looking at second-story windows or glass that’s just plain awkward to get to, that's pro territory. A professional crew shows up with the right ladders, safety harnesses, and the training to use them without putting themselves—or your property—at risk. Honestly, scrambling up a wobbly ladder is a job best left to people who do it every single day.
Protecting Special or Damaged Glass
Another big one is the glass itself. Are you dealing with delicate, wavy antique panes? Or maybe you have windows with special UV or low-E coatings? Using the wrong cleaner or a scrubbing pad that's even a little too abrasive can cause permanent, costly damage. A true professional knows exactly how to identify these sensitive surfaces and has the right tools for the job.
If mineral deposits have been baking onto the glass for years, they can actually etch the surface. At that point, no amount of vinegar or elbow grease will get it off. Professionals have specialized polishing compounds and equipment that can literally buff the damage out and restore the glass, something that’s well beyond the scope of a typical DIY toolkit.
Finally, the pros bring technology to the fight. Many top-tier services use water purification systems that strip out all the minerals. This means the final rinse is with 100% pure water, which dries completely spot-free. It's a level of clean you just can't replicate with a garden hose.
For a more detailed breakdown, we have a whole guide on knowing when to call a professional window washing company.
Got Questions About Water Stains? We’ve Got Answers.
Even after you've armed yourself with the right techniques, a few tricky questions always seem to pop up when you're in the middle of a window cleaning project. Getting these little details right is what separates a decent job from a perfect, streak-free finish. Let's tackle some of the most common ones I hear from people.
Can I Just Grab Any Old Steel Wool?
Definitely not—and this is one detail you absolutely don’t want to get wrong. You must use #0000 grade steel wool, which is often called "super-fine." Anything more aggressive, like the pads you'd use to strip paint, will leave a mess of permanent scratches all over your glass.
Think of it like this: you wouldn't use coarse sandpaper on a fine piece of furniture. The same logic applies here. The #0000 grade is just abrasive enough to shear off the mineral deposits without biting into the glass itself. Always keep the glass wet and soapy while you work, and do a quick test on a small, hidden corner first just to be safe.
I always tell my clients to treat their glass with care. The goal is to remove the stain, not create a bigger problem. Super-fine steel wool is the right tool for the job.
Is the Vinegar Mix Going to Wreck My Window Frames?
That's a smart question to ask, since the window is more than just the glass. A standard 50/50 white vinegar and water solution is typically fine on modern vinyl or fiberglass frames. Where you need to be careful is with more sensitive materials.
- Wood Frames: Vinegar is acidic, and if left to sit, it can eat away at the paint or finish on wood.
- Painted Surfaces: On certain types of paint, it can cause dulling or even damage the finish over time.
Your best bet is to avoid spraying the solution directly on the frames altogether. If you get some overspray or drips, just wipe them up right away with a clean, damp rag. Problem solved.
How Often Do I Need to Reapply a Glass Sealant?
How long a sealant lasts really comes down to two things: the quality of the product you're using and the kind of weather it's up against. As a general rule, most consumer-grade sealants you can buy at the store will give you solid protection for about 3 to 6 months.
The telltale sign that it's time for a new coat is when water stops beading up and rolling off the glass. When you see water clinging or streaking again, that hydrophobic barrier is gone. A fresh application will bring it right back and keep new mineral stains from taking hold.
If you're dealing with stubborn stains that refuse to disappear, or if your windows are high, fragile, or just plain awkward to reach, don't risk it. The team at Sparkle Tech Window Washing has the professional-grade equipment and know-how to bring your windows back to life safely. Find out more about how we can help at https://sparkletechwindowwashing.com.