


To get those stubborn water spots off your windows, you first have to break down the mineral deposits left behind after water dries. For a light haze, a simple mix of 50/50 white vinegar and distilled water often does the trick. But for tougher, built-up stains, you'll need to step up your game.
Why You Have Water Spots on Your Windows
Before you grab a cloth and start scrubbing, it helps to know what you’re up against. Those cloudy, milky-white marks aren't just dried water. They're actually mineral deposits—mostly calcium and magnesium—that were dissolved in the water. Once the H₂O evaporates, those minerals cling to the glass, creating a stubborn film.
This is a widespread problem. In fact, the global market for water spot removers hit USD 1.14 billion, which tells you just how many people are fighting this same battle. It’s clear that everyone values sparkling, clear glass on their homes and cars. You can even explore the market trends for water spot removers to see how big the industry has become.
The Two Stages of Water Stains
It’s really important to figure out what kind of water spot you're dealing with because that dictates your entire cleaning approach. Mineral buildup typically happens in two stages:
- Stage I Corrosion: These are fresh deposits just sitting on top of the glass. If you run your hand over them, you can feel a rough texture, but they haven't etched the glass yet. Thankfully, these are much easier to remove with the right acidic cleaner.
- Stage II Corrosion: This is what happens when mineral spots are left to sit for a long, long time. The alkaline minerals start to react with the silica in the glass, which leads to permanent etching. At this point, the glass might feel pitted, and a simple cleaner isn't going to bring back that perfectly smooth, clear finish.
Common Causes of Window Spots
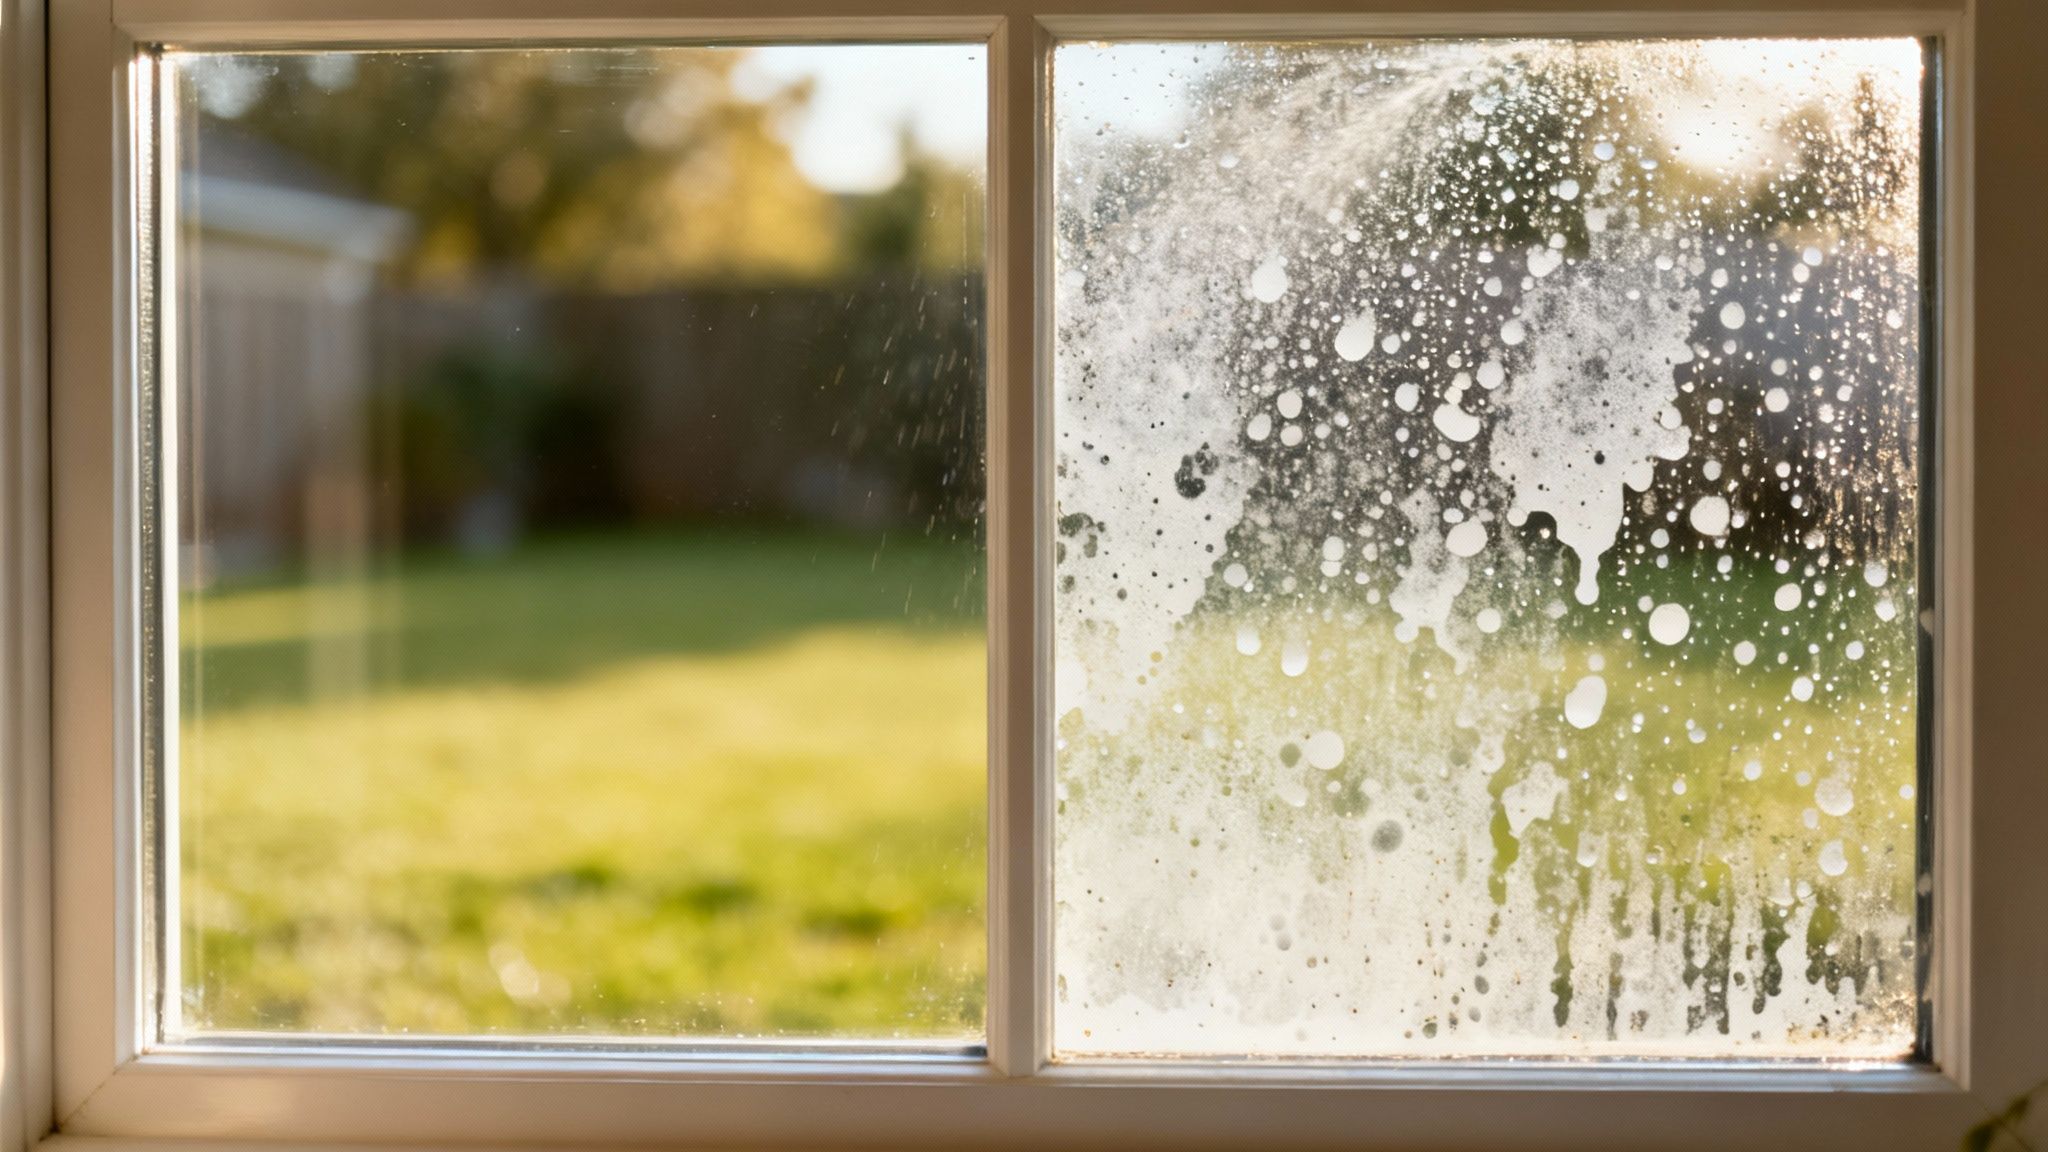
You've probably noticed that not all windows get spots equally. Where the window is and how it gets wet are huge factors. A classic example is a window that gets hit by a misaimed lawn sprinkler day after day. That constant spray of hard water is a recipe for a rapid, heavy buildup of mineral deposits.
Pro Tip: Hard water is almost always the main culprit. If you have hard water at home, you'll see these same spots on your shower doors, faucets, and even your dishes. The higher the mineral content in your water, the more stubborn the stains will be.
Taking a moment to figure out if you're dealing with a fresh surface deposit or a deeper etch is the key to success. It lets you choose the right tools and cleaning methods from the start, saving you a ton of time and preventing you from accidentally damaging your windows with a cleaner that’s too harsh for the job.
Your Go-To Toolkit for Spotless Glass
Knowing how to get water spots off windows starts with having the right supplies on hand. A well-stocked toolkit can save you hours of frustration and prevent you from accidentally damaging your glass, letting you tackle anything from a light haze to years of mineral buildup.
The best part? You probably already have the basics. For everyday water spots, simple household items are often all you need because their chemical properties are perfect for breaking down the minerals left behind on your glass.
Essential DIY Cleaning Agents
For most common water spots, you can skip the harsh chemicals. A few things from your pantry will do the trick by dissolving the alkaline mineral deposits that make your windows look cloudy.
- Distilled White Vinegar: The acetic acid in vinegar is a fantastic natural cleaner. It's gentle on glass but tough on the calcium and magnesium deposits that cause those stubborn spots.
- Baking Soda: Mix this with a bit of water to form a paste. It works as a very mild abrasive, giving you just enough scrubbing power to lift tougher spots without scratching the surface.
- Distilled Water: This is a non-negotiable. Always use distilled water when mixing your cleaning solutions. If you use tap water, you risk putting the very minerals you're trying to remove right back onto the window. It's a frustrating cycle you want to avoid.
A common mistake is using tap water for the final rinse. This can leave behind fresh mineral spots as it evaporates, undoing all your hard work. Always finish with distilled water or a thorough squeegee dry.
Tools for Application and Finishing
What you clean with is only half the battle; how you apply it and dry the glass is just as important for getting that streak-free shine.
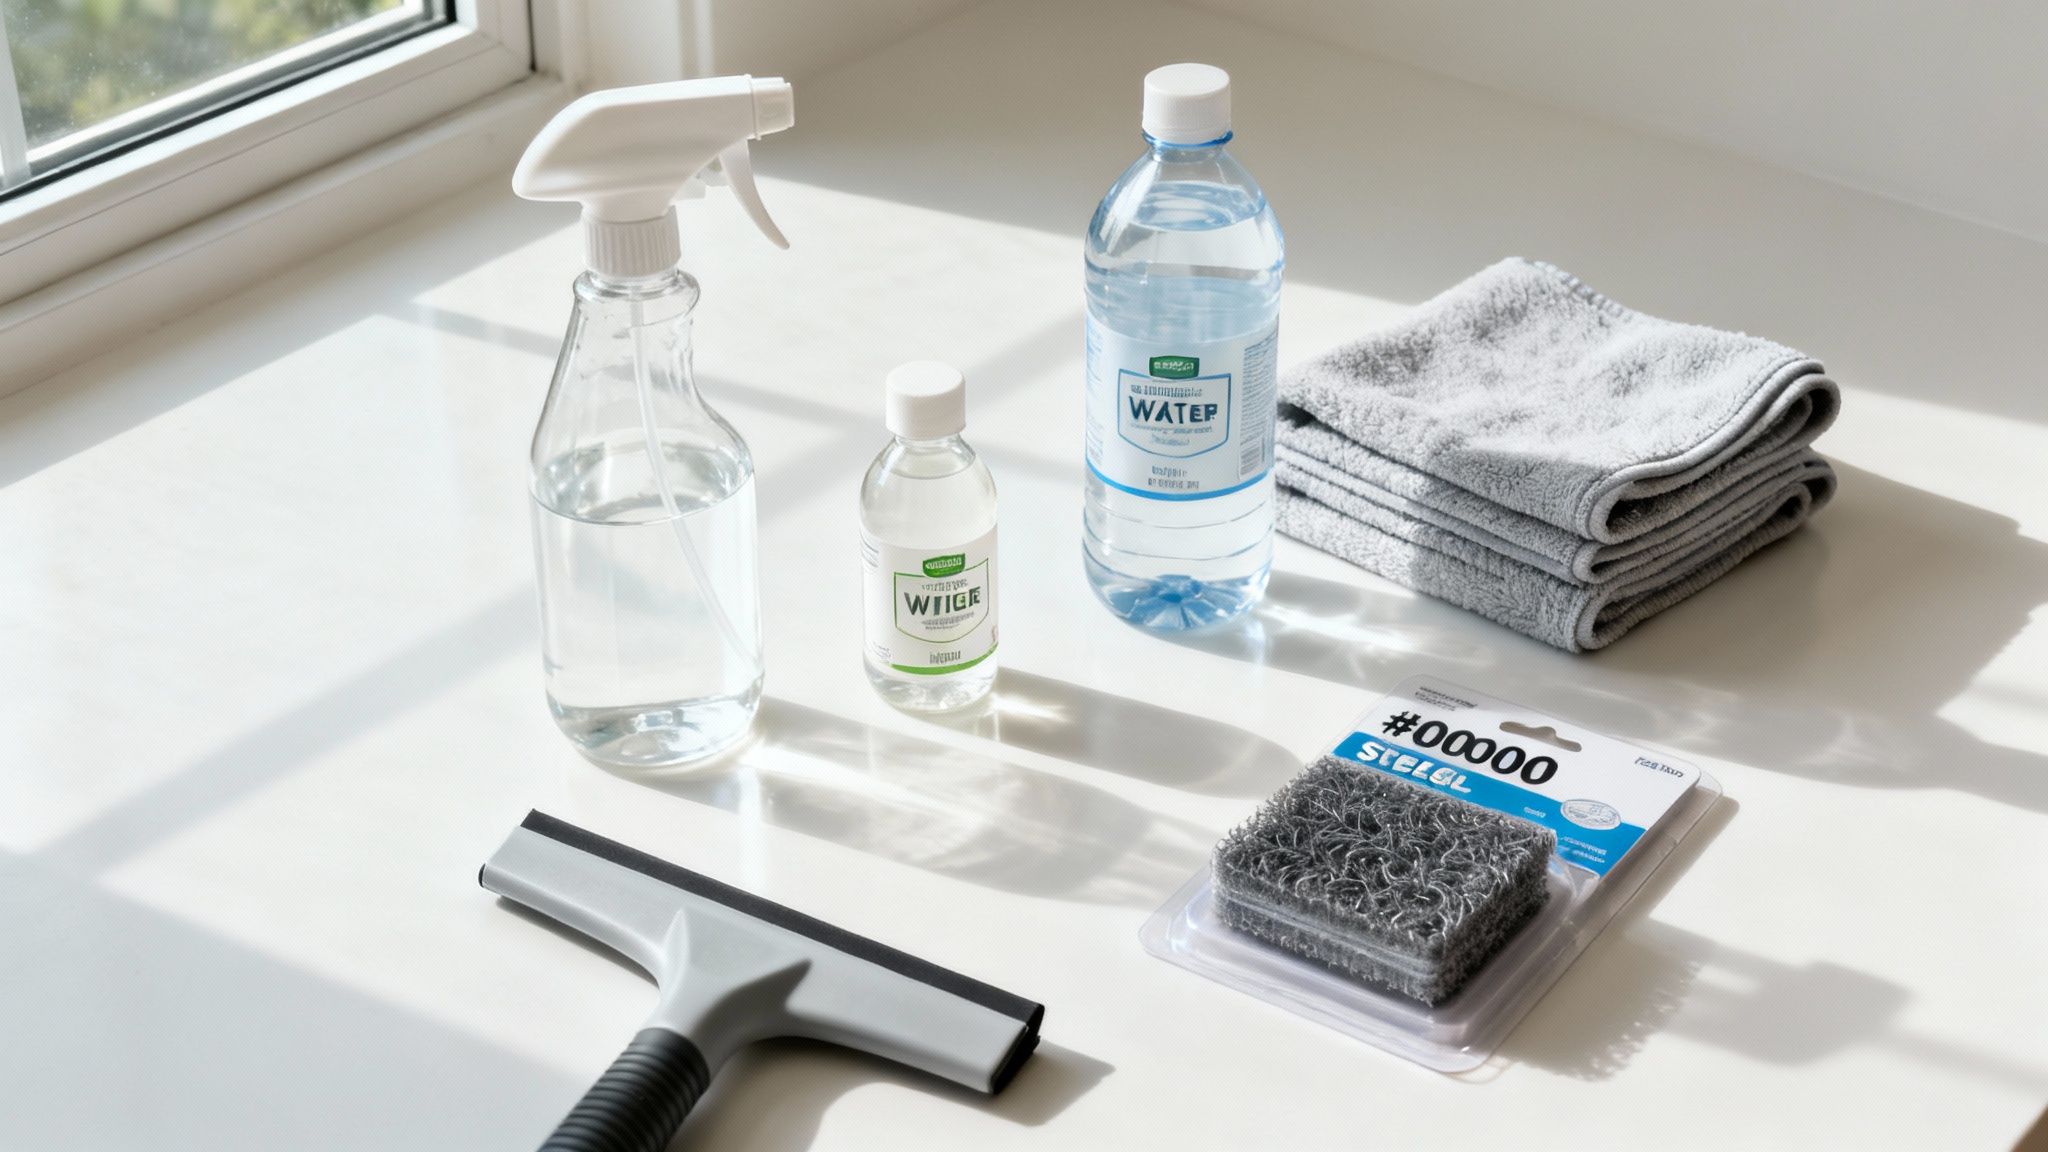
Your foundation should be a good set of microfiber towels. They’re super absorbent and lint-free, making them perfect for scrubbing and drying. A quality squeegee is another must-have for a professional finish—it pulls all the dirty water and dissolved minerals away in one clean pass. If you're looking for recommendations, our guide on the best window cleaning tools will help you build a kit just like the pros use.
For those really tough, crusted-on mineral stains, you might need a little more muscle. #0000 steel wool (that’s the finest grade you can get) works wonders and is safe on glass as long as you use it with plenty of lubricant. You can also find non-abrasive scrubbing pads made specifically for hard water stains. Think of these as your secret weapons against the most stubborn spots.
Water Spot Removal Toolkit Comparison
Choosing the right tool for the job makes all the difference. Some solutions are perfect for light, fresh spots, while others are built for heavy-duty mineral deposits. Here’s a quick comparison to help you decide what you need.
| Tool/Solution | Best For | Pros | Cons |
|---|---|---|---|
| Vinegar & Water | Light, recent water spots and general haze. | Inexpensive, readily available, natural, and safe for most surfaces. | May not be strong enough for old, thick mineral deposits. |
| Baking Soda Paste | Mildly stubborn spots that need a gentle scrub. | Provides light abrasion without scratching; very affordable. | Can be messy to apply and rinse off completely. |
| #0000 Steel Wool | Severe, old, and crusted mineral deposits. | Highly effective at removing tough stains that other methods can't. | Requires a lubricant (soapy water) and care to avoid scratching. |
| Professional Squeegee | The final drying step on any window. | Delivers a fast, streak-free finish; removes all moisture. | Takes a little practice to master the technique. |
Ultimately, your toolkit should be flexible. Start with the gentlest method, like a vinegar solution, and only move on to more abrasive options like steel wool if the stains refuse to budge.
Everyday Fixes for Light Water Spots
Before you go hunting for heavy-duty chemicals, take a look in your pantry. For those newer, less stubborn water spots, a simple homemade solution is often all you need. These everyday fixes work because they use simple chemistry to break down the very mineral deposits that are clouding up your beautiful view.
The secret weapon here is plain old distilled white vinegar. Its mild acetic acid is fantastic at dissolving the alkaline minerals, like calcium and magnesium, that sprinklers and tap water leave behind. There's a good reason it's a classic cleaning hack.
The Vinegar and Distilled Water Method
For this trick to work, you need the right mix. A simple 50/50 blend of distilled white vinegar and distilled water is your go-to starting point. And yes, using distilled water really matters—tap water often contains the same minerals you're trying to get rid of, which can put you right back where you started.
Once you’ve mixed it up in a spray bottle, here’s what to do:
- Spray it on liberally. Don't be shy; you want to completely soak the affected areas of the glass. Make sure every spot is saturated.
- Let it sit. Give the solution at least five to ten minutes to work its magic. This "dwell time" is crucial for the acid to break down and loosen the mineral bonds.
- Wipe and dry. Grab a clean microfiber cloth to wipe it all away. For that perfect, streak-free finish, I always follow up with a good squeegee to pull off any leftover moisture.
This approach is surprisingly effective for what we call Stage I spots—the kind that haven't been baking onto the glass for months on end.
The key is patience. If you just spray and immediately wipe, you're not giving the vinegar enough time to do its job. Letting it sit is the most important part of the process.
Using a Baking Soda Paste for Extra Power
What if the vinegar spray just isn't cutting it? Sometimes, a spot is a little more persistent and needs some gentle persuasion. This is the perfect time to bring in a baking soda paste. Baking soda is a mild abrasive that can physically scrub away the deposits without scratching your glass.
Making the paste is a breeze. Just mix a few tablespoons of baking soda with a little water until you get a thick, toothpaste-like consistency.
Dab the paste directly onto the stubborn water spots with a soft cloth or sponge. Work it in with a gentle, circular motion. You should feel the fine grit of the baking soda doing the work. Once you're done, rinse the glass thoroughly with distilled water to get all the residue off, then dry it completely with a microfiber towel or your squeegee. This is my go-to for those slightly tougher marks that laugh at a simple spray-and-wipe.
Tackling Stubborn Hard Water Stains
So, you’ve tried the vinegar solution, and those pesky water spots are just laughing at you. Don't worry, it happens. When you're dealing with layered, caked-on mineral deposits—the kind that sprinklers bake onto the glass season after season—it’s time to bring out the bigger guns.
This is where we move from a simple chemical fix to a more hands-on approach designed to physically break down those stubborn stains without harming your windows.
To make it easier, here’s a quick visual guide to help you decide which method is right for the job.
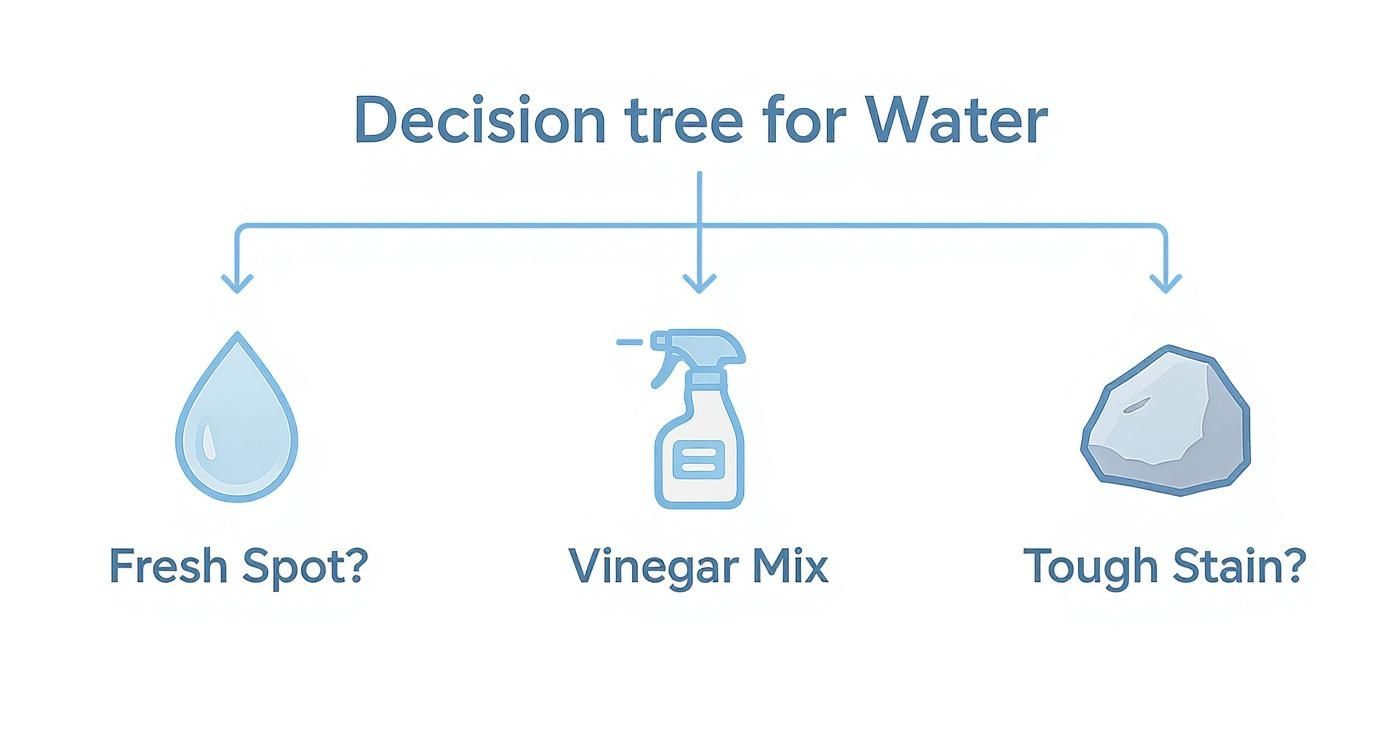
As you can see, the game plan changes. Fresh spots need a quick spray, but for the really tough stuff, you need to get a little more physical.
Using Steel Wool the Right Way
Putting steel wool on glass sounds terrifying, I know. But we're not talking about the coarse stuff you use on pots and pans. For windows, you need #0000 steel wool, which is the absolute finest grade you can get. It’s just abrasive enough to shear off mineral deposits but too fine to scratch the hard surface of the glass itself—but only if you do it right.
The golden rule here is to always use a lubricant. Never, ever take dry steel wool to a window. A simple solution of dish soap and water is perfect. The suds create a slippery cushion, letting the steel wool glide across the glass while the micro-fine fibers grab and lift the mineral buildup.
Get the window nice and soapy, then gently work on the stained areas with the steel wool in small, circular motions. You don't need to apply a lot of force; let the fine abrasives do their job. Once you’re done, give the glass a good rinse with distilled water and dry it with a quality squeegee for that perfectly clear finish.
When to Use a Commercial Water Spot Remover
If the steel wool trick doesn't cut it, or if you'd rather stick with a chemical approach, it's time to look at a dedicated commercial water spot remover. These products are specifically formulated to dissolve the kind of mineral bonds that household cleaners can't touch.
Pro Tip: Look for a cleaner that contains a mild acid (like sulfamic or glycolic acid) or fine polishing compounds. These are the active ingredients that break down or buff away the minerals. Always, always test a new product on a small, hidden corner of the glass first to be safe.
For the absolute worst-case-scenarios, you might even consider a specialized auto hard water spot remover. They are designed for cars, which are constantly battling sprinklers and road spray, so their formulas are often powerful enough to tackle even the most extreme mineral buildup on home windows.
By starting with the gentlest method and working your way up, you can defeat even the toughest water spots. Just remember to only escalate to a stronger approach when the previous one doesn't get the job done.
How to Keep Water Spots from Coming Back
Getting rid of existing water spots is one thing, but the real win is making sure they don’t come back. The secret is to shift from reactive deep cleans to proactive maintenance. A few smart adjustments will stop mineral deposits in their tracks before they ever get a chance to etch your glass.
Trust me, this approach is far less work in the long run. A little prevention keeps your view crystal clear and means you won't have to spend another Saturday scrubbing away at stubborn stains.
https://www.youtube.com/embed/sxCEoTTdEsc
Tame Your Sprinklers
More often than not, the main culprit behind those stubborn water spots is an external water source that's constantly drenching your windows. And usually, it's the lawn sprinklers.
Next time they're running, take a look. Are they spraying your windows along with your lawn? If so, you’ve found the root of your problem. It’s a simple fix—just adjust the sprinkler heads so their spray arc stays on the grass. This tiny change can have a massive impact.
Use a Hydrophobic Glass Sealant
For a long-term solution, one of the best things you can do is treat your windows with a hydrophobic glass sealant. Think of it like waxing your car. These products create an invisible, super-slick barrier on the glass that water just can't stick to.
Instead of clinging and drying into a spot, water beads up and rolls right off. As it goes, it takes dirt and minerals with it. This is sometimes called the "lotus effect," and it's incredibly effective. It not only stops new spots from forming but also makes your next cleaning job a breeze. You can find a good sealant at most home improvement or auto parts stores.
A quality glass sealant applied every few months is a game-changer. Seriously. It's a small time investment that pays off big by keeping your windows looking pristine, even after a rainstorm.
Stick to a Simple Cleaning Routine
Prevention is all about consistency. A quick wipe-down every couple of weeks is so much more effective than a back-breaking deep clean twice a year. Regular, light-touch maintenance stops minerals from building up into those tough Stage II stains that are a real nightmare to remove.
Here’s a simple routine that works wonders:
- Dusting every two weeks: Grab a dry microfiber cloth and give the glass a quick wipe to get rid of any loose dust and grime.
- A quick monthly wash: Lightly spritz your windows with that vinegar and distilled water solution, then dry them off with a squeegee.
This barely takes any time at all, but it keeps mineral deposits from ever getting a foothold. The best way to know how to get water spots off windows is to never let them form in the first place.
When It's Time to Call in the Pros
Look, while the DIY methods we’ve gone over are fantastic for most everyday water spots, there are absolutely times when trying to muscle through it yourself is the wrong move. Knowing when to put down the spray bottle and pick up the phone is just as critical as knowing what vinegar solution to mix. Pushing too hard with the wrong approach can sometimes cause more harm than good.
It's all about recognizing your limits to protect yourself and your windows. This is about making the smart call to get the job done right—and safely—especially when you're up against more than just a few stubborn spots.
The Stains Are Just Too Tough
The biggest red flag is when you suspect the spots have caused permanent damage. After you've tried cleaning a particularly stubborn area, run your fingernail across it. Do you feel any roughness? A slight indentation or a gritty texture? If so, the glass has probably been etched.
This is what we in the business call Stage II corrosion. It happens when minerals from the water have chemically bonded with the glass, literally eating into the surface. No amount of scrubbing or acidic cleaner is going to reverse that. At this point, the glass needs professional polishing with specialized compounds and power tools to grind down and restore the smooth surface. Trust me, trying to fix this yourself without the right gear will only lead to frustration and a window full of new scratches.
Safety First, Always
This one should be a no-brainer. If the job requires you to climb a tall, shaky ladder to get to those second-story windows, it’s time to stop. Professional window cleaners have the training, safety harnesses, and specialized equipment like water-fed poles to tackle high or awkward windows safely and effectively. Your personal safety is never worth the risk.
Professionals bring a lot more to the table than just a squeegee. Many of us use advanced purified water systems that leave zero mineral deposits behind. This gives you a perfectly spotless, streak-free finish that’s nearly impossible to get with regular tap water.
And let's be honest, sometimes you just don't have the time or energy for a massive window cleaning project. If you're looking at a whole house full of baked-on hard water stains, bringing in a service like Sparkle Tech Window Washing can save you an entire weekend of back-breaking work and deliver a far better result.
If you're still on the fence, our guide on knowing when to call a professional window washing company can help you make the final call. An experienced pro can quickly assess how severe your water spots are and use the right solution to get it done right the first time.
Answering Your Questions About Water Spot Removal
Even when you feel prepared, a few questions always pop up once you start tackling those stubborn water spots. Getting the right answers can be the difference between a frustrating afternoon and a perfectly clear, streak-free window.
Can I Just Use Tap Water for My Cleaning Solution?
This is probably the most common question I hear, and the answer is a firm "no." It's always best to use distilled water. Why? Because the minerals in your tap water are the very same culprits that caused the water spots in the first place. Using it to clean just risks leaving a brand-new layer of mineral film behind, essentially undoing all your hard work.
How Do I Clean Tinted or Coated Windows?
This is another big one, and it's critical to get it right. People often ask if things like vinegar or steel wool are safe for tinted windows. Absolutely not. You should never use acidic or abrasive cleaners on tinted films or any glass that has a special coating.
These surfaces are surprisingly delicate. Abrasives will scratch them, and acids can chemically damage or even start to peel the film away. Your safest bet here is to stick with a gentle, pH-neutral soap mixed with distilled water and apply it with a fresh microfiber cloth. When in doubt, always check the window manufacturer's care instructions first.
We dive into more of these essential topics in our guide to common questions about window cleaning.
Is It a Stain or Is the Glass Damaged?
Sometimes, no matter how much you scrub, a spot just won't budge. This is when you need to figure out if you're dealing with a surface deposit or permanent damage, known as etching.
Here’s a simple test I use on the job: run your fingernail over a cleaned, dry spot. If you can feel a little roughness or a slight divot in the glass, the minerals have likely etched into the surface. At that point, no amount of cleaning will fix it—the glass itself needs to be professionally polished to become smooth again.
Knowing this difference is crucial. It saves you from wasting hours trying to clean a problem that a simple cleaner can't solve, letting you know when it's time to call in a pro for glass restoration.
When the spots are too tough or your windows are just too high to clean safely, the team at Sparkle Tech Window Washing is here to help. Contact us today for a free estimate!