

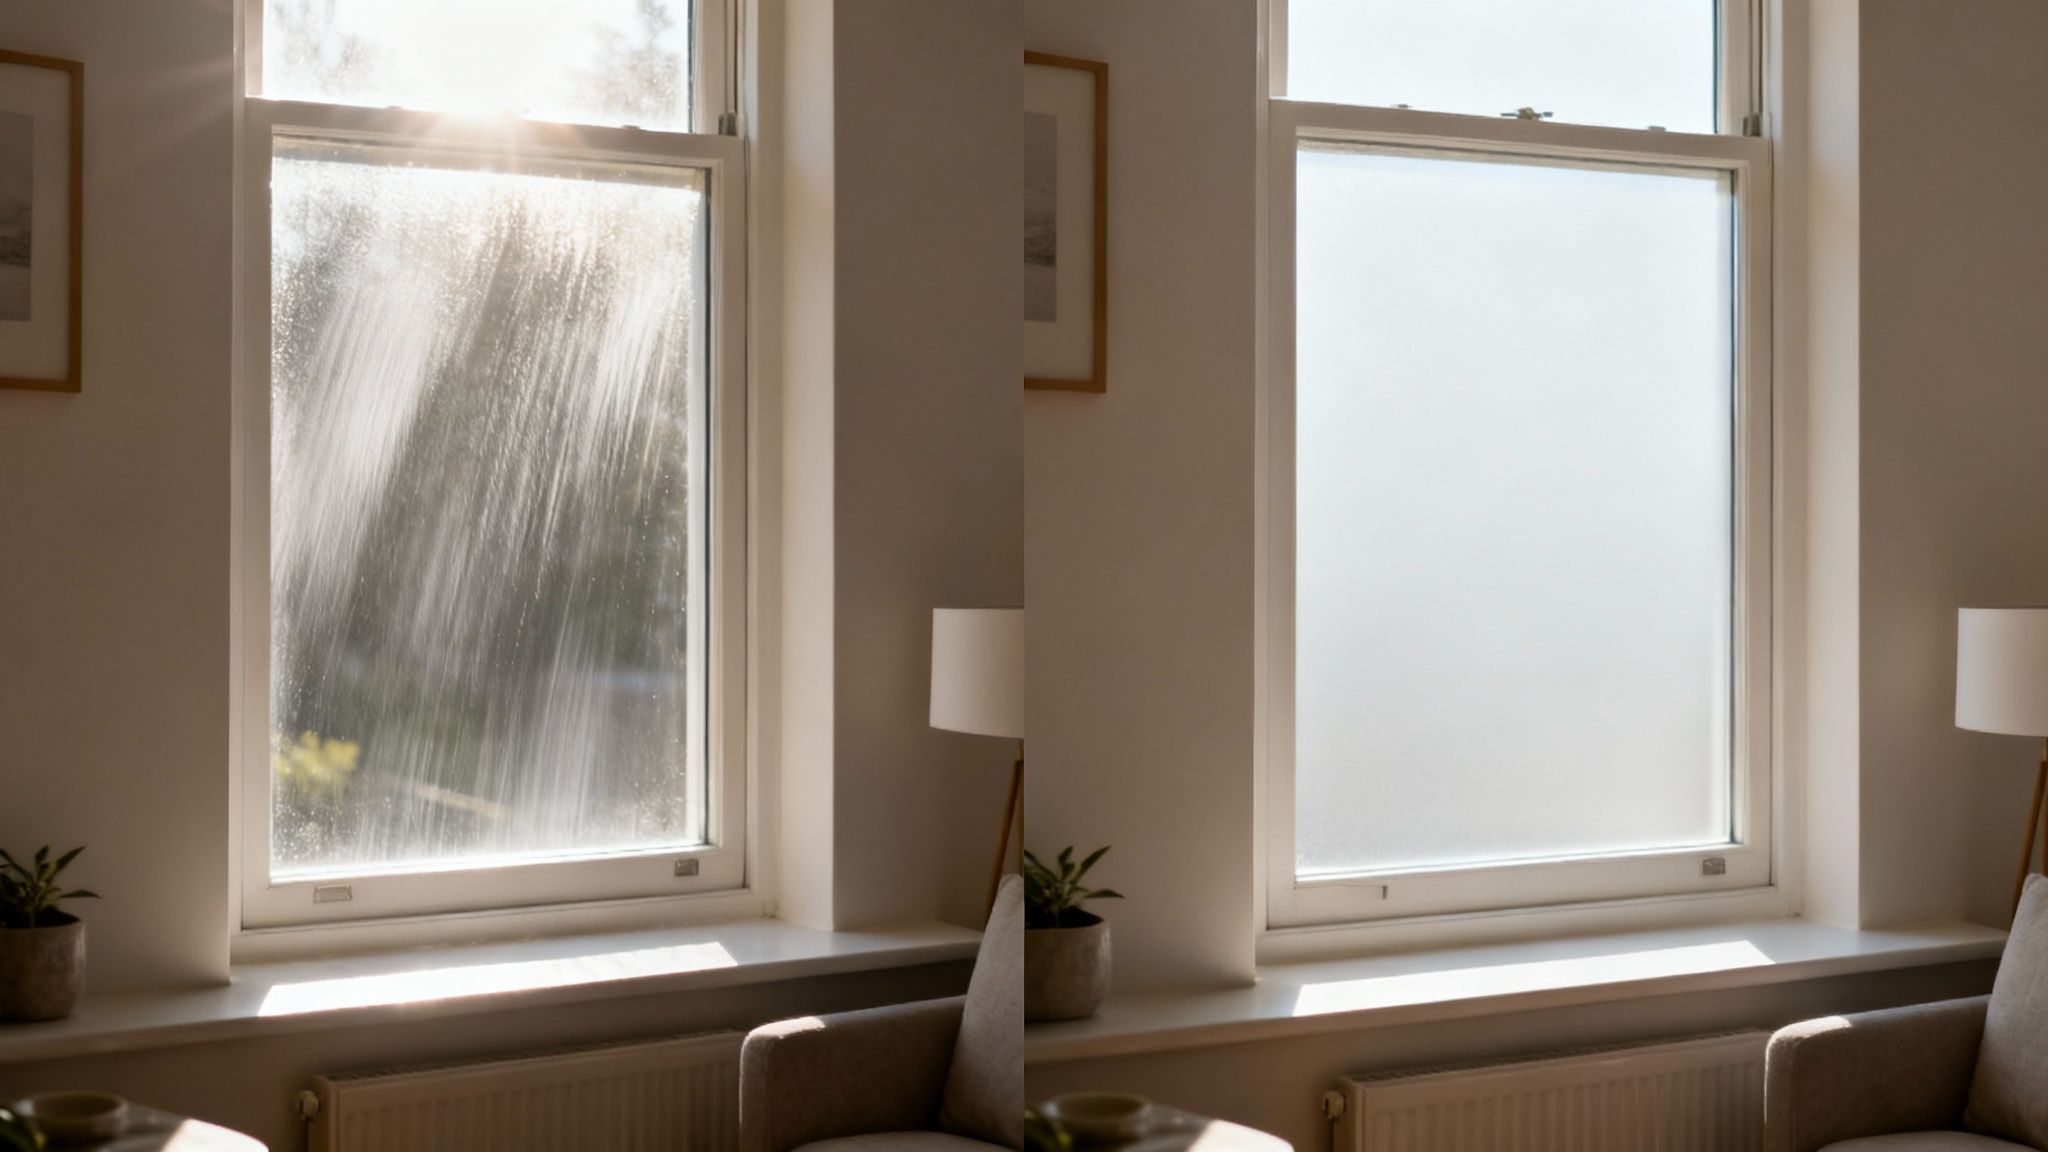
That flawless, streak-free shine on your inside windows always seems like some guarded professional secret, doesn't it? But honestly, getting those crystal-clear results is much more achievable than you’d think. It all comes down to having the right gear, a surprisingly simple homemade cleaning solution, and getting the hang of a specific squeegee technique.
It's time to say goodbye to endless wiping and those frustrating streaks that only show up when the sun hits just right.
The Secret to a Truly Streak-Free Finish
The real difference between a job well done and a frustrating afternoon is all in the details. Too many of us just grab a roll of paper towels and a bottle of that blue stuff, only to create a hazy, lint-covered mess. Learning the right way to clean your windows from the inside can turn this dreaded task into a quick and satisfying part of your home routine.
And it’s worth it. A truly clean window does more than just look nice—it completely changes the feel of a room. Grimy glass dulls the natural sunlight, but with a clear pane, your living spaces instantly feel brighter, bigger, and far more welcoming.
Beyond the Basics of Wiping
This guide is about moving past the generic advice and getting into the specific methods that deliver that professional-grade clarity. We're going to focus on the things that truly make the biggest impact.
- The Right Tools: I’ll explain why a quality squeegee is your best friend and how microfiber cloths are essential for the finishing touches.
- A Simple Solution: You'll get my go-to DIY cleaner recipe using stuff you probably already have, which consistently beats most store-bought sprays.
- Proven Technique: Mastering the squeegee is the core skill here. Once you get it, you’ll never see a streak again.
The goal isn't just to get your windows clean. It's to give you the confidence to do it efficiently, anytime. A streak-free window is one of those small details that makes a massive difference in your home's overall atmosphere.
Of course, properly drying the glass is just as critical as the washing process. I find this is where most people run into trouble. For a deeper dive into this final, crucial step, check out our article covering 3 proven ways to dry windows without leaving streaks.
With these skills, you’ll be able to transform your windows from grimy to gleaming, letting all that beautiful, natural light flood your home.
Gathering Your Window Cleaning Tools and Solutions
Let’s be honest, the difference between a frustrating, streaky mess and that perfect, invisible shine often comes down to your gear. Before you even touch a window, getting the right kit together is what turns this chore from a pain into something surprisingly simple. It’s not about spending a ton of money on fancy gadgets; it's about having a few key items that do the heavy lifting for you.
When you have the right setup from the start, the whole process just clicks. You’ll work faster, get much better results, and dodge all those common mistakes that can leave your glass looking even worse than when you started.
Your Essential Toolkit for Crystal-Clear Glass
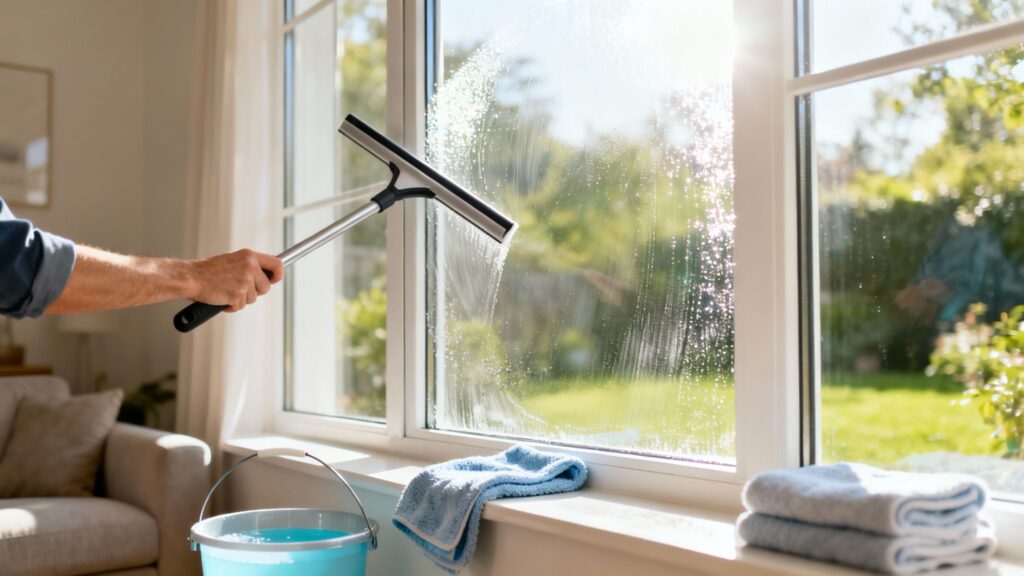
Your number one weapon in the war against streaks is a high-quality rubber-bladed squeegee. You really want to find one with a sharp, pliable rubber edge. That perfect, flexible seal is what whisks the water away flawlessly. A cheap or worn-out blade is your enemy—it’ll skip and chatter across the glass, leaving behind the very lines you’re trying to get rid of.
Next up, you'll need two distinct types of microfiber cloths. Think of them as a team.
- Your Scrubber: This is the cloth you'll use to apply the cleaning solution and scrub away the grime. One with a bit of a shaggier texture works great for this.
- Your Detailer: This one must stay completely dry. Its only jobs are to wipe the squeegee blade clean after each and every pass and to catch any little water lines around the edges of the pane for a perfect finish.
Finally, let's round out your supporting cast: a simple bucket for your cleaning solution and a few old, absorbent towels. Laying these towels along the windowsill and on the floor beneath is a non-negotiable step. It’s your insurance policy against drips, protecting your paint, wood, and flooring.
For a complete rundown of our tried-and-true favorites, check out our detailed guide on the best window cleaning tools.
Mixing Your Go-To Cleaning Solution
You can forget about those bright blue sprays you see at the store. In my experience, the most effective window cleaning solution is one you can whip up yourself with stuff you probably already have. It cuts right through grease and grime without leaving behind the filmy residue that causes most streaks.
My go-to recipe couldn't be simpler: just mix equal parts distilled water and plain white vinegar. The acetic acid in the vinegar is a powerhouse for breaking down film and mineral deposits. Using distilled water is the secret ingredient—it has no minerals, so it can't leave spots behind.
If you’re tackling extra-grimy windows, like in a kitchen where grease builds up, add a single drop of dish soap to your bucket. I can't stress this enough—just one drop! Any more than that and you'll create suds that are a nightmare to remove completely, guaranteeing a streaky finish.
A good cleaning solution is clearly a hot commodity. The global glass cleaner market was valued at around USD 3.8 billion in 2024 and is projected to skyrocket to USD 7.4 billion by 2035. That shows just how many people are chasing that perfect shine. You can find more glass cleaner market trends on Future Market Insights if you're curious.
DIY vs. Store-Bought Window Cleaner Comparison
While my go-to is the homemade vinegar solution, it's worth knowing how it stacks up against what you can buy off the shelf.
| Feature | DIY Vinegar Solution | Store-Bought Cleaner |
|---|---|---|
| Effectiveness | Excellent on most grime; great for hard water spots. | Very effective, often formulated for specific issues like grease. |
| Cost | Extremely low; pennies per batch. | Can be pricey, especially for specialty or "eco-friendly" brands. |
| Ingredients | Simple and non-toxic: water and vinegar. | Often contains ammonia, alcohol, and other chemicals with strong odors. |
| Residue | Leaves virtually no residue when mixed correctly. | Some formulas can leave a film that attracts dust and causes streaks. |
Ultimately, the choice is yours. The DIY solution is cheap, effective, and free of harsh chemicals, making it my top recommendation for routine cleaning. But for a really tough job, a quality commercial cleaner can sometimes give you an edge.
Mastering the Pro Squeegee Method
Alright, you've got your tools and your cleaning solution is mixed. Now for the fun part—this is where you go from just wiping glass to getting that truly invisible, professional-grade shine. The squeegee is what makes all the difference. Get this right, and you'll wonder why you ever did it any other way.
First things first, a little prep saves a lot of cleanup later. Toss a couple of old towels on the windowsill and the floor beneath where you're working. This simple step catches any drips and lets you focus on the glass without worrying about your floors or paintwork. I also like to give the window frames and tracks a quick wipe with a damp cloth to get rid of any loose dust before I start.
Now, let's get the glass wet. Whether you're using a spray bottle or a sponge, you want to apply the solution generously. The goal is a surface wet enough for the squeegee to glide smoothly, but not so soaked that you have rivers running down the pane. A consistently damp surface is your best friend here.
Perfecting Your Squeegee Technique
The real secret sauce is in the technique. It might feel a bit clumsy at first, but trust me, it becomes muscle memory pretty quickly. For most windows, the most reliable method is a series of overlapping vertical pulls.
Here’s how to approach it:
- Create a "Dry Edge": Take a microfiber cloth and wipe a one-inch dry strip across the very top of the window pane. This gives your squeegee a dry place to start and stops it from dragging down dirty water from the top frame.
- Get the Angle and Pressure Right: Hold your squeegee at about a 30-degree angle to the glass. You don't need to press hard at all; let the weight of the tool do the work. A light, consistent touch is all it takes.
- Make Your First Pull: Set the blade in that dry strip you just made, making sure it’s sitting flat against the glass. In one smooth, steady motion, pull it straight down to the bottom.
- Wipe the Blade. Every. Single. Time. This is the step people always forget, and it's a dealbreaker. After each pull, wipe the rubber blade clean with a dry detailing cloth. If you don't, you're just dragging a line of dirt across the window you just cleaned.
The most common mistake I see is people not wiping the blade between strokes. Every pass collects dirt and solution. Dragging that onto your next pass is a guaranteed recipe for streaks.
Achieving a Flawless Overlap
After that first clean strip, you're ready for the next one. The trick is to overlap your last pull by about an inch. This little bit of overlap is what prevents those annoying, skinny lines of water from being left behind.
Just repeat that rhythm: pull down, wipe the blade, overlap by an inch. Keep going until you've covered the whole pane. You'll find it becomes almost meditative once you get the hang of it. Don't rush—keep your movements deliberate and smooth.
It's no surprise that more people are looking to master skills like this. The focus on home maintenance has grown, and after the pandemic, the professional window cleaning industry saw some major shifts. In fact, global industry projections pointed to roughly 13% growth between 2020 and 2028, driven by homeowners wanting to keep their spaces looking great. You can discover more insights about window cleaning industry trends if you're curious.
This simple infographic really nails down the core tools for this method.
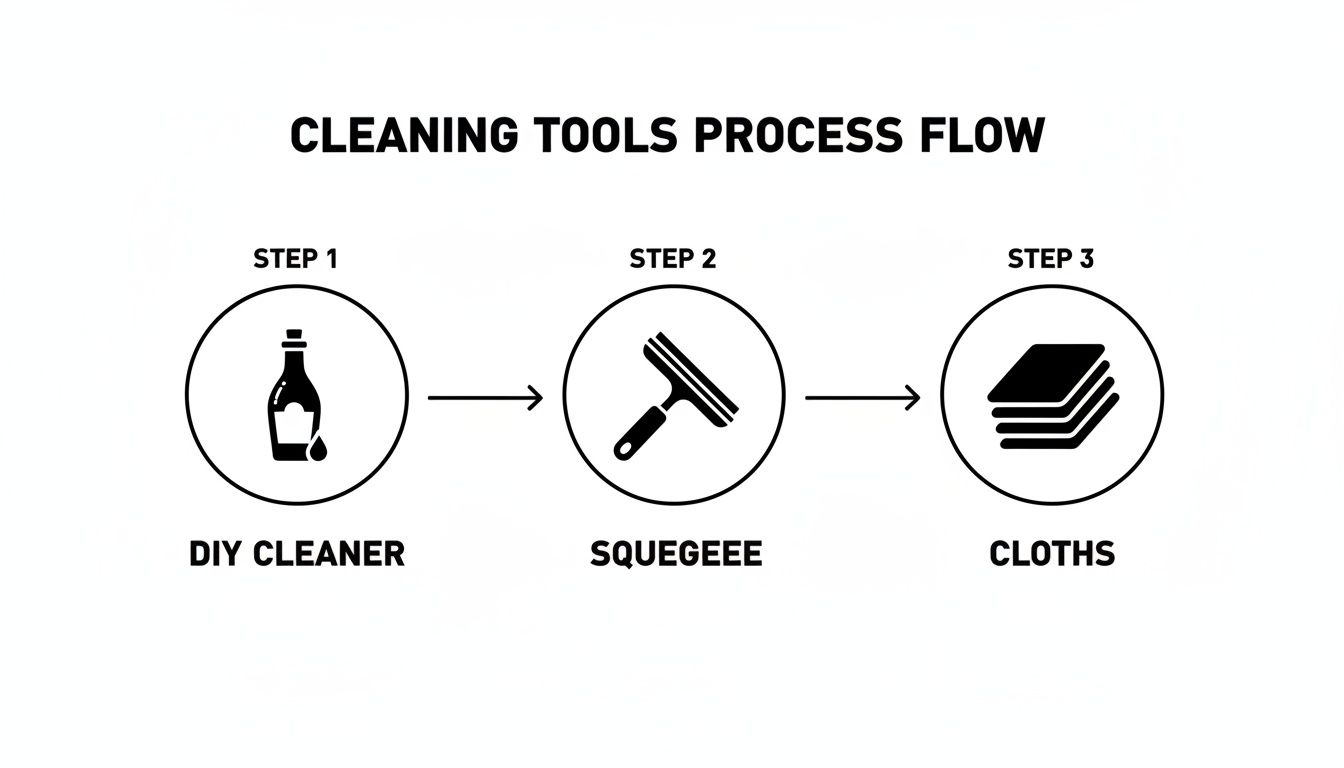
As it shows, the whole system is built on that simple trio: a good solution, a quality squeegee, and the right cloths.
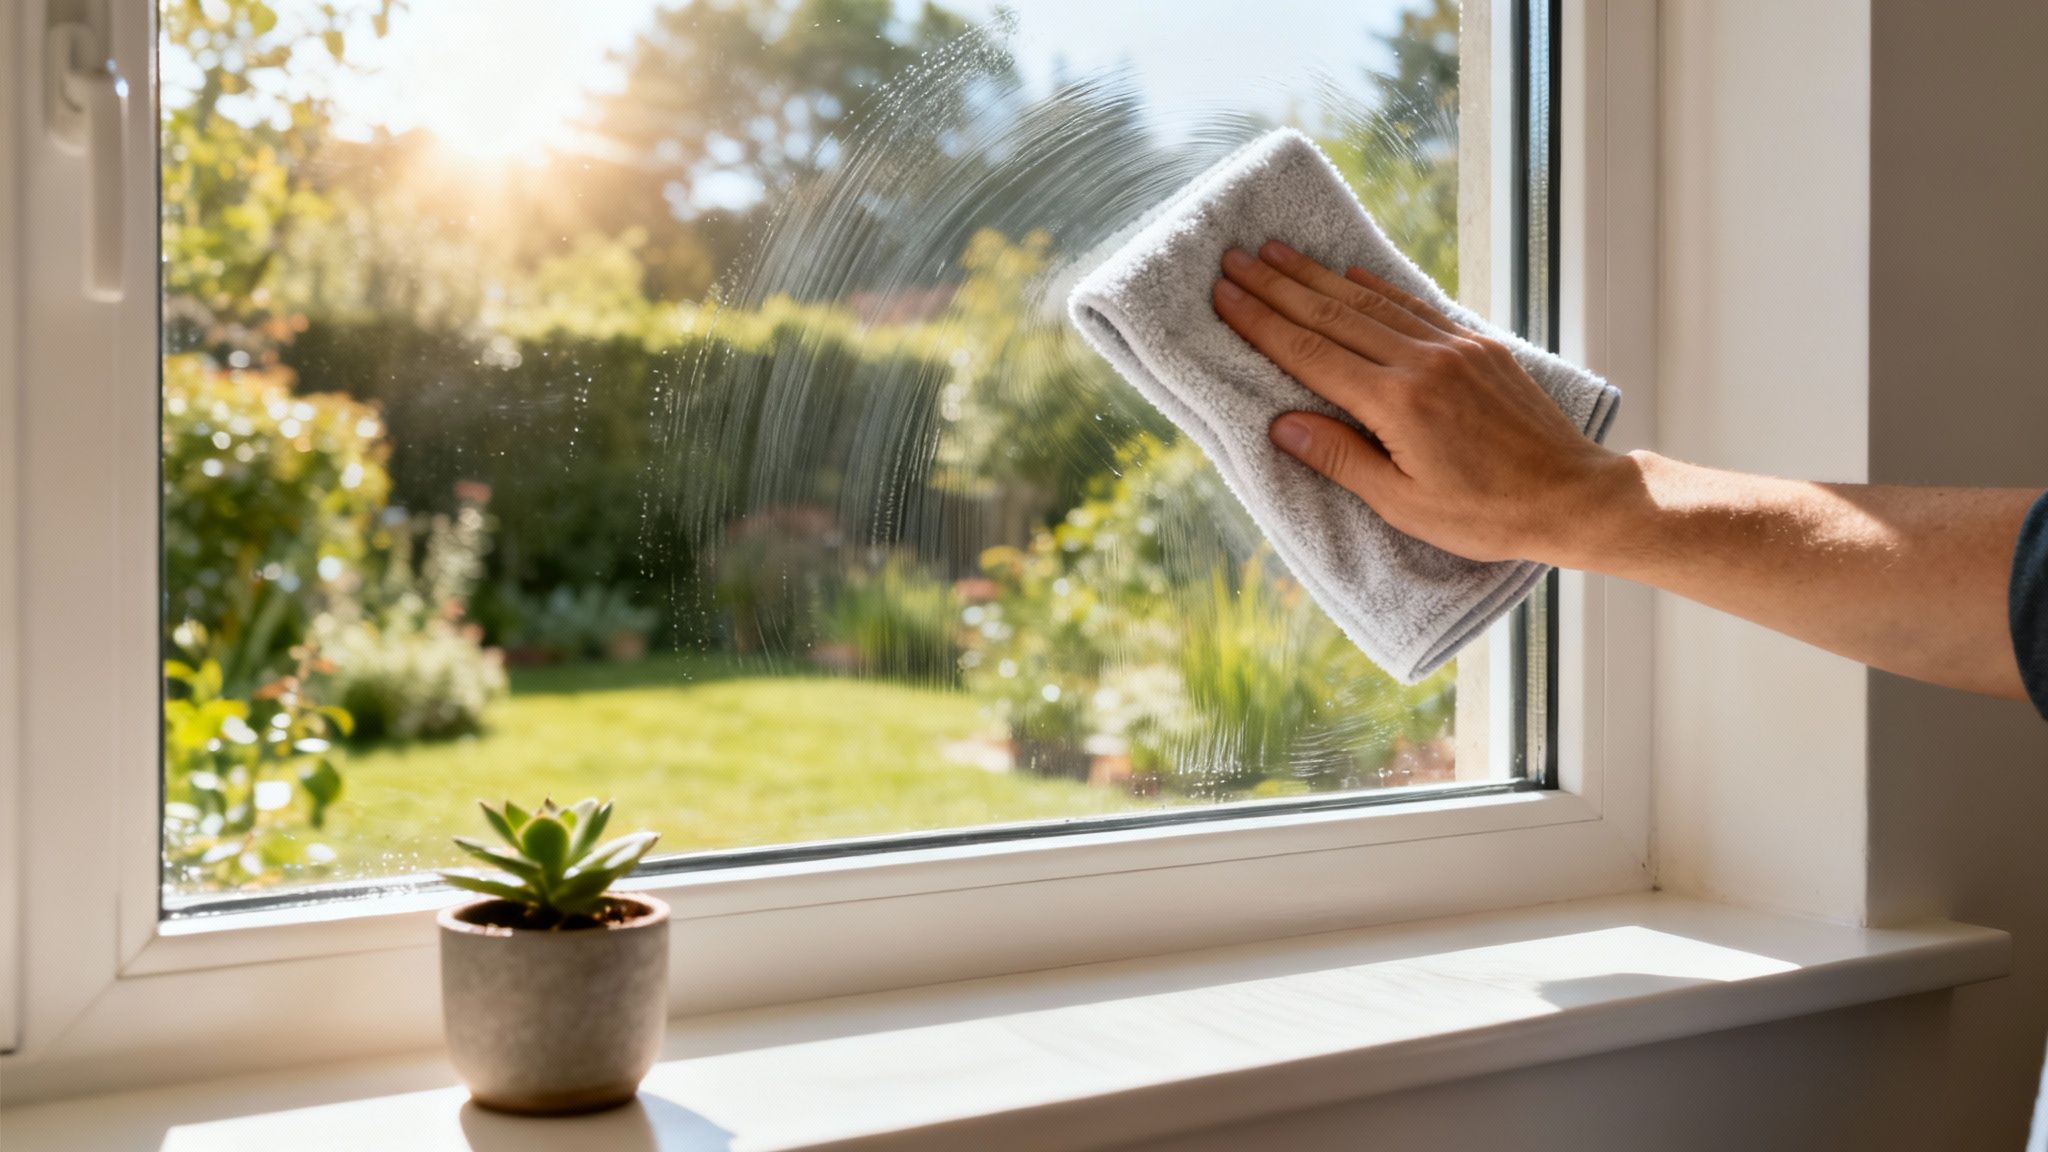
For the final touch, grab your dry microfiber detailing cloth. Carefully wipe away any little beads of moisture left along the edges and in the corners of the pane. Give the windowsill a final wipe, too. This last step is what takes your work from "clean" to "spotless."
Dealing With Common Window Cleaning Headaches
Even with the best technique, things can go sideways. Streaks, stubborn spots, and a hazy finish are the usual suspects, but don't worry—they're almost always fixable. You just have to know what you’re looking at to apply the right fix.
The number one complaint I hear is about streaks showing up after the glass dries. It’s that frustrating moment when the sun hits the window just right, and all you see are fine lines marring your hard work. Let's get to the bottom of what's causing them.
What's Causing Those Streaks?
Streaks don't just happen randomly; they're a sign that something in your process needs a small tweak. Before you throw in the towel, run through this quick mental checklist. It's often a surprisingly simple adjustment that makes all the difference.
Here are the top three culprits I see all the time:
- You're Racing the Sun: If the sun is baking the glass, your cleaning solution is evaporating in seconds. This leaves behind a film of soap and minerals before your squeegee even gets a chance. The solution is easy: work on an overcast day or wait until the windows are in the shade.
- Your Squeegee is Dirty: You know how we talked about wiping the blade after every single pass? This is why. If you skip it, you're just dragging dirty water across the glass, which creates that fine, greasy-looking streak. Keep that detailing cloth clean and dry, and be diligent about wiping the blade.
- You Went Overboard With the Soap: Using more than a single drop of dish soap is a guaranteed recipe for a streaky mess. The extra suds leave behind a film that's a real pain to remove. If you think this is the problem, just rinse the glass with plain distilled water and start over with a properly mixed solution.
Getting Rid of Stubborn Mineral Deposits
Ever notice those chalky, white spots that seem welded to the glass? Those are hard water spots—mineral deposits left behind after water evaporates. You’ll see them a lot on bathroom windows or any glass near a sink.
Your standard cleaning mix might not cut it here because you're dealing with mineral-based stains. The trick is to fight back with a mild acid. A simple solution of two parts white vinegar to one part water usually does the trick.
Just apply the vinegar mix, let it sit on the spots for a few minutes to give it time to work, then give it a gentle scrub with a non-abrasive cloth before cleaning and squeegeeing like usual.
A Word on Special Window Types
Not all glass is created equal. If you're working with tinted or specialty-coated windows, you have to be careful. The wrong cleaner can cause permanent damage. Ammonia-based products, for instance, are notorious for reacting with window films, causing them to bubble and peel.
For these more sensitive surfaces, always stick to a simple vinegar and distilled water solution. Stay far away from harsh chemicals, abrasive pads, or razor blades. If you're ever unsure, it’s always best to check the manufacturer's cleaning guidelines. You’ll protect your investment and keep your windows looking great for years.
Smart Habits for Long-Lasting Clarity
Okay, your windows are finally sparkling. Now what? The real goal is to keep them that way without having to do a massive deep clean every month. It’s all about shifting from a big project to smart, simple maintenance.
A few easy habits can make a huge difference, extending that crystal-clear view and making your next cleaning session a breeze. This isn't about adding more chores, but about working smarter.
As a general rule, a good interior window cleaning four times a year—once per season—is perfect for most homes. This stops that grimy, hazy film from building up over time. Of course, if you have kids or pets, you know all about the smudges and nose prints. Tackling those with a quick spot-clean as they appear will keep everything looking fresh in between the bigger cleans.
Work With the Weather, Not Against It
Here’s a pro tip that sounds backward but trust me on this: a bright, sunny day is one of the worst times to wash your windows. The heat from direct sunlight bakes the glass, causing your cleaning solution to evaporate in seconds.
That rapid drying is what leaves behind those frustrating streaks—a thin film of soap and minerals that your squeegee never even had a chance to remove.
For a flawless, streak-free finish, always clean your windows on a cool, overcast day or when they are completely in the shade. This gives you plenty of working time to scrub, squeegee, and get it right.
And don't forget what's around the glass! Taking the time for proper care for your window coverings makes a huge difference. Dusty blinds next to a clean window will just make the glass dirty again.
Safely Handling Hard-to-Reach Windows
What about those high windows in a vaulted entryway or over the stairs? They're a classic headache. Before you even think about climbing a wobbly ladder with a bucket of water, remember that safety comes first.
This is where the right gear is non-negotiable. A high-quality telescoping extension pole is one of the best investments you can make for home maintenance. You can attach both your scrubber and your squeegee to it, letting you clean second-story windows while your feet are planted safely on the ground.
It takes a little practice to get the angle and pressure just right with an extension pole, but it’s a skill you’ll be glad you learned. It completely eliminates the risk that comes with balancing on a ladder.
If you have windows that are just too awkward to reach or you simply don’t feel comfortable tackling them, that's the time to call in a pro. There's no shame in knowing when a job is better left to the experts.
When to Leave It to the Professionals
There's a real sense of accomplishment in standing back to admire your own streak-free work. But let's be honest—some window cleaning jobs are best left to the pros. Knowing when to make that call isn't giving up; it's just being smart about your time, safety, and getting the best possible results.
The most obvious red flag? Height. If you find yourself staring up at second-story windows, massive panes in a vaulted great room, or skylights that seem miles away, it’s time to put the ladder away. Your safety is paramount, and no clean window is worth a dangerous fall.
Situations That Warrant a Professional
Beyond just high-up windows, there are other times when a professional's touch is simply necessary. Think about the kind of grime you're dealing with. If it's more than just a season's worth of dust and rain spots, you might be in over your head.
Here are a few scenarios where calling in the experts makes sense:
- Post-Construction Mess: Just finished a renovation? Your windows are likely covered in a fine film of drywall dust, paint specks, or even adhesive residue. Standard DIY solutions just can’t cut through that kind of buildup without scratching the glass.
- Serious Mineral Deposits: If your sprinklers have been hitting the windows for years, you’ve probably got stubborn, chalky hard-water stains. These require special acidic cleaners and techniques to remove without damaging the glass.
- Years of Neglect: Sometimes life gets in the way, and windows get ignored. A thick, caked-on layer of grime requires more muscle and specialized equipment than most homeowners have on hand.
It really boils down to this: Can you get the job done safely and effectively with the tools and products you have? If there's any hesitation in your answer, it's probably time to call a pro.
There's a reason the professional window cleaning industry is so massive. The global market pulled in around USD 93,156.6 million in 2024, and that number is only expected to climb. You can see more details about the professional window cleaning market size on Grand View Research.
A company like Sparkle Tech Window Washing isn't just bringing a squeegee and a bucket; they have the industrial-grade equipment, the right solutions for tough jobs, and the expertise to do it all quickly and perfectly. We explore this topic in more detail in our guide on knowing when to call a professional window washing company. They have the tools and training to handle the jobs you can't—or just don't want to.
When a window cleaning project feels too big, too high, or just too difficult, don't hesitate. Contact Sparkle Tech Window Washing for a free, no-obligation quote and let our insured professionals deliver a perfect, streak-free shine every time. https://sparkletechwindowwashing.com