


If you want to get your interior windows perfectly clean, the secret is surprisingly simple: start by dry dusting the glass and frame, then spray it down with a basic solution of distilled water and white vinegar. Finish the job by wiping it clean with a professional-grade squeegee. That's it. This method helps you sidestep the usual frustrations, like the streaks and lint that paper towels almost always leave behind.
Your Guide to Flawless Interior Windows
Getting that invisible, streak-free shine on your windows can feel like an impossible task, but trust me, it's a skill anyone can learn. This guide is all about what actually works. Forget the fancy gadgets and overpriced sprays—we’re going back to basics with proven techniques that deliver professional results, every single time.
My goal here is to turn a frustrating chore into a genuinely satisfying project. I'm sharing insights I've picked up from years of my own trial and error, so you can skip common headaches like leftover haze and stubborn smudges. The end game? A window so clean, you forget it’s even there.
The Value of a Clear View
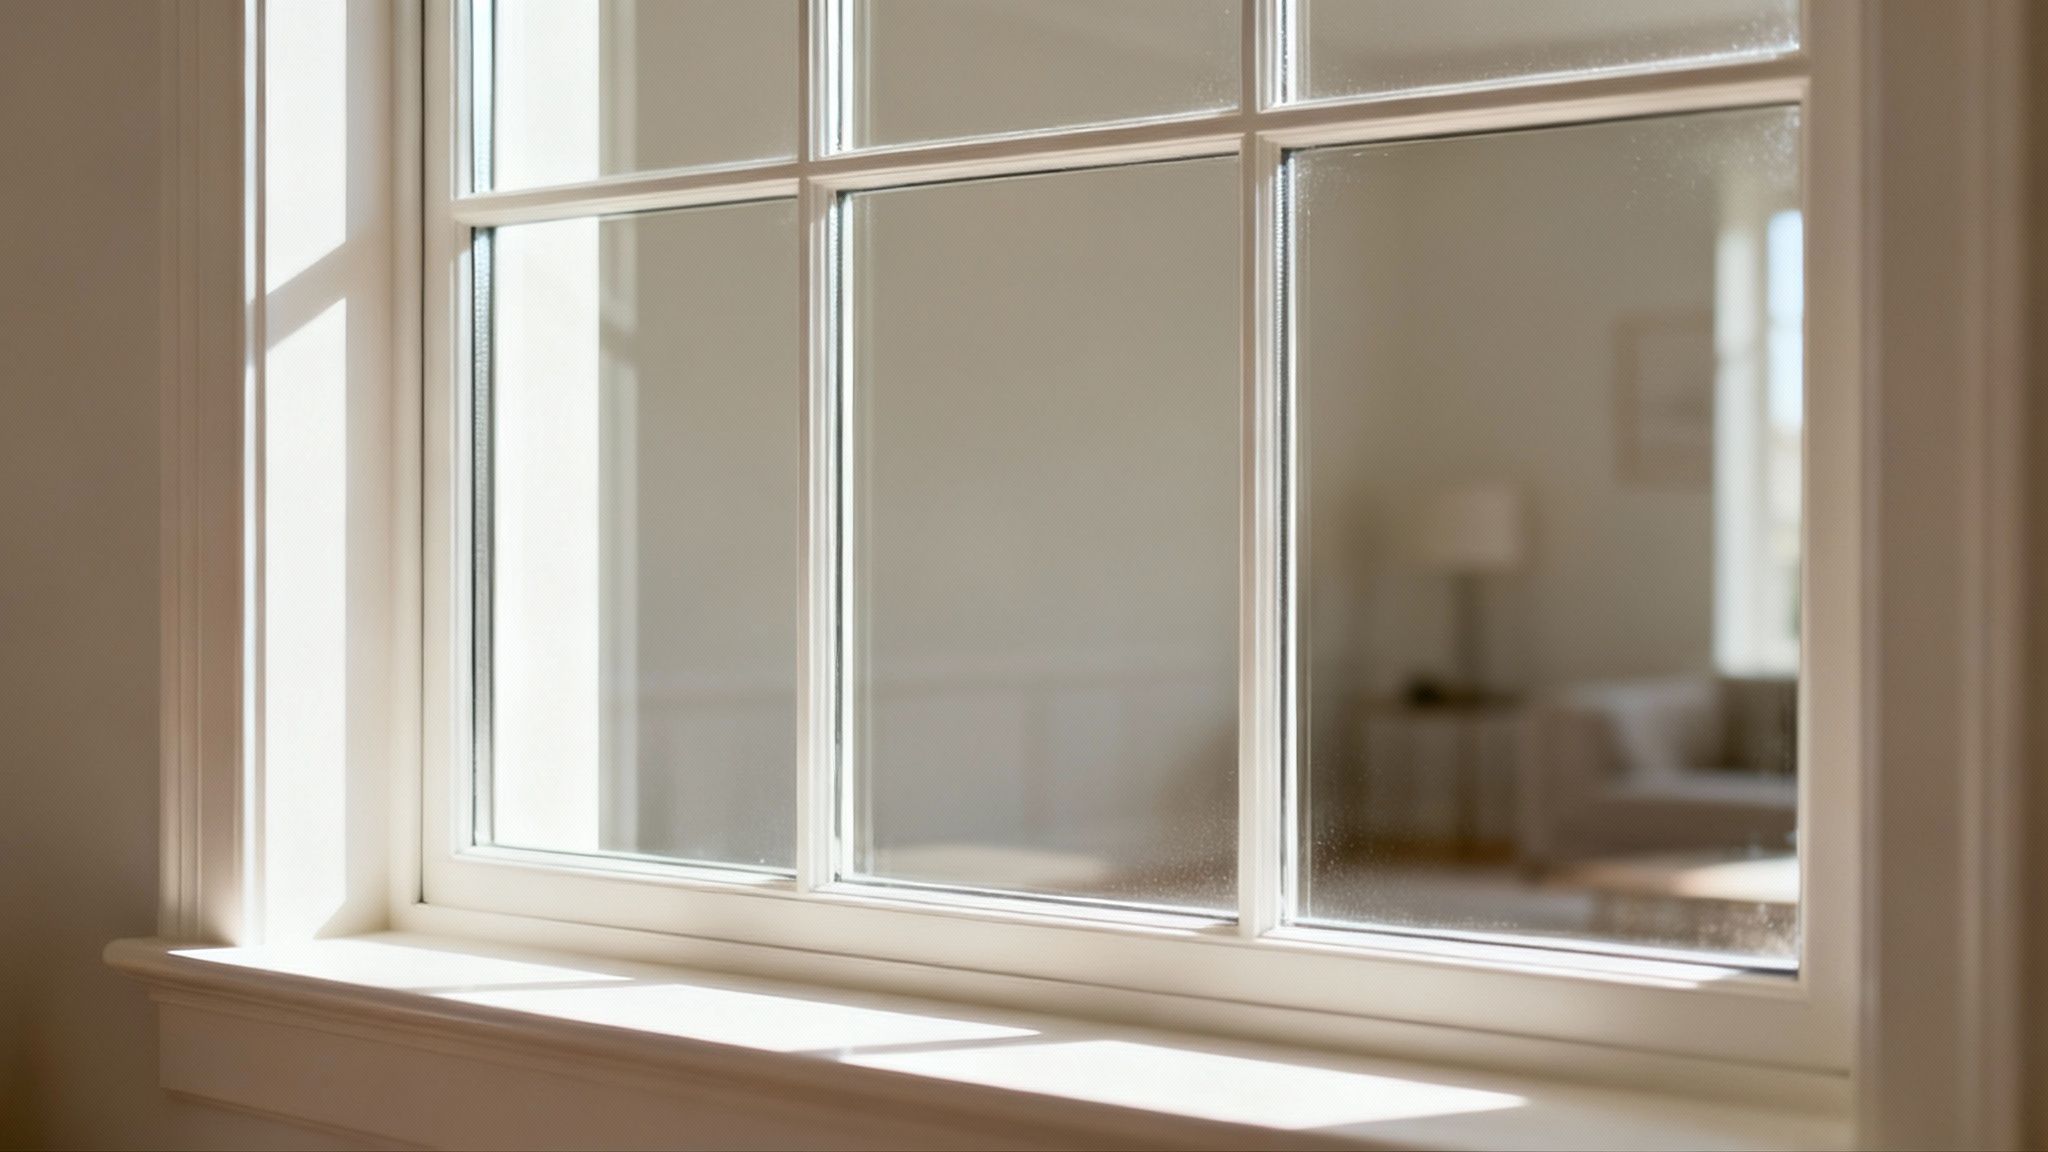
Clean windows do more than just let you see outside; they completely change the feel of a room. Natural light is a huge mood booster, and crystal-clear glass lets every bit of it stream in, making your space feel bigger, brighter, and more inviting. This isn’t just about looks—it’s about creating a better environment to live in.
Think of dirty windows like a smudged filter on a camera lens. Everything you see through them is just a little duller. Wiping away that film of dust and grime instantly restores the color and vibrancy of the world outside. It's a small effort with a surprisingly big impact on your home's atmosphere.
Why Professional Techniques Matter
Sure, anyone can grab a spray bottle and a cloth, but getting a truly flawless finish takes the right approach. Professionals don't rely on expensive products; they rely on technique. By adopting their methods, you can work more efficiently and avoid the common mistakes that lead to streaks and having to start all over again.
We're going to focus on a few key principles:
- Start Dry: This is non-negotiable. You have to remove loose dust and cobwebs before any liquid touches the glass.
- Tool Selection: A simple, high-quality squeegee will outperform every gadget on the market. It’s the single most important tool you'll use.
- Solution Simplicity: You don't need a shelf full of chemicals. A basic homemade cleaner is often far more effective than store-bought options.
The demand for that perfect clean has turned window washing into a huge business. The global cleaning services market was valued at $55.7 billion in 2020 and is on track to nearly double by 2030, all because people value a truly clean environment. Your windows are a massive part of that perception. You can dig deeper into the window cleaning industry's growth to see just how big it's become.
Pro Tip: The secret to a perfect finish isn't in the spray bottle; it's in your technique. Mastering the squeegee and prepping the surface correctly are the two most important skills you can learn for achieving that "invisible glass" look.
For those who want a quick overview before diving in, this checklist breaks down the essentials.
Quick-Start Window Cleaning Checklist
This table summarizes the core tools and actions for each phase of the cleaning process, helping you stay organized and efficient.
| Phase | Required Tools | Key Action |
|---|---|---|
| Preparation | Drop cloth, towels, microfiber cloth, bucket | Lay down protection and dry-dust the entire window area first. |
| Cleaning | Spray bottle, squeegee, cleaning solution | Apply solution and use the squeegee with overlapping strokes. |
| Detailing | Clean, dry microfiber cloths | Wipe away any drips and polish the frame and sill for a perfect finish. |
With this simple roadmap, you're ready to tackle any window with confidence.
Now, let's start by gathering the simple tools you’ll need to get the job done right.
Getting Your Window Cleaning Gear Together
I’ve learned over the years that the difference between a frustrating, streaky mess and a crystal-clear finish really comes down to having the right tools. You don't need to buy out the hardware store, but investing in a few key items will completely change the game. It turns a dreaded chore into a satisfying task.
Think of this as building a pro-level kit that will give you amazing results every single time. Let's walk through what you actually need and why each piece is so important.
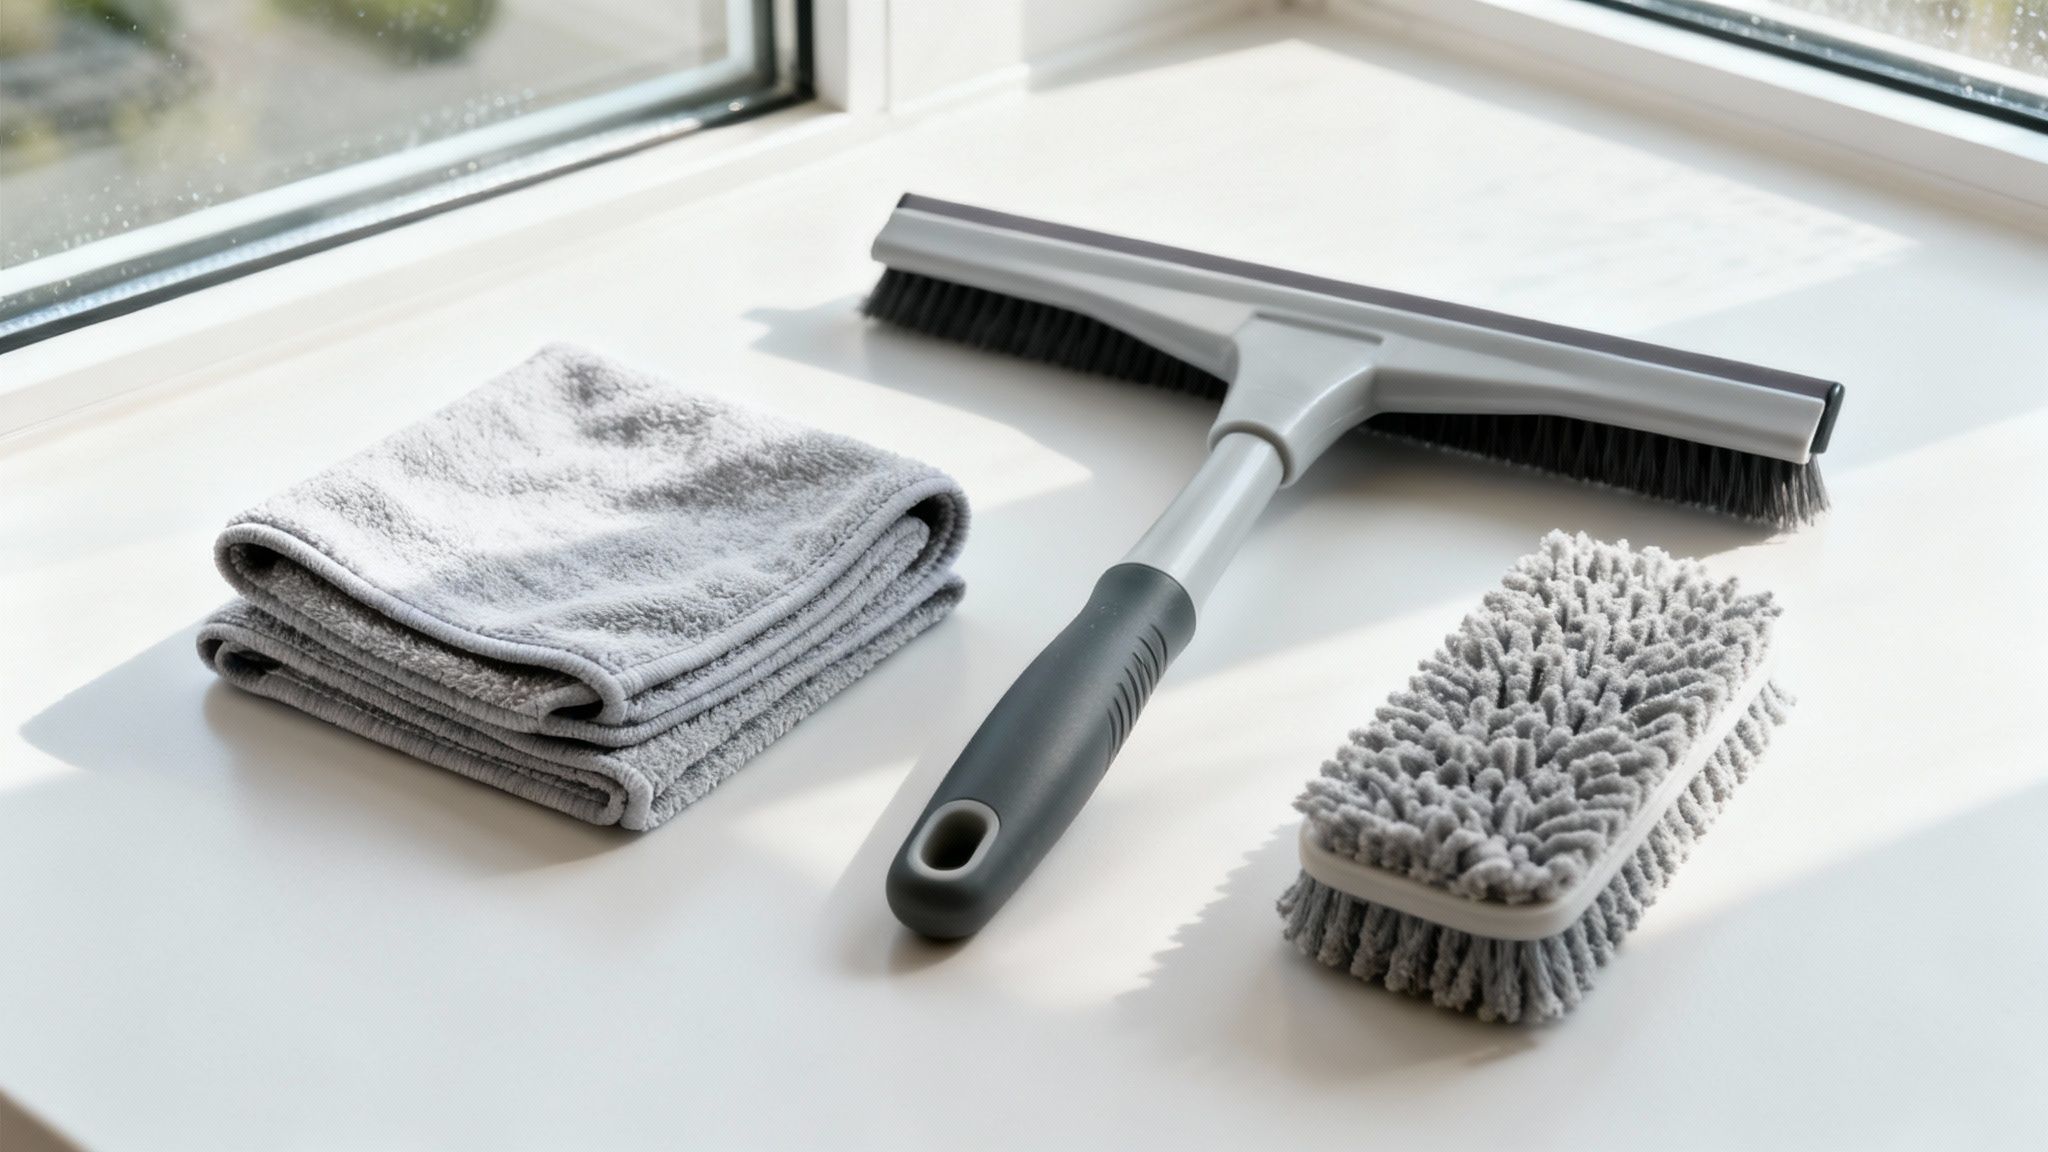
The Squeegee: Your Most Valuable Tool
If you only buy one specialized tool, make it a high-quality squeegee. This is, without a doubt, the secret to that perfect, streak-free shine. You're looking for one with a soft, flexible rubber blade that glides across the glass instead of skipping or chattering.
A good blade forms a perfect seal, pulling every last drop of dirty water off the pane. Those cheap, hard plastic blades you see everywhere just can't compete. I’m a big fan of squeegees with brass or stainless-steel handles; the added weight gives you much better control than flimsy plastic. For most windows inside a house, a 10- or 12-inch squeegee is the ideal size.
The Right Cloths and A Good Scrubber
While the squeegee is the star, microfiber cloths are the essential supporting actors. Their amazing weave traps dirt and soaks up water way better than old rags or paper towels. Seriously, just ditch the paper towels—they fall apart and leave a trail of linty fuzz all over your clean glass.
You'll want a couple of different types of microfiber in your kit:
- Scrubbing Cloths: Look for a terry weave cloth with a bit of a "grippy" texture. It's perfect for the initial scrub-down and for wiping window frames and sills.
- Polishing Cloths: These are smooth, flat-weave cloths, sometimes called glass cloths. You'll use these for detailing the edges and buffing away any tiny water spots or leftover smudges.
When it comes to applying your cleaning solution, a dedicated scrubber is a huge step up from a simple cloth. A T-bar scrubber (also called a wand or mop) soaks up plenty of soapy water and spreads it evenly, helping to loosen all that built-up grime much more effectively.
Buckets and Other Essentials
A simple rectangular bucket is a non-negotiable part of your kit. Just make sure it's wide enough to dunk your T-bar scrubber easily. No need for anything fancy here, just a sturdy bucket that holds a couple of gallons.
Here's a tip I swear by: Get two buckets. One for your fresh cleaning solution and a second one with plain, clean water for rinsing your scrubber. This little trick keeps you from putting dirt right back on the glass and makes your cleaning solution last so much longer.
Finally, don’t sweat the small stuff—prepare for it. A drop cloth or a few old towels are your best friends for protecting floors and windowsills from drips. And since you're already there, give your window screens a look. If they're caked in dust, the first gust of wind will undo all your hard work. We have a straightforward guide on how to clean window screens that makes it easy.
Mixing a Better DIY Window Cleaning Solution
You can forget about most of those brightly colored, chemical-laden cleaners on the store shelves. After years of cleaning windows, I can tell you that the best solutions are the ones you mix yourself, and you probably have everything you need in your kitchen pantry right now.
A simple homemade mixture is not only cheaper but also far more effective. It cuts through grime without leaving that sticky chemical film that seems to attract dust the moment you're done.
The Secret to a Streak-Free Shine
The real magic comes down to two simple ingredients: distilled water and white vinegar.
The acidity in white vinegar is a powerhouse, effortlessly breaking down everything from greasy fingerprints to that hazy film that builds up over time. But the real game-changer, and the one thing people often skip, is using distilled water.
Your tap water is full of minerals like calcium and magnesium. When that water evaporates, those minerals get left behind as tiny white spots and streaks, ruining all your hard work. Distilled water is completely pure, which means when it dries, it leaves absolutely nothing behind. It's the only way to guarantee a spotless finish.
My Go-To DIY Recipe
Over the years, I've found that the common one-to-one vinegar and water ratio is often way too strong for interior windows and can leave a lingering vinegar smell. A more diluted solution works much better.
Here’s the simple recipe I swear by:
- 1 cup of distilled water
- 1/4 cup of white vinegar
Just mix them in a clean, clearly labeled spray bottle, give it a gentle shake, and you’re good to go.
If you're tackling extra grimy windows, like in a kitchen where grease builds up, you can add one or two drops of a basic dish soap (Dawn works great). Be careful here—a little goes a very long way. Using too much soap is one of the biggest culprits behind streaky windows.
This quick visual guide breaks down just how simple it is to mix a powerful, professional-grade solution at home.
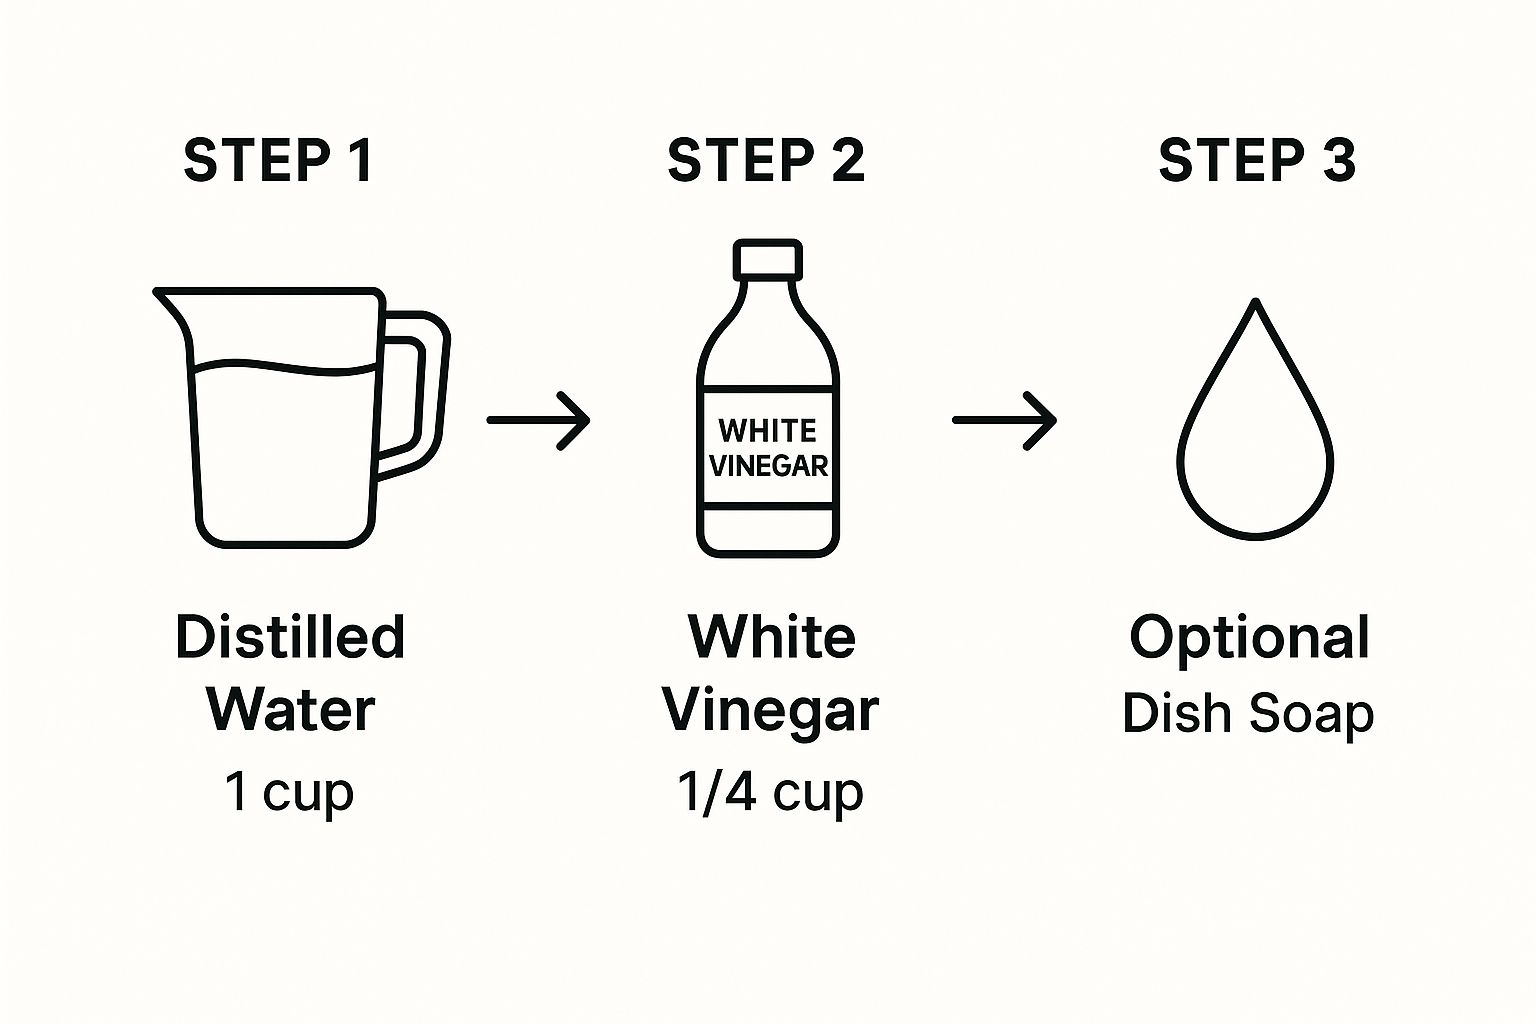
As you can see, it all starts with pure, mineral-free distilled water. That’s the foundation for a perfect, spot-free result every single time.
While my go-to recipe is great for general use, you can tweak the formula for different situations. Here’s a quick comparison of a few options.
DIY Window Cleaner Recipe Comparison
| Solution Type | Ingredients | Best For | Pro Tip |
|---|---|---|---|
| Everyday Maintenance | 1 cup distilled water, 1/4 cup white vinegar | Routine cleaning of fingerprints, dust, and light smudges on interior windows. | The perfect all-purpose mix. Keep it in a spray bottle for quick touch-ups. |
| Heavy-Duty Grime | 1 cup distilled water, 1/4 cup white vinegar, 2 drops dish soap | Kitchen windows with grease buildup or windows that haven't been cleaned in a long time. | Use this sparingly. The soap helps lift stubborn grime but requires thorough rinsing or wiping. |
| Alcohol-Based Quick Dry | 1 cup distilled water, 1/4 cup rubbing alcohol, 2 tbsp white vinegar | Cleaning on cool, humid days when evaporation is slow, or for a super fast, streak-free dry. | The alcohol evaporates quickly, reducing the chance of streaks forming as the window dries. |
Experimenting with these recipes will help you find the perfect mix for whatever grime you're up against. The key is always starting with distilled water.
Ingredients You Should Never Use
Knowing what not to use is just as critical as knowing what to mix in. Some common household cleaners can be a disaster for your windows.
Critical Warning: Stay away from any ammonia-based cleaners (like many of those classic blue sprays) or anything with bleach. These harsh chemicals can damage expensive window tints, eat away at rubber seals, and even discolor certain types of window frames over time.
It really pays to understand the simple chemistry behind your cleaning solution. To get a deeper dive into which additives do more harm than good, you can learn more about window cleaning chemicals to avoid. When in doubt, sticking with a simple vinegar and distilled water mix is always your safest and most effective bet.
Mastering Professional Squeegee Techniques
https://www.youtube.com/embed/Zf-I9GE5pgA
If you want to take your window cleaning from amateur to pro, the squeegee is your best friend. Seriously, this is the single biggest leap you can make. It's the secret weapon against streaks, but only if you know how to handle it. This is where we move past just getting the glass wet and focus on the technique that leaves a perfect, invisible finish.
Forget about random, frantic swipes. The key is a controlled, methodical approach. Your goal is to gather all the dirty cleaning solution and pull it off the glass in one clean sweep, leaving absolutely nothing behind. Mastering this isn't just about speed; it's all about precision.
The Two Core Squeegee Methods
Depending on the size and shape of the window you're tackling, you’ll want to use one of two main techniques. For smaller, standard window panes, a simple top-to-bottom pull works beautifully. But for those big picture windows, the professional "S-Method" is way more efficient.
Let's break down how to get each one right.
-
The Straight Pull-Down: This is your starting point, the fundamental move. Place the squeegee at the top of the wet glass, tilting it to about a 45-degree angle. Start your first stroke by overlapping onto the dry edge of the frame by about an inch, then pull straight down in one smooth, continuous motion.
-
The "S-Method" (or Fanning): On large panes of glass, this technique is a game-changer because you never have to stop and start. You basically guide the squeegee back and forth across the glass in a fluid, snake-like pattern from top to bottom. The trick is to always lead with the top edge of the blade to direct the water downward.
No matter which method you’re using, the pressure should be light but firm. Let the squeegee’s own weight do most of the work. If you push too hard, the blade will skip or "chatter," leaving those ugly horizontal lines we all hate.
The Most Important Habit to Build
Here it is. This is the one thing beginners almost always forget, and it's the number one cause of those frustrating streaks you see along the edges. You must wipe your squeegee blade with a clean microfiber cloth after every single pass.
Every time you pull that squeegee, it collects a line of dirty water on the rubber edge. If you don't wipe it off, your very next stroke just puts that grimy water right back on the clean glass.
Keep a dedicated, dry microfiber cloth folded in your back pocket or tucked into your belt. After each pull, give the blade a quick, deliberate wipe. This simple habit takes less than a second but makes a night-and-day difference in your final result.
This is a non-negotiable step for a truly streak-free finish.
Detailing the Edges for a Perfect Finish
Even with flawless technique, you'll almost always find a thin line of water left along the very edges of the glass where the squeegee couldn't quite reach. This is where "detailing" comes in.
Grab a separate, bone-dry, flat-weave microfiber cloth and wrap it tightly around your index finger. Carefully run your finger along the top, sides, and bottom edges of the glass to soak up that last bit of moisture. This final touch is what elevates a good job to a flawless one. The squeegee does 95% of the heavy lifting, but this last step is what truly completes the job.
While a squeegee is the best tool for the job, it's good to know what other options exist. You can explore more in our guide covering 3 proven ways to dry windows without leaving streaks.
Finally, grab another clean cloth to wipe down the window sill and frame, catching any last drips. Now you can stand back and admire your work—a perfectly clear, professional-grade shine.
Tackling Common Window Cleaning Headaches
Even when you do everything right, you can still run into a few frustrating problems. It happens to everyone. But don't worry—most common window cleaning issues have a simple fix. Let's walk through how to troubleshoot the classic culprits so you can get that flawless, crystal-clear finish.

We’ll cover everything from those annoying streaks that appear out of nowhere to stubborn, hazy films that just won't seem to budge. Think of this as your expert cheat sheet for mastering the art of window cleaning.
Why Are My Windows Still Streaky?
Streaks are by far the most common complaint, but the cause is almost always one of three things. If you’re seeing lines after you’ve put the squeegee down, here’s what to check first.
- You're Racing the Sun: This is the number one reason for streaks. If you're cleaning a window in direct sunlight, the heat makes your cleaning solution evaporate in seconds. It dries before you can wipe it away, leaving behind all the soap and minerals as ugly lines. The fix is easy: always work on the shady side of the house or wait for an overcast day.
- Too Much Soap in Your Bucket: When it comes to dish soap, less is truly more. Using more than a couple of drops creates a sudsy mess that’s nearly impossible to remove completely. This is what often leaves behind that streaky, hazy film. If you think you overdid it, just give the window a quick rinse with plain distilled water and squeegee it one more time.
- A Grimy Squeegee Blade: Make it a habit to wipe your squeegee blade with a clean, dry microfiber cloth after every single pass. If you don't, you're just dragging dirty water right back over the glass you just cleaned, creating a fresh set of streaks.
Getting Rid of Hazy Film and Tough Spots
Ever had a window that still looks foggy no matter how many times you clean it? You're not alone. This is usually caused by buildup from hard water or the ghosts of cleaning products past.
A hazy film is often residue left behind by commercial cleaners. Many contain waxes or silicones that build up over time, creating a stubborn layer that actually attracts more dust and dirt. A cleaning solution with a bit more white vinegar will usually cut right through it.
For those extra-stubborn spots, like old sticker residue or a few specks of paint, you’ll need a more targeted approach.
- Sticky Gunk: To get rid of that leftover adhesive from old tape or decals, just dab a little rubbing alcohol onto a microfiber cloth. Rub the spot gently in a circular motion, and you should feel the residue start to break down and dissolve.
- Paint Specks: If you’re dealing with tiny flecks of latex paint, you can often pop them right off with a fresh razor blade. The key is to hold the blade at a shallow 45-degree angle and always work on wet glass to avoid any chance of scratching. Be careful and take your time.
Achieving this level of perfection is exactly why professional window cleaning is such a big business. The global window and gutter cleaning market is on track to be worth between $5 to $10 billion by 2025, all because homeowners want that flawless, professional-grade finish. You can dig into more details about this growing market if you're curious. With these pro troubleshooting tips, you can get that same exact quality yourself.
Your Top Window Cleaning Questions Answered
Alright, even with the best game plan, a few questions always seem to surface when you're chasing that perfectly clear, streak-free shine. Honestly, getting these little details right is what makes all the difference. Let's tackle some of the most common questions I hear about cleaning interior windows so you can fine-tune your approach.
Think of this as your quick-reference guide for those little "hang on a second…" moments. We'll get into how often, what tools to (not) use, and the best time to do the job.
How Often Should I Clean My Inside Windows?
For the average home, giving your interior windows a good cleaning two to three times a year is a great starting point. This is usually plenty to keep the everyday dust and film from building up, ensuring your view stays crisp and you're getting as much natural light as possible.
But that's just a baseline. Life isn't average, so you'll need to adjust for your own situation.
- Got Pets or Kids? If so, you already know about the constant battle with fingerprints, smudges, and those adorable little nose prints. You'll probably find that cleaning them every few months, or even more frequently, is the only way to stay on top of it.
- Where Do You Live? A house on a busy street or in a dusty area will see grime accumulate much faster than one tucked away in a quiet suburb. In those cases, more frequent cleanings are pretty much a necessity.
My best advice is always the most practical: just clean them when they look dirty. A quick spot-clean is always less of a hassle than letting months of grime build up into a major project.
Can I Use Paper Towels Instead of Microfiber Cloths?
Please don't. I can tell you from years of experience that paper towels are the fastest way to a linty, streaky mess. The second they get wet, they start to fall apart, leaving a trail of tiny paper fibers all over the glass you just worked so hard to clean.
Beyond the lint, they just don't have the muscle of a quality microfiber cloth. Microfiber is specifically designed with a split-fiber weave that actively grabs and holds onto dust and dirt. Paper towels just push it around.
My Pro Tip: A clean, dry microfiber cloth is your secret weapon. It's the absolute best tool for drying off the edges of the pane or buffing out that one stubborn little streak. It soaks up every last drop of moisture without leaving a trace behind, giving you that final, flawless finish.
What Is the Best Time of Day to Clean Windows?
This one is a non-negotiable rule in the world of window cleaning: avoid direct sunlight at all costs. When the sun is beating down on the glass, your cleaning solution will evaporate in seconds—long before you have a chance to wipe or squeegee it off. This flash-drying is what causes those frustrating, hard-to-remove streaks.
The ideal time to clean your windows is on a cloudy, overcast day. The glass will be cool to the touch, which gives you plenty of time to work your magic without feeling rushed. If you absolutely have to clean on a sunny day, just follow the shade around your house. Start on the east side in the afternoon, or the west side in the morning. Working on cool glass is one of the simplest changes you can make to guarantee a perfect result every time.
Even with the best advice, sometimes you'd rather just have it done for you. If you're looking for that professional, guaranteed-to-sparkle finish without lifting a finger, Sparkle Tech Window Washing is ready to help. Schedule your service today!