


That frustrating, hazy film trapped between your window panes isn't something a bottle of Windex and a roll of paper towels can fix. If you've ever tried to scrub it away only to realize the grime is inside the glass, you've encountered a failed window seal. This is less of a cleaning job and more of a repair project.
Why Your Windows Look Foggy Inside
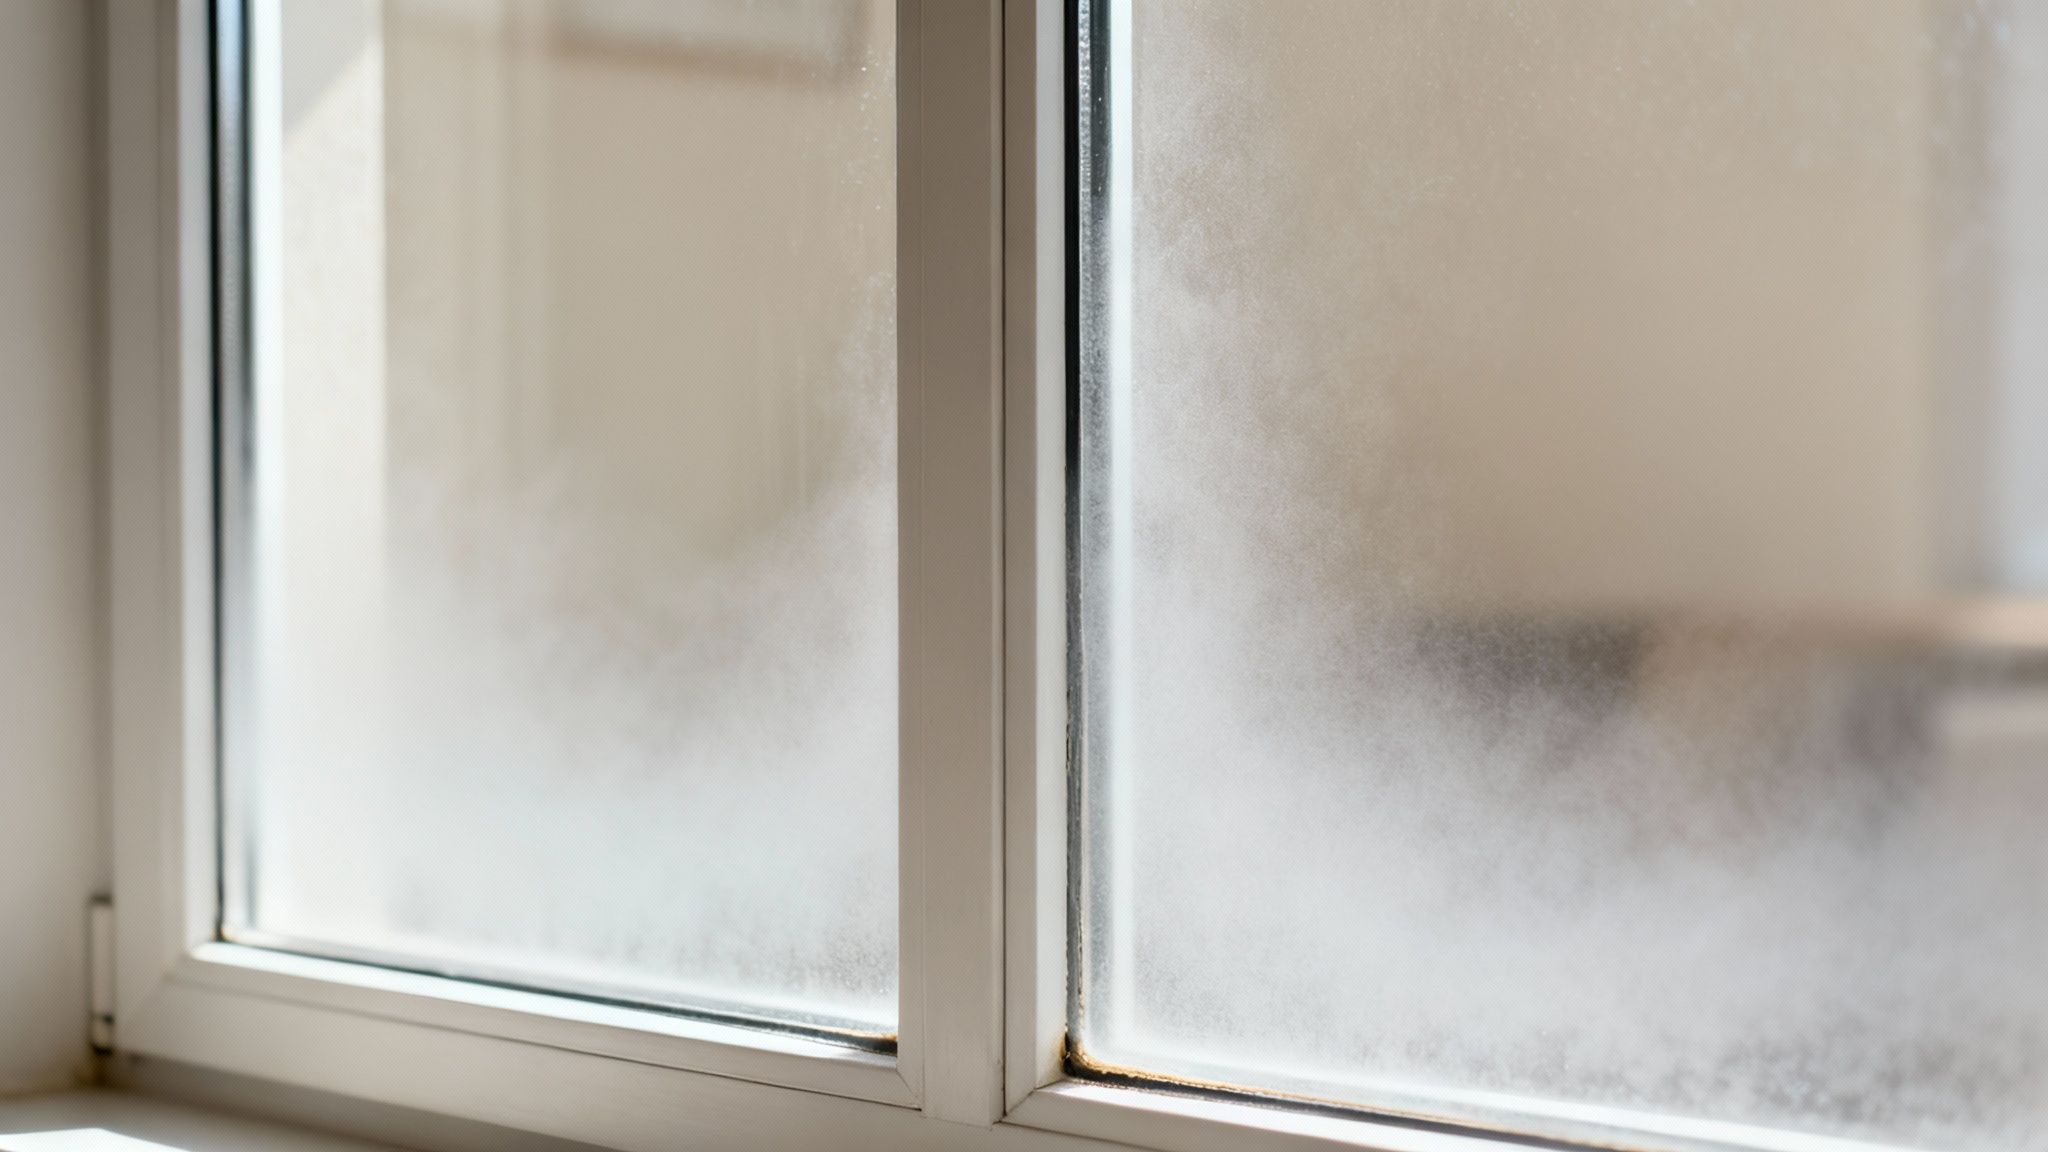
The sight of a permanently fogged-up window is a dead giveaway that the seal on your double-pane or triple-pane window has broken. These windows, known in the industry as insulated glass units (or IGUs), are built with a spacer between the panes that creates a sealed, airtight chamber.
That chamber isn’t just filled with regular air. Manufacturers typically fill it with an inert gas, like argon or krypton, which is a much better insulator. But when the seal holding everything together gives way, that special gas leaks out, and regular, moisture-laden air gets in.
The Science Behind the Fog
Once the seal is broken, your window starts to "breathe" with the daily weather changes. When it's humid, it pulls in damp air. Then, as the temperature drops, that trapped moisture condenses on the inner surfaces of the glass panes.
This cycle of condensation and evaporation happens over and over, leaving behind mineral deposits and a streaky, milky film that you can't reach. This is precisely why you can't just wipe it clean. The initial fog might only show up on a cold morning or a hot, sunny afternoon, but sooner or later, it will become a permanent, view-ruining fixture.
Key Takeaway: A foggy window isn't just an eyesore; it's a sign that the window has lost its insulating power. This hurts your home's energy efficiency and can lead to noticeably higher heating and cooling bills.
What Causes a Window Seal to Fail?
Window seals don't usually fail overnight. It's almost always a gradual process caused by a combination of factors. Knowing what causes it can help you spot potential problems early.
- Age and Thermal Stress: Every single day, your windows expand in the heat and contract in the cold. This constant movement, sometimes called "solar pumping," puts a huge amount of stress on the seals. Over a decade or more, that stress can cause them to weaken and break.
- Direct Sun Exposure: Windows that get blasted by direct sunlight all day, especially those with dark-colored frames, absorb a ton of heat. This just accelerates that expansion-contraction cycle and puts the sealants under even more strain.
- Physical Damage: It doesn't take a baseball through the glass to cause a problem. The house settling, a shoddy installation job, or even a small impact on the frame can be enough to compromise the seal's integrity.
It’s clear homeowners want spotless, clear windows. The global cleaning services market was valued at $55.7 billion in 2020 and is on track to nearly double by 2030, partly because people value functional, great-looking windows. You can dive deeper into window cleaning industry trends to see how the market is growing. This guide will walk you through what "cleaning" between window panes really means—addressing the failed seal, which is a repair task, not just a housekeeping chore.
Is It a Broken Seal or Just Condensation?
Before you grab a single cleaning tool, you need to play detective. What looks like a dirty window might be something else entirely, and figuring it out now will save you a world of frustration later. Are you dealing with a simple cleaning job, or is the seal on your double-pane window busted?
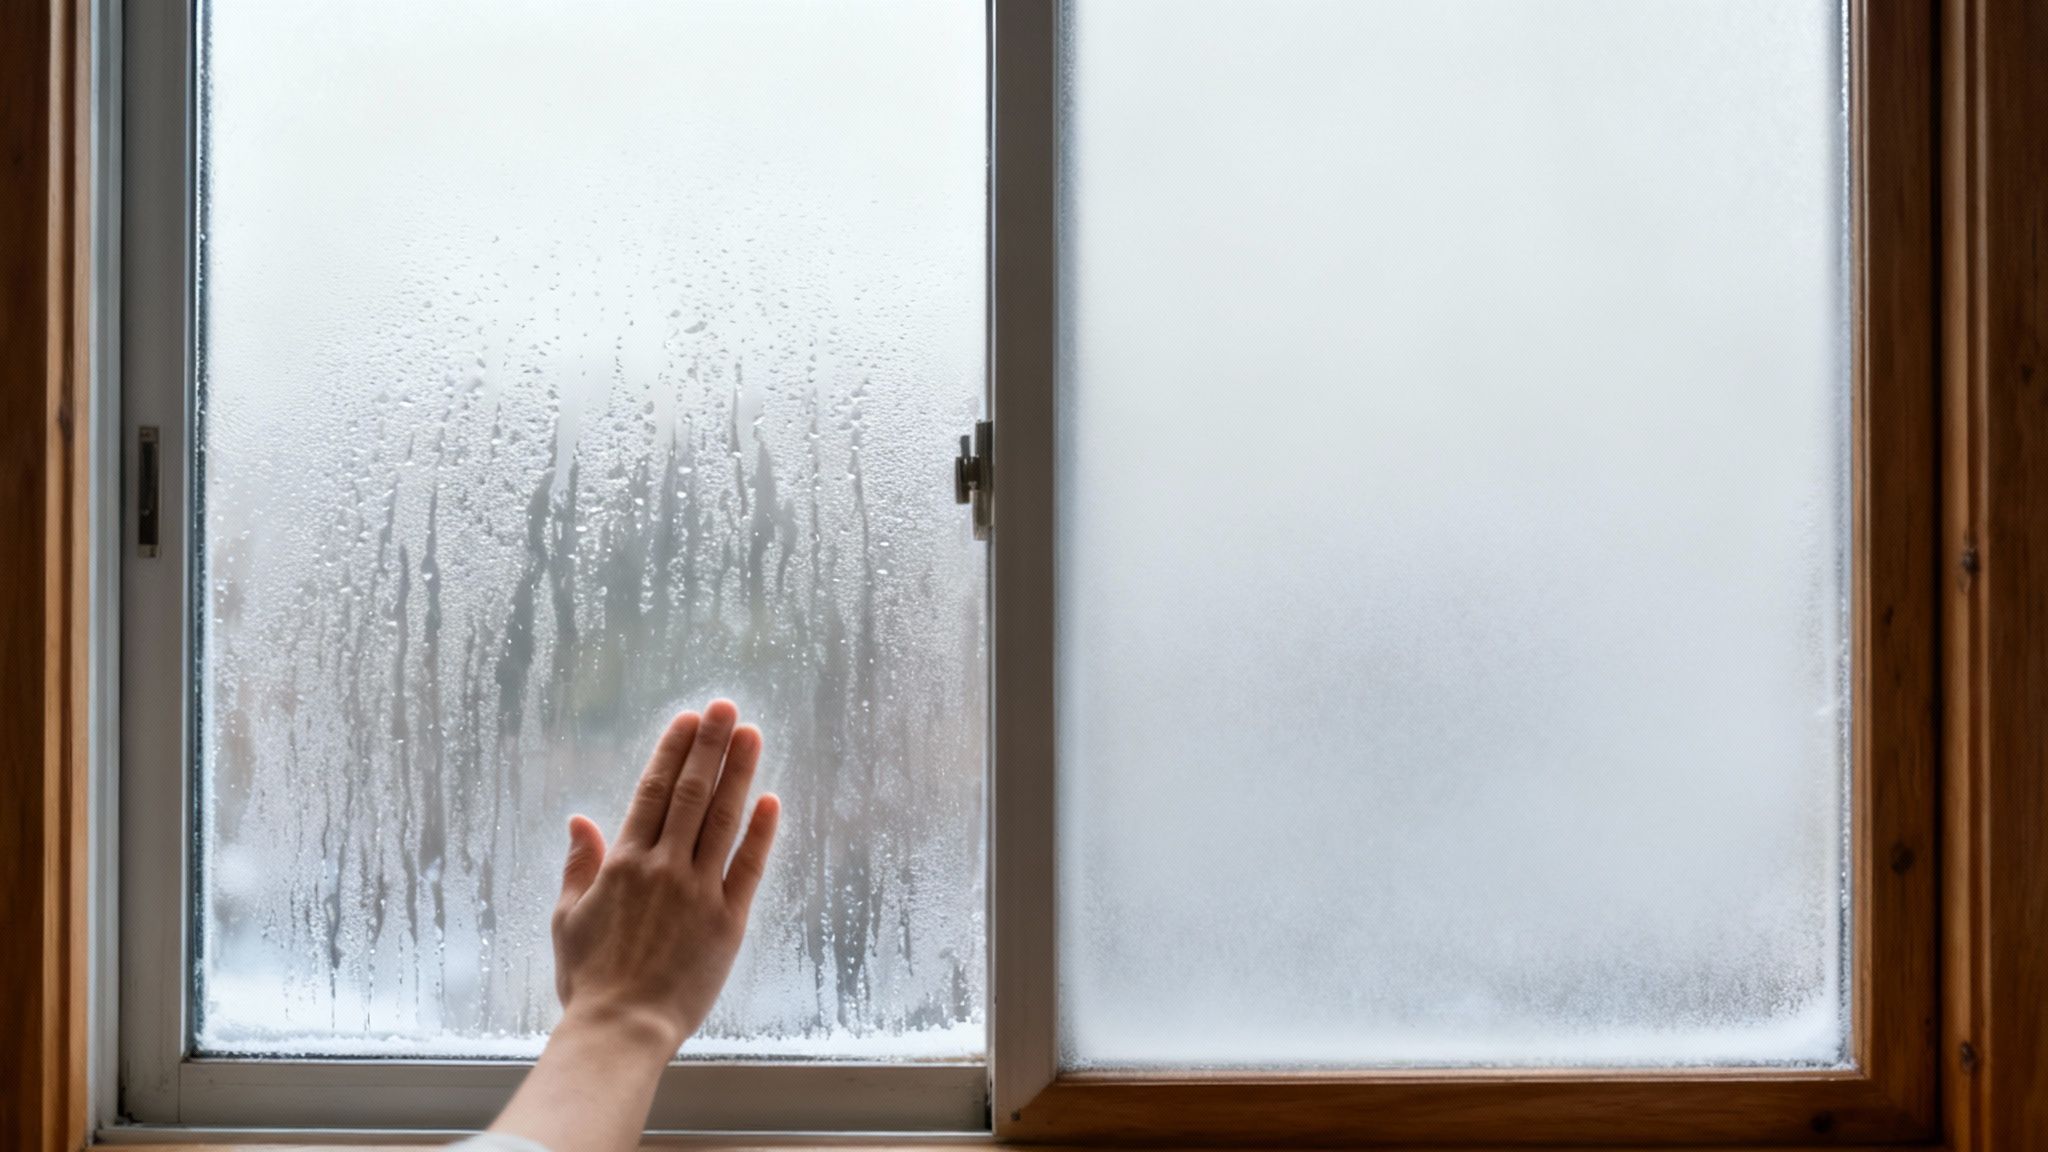
The dead giveaway is the location of the moisture.
When a window seal fails, humid air gets sucked into the space between the two panes of glass. That’s where the fog, haze, or streaky mineral deposits form. You can see it, but you absolutely can't touch it, no matter how hard you wipe the inside or outside of your window.
Normal condensation, on the other hand, is completely harmless and forms on surfaces you can actually reach.
- Interior Condensation: This is the fog on the inside of the glass. It’s common during winter when the warm, moist air in your house hits the cold window pane.
- Exterior Condensation: This shows up on the outside of the glass, usually on a cool morning after a humid night. Don't worry about this one—it’s actually a good sign that your windows are doing their job and insulating well!
The Touch Test: Your Go-To Diagnostic
So, how do you know for sure? Just use the simple touch test.
First, try wiping the foggy spot from inside your house with a cloth. If the moisture disappears, you’ve just got regular interior condensation. Problem solved.
If that doesn't work, head outside and try wiping the same area. If it clears up, it's just exterior condensation. But if that fog is still there, stubbornly trapped between the glass panes, you've got your answer: a failed window seal. This diagnosis is a game-changer.
A broken seal isn't just a cosmetic issue. It means the insulating argon or krypton gas that was once between the panes has escaped. Your window is no longer energy-efficient, and that can have a real impact on your heating and cooling bills. At this point, you're facing a window repair, not just a cleaning task.
Broken Seal Symptoms vs. Normal Window Issues
It’s easy to misdiagnose the problem if you don't know what to look for. This table breaks down the common signs to help you figure out what you’re really dealing with.
| Symptom | Indicates Broken Seal? | Common Cause & Solution |
|---|---|---|
| Fog or moisture you can't touch | Yes | The airtight seal has failed. This requires either disassembling the window to clean and reseal it or having a professional replace the insulated glass unit (IGU). |
| Milky or white mineral stains | Yes | This is the residue left behind after moisture between the panes evaporates. It's a sure sign of a long-term seal failure. |
| Moisture on the inside surface | No | Just normal interior condensation. High indoor humidity is the culprit. Try using a dehumidifier or cracking a window to improve ventilation. |
| Moisture on the exterior surface | No | This is normal exterior condensation and a sign of good insulation. It will clear up on its own as the temperature rises. |
Getting this diagnosis right is the most critical first step. Once you confirm the seal is broken, you can stop wasting time with surface cleaners and get ready for the real project: learning how to clean between window panes by carefully taking the unit apart.
Tools and Safety for This Advanced DIY Project
Before you even think about splitting apart a double-pane window, let’s be clear: this is not your average weekend chore. This is a delicate repair job that can go wrong quickly without the right tools and a healthy respect for safety. Getting everything in order before you start is the single biggest key to success.
You really don't want to find yourself with a disassembled window, exposed to the elements, only to realize you’re missing a crucial tool. Think of this as your pre-flight checklist.
Your Essential Toolkit
Here’s a rundown of exactly what you’ll need to have on hand. Each of these items has a very specific job, from taking the window apart to cleaning and putting it all back together properly.
- Heat Gun: You need this to soften the old, hardened sealant around the glass. A hairdryer just won’t cut it—it simply doesn't get hot enough.
- Stiff Putty Knife & Utility Knife: These will be your go-to tools for carefully prying and scraping away the old gunk once the heat gun has done its job.
- Thick Work Gloves & Safety Glasses: These are non-negotiable. Seriously. The risk of breaking glass is very real, and protecting your hands and eyes should be your top priority.
- Microfiber Cloths: Grab a few of these. You'll need clean, lint-free cloths for the actual cleaning and for getting the glass perfectly dry and streak-free.
- Isopropyl Alcohol Solution: A simple mix of isopropyl alcohol and distilled water works wonders on the inner glass surfaces. It cleans effectively and won't leave behind any mineral spots. Using the right cleaner is vital, so check out our guide on window cleaning chemicals to avoid to prevent any accidental damage.
- Desiccant Packets: Those little silica gel packets are your secret weapon against future fogging. You’ll place them inside, between the panes, before you seal everything back up.
- High-Quality Clear Silicone Caulk: Don’t cheap out on this. You need a top-notch, waterproof silicone to create a new, airtight seal that will last for years.
Safety First Always
Let’s talk about the risks. Working with large sheets of glass is inherently dangerous. A pane that looks fine can have a hidden stress fracture and shatter unexpectedly. One slip and you could be looking at a serious injury. Keep your gloves and safety glasses on from the moment you begin until the window is completely back in its frame.
If the window is on an upper floor, the danger level skyrockets. Trying to handle a heavy, awkward piece of glass while balanced on a ladder is a recipe for disaster for anyone who isn't a seasoned pro.
Crucial Safety Check: Take a moment and be honest with yourself. Is the window huge? Is it on a second story? Do you feel even the slightest bit unsure about this? If so, stop. It’s simply not worth the risk. This is the exact point where calling a professional is the smartest and safest move you can make.
It's no surprise that people want crystal-clear windows. The global glass cleaner market was valued at $3.29 billion in 2024 and is expected to climb to $6.14 billion by 2033. This demand, explored in the window cleaners market growth on verifiedmarketresearch.com, shows just how much we all value a perfect view. But getting that clarity between the panes demands a whole new level of caution.
Taking Apart the Window to Clean Between the Panes
Alright, you've got your tools and safety gear ready to go. Now comes the part that requires a bit of patience and a steady hand. I can't stress this enough: don't rush through this. Trying to speed things up is a surefire way to crack the glass or end up with a seal that’s even worse than when you started.
First things first, you need to get the window sash out of the main frame. How you do this really depends on the type of window you have. Vinyl, wood, and aluminum windows all have different mechanisms, as do windows that slide versus those that crank or tilt. Look for small release tabs, clips, or screws that secure the sash. Work slowly and gently—if you have to force it, you're probably missing a release somewhere.
Once the sash is free, lay it down flat on a stable surface that you've padded with an old blanket or some towels. This is where your heat gun comes into play.
Breaking Down the Old Seal
The mission here is to soften the original sealant and the spacer holding the two glass panes together. Set your heat gun to a medium temperature and, most importantly, keep it moving along one edge of the glass. Never let it sit in one spot. Concentrated heat creates thermal shock, which is a fast track to a cracked pane.
As you see the sealant getting pliable, you can start to gently work a stiff putty knife into the gap between the glass and the frame. Continue this process around the entire perimeter, applying heat as needed. Eventually, you'll be able to carefully pry the outer pane of glass away from the spacer.
A Quick but Crucial Warning: Those glass panes are fragile and their edges can be razor-sharp. Always wear thick work gloves for this part of the job. If you feel any real resistance when prying, stop immediately and apply more heat. Brute force will only lead to broken glass.
Getting That Perfect, Streak-Free Clean
With the panes separated, it’s time to clean. This is your one shot to get those interior surfaces spotless, so you'll want to do it right.
I recommend mixing a solution of one part isopropyl alcohol to one part distilled water in a clean spray bottle. Why distilled water? Simple. It has none of the minerals that are in regular tap water, which are the culprits behind those annoying spots and streaks you see after cleaning.
Spray your solution generously on the inside surface of each pane and wipe it down with a fresh, lint-free microfiber cloth. Follow that up immediately with a second, completely dry microfiber cloth to buff the glass to a crystal-clear shine. It's absolutely critical that the glass is bone-dry before you start putting things back together.
Before you reassemble, double-check that you have all your supplies and tools laid out for a smooth repair.

This graphic gives you a good sense of the workflow: start with your safety gear, get the right tools for your window, and have your sealing supplies ready to go.
Resealing for a Long-Term Fix
Now for the most critical part of the entire project: creating a new, completely airtight seal. Once you've scraped away every last bit of the old, gummy sealant, you can begin reassembly.
- Add Desiccant Packets: Before you even think about putting the glass back, place two or three small desiccant (silica) packets inside the spacer frame. These little guys are pros at absorbing any tiny bits of moisture you might trap inside, which is key to preventing future fogging.
- Apply the New Silicone: Lay down a thin, continuous bead of high-quality, waterproof clear silicone caulk right on the spacer where the glass pane will sit. Make sure there are absolutely no gaps in this bead of caulk.
- Set the Glass: Very carefully lower the clean glass pane back onto the spacer. Press down firmly but gently to squish it into the silicone and create a solid bond all the way around.
- Create the Outer Seal: To finish it off, apply another bead of silicone around the exterior edge where the glass meets the sash frame. This creates your final weatherproof barrier.
Now, you have to let that silicone cure. Check the manufacturer's instructions, but you're typically looking at a wait time of at least 24 hours. Don't even think about reinstalling the sash until you're certain it's fully cured. While this DIY approach can definitely get the job done, you can learn more by reading about professional techniques for cleaning double-pane windows to see how the pros handle it.
Knowing When to Call a Window Professional

As much as I love a good DIY project, cleaning between window panes is one of those high-stakes tasks where the margin for error is razor-thin. Sometimes, the smartest and most wallet-friendly decision is to know when to step aside and call in a pro. This isn’t about giving up; it’s about protecting your home and your investment.
Knowing your limits is everything. If you feel the slightest bit unsure about prying apart a window or working with a heat gun, that's your cue. A botched DIY job can quickly turn a simple cleaning project into a very expensive full window replacement.
When a Professional Is the Only Option
There are a few scenarios where trying to tackle this yourself goes from risky to just a flat-out bad idea. If any of these sound familiar, it’s time to put down the tools and pick up the phone.
- Your Windows Are Still Under Warranty: This is the big one. The moment you break the seal on a double-pane window, you've almost certainly voided the manufacturer's warranty. What could have been a free fix from the company now comes directly out of your pocket.
- You Can See Cracks or Chips in the Glass: Even a tiny, hairline fracture can spell disaster. The pressure and heat needed to separate the panes will almost guarantee that small crack spiders across the entire pane, shattering the glass.
- The Window Is on an Upper Floor: I can't stress this enough—working on a ladder while trying to handle a heavy, awkward, and fragile window sash is incredibly dangerous. Professionals have the training and safety gear to handle these heights without risking life and limb.
Hiring an expert isn't just about avoiding disaster; it's about getting the job done right. A seasoned pro can diagnose and fix the problem in a fraction of the time it would take most homeowners, with results that last.
The Advantage of Professional IGU Replacement
A lot of people think a foggy window means they need to replace the entire window, frame and all. Thankfully, that's rarely the case. The go-to solution for a professional is to simply replace the sealed glass unit itself, known as an Insulated Glass Unit (IGU).
This is a game-changer for your budget. You get a brand-new, factory-sealed unit with a fresh charge of insulating gas, restoring your window’s clarity and energy efficiency for a fraction of the cost of a full replacement. If the problem is more severe, like broken glass, a specialized glass company may be your best bet for a full panel replacement.
Ultimately, deciding whether to DIY or call for help comes down to a realistic assessment of the risks. If you want to learn more about what the experts bring to the table, check out the full benefits of hiring a professional window washing company. A pro provides peace of mind and a crystal-clear view that's guaranteed to last.
Got Questions About Foggy Windows? Let’s Clear Things Up.
So, you’ve discovered that annoying fog between your window panes, and it’s clear this isn’t a simple cleaning job. It’s totally normal to have a few questions about what to do next. Let's walk through some of the most common ones I hear from homeowners.
Can I Actually Clean Between a Sealed Double-Pane Window Myself?
Look, I’m all for a good DIY project, but this is one where I urge serious caution. While it's technically possible to take apart a window, clean it, and try to reseal it, this is a very risky and advanced task. The real issue isn't the fog—it's the broken seal that let the moisture in.
Simply cleaning the glass won't bring back the window's insulating power. That special argon or krypton gas that was in there? It's long gone.
Trying to pry the glass panes apart often ends in a cracked window or a messy resealing job that fails again in a few months. Honestly, for 9 out of 10 homeowners, getting a professional to replace the insulated glass unit (IGU) is the smarter, safer, and more permanent fix.
My Takeaway: A DIY fix is just cosmetic; it won’t make your window energy-efficient again. A professional IGU replacement fixes the fog and restores the insulation, usually with a fresh warranty to boot.
What About Drilling a Hole to Let the Moisture Out?
You might have heard about this "defogging" trick where a small hole is drilled in the glass. It sounds clever, but it’s a temporary Band-Aid at best and can cause bigger problems. Sure, it lets the trapped moisture evaporate, but it also completely guts the window's insulation.
Any insulating gas left inside immediately escapes, and your window's ability to keep your home warm or cool drops to zero.
Plus, this method does nothing to get rid of the chalky mineral stains left behind by the evaporated moisture. It also creates a new, permanent opening for dust and humidity to get in later. It’s not a recommended long-term solution and will definitely void any warranty you have left.
How Do I Keep My Other Window Seals from Breaking?
Seal failure is often just a matter of time and the daily stress of sun, heat, and cold. But with a little TLC, you can absolutely help your windows last longer.
Here are a few things I always tell people to do:
- Check Your Weep Holes: Those little holes at the bottom of your window frames are for drainage. Make sure they’re clear of gunk so water doesn't pool up against the seals.
- Keep the Tracks Clean: When you open and close your windows, dirt and grit in the tracks can put extra stress on the whole frame, including the seals. A quick vacuum or wipe-down helps.
- Go Easy on Cleaning: Never blast your windows with a pressure washer or use harsh chemicals near the seals. These can eat away at the material and cause it to fail much faster.
In the end, starting with high-quality windows from a trusted brand is your best defense against seals giving up too soon.
If you're dealing with a foggy window and want a guaranteed, professional fix, Sparkle Tech Window Washing can help. Our team can take a look and give you the best path forward to getting your clear views back. Contact us today for a free estimate!