


That smudge or haze you see trapped between the panes of your double window is a common headache, but how you tackle it depends entirely on the kind of windows you have. For modern, sealed windows, that fogginess is a red flag that the unit's seal has failed—a job for a pro, not a spray bottle. But if you have older storm windows with removable sashes, you're in luck; that's a job you can handle yourself.
First, Figure Out What Kind of Double Windows You Have
Before you grab a single tool, you need to know what you’re up against. The game plan for cleaning a modern, sealed window is wildly different from an older, multi-part storm window. One is a simple maintenance task, while the other points to a bigger problem that needs repair or replacement.
Getting this right is critical. Trying to pry open a sealed unit will wreck it for good, instantly voiding any warranty and destroying its insulating power.
The Modern Sealed Insulated Glass Unit
Most modern double-pane windows are what we call Insulated Glass Units (IGUs). Think of them as a factory-sealed glass sandwich: two panes of glass are separated by a spacer, and the gap is usually filled with an inert gas like argon to create a thermal barrier. It's what keeps your home warmer in the winter and cooler in the summer.
If you're seeing haze, condensation, or dirt inside that sandwich, the seal has broken. Air and moisture have worked their way in, and no amount of scrubbing on the outside (or inside of your house) will touch it.
Key Takeaway: You can't "clean between the panes" of a sealed IGU. The problem isn't dirt you can wipe off; it's a structural failure. The seal is compromised.
The tell-tale signs of a failed seal are pretty obvious once you know what to look for:
- A Foggy or Hazy Look: You'll notice a milky, cloudy film that doesn't disappear when you clean the window's surfaces.
- Trapped Moisture: On sunny days, you might see actual water droplets or streaks stuck between the glass layers.
- Warped Reflections: The glass can look slightly distorted because the pressure inside the unit has changed.
This is a more common issue than you'd think. Industry data shows that a surprising 25% of double windows over 10 years old have micro-leaks that let in enough air and dust to cause buildup. It's not just an ugly nuisance; it means your window is no longer insulating effectively, which can lead to higher energy bills. You can learn more about how window condition impacts home efficiency in these window cleaning industry statistics.
Old-School Removable Storm Windows
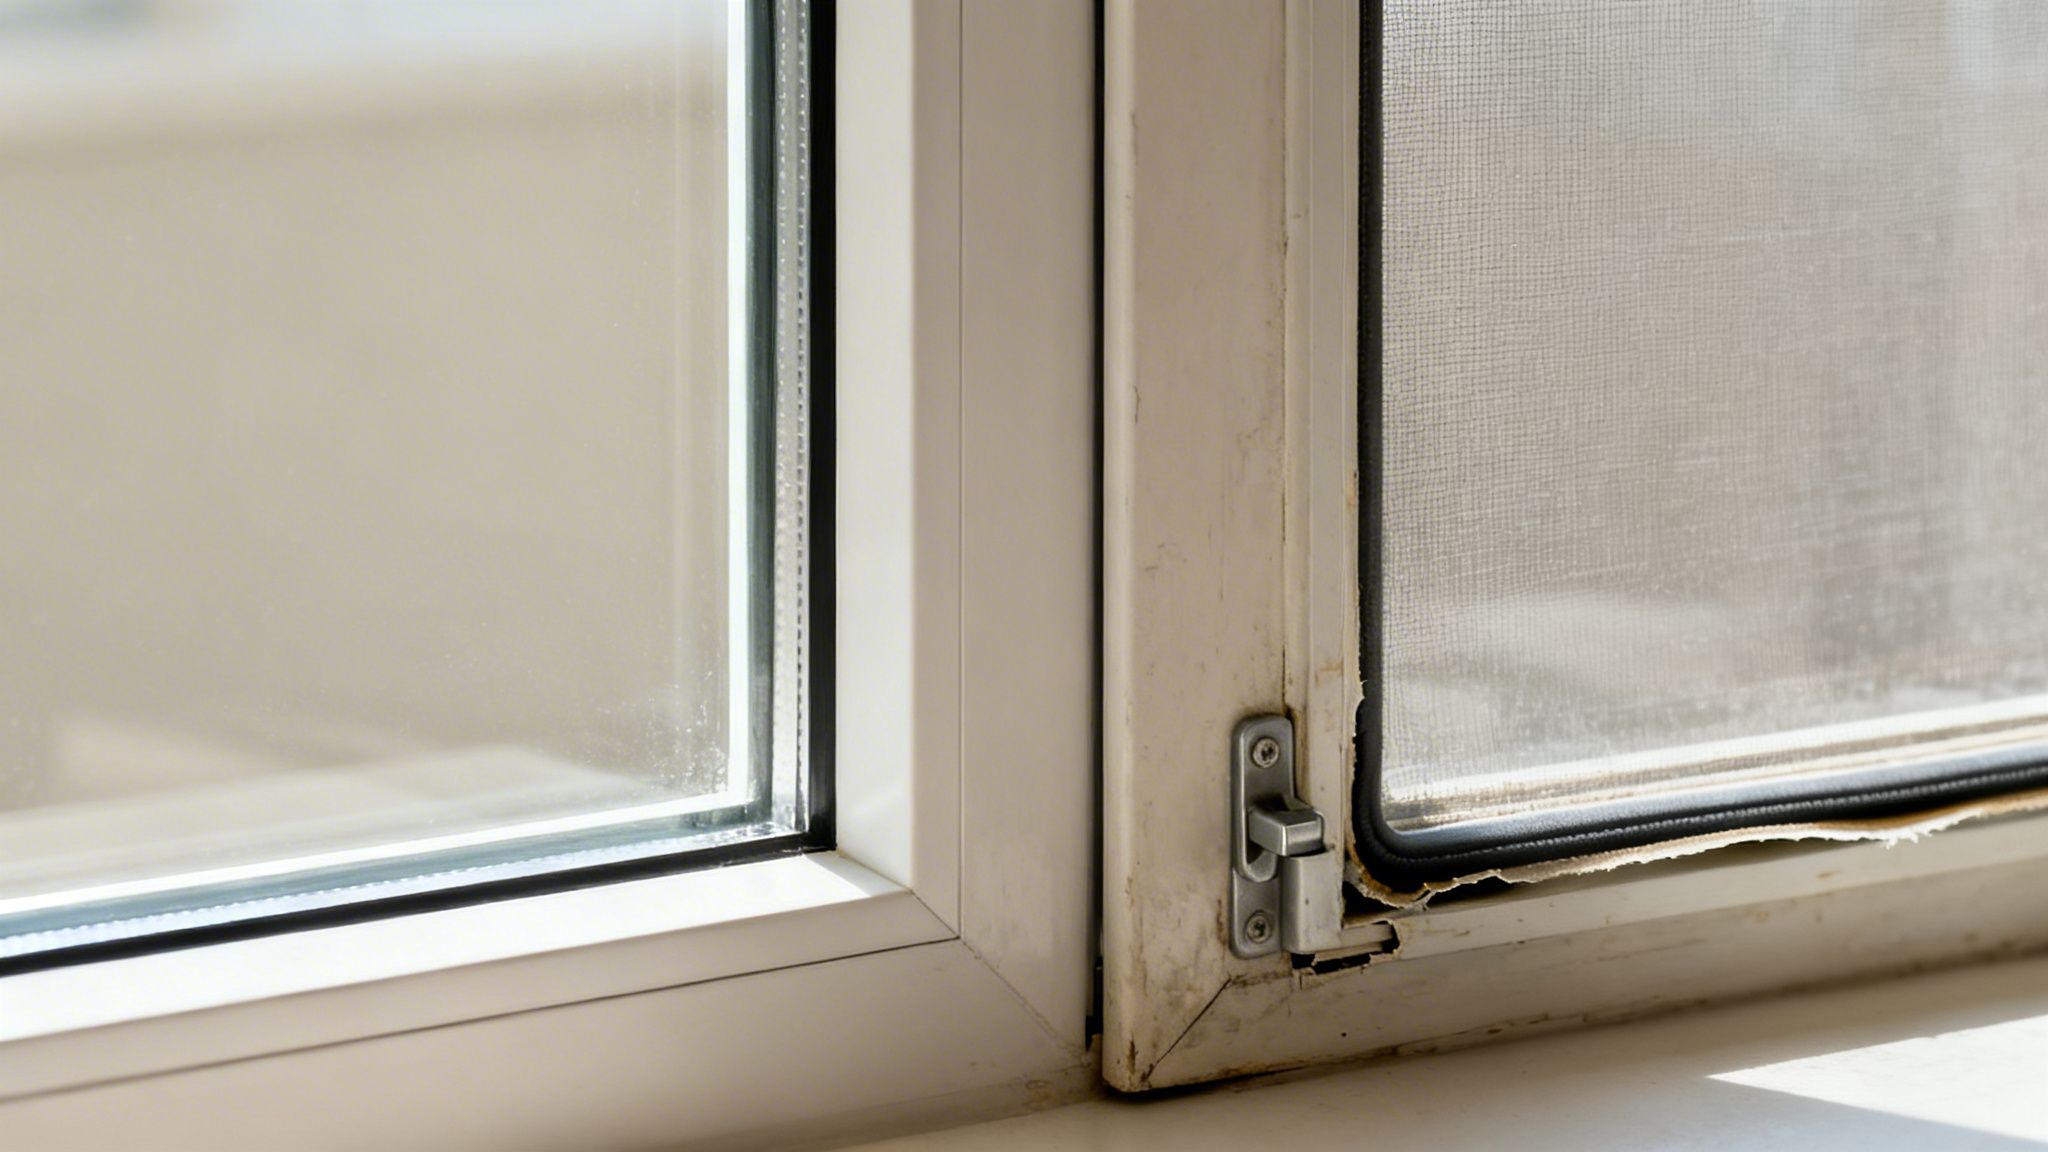
On the other hand, many older homes have a completely different setup: a main window sash with a separate storm window that attaches to the exterior frame. These were built to be taken apart.
You probably have this type if you spot:
- Clips, Screws, or Latches: Take a look around the exterior frame. You'll likely see hardware holding the outer window in place.
- A Separate Outer Frame: It's usually clear that the storm window has its own frame, distinct from the main window.
- Sashes That Tilt In: Some double-hung windows are designed with latches that let the sashes tilt inward, giving you access to both sides.
If this sounds like your windows, good news! Cleaning between the panes is a totally doable—though sometimes tedious—DIY project.
Sealed Units vs Removable Sashes At a Glance
Not sure which type you have? This quick table should clear things up and point you in the right direction.
| Feature | Sealed Insulated Glass Unit (IGU) | Removable Storm Window Sash |
|---|---|---|
| Construction | A single, factory-sealed unit with two panes | Two separate window sashes in one larger frame |
| Identifying Signs | No visible fasteners, often a metallic spacer between panes | External clips, screws, or latches holding the outer pane |
| Cleaning Between Panes? | No. A foggy appearance means the seal has failed. | Yes. The outer sash is designed to be removed for cleaning. |
| Solution for Inside Grime | Professional defogging service or full glass unit replacement. | A DIY cleaning project involving removal and reassembly. |
Now that you've correctly identified your window, you know what to do next. If you have a failed sealed unit, it's time to call in a professional. If you've got removable sashes, it's time to roll up your sleeves and gather your cleaning supplies.
Gathering the Right Tools and Cleaning Solutions
Before you even think about taking a window apart, getting your gear in order is the secret to a smooth, headache-free cleaning session. The real goal here isn't just to get the glass sparkling; it's to do it safely—without scratching the panes, wrecking the frames, or compromising the seals that keep your home insulated. A little prep work can turn what feels like a major chore into a really satisfying project.
You don't need a truck full of specialized equipment, either. Chances are, you already have most of what you need. The difference between a pro-level, streak-free shine and a smeary mess often just comes down to a few key items and the right cleaning mix.
Building Your Essential Toolkit
Think of this as your go-to window cleaning kit. Having everything within arm's reach before you pull out the first pane will save you a ton of time and frustration.
Microfiber Cloths: You’ll want at least four of these. I use two for washing and two for drying and buffing. Microfiber is a game-changer because it’s non-abrasive and grabs onto dirt instead of just pushing it around, which prevents those tiny scratches cotton rags can sometimes leave.
A High-Quality Squeegee: This is your best friend for a truly streak-free finish. Find one with a sharp, flexible rubber blade. For most homes, a 10- to 12-inch squeegee is the perfect, all-purpose size.
Two Buckets: It sounds simple, but this is a pro move. One bucket holds your soapy water, and the other holds clean rinse water. This keeps you from dipping a dirty cloth back into your clean solution and smearing grime right back onto the glass.
Gentle Dish Soap: Just a few drops of a basic dish soap (think original blue Dawn, nothing with lotions) in a bucket of warm water creates a fantastic cleaning solution. It’s powerful enough to cut through grime but gentle enough that it won't damage your window seals or frames.
Powerful DIY Cleaning Solutions
Forget the harsh, ammonia-based commercial cleaners. They can actually eat away at your window seals over time. Simple homemade solutions work just as well, are better for the environment, and cost next to nothing.
A Tip from Experience: For tough gunk like bird droppings or dried-on tree sap, don't just start scrubbing. Lay a warm, soapy cloth over the spot for a few minutes to soften it up first. Whatever you do, never reach for a razor blade or an abrasive pad—you’ll permanently scratch the glass.
The Classic Vinegar Mix:
For a tried-and-true cleaner, just mix equal parts white vinegar and distilled water in a spray bottle. The vinegar's acidity is perfect for dissolving hard water spots and cutting through film. Using distilled water is a little trick of the trade; since it has no minerals, it won't leave spots behind as it dries.
For Extra Grime-Fighting Power:
If you're tackling windows that haven't been cleaned in a while, add a couple of drops of dish soap to your vinegar-water spray. This gives it a little extra muscle to lift away greasy fingerprints and stubborn dirt. For a deeper dive into what works and what to avoid, you can check out our guide on window cleaning chemicals.
Addressing the Frames and Tracks
Cleaning between the panes isn't just about the glass. You’d be amazed at how much dust, dead bugs, and other gunk collects in the window tracks and frames.
Vacuum with a Brush Attachment: Always start by vacuuming the tracks and sills before you introduce any liquid. This gets rid of all the loose debris and stops you from creating a muddy mess later.
Old Toothbrush or Grout Brush: For those tight corners and grooves your vacuum can't reach, a small brush is perfect for digging out that packed-in dirt.
This kind of gentle, eco-friendly approach is becoming more and more common. We've seen the demand for green window cleaning options jump by 35% since 2018. The process today often involves using vacuums with HEPA filters that capture 99.97% of particles and biodegradable foaming agents that cut chemical waste by 25% across the industry. These newer solutions also dissolve grime 40% faster than old-school methods without harming the window's insulating parts. You can read more about these shifts in our look at window cleaning industry statistics.
Cleaning Removable Double Windows Like a Pro
Alright, so you’ve confirmed you have removable sashes. Excellent. Now comes the satisfying part: getting that grime out from between the panes. This isn’t just a quick spray-and-wipe job; it's a process that, when done right, leaves your windows looking invisible and gives you a chance to do some quick, valuable maintenance.
Before you even think about popping that window out, do yourself a favor and lay a thick towel or an old blanket on the floor right underneath. It's a simple move that saves your floors from drips and gives you a soft spot to place tools without a second thought.
Safely Removing the Outer Sash
First things first, you have to get that outer sash or storm window off. How it’s attached really depends on the window's age and manufacturer, so take a minute to see what you're working with.
You're likely looking at one of a few common systems:
- Clips: These are usually small metal or plastic tabs around the frame's edge. They're designed to swivel or slide out of the way to release the sash.
- Thumb Latches: Some windows have simple, spring-loaded latches. A quick press or slide is all it takes to disengage them.
- Screws: If you're dealing with older windows, they might just be held in with good old-fashioned screws. Grab the right screwdriver and be careful removing them. A magnetic bowl or even a labeled sandwich bag is a lifesaver for keeping track of the hardware.
Once all the fasteners are released, get a firm grip on both sides of the sash and gently pull it toward you. Don't ever force it. If it’s stuck, double-check for a missed clip. Sometimes, a bead of old paint is the culprit; you might need to score the edge carefully with a utility knife to break that seal.
My Go-To Tip: If you're tackling more than one window, label everything. A small piece of painter's tape on each sash and a corresponding baggie for its hardware ("Living Room – Left") will prevent a massive headache when it's time to put it all back together.
This visual guide shows the essential tools you'll need for the cleaning phase.
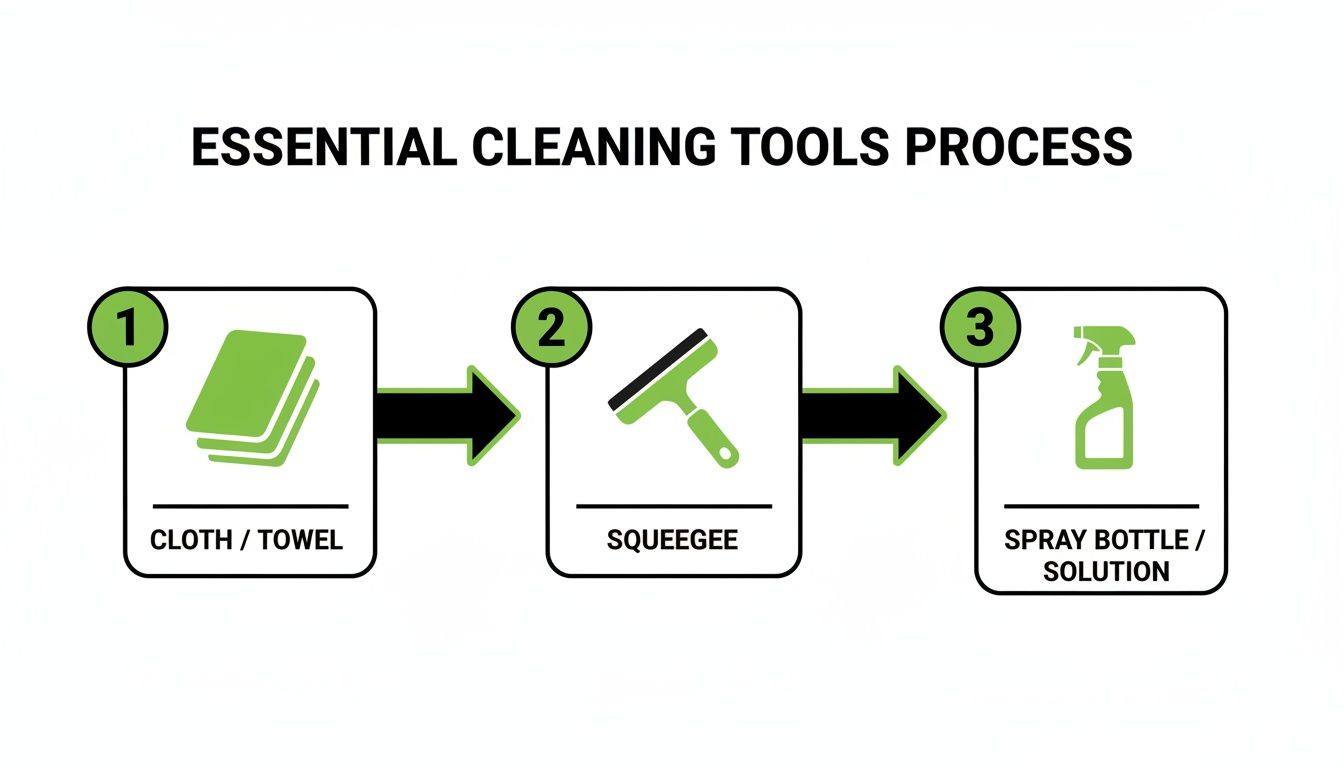
This process flow highlights the core trio for achieving a professional finish—a cloth for washing, a squeegee for clearing, and a spray bottle for your solution.
The Cleaning and Inspection Process
With the sash out, you've opened up access to all four surfaces: both sides of the sash you just removed and both sides of the inner window.
Carry the sash to a good workspace—a pair of sawhorses or a covered table works great. Before you get it wet, use a vacuum with a brush attachment to clear out any loose dust, cobwebs, and debris from the frame and tracks. Then, get to washing with your soapy water and a microfiber cloth.
This is where the squeegee earns its keep. Start at a top corner and pull it down in one smooth, continuous stroke. Overlap each pass by about an inch. The real secret to a streak-free finish? Wipe the squeegee blade with a clean, dry cloth after every single pass. It stops you from just dragging dirt back and forth.
Once a side is squeegeed, use a separate dry microfiber cloth to detail the edges of the glass and wipe down the frame. Flip the sash over and repeat the exact same steps. Then, do it all again on the now-exposed exterior of your inner window.
While everything is apart, take the opportunity to play detective. Look for:
- Peeling paint or cracked caulk around the main window frame.
- Any signs of wood rot or water stains, especially at the sill.
- Weatherstripping that looks compressed, cracked, or brittle.
Catching these small issues now can save you from major repairs and high energy bills down the line.
Drying and Reassembling Your Window
Getting the glass perfectly clean is only half the battle; getting it perfectly dry is what seals the deal. Any moisture left behind will cause spots, or worse, get trapped between the panes and create the very fog you were trying to eliminate.
Make sure every single surface—glass and frame—is bone dry. For a truly brilliant shine, give the glass a final buff with a fresh, dry microfiber cloth to pick up any remaining lint or smudges.
Now, carefully guide the clean sash back into its opening. Re-engage the clips, latches, or screws, ensuring the sash sits squarely and securely in the frame. Tighten the fasteners until they're snug, but don't crank down on them. Overtightening is an easy way to crack a frame or even the glass.
Step back and take a look. You've done more than just learn how to clean between double windows; you've performed a crucial piece of home maintenance that makes a world of difference.
Diagnosing Condensation, Mold, and Seal Failure
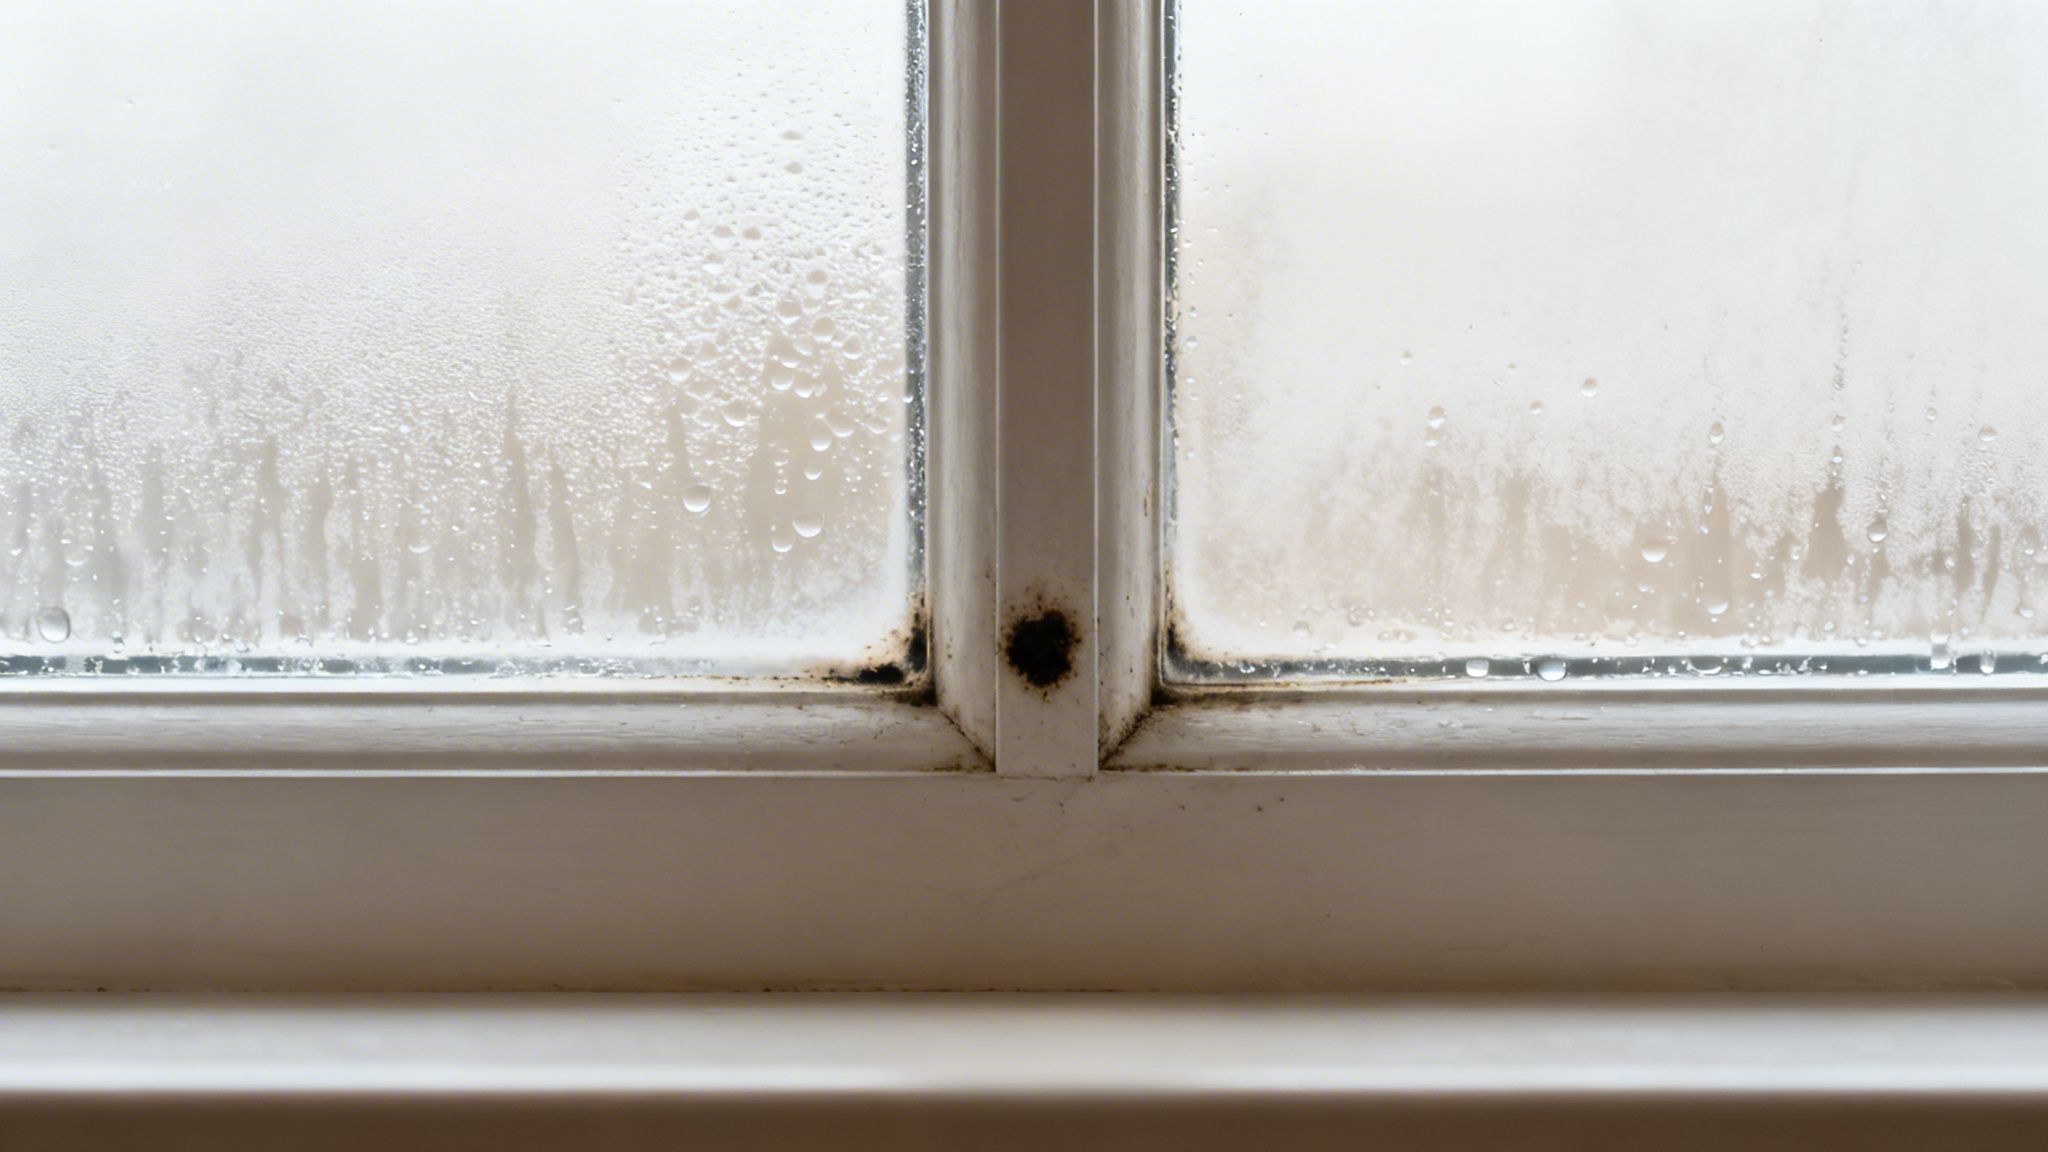
Sometimes, the gunk you see between your window panes is more than just a simple cleaning job. If you’re seeing a persistent fog that never seems to clear or dark, ugly specks you can't wipe away, you're probably looking at condensation, mold, or a completely failed window seal. This is a whole different ballgame compared to cleaning a removable storm window.
Think of the hermetic seal on an Insulated Glass Unit (IGU) like a tire. When it breaks, the insulating gas inside (usually argon) slowly leaks out, and moist, unfiltered air seeps in. That’s the real culprit behind that permanent haze.
Differentiating Condensation Types
Before you panic, it's important to figure out what kind of condensation you're seeing. Not all window fog is a sign of disaster. Where the moisture appears tells you everything you need to know.
On the Outside: See a little dew on the exterior of the glass on a cool morning? That’s actually a good thing. It means your double-pane window is working perfectly, insulating your warm home from the cooler outside air. This type of condensation will burn off as the sun comes up.
On the Inside: Moisture on the interior surface of the glass, facing into your room, is a classic sign of high humidity inside your house. You’ll often see this in bathrooms after a shower or in the kitchen while cooking. While it's not a window failure, it can lead to mold and mildew on the sills if you don't manage the humidity.
Between the Panes: This is the big red flag. If you can see fog, mineral streaks, or water droplets trapped inside the sealed space, your window’s seal has failed. That moisture is now stuck in there for good, and no amount of cleaning the surfaces will get rid of it.
The Critical Takeaway: You cannot learn how to clean between double windows if they are modern sealed units with internal condensation. The problem is a structural failure, not a cleaning issue. The only true fixes are professional defogging or replacing the glass unit itself.
The Dangers of Trapped Moisture and Mold
A broken window seal isn't just an eyesore—it can be a genuine health hazard. That trapped moisture creates a perfect little terrarium for mold and mildew. The dark, spotty growth you might see isn't just ugly; it can release spores right into the air you breathe.
This gets even worse in dusty climates. In a place like Phoenix, airborne PM2.5 particles can jump by 30% during monsoon season. When a window seal fails here, these particles get trapped with the moisture, causing a 15% annual drop in window clarity for affected homes. Homeowners who ignore this problem often find themselves needing full window replacements 35% more frequently, a job that can run about $400 per unit.
What Are Your Immediate Options?
If you've confirmed the fog is between the panes, your DIY cleaning project for this particular window is over. Don't even think about trying to pry the unit apart; you'll only make things worse and risk injury. Your next move is to mitigate the issue and plan for a real repair.
For a deeper dive into managing humidity, these tips for stopping condensation can help prevent the problem from spreading to other windows.
For the failed unit, you have a couple of options. Some specialized companies offer a "defogging" service where they drill a tiny hole, clean the inside with a special solution, and install a one-way valve. It can be a cheaper fix, but it's not always a permanent one. You can read more about why this happens in our guide on the causes of double-pane windows fogging up.
Ultimately, the best long-term solution is to replace the IGU. A professional glazier can often swap out just the sealed glass unit without having to replace the entire window frame, saving you a good chunk of change and restoring your window's insulating power.
When a DIY Approach Isn't the Best Choice
Sometimes, the smartest move in any home project is knowing when to put the tools down and pick up the phone. While cleaning older, removable sashes is a perfectly fine weekend project, there are definite moments when trying to clean between double-pane windows yourself is a bad idea.
At best, it’s ineffective. At worst, it can be dangerous and lead to a much bigger bill than you started with. Recognizing these red lines is the key to protecting your home—and yourself.
The biggest stop sign is a failed seal in a modern Insulated Glass Unit (IGU). If you see that permanent fog trapped between the panes, that’s not just grime; it's a sign of structural failure. Trying to "fix" it on your own will almost certainly damage the window beyond repair, turning a salvageable unit into a full replacement.
Safety and Accessibility Risks
Let’s be honest—anytime a ladder comes out, the risk goes up. Windows on a second story or perched over a sloped roof are a whole different ballgame. Trying to juggle cleaning supplies while balancing on a ladder is just asking for trouble. Your safety should always come first.
Professionals don't just "deal with" these risks; they eliminate them with specialized gear like water-fed poles, safety harnesses, and stable lifts. It’s not just about getting the job done, it's about getting it done safely. When you hire an insured team, you're transferring that liability from your shoulders to theirs.
Expert Insight: When you hire a professional window cleaning company, you're not just paying for clean glass. You're investing in their safety protocols, insurance, and expertise. That peace of mind is priceless.
When Specialized Equipment Is Required
A broken seal doesn’t always mean you need a brand-new window. There are companies that specialize in "defogging" sealed units, and it's a process you simply can't replicate with household tools. It’s a bit like window surgery.
The process usually looks something like this:
- First, they drill a tiny, precise hole through the glass to get into that sealed space.
- Then, they inject a special cleaning solution to wash away the condensation and mineral buildup.
- Next, they flush the unit with a drying agent to get every last bit of moisture out.
- Finally, they install a one-way desiccant valve that lets moisture escape but prevents it from getting back in.
This kind of service can bring back the clarity and insulating power of your window for a fraction of the cost of a full replacement, often buying you several more years of life from the unit. If you're weighing your options, our guide on knowing when to call a professional window washing company can help.
Protecting Your Investment
At the end of the day, your windows are a major investment in your home's value and energy efficiency. An amateur repair attempt can easily lead to bigger headaches, like permanent scratches on the glass or irreversible damage to the frame.
Professionals bring more than just the right tools; they bring a trained eye. They can spot underlying issues you might miss, like a slow leak in the frame or early signs of wood rot. While you're focused on cleaning, they see the bigger picture.
And remember, if a window seal has failed, it might be a symptom of a larger security issue. Keeping your home safe goes hand-in-hand with maintenance, so it's always a good idea to know how to secure your windows. A professional assessment gives you that holistic view, ensuring your windows are clean, efficient, and secure.
Common Questions About Cleaning Between Double-Pane Windows
Even with the best guide in hand, you're bound to have questions when you're staring down a grimy window. It's one of those jobs where knowing what not to do is just as important as knowing what to do, especially when you're trying to figure out if your windows can even be taken apart.
I've been in the window business for a long time, and these are the questions I hear from homeowners over and over. Let's get them answered so you can tackle this project with confidence.
Can I Clean Between a Permanently Sealed Window Myself?
This is the big one, and the answer is a hard no. You absolutely cannot clean between the panes of a modern, factory-sealed window, often called an Insulated Glass Unit (IGU).
That gap between the panes isn't just air; it's hermetically sealed and filled with an inert gas like argon to insulate your home. If you're seeing fog, moisture, or dirt in there, it means the window's seal has failed. Trying to pry it open will wreck its insulating properties for good and you'll almost certainly crack the glass. For a failed seal, your only options are a professional defogging service (which is often a temporary band-aid) or, more realistically, replacing the glass unit itself.
How Often Should I Clean My Removable Storm Windows?
Now, if you have older windows with removable storm sashes or inserts, that's a different story. For these, a deep clean between the panes is a fantastic task for your annual home maintenance list. I usually recommend doing this at least once a year, either in the spring or fall.
Of course, where you live matters. If your home is near a dusty field, a busy road, or in an area with a ton of pollen, you might find yourself needing to do it twice a year. Keeping up with it doesn't just improve your view—it prevents all that gunk from building up in the window tracks, which can make them a real pain to open and close later on.
A Quick Tip: Washing the outside of your windows a few times a year makes a huge difference. It dramatically cuts down on the amount of dirt that can work its way into the tracks, buying you more time between deep cleans.
What Are the Biggest DIY Window Cleaning Mistakes to Avoid?
I've seen some real disasters over the years. Even a simple job can go south if you're not careful. Steer clear of these common mistakes to get a streak-free finish without damaging your windows.
Here are the top three blunders I see all the time:
- Cleaning in Direct Sunlight: This is the cardinal sin of window washing. When the sun is beating down on the glass, your cleaning solution evaporates in seconds. This leaves behind a streaky, filmy residue before you even have a chance to squeegee it off. Do yourself a favor and work on the shady side of the house or wait for an overcast day.
- Using Abrasive Tools: Please, put down the razor blades, steel wool, and scouring pads. They might seem like a quick fix for a stubborn spot of paint or sap, but they will etch your glass with thousands of tiny scratches. You won't notice them at first, but in the right light, your window will be ruined.
- Choosing Harsh Cleaners: Many common household cleaners, especially those with ammonia, are too aggressive for windows. Over time, they can dry out and degrade the rubber seals around the glass and can even damage special low-E or UV coatings. A simple squirt of dish soap in a bucket of water with a splash of white vinegar is safer and works just as well.
Can Clean Double-Pane Windows Really Lower My Energy Bills?
Yes, they can—but it's not about the clean glass itself. The real energy savings come from the inspection you perform while you're cleaning.
When you're up close and personal with your windows, you’re much more likely to spot a failed seal—that dreaded fogging between the panes. A broken seal means the insulating argon gas is gone and has been replaced by moist air, completely tanking your window's ability to insulate.
Think about this: the Department of Energy estimates that heat gain and loss through windows are responsible for 25% to 30% of residential heating and cooling energy use. By catching a broken seal early and replacing the IGU, you're restoring that window's insulating power. That's a direct fix that stops you from heating and cooling the outdoors, which absolutely helps lower your energy bills.
Ready to leave the streaks and ladders to the experts? Sparkle Tech Window Washing provides professional, insured, and reliable window cleaning services across Arizona. Let us restore your view and give your home the sparkle it deserves.
Get Your Free Estimate Today at sparkletechwindowwashing.com