


If you're looking at your windows and seeing stubborn, cloudy spots that just won't budge, you're in good company. Those frustrating marks are mineral deposits—mostly calcium and magnesium—left behind when water dries. The good news is you can absolutely get rid of them with the right approach, and I'm here to show you exactly how.
Understanding Why Water Spots Form on Your Windows
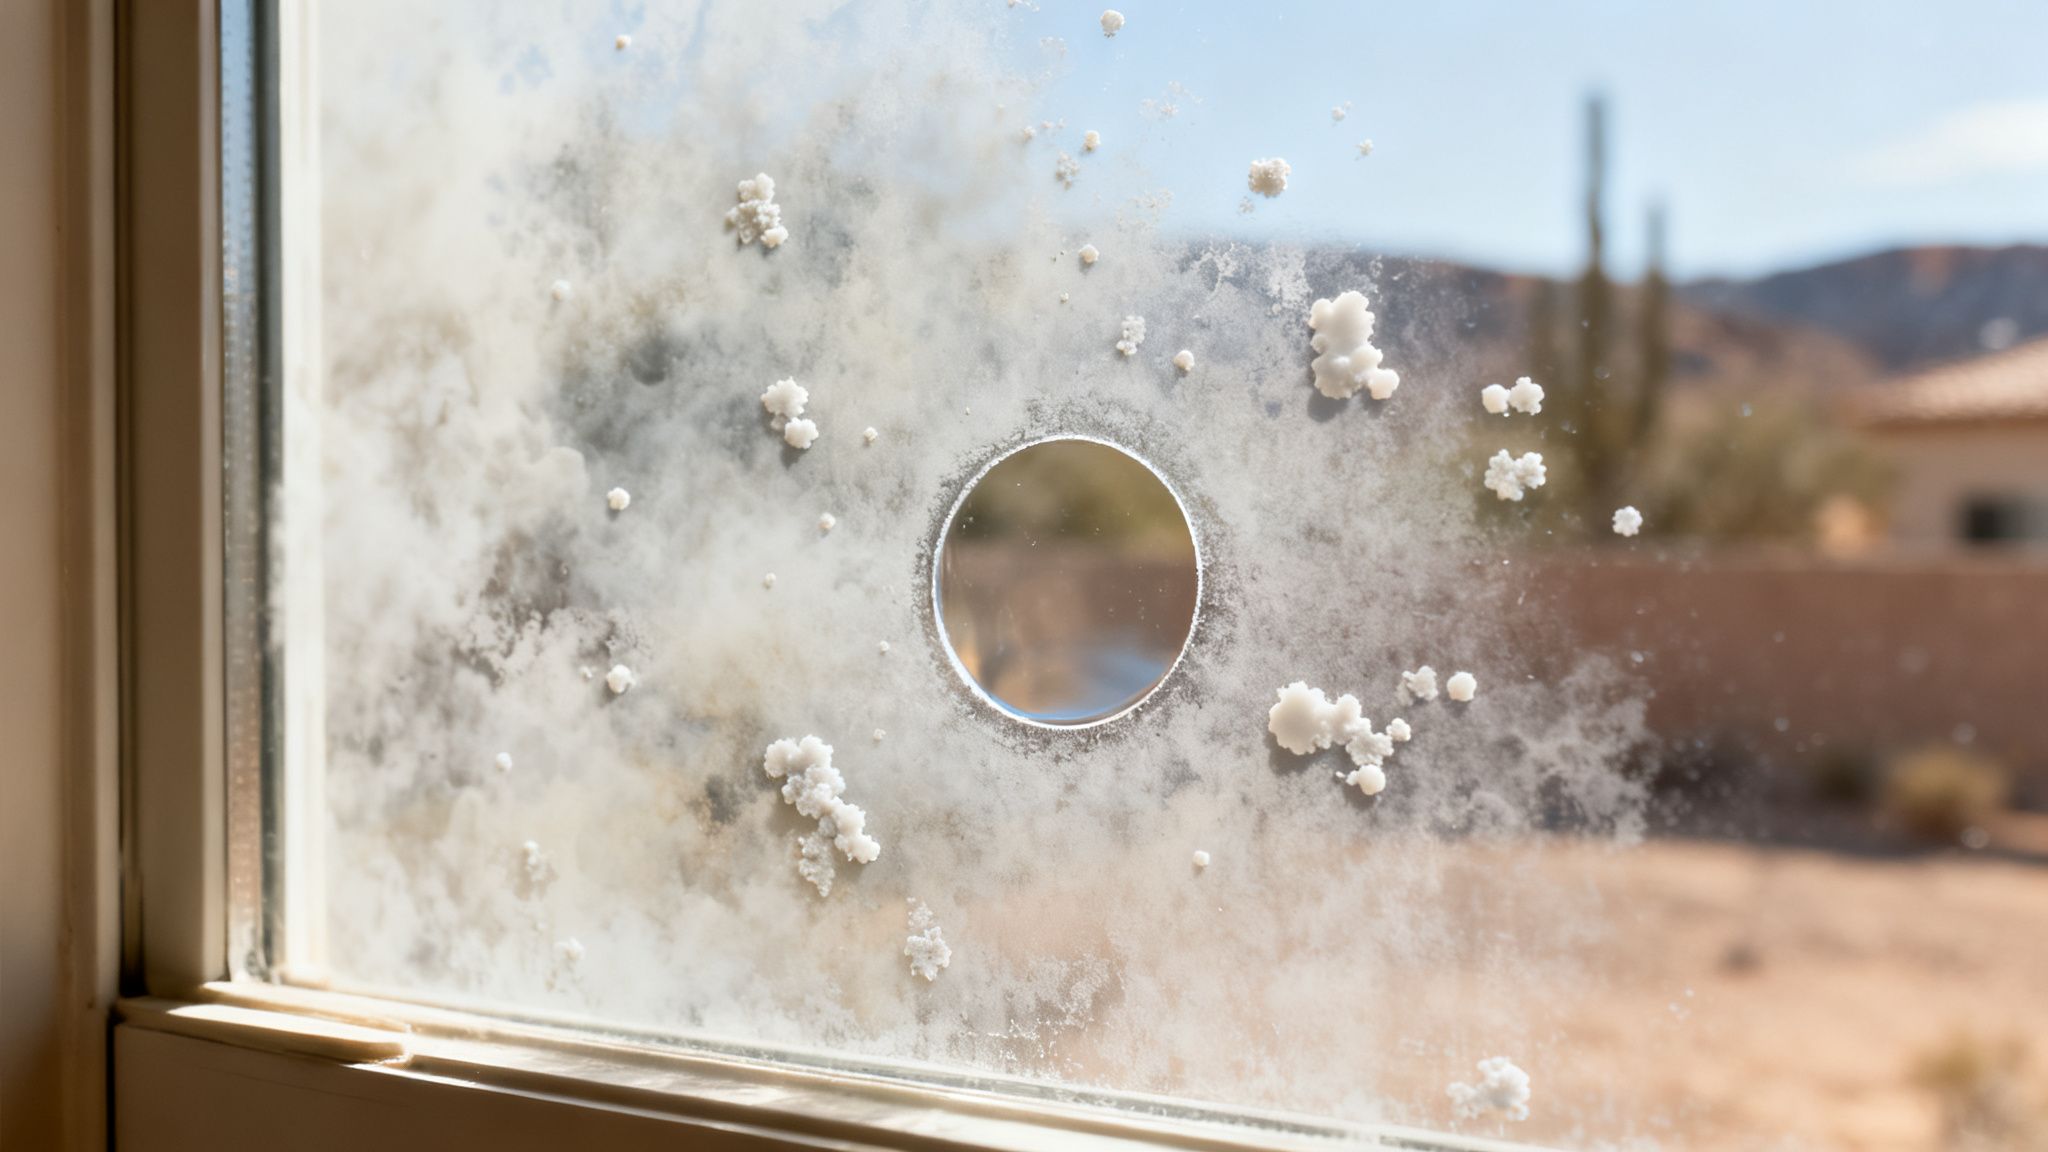
Those chalky white blemishes on your glass aren't just dirt; they're the ghost of water past. This is a huge issue in areas with "hard water," where the local water supply is packed with dissolved minerals. When water from a sprinkler, a hose, or even a rainstorm evaporates on the glass, all those minerals get left behind.
Give it some time, and the sun bakes those deposits right onto the surface. That's when you realize your standard glass cleaner isn't going to cut it. If they sit for too long, they can actually bond with the glass and cause permanent etching—a cloudy haze that no amount of scrubbing will ever fix.
The Science Behind the Stains
Figuring out the "why" is the first step to finding the right fix. In my experience, the problem almost always comes down to one of these culprits:
- Hard Water: Water from wells or municipal sources often has high levels of calcium and magnesium, which are the main ingredients in those tough white spots.
- Misdirected Sprinklers: This is a big one. An irrigation system that constantly sprays your windows is a guaranteed recipe for serious mineral buildup.
- Metal Screens: Ever notice stains below your window screens? Rainwater running over old metal screens can pick up oxidized particles and leave a different kind of stain on the glass.
This isn't just a niche problem; it's a massive headache for homeowners everywhere. In fact, the global market for window cleaning equipment, which includes specialty products for water spots, was valued at $2.8 billion back in 2026. Homeowners like you and me make up over half of that market—53.2%, to be precise—which tells you just how common this is. You can learn more about the window cleaning market and see how big the industry has become.
Key Takeaway: Water spots are mineral deposits, not just dirt. Tackling them quickly is crucial to prevent them from etching into the glass and causing permanent damage. Let’s walk through the safe and effective ways to get your glass clear again.
Getting Your Gear Together: Tools and Safety
Before you even think about tackling those stubborn water spots, let’s talk prep. Jumping in without the right gear is a recipe for frustration. A few minutes of setup can be the difference between a sparkling, clear view and a streaky mess—or worse, an accident.
Think of it like any other project around the house. You wouldn't start painting a room without your rollers and drop cloths, right? Same principle applies here. A little organization up front makes the entire process smoother and gives you much better results.
First Things First: Your Safety Checklist
Safety is never something to brush aside, even with seemingly harmless DIY solutions. Vinegar is acidic, and commercial cleaners can be potent. Always put your well-being first.
- Protective Gloves: Your skin will thank you. A good pair of waterproof gloves is a must to avoid irritation from any cleaning solution you're using.
- Eye Protection: Goggles or safety glasses are non-negotiable. One accidental splash is all it takes to cause serious eye irritation. Don't risk it.
- Stable Footwear: If you're getting on a step ladder to reach higher windows, make sure you're wearing sturdy, non-slip shoes. A secure footing is critical.
The Tools of the Trade
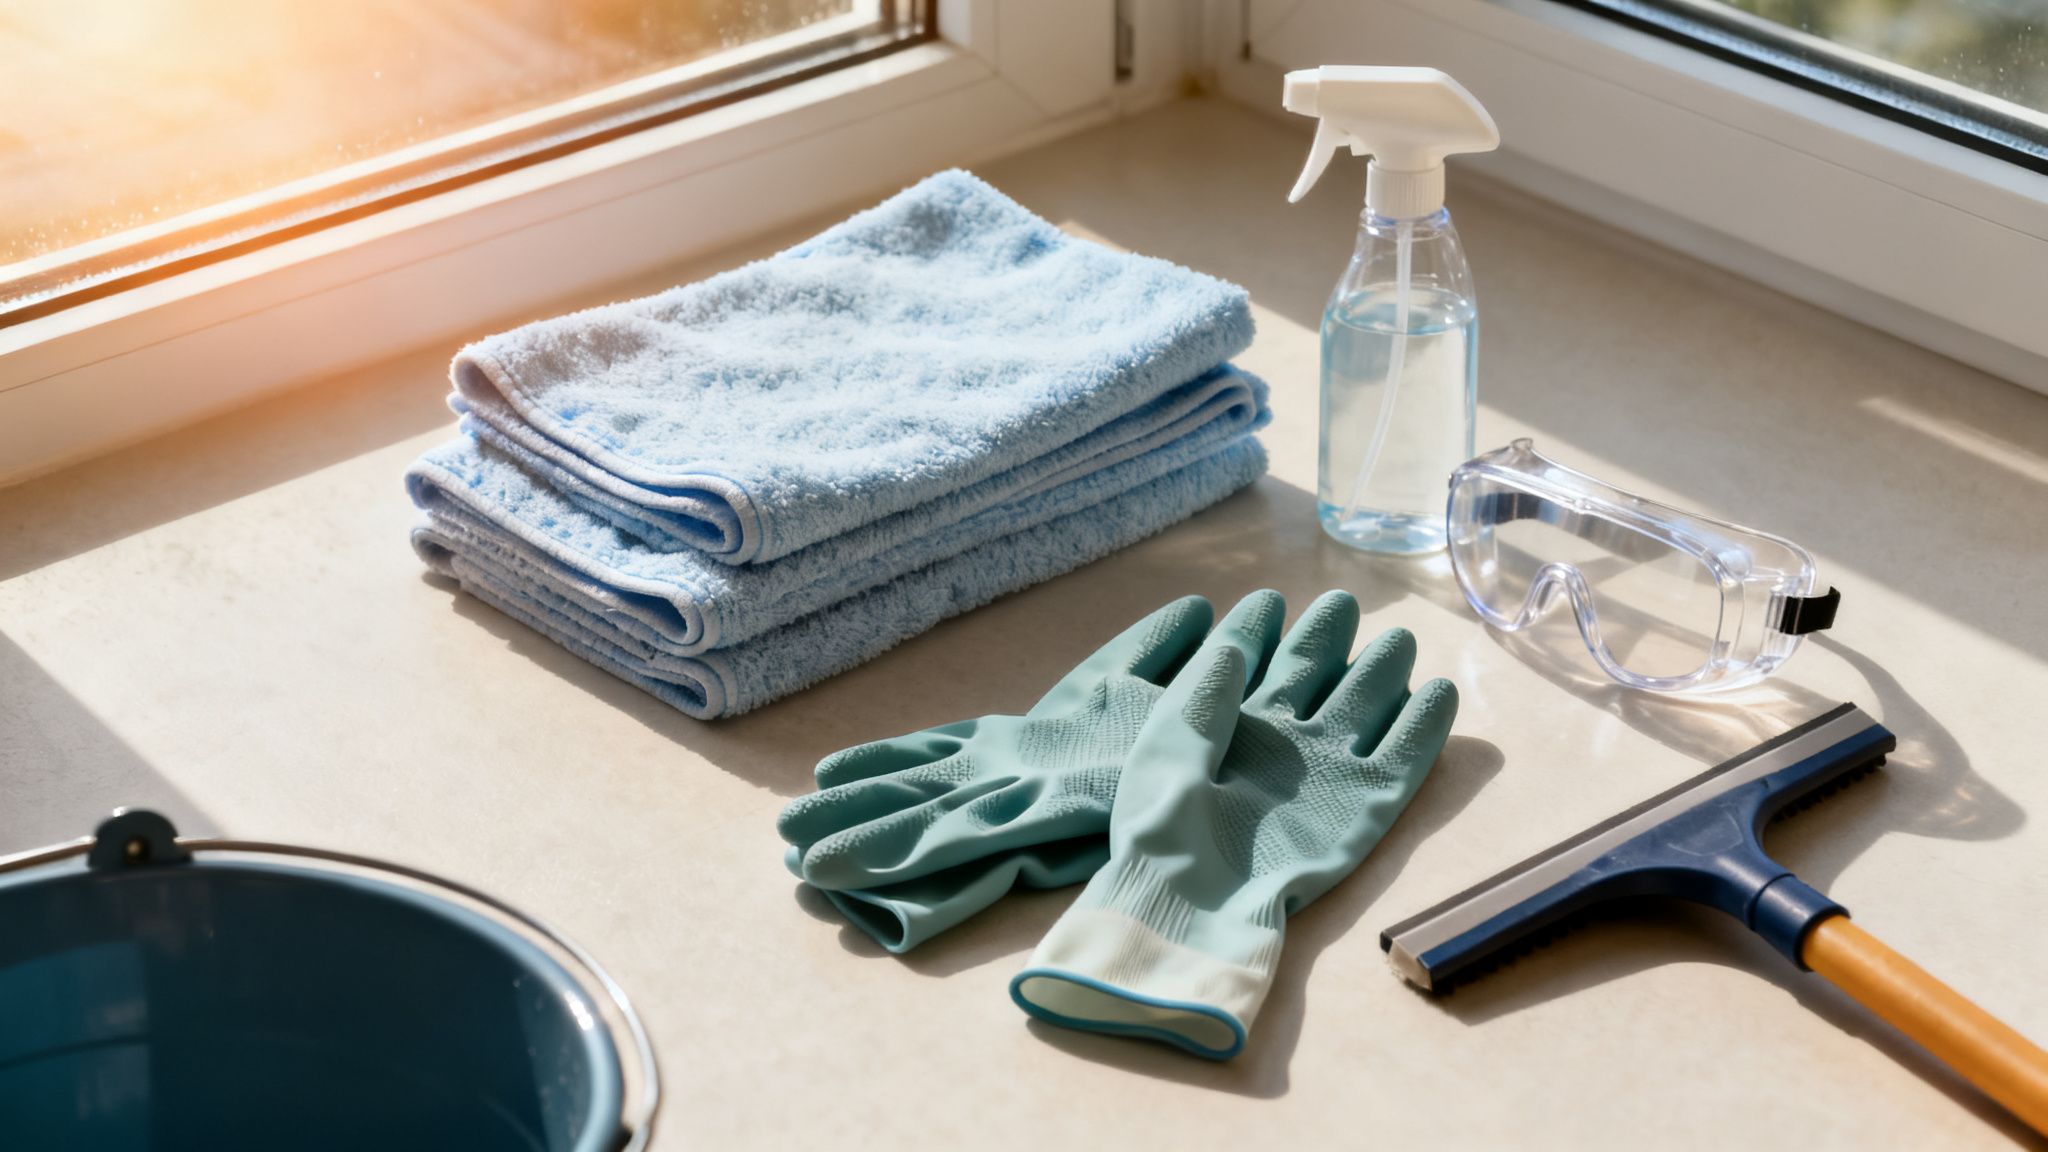
With safety covered, it's time to assemble your cleaning kit. The secret to a professional-looking, streak-free shine isn't about expensive gadgets; it’s about having the right fundamental tools and knowing how to use them.
Here's what I always have on hand for a water spot removal job:
- Plenty of Microfiber Cloths: You'll want at least 3 of them. One for applying the cleaner, one for the first pass of drying, and a final, perfectly dry one for that last polish. They're super absorbent and won't leave lint behind.
- A High-Quality Squeegee: This is your MVP for a flawless finish. Don't skimp here—a cheap one will just push dirty water around. Get one with a sharp, flexible rubber blade.
- Spray Bottle & Bucket: The spray bottle is your best friend for applying homemade solutions evenly. A bucket is great for your rinse water or for mixing up a larger batch of cleaner.
A Pro Tip for the Arizona Sun: Timing is everything out here. Never, ever clean your windows in direct, blazing sunlight. The intense heat will evaporate your cleaning solution in seconds, leaving behind a film of minerals and residue that's often worse than the original spots. Your best bet is to work early in the morning or on an overcast day.
Getting the right equipment doesn't have to be complicated. If you're looking for a deeper dive into what makes a great tool, check out our guide on the best window cleaning tools. Starting with the right basics is the foundation for a job well done.
Simple DIY Fixes for New or Lighter Water Spots
When you first spot those pesky, cloudy marks messing up your view, don't worry. If the mineral buildup is fairly new or not too severe, you probably already have a great water spot remover in your kitchen.
Starting with a simple home remedy is often the smartest move. It can save you both time and money, and you can get fantastic results without immediately reaching for harsh chemicals. The most trusted first-line defense is a classic for a good reason: a simple mix of white vinegar and water. The mild acid in the vinegar is surprisingly effective at dissolving the alkaline mineral deposits, like calcium and magnesium, that cause the spots in the first place.
The Go-To Vinegar and Water Method
First thing's first, let's mix up the solution. A 50/50 ratio of distilled white vinegar and water is the perfect place to start. I always recommend using distilled water—it’s a small detail, but it makes a difference. Tap water contains its own minerals, and you don’t want to add more to the glass you're trying to clean.
Once you’ve got your mix in a spray bottle, here’s how to get the best results:
- Soak the Spots: Don't hold back. Give the window a good, thorough spray, making sure you've completely coated every cloudy area.
- Give It Time to Work: This is the most crucial step. You have to let the solution sit on the glass for at least one full minute. For more stubborn spots, I've let it dwell for up to ten minutes. This "dwell time" is what allows the acetic acid to break down those mineral bonds.
- A Little Elbow Grease: After letting it sit, grab a clean microfiber cloth and gently scrub the spots. I find small, circular motions work best to lift the dissolved minerals without any risk of scratching the glass.
- The Perfect Squeegee Finish: To avoid leaving new streaks behind, finish with a squeegee. Start at the top and pull down in smooth, overlapping strokes. Just remember to wipe your blade on a clean rag after each pass. This pulls all the gunk and moisture off the window for a truly clear finish.
Knowing When to Grab a Stronger Cleaner
So, what happens if the vinegar trick doesn't quite cut it? It usually just means the minerals have been on the glass longer and have really baked on. This is when it's time to bring in a dedicated commercial water spot remover. These cleaners are formulated with slightly stronger acids or super-fine abrasives designed to tackle tougher jobs.
A quick pro tip: When you're shopping for a commercial remover, make sure the label explicitly says it's safe for residential glass. Some of the heavy-duty products out there are meant for cars or industrial settings and can be way too aggressive for your home's windows, potentially damaging special coatings or seals.
Before you go all-in with a new product, always, always do a patch test. Pick a small, out-of-the-way corner of the window and apply a little bit of the cleaner exactly as the directions say. This simple check saves you from any nasty surprises like discoloration or damage to your window frames.
Even with great DIY options, it's clear that sometimes a bigger problem needs a professional touch. The window cleaning services market is expected to hit $160.3 billion in 2025 and is projected to nearly double by 2034. This trend shows that many homeowners ultimately decide to call in an expert for a guaranteed, perfect finish. You can discover more about this market growth on MarketResearch.com.
Dealing With Heavy Mineral Buildup and Etched Glass
Every so often, you’ll run into water spots that have been sitting on the glass for so long they feel like they’re part of it now. When your vinegar solution or a store-bought cleaner just isn't cutting it, you’re dealing with a much tougher problem. For these stubborn mineral deposits, stepping up to a stronger solution like cleaning vinegar can sometimes do the trick.
But what happens when even that doesn't work? At that point, you're looking at physical removal methods. These can be incredibly effective, but I have to be honest—they also come with a serious risk of scratching the glass for good if you aren't careful. This is where a simple DIY project can quickly turn into a costly mistake.
Using a Scraper—Very, Very Carefully
If you can feel the mineral deposits—they have a rough, gritty texture—a new, sharp razor blade or a proper ceramic scraper can physically lift them off the glass. But there's one golden rule you absolutely cannot break: the glass must stay wet the entire time. A dry blade on dry glass is a surefire way to leave behind a permanent, deep scratch.
Here's how to approach this safely:
- Have a spray bottle filled with soapy water right next to you. You'll need to keep the area you're working on constantly lubricated.
- Hold the blade at a 45-degree angle to the glass. If you go too steep, you'll dig into the glass. Too shallow, and it won't be effective.
- Apply gentle, even pressure. Work in a single direction to carefully shave off the deposits. Don't scrub back and forth.
This simple guide illustrates the basic workflow for removing water spots, highlighting the essential steps of mixing your solution, testing it, and finally cleaning.
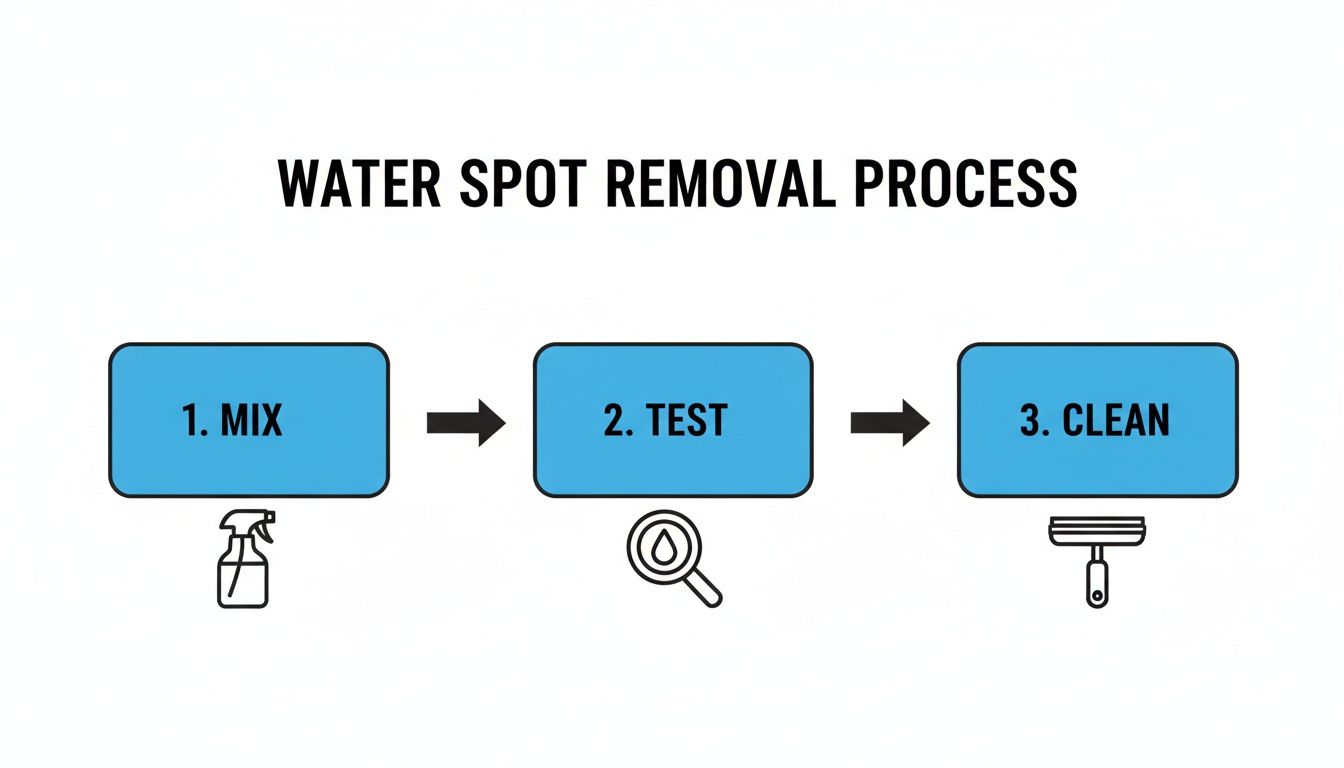
When you’re using something as aggressive as a scraper, that "Test" step is non-negotiable. Always start in a small, hidden spot.
The Abrasive Method: A Final Option
For truly stubborn stains on standard, uncoated glass, there's one more trick you can try: super-fine #0000 steel wool. It has to be this specific grade. It’s so fine that it can often polish away mineral buildup without scratching the glass surface.
Just like with a scraper, lubrication is key. Keep the glass wet and use very light pressure in small, circular motions.
A Word of Warning: Never, ever use steel wool on tinted windows, specialty coated glass, or Low-E windows. You will ruin the finish. I can't stress this enough: always test it in an out-of-the-way corner first to see how the glass reacts.
Honestly, these advanced techniques are where most homeowners should draw the line. The potential for causing permanent damage is just too high, and it takes a very steady hand. If you're dealing with stains this bad, bringing in a professional is almost always the smarter, safer bet. For a deeper dive into this topic, check out our guide on cleaning hard water spots from glass.
A quick call to us at Sparkle Tech will get the job done right, without any risk to your windows.
Keeping Your Windows Spot-Free for Good
Getting your windows perfectly clear is a fantastic feeling. But let's be honest, the real win is keeping them that way. Preventing water spots is less about endless cleaning and more about smart, proactive care. It’s far easier to stop those pesky mineral deposits from ever forming than it is to battle them with a scraper and elbow grease later.
One of the most common culprits I see out in the field? A rogue sprinkler system. Seriously, take a few minutes and just watch your sprinklers run their cycle. If they’re spraying your windows, you’ve found the primary source of your problem. A quick adjustment of the sprinkler heads can solve the issue for good.
Build a Simple Maintenance Routine
Think of window care like any other home maintenance task—a little bit of regular effort goes a long way. A few simple habits can save you from ever needing a heavy-duty water spot remover again.
- Squeegee on the Spot: Whenever you’re washing the car or rinsing down the siding, take an extra minute to squeegee the windows dry. This whisks the water away before the sun bakes those minerals onto the glass.
- Use a Glass Sealant: Hydrophobic glass coatings are a game-changer. These products create a slick, invisible shield that causes water to bead up and roll right off, taking all the dissolved minerals with it. It’s basically Rain-X, but for your house.
- Fix Leaks Immediately: Don't overlook a leaky window frame. That slow, consistent drip is a perfect recipe for stubborn stains and potential water damage. The first and most critical step is to fix leaking windows to cut off the problem at its source.
My Two Cents: Your best tool is always prevention. By managing nearby water sources and protecting the glass itself, you can break the endless cycle of scrubbing and scraping. You’ll shift to a simple, sustainable routine that keeps your windows looking their best for years.
It’s no surprise that specialized cleaning and maintenance services are in high demand. The global cleaning services market is expected to grow from $418.7 billion in 2025 to a staggering $823.6 billion by 2035. North America currently holds the largest piece of that pie with a 36.8% market share, showing just how much homeowners value professional help in maintaining their properties. You can dive deeper into the data from the global cleaning services market report on Market.us.
When It’s Time to Call in the Window Cleaning Pros
There’s a real sense of accomplishment that comes from a successful DIY project, but every seasoned homeowner knows there's a point where you have to call it. You’ve given it your best shot with the vinegar, the special cloths, and even the store-bought removers, but those stubborn spots just aren't budging.
This is that critical moment. Pushing forward could take you from a DIY fix to a DIY disaster, and that's when calling a professional becomes the smartest move you can make.
Signs You’ve Hit a Wall
Sometimes, what you think is just a really tough stain is actually damage to the glass itself. In those cases, more elbow grease or stronger chemicals won’t help—in fact, they can make things a whole lot worse. Learning to spot these warning signs can save you from accidentally ruining your windows.
Here are the tell-tale signs that it's time to put down the squeegee and pick up the phone:
- The Fingertip Test: Gently run your fingers over the stained area. If it feels like a gritty or rough film, you're probably dealing with a heavy layer of mineral buildup. But if the glass feels pitted or indented, that's a classic sign of etching. This means the minerals have literally eaten into the glass, and no amount of cleaning will reverse it.
- Safety First: Are the problem windows on the second story? Do you feel even slightly uneasy on that extension ladder? Your safety is non-negotiable. We professionals have the right safety gear, training, and insurance to tackle high and hard-to-reach windows without a second thought. It's just not worth the risk.
- You Just Want It Done Right: Let's be honest, sometimes you just want that perfect, crystal-clear result without giving up your entire Saturday. A pro service brings that guarantee. It’s an investment in your home's curb appeal and, just as importantly, in your own free time.
For a lot of homeowners, calling us isn't admitting defeat. It's about recognizing when a problem needs a specialist's touch. We get calls all the time from people who've tried everything, only to realize the issue was more complex than it looked.
The Sparkle Tech Advantage for Arizona’s Tough Water Stains
Here in Arizona, we have notoriously hard water. Combine that with our intense sun, and you get mineral stains that are baked on and incredibly stubborn. Our team at Sparkle Tech Window Washing is built to handle exactly these kinds of local challenges.
We come equipped with professional-grade compounds and specialized equipment that you just can't find at a hardware store. More importantly, our technicians know the difference between a stain that can be removed and glass that has been permanently etched. This expertise ensures we use the right approach to get your windows sparkling again without causing any damage.
Want to dig deeper into this decision? Check out our guide on knowing when to call a professional window washing company.
If you're looking at your windows and feeling more frustration than pride, it's time for a different plan.
Don't let stubborn water spots ruin your view any longer. The expert team at Sparkle Tech Window Washing has the tools and experience to safely restore your windows to a perfect shine. Contact us today for a free, no-obligation estimate!