


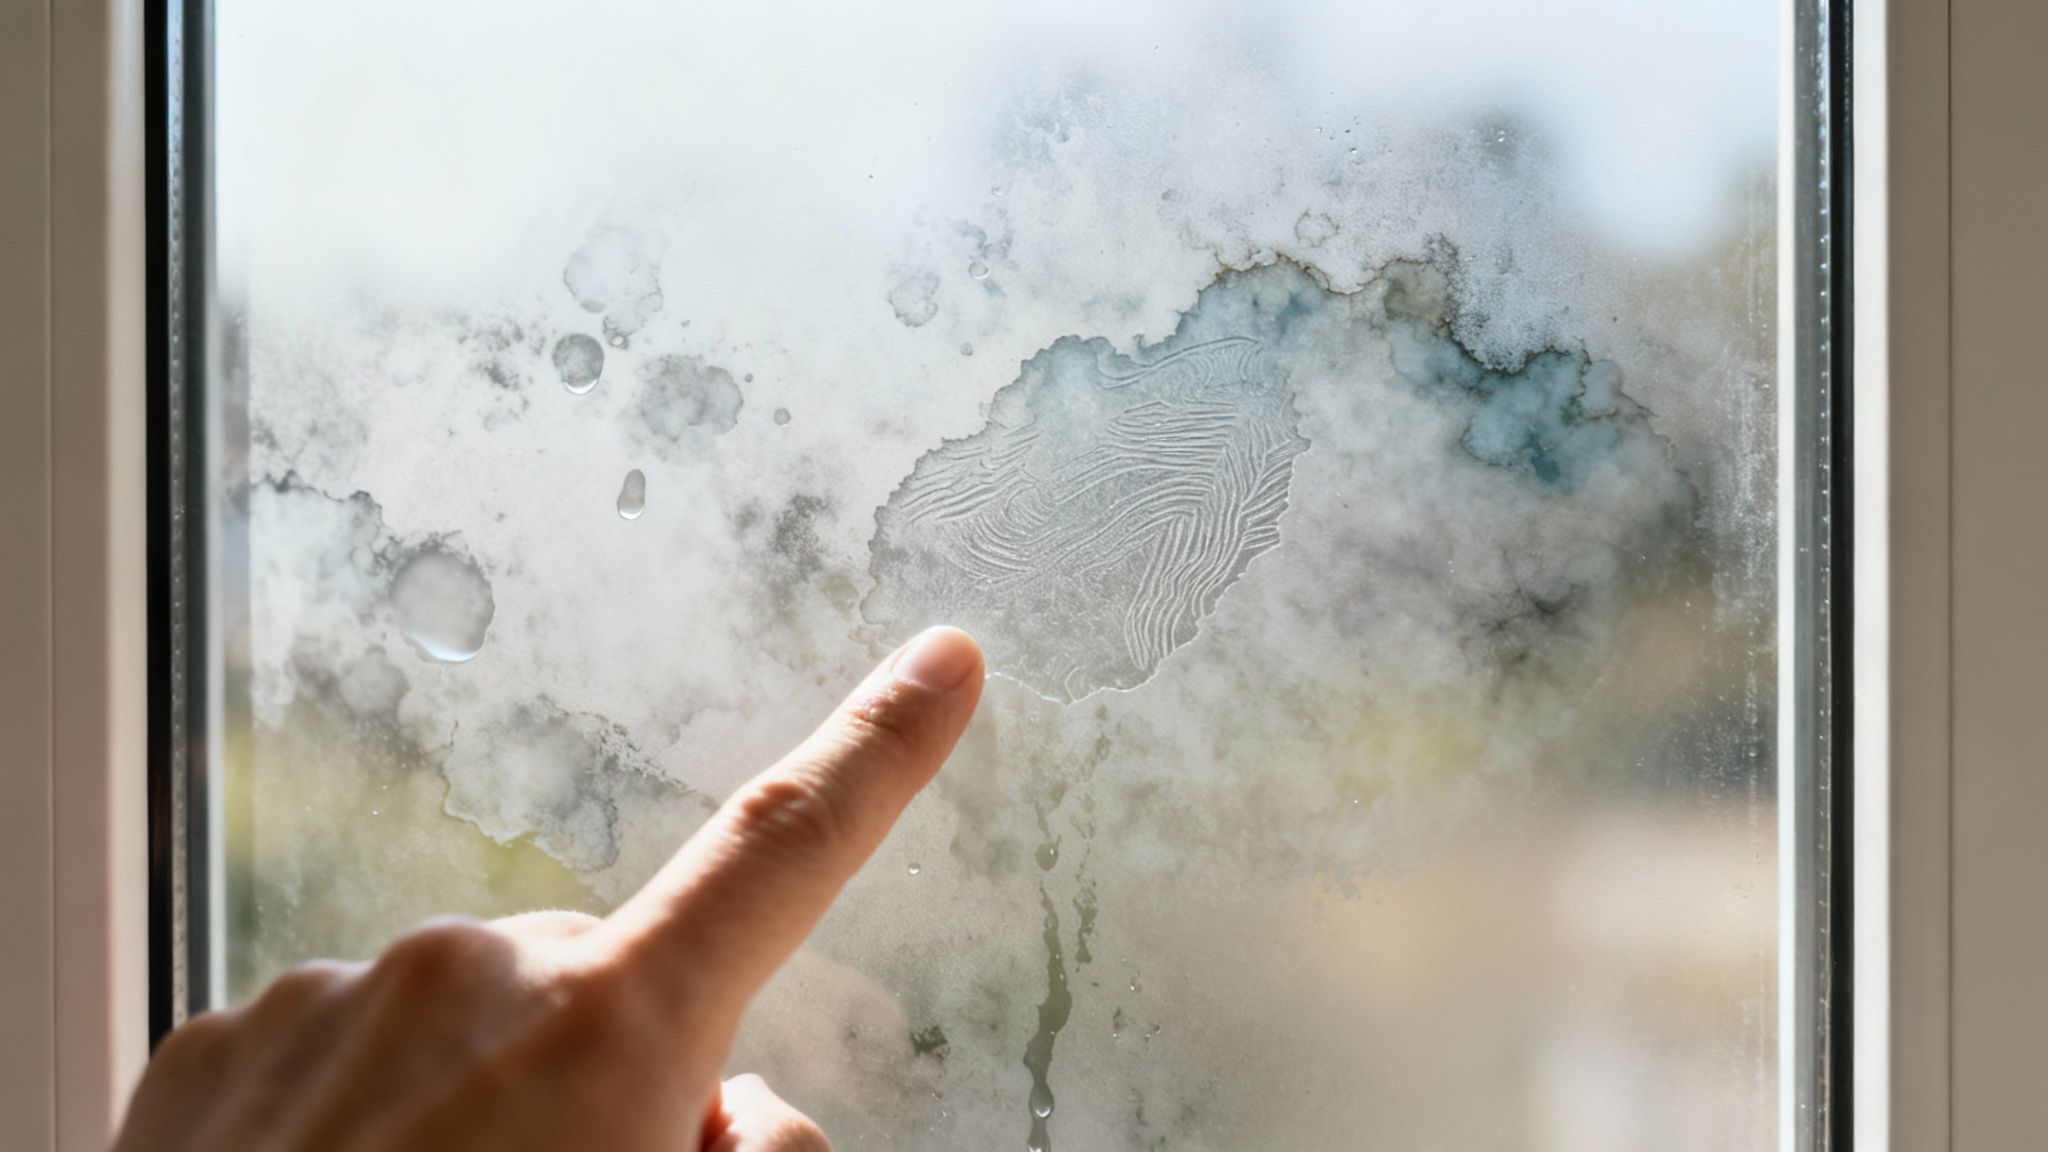
Before you can get rid of those stubborn water stains on your windows, you need to know what you're dealing with. Those annoying spots are mineral deposits, mostly calcium and magnesium, that get left behind when hard water evaporates. Figuring out how bad they are is key to getting them off for good.
What Causes Those Stubborn Water Stains on Glass?
Before you even think about grabbing a cloth and spray bottle, it helps to understand your opponent. Those cloudy, chalky marks aren't just dried water—they're concentrated mineral deposits that have literally bonded to the glass. Knowing this helps you pick the right cleaner and avoid wasting a Saturday afternoon on something that doesn't work.
The main culprit is hard water. It’s just water that's packed with dissolved minerals. When a drop of it lands on your window and dries up, the H₂O is gone, but the minerals are left behind. That's the stain.
Common Sources of Window Water Stains
A few everyday things are probably causing this mineral buildup. Spotting them is the first step to keeping your windows clear in the future.
- Lawn Sprinklers: This is the big one. I’ve seen it a hundred times. Your sprinkler system does a great job watering the lawn, but it also blasts tap water all over your ground-floor windows. As the sun bakes those droplets dry, you're left with perfect little circles of mineral gunk.
- Rain and Runoff: You might think rain is pure, but if you live in an area with hard water, even a rainstorm can leave spots. The real problem is when that rainwater runs down your siding, roof, or window frames, picking up more minerals and dirt along the way before it dries on the glass.
- Improper Cleaning: Believe it or not, washing your windows can actually make things worse. If you use regular tap water from a hose and just let it air-dry, you're essentially applying a fresh coat of mineral deposits across the entire pane.
Distinguishing Between Water Spots and Etched Stains
It's important to know that not all stains are the same. A fresh water spot is just sitting on the surface, and a good acidic cleaner can usually break it down pretty easily. But when you let those minerals sit for weeks or months, a nasty chemical reaction starts.
The alkaline minerals slowly start to corrode the glass itself, a process called etching. An etched stain is actual damage to the window. It looks cloudy or hazy even after you've cleaned it, because the surface of the glass is no longer perfectly smooth.
Hard water stains are a pain, but they're manageable if you catch them early. While mild spots might come off with simple household solutions, older, more severe stains often need a professional touch. We use specialized polishing compounds to gently grind away the mineral buildup without scratching the glass. This is exactly why regular cleaning is so important—it stops the stains from ever getting bad enough to cause permanent etching. Want to know more? You can find out more about the hard truth of water stains.
Gathering Your Water Stain Removal Toolkit
Let's be honest, trying to scrub away stubborn water stains with the wrong gear is a recipe for frustration. The secret isn't more elbow grease; it's about having the right tools ready to go before you start. Getting your kit together first makes the whole process smoother and, dare I say, almost satisfying.
The first thing to do? Toss the paper towels. Seriously. They just shred and leave linty fuzz all over your glass, which is the last thing you want. Your new best friends are a couple of high-quality microfiber cloths. You'll need one for the actual cleaning and a second, completely dry one for that final buff to get a flawless, gleaming finish.
Your Essential Cleaning Arsenal
Beyond the cloths, a few key items will elevate your window cleaning from a chore to a craft. These are the non-negotiables I recommend for getting those professional-looking results.
- A Quality Squeegee: This is the game-changer for a truly streak-free window. A good rubber blade glides over the glass, whisking away every drop of dirty water and dissolved minerals in one clean swipe.
- Spray Bottles: I always keep at least two on hand. One is for my cleaning solution—often just a simple vinegar mix—and the other is filled with distilled water. That final spritz of pure, mineral-free water is a pro trick for a spotless rinse.
- A Soft-Bristled Brush or Non-Abrasive Scrubber: Sometimes, mineral deposits have been sitting for a while and need a little extra persuasion. A soft brush helps you work the cleaner into those tough spots without any risk of scratching the glass.
If you're looking to build out a more comprehensive kit for all your windows, high and low, our guide on the best window cleaning tools has some great recommendations on everything from squeegees to extension poles.
Cleaners and Safety Gear
Now, let's talk about the cleaners that do the real work. For light spots, a simple solution of white vinegar and water often does the trick beautifully.
But for those really baked-on, cloudy stains, you might need to bring in something with a bit more punch. That's where a specialized glass cleaner can be a lifesaver. These are formulated specifically to break down heavy mineral buildup without damaging your glass.
Pro Tip: Don't forget to protect yourself and your home. A simple pair of waterproof gloves saves your hands from drying out, especially when using vinegar. I also always lay an old towel along the windowsill. It’s a small step that catches any drips and saves you from having to clean your floors or sills afterward.
Effective DIY Methods for Removing Water Stains
Alright, this is where the rubber meets the road. You’ve got your tools, and now it's time to tackle those frustrating water stains head-on. Let's walk through a couple of proven, home-based methods that are surprisingly effective, starting with the gentlest option for lighter mineral buildup.
The real key to success with any of these techniques is patience. Those mineral deposits didn't show up overnight, and they won’t disappear with a quick wipe. You have to give your cleaning solution enough time to actually break down the bond between the minerals and the glass.
Not sure where to start? This handy visual guide can help you choose the right path based on how tough your stains look.
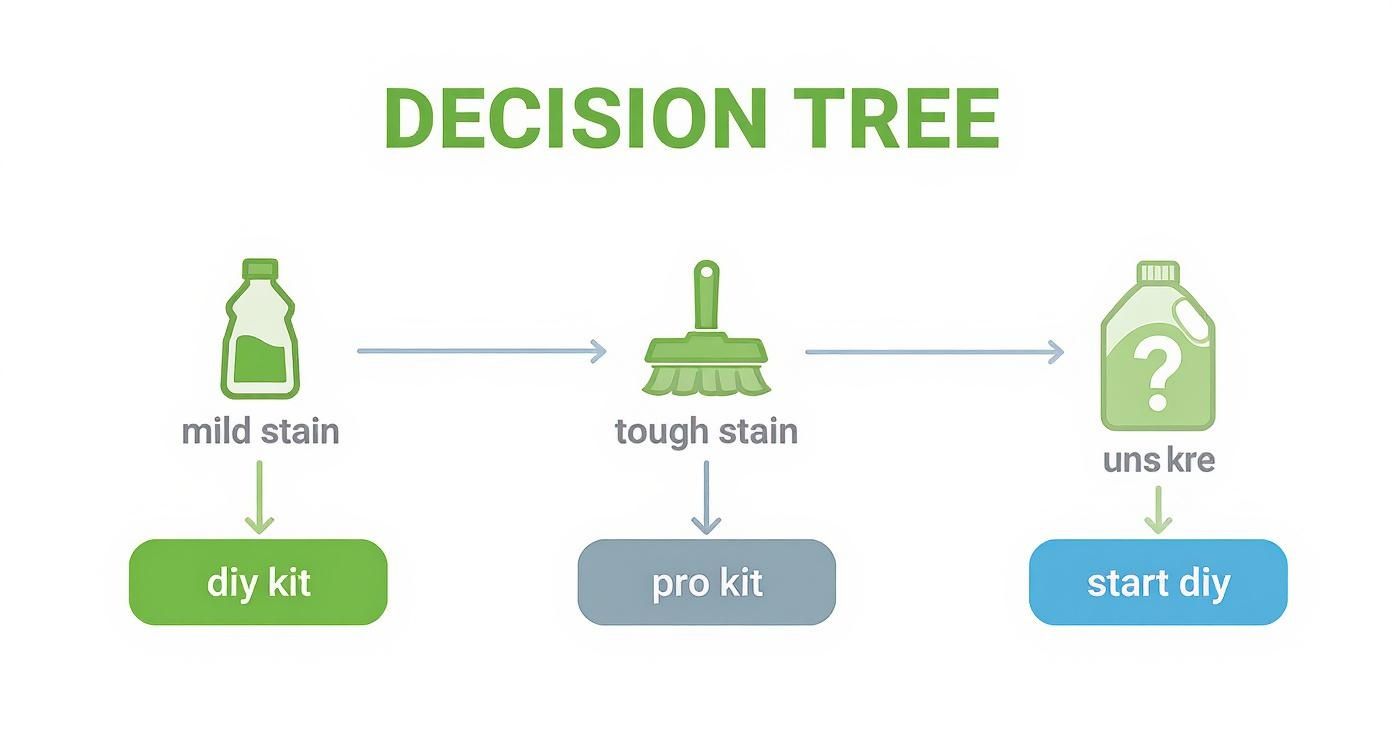
As you can see, starting with a simple DIY approach is almost always the right first move unless you're up against some really severe, etched-in damage.
The Classic Vinegar And Water Solution
For those light to moderate water spots, your first line of attack should be a simple mix of white vinegar and water. Vinegar's natural acidity is fantastic for dissolving the alkaline mineral deposits that leave behind those chalky, hazy stains.
To start, just mix equal parts white vinegar and distilled water in a spray bottle. Here's a pro tip: using distilled water is crucial because it’s free of minerals. That way, you won't be accidentally adding new spots while you're trying to clean off the old ones.
Spray the solution generously onto the stained areas. Don't be shy; you want the glass to be completely saturated.
Now for the most important part: let it sit. The acetic acid in the vinegar needs time to work its magic. Give it at least 10 to 15 minutes to dwell on the glass and dissolve that mineral gunk. If you're working on a vertical window where the liquid runs down, try soaking a paper towel in the solution and pressing it against the glass. It’s a simple trick to keep the area saturated.
Key Takeaway: After the soak, gently scrub the area with a non-abrasive sponge or microfiber cloth. Rinse the window with a clean spray of distilled water and dry it immediately with a fresh microfiber cloth or a good squeegee for that perfect, streak-free finish.
Tackling Tougher Stains With A Baking Soda Paste
Sometimes, vinegar just doesn't have enough oomph to cut through years of baked-on mineral deposits. When you need a little more scrubbing power without scratching your glass, a baking soda paste is the perfect next step.
Baking soda is a fantastic mild abrasive. It provides just enough grit to help lift stubborn stains that have really bonded to the glass surface, but it's gentle enough not to cause damage.
To make the paste, just mix baking soda with a tiny bit of water until you get a thick, spreadable consistency, almost like toothpaste.
Apply the paste directly onto the stubborn spots, covering them completely. Let it sit for a few minutes, then use a damp microfiber cloth or a soft-bristled brush to scrub the area in a circular motion. You should be able to feel the gentle grit working on the deposits.
Vinegar is a go-to for both homeowners and professional cleaners because its acidity is so effective at dissolving those alkaline minerals. But when it needs a boost, a baking soda paste adds that gentle friction needed to lift tough films without harming the glass. You can explore more expert tips on how the pros handle these issues in guides to commercial window cleaning in Minneapolis.
After a good scrub, rinse the window thoroughly with distilled water to remove all the paste residue. Finish by drying the glass completely with a clean microfiber cloth to prevent any new water spots from forming. This two-step approach is a powerful combo for getting your windows crystal clear.
For a quick overview of these DIY options, here's a simple comparison to help you choose the right one for your situation.
DIY Window Stain Removal Solutions
| Solution | Best For | How to Prepare | Key Precaution |
|---|---|---|---|
| Vinegar & Water | Light to moderate mineral spots and cloudiness. | Mix 1 part white vinegar with 1 part distilled water in a spray bottle. | Always use distilled water to avoid adding more mineral deposits to the glass. |
| Baking Soda Paste | Stubborn, built-up hard water stains. | Mix baking soda with a small amount of water to form a thick paste. | Use only a soft cloth or soft-bristled brush to avoid scratching the glass. |
These simple, household solutions can often save you from needing a professional-grade cleaner. Just remember to start with the gentlest method first and work your way up only if necessary.
How to Keep Water Stains from Coming Back
Winning the battle against existing water stains is incredibly satisfying, but the real victory is keeping them from ever returning. If you can shift from a reactive mindset of removal to a proactive one of prevention, you'll save yourself a ton of time and effort down the road. It just takes a few smart adjustments.
The best place to start is with a quick walk around your property to scout out the most common sources of those mineral-caked spots.
Tweak Your Environment to Protect the Glass
You'd be surprised how a few simple changes to your home's exterior can stop mineral-rich water from ever touching your windows in the first place. Think of it as creating a "splash-free zone."
- Redirect Sprinklers: This is a big one. Take a moment to ensure your lawn sprinklers are actually watering the lawn, not the glass. A quick twist of the sprinkler head can stop that constant cycle of spraying and drying that cakes minerals onto your lower-level windows.
- Check Your Drainage: Clogged gutters and poorly aimed downspouts are another major culprit. When they overflow, rainwater sheets down your siding, picking up dirt and grime before it dries all over your windows. Make sure water is being channeled away from the house properly.
- Get Creative with Landscaping: A little strategic planting can go a long way. Small shrubs or a decorative garden border near your windows can act as a natural splash guard against both rain and sprinklers.
These small fixes get to the root of the problem, stopping stains before they even have a chance to form.
Master a Proactive Cleaning Routine
How you clean is just as important as how often. Picking up a couple of techniques the pros use will not only keep your windows looking pristine but also make the job much faster.
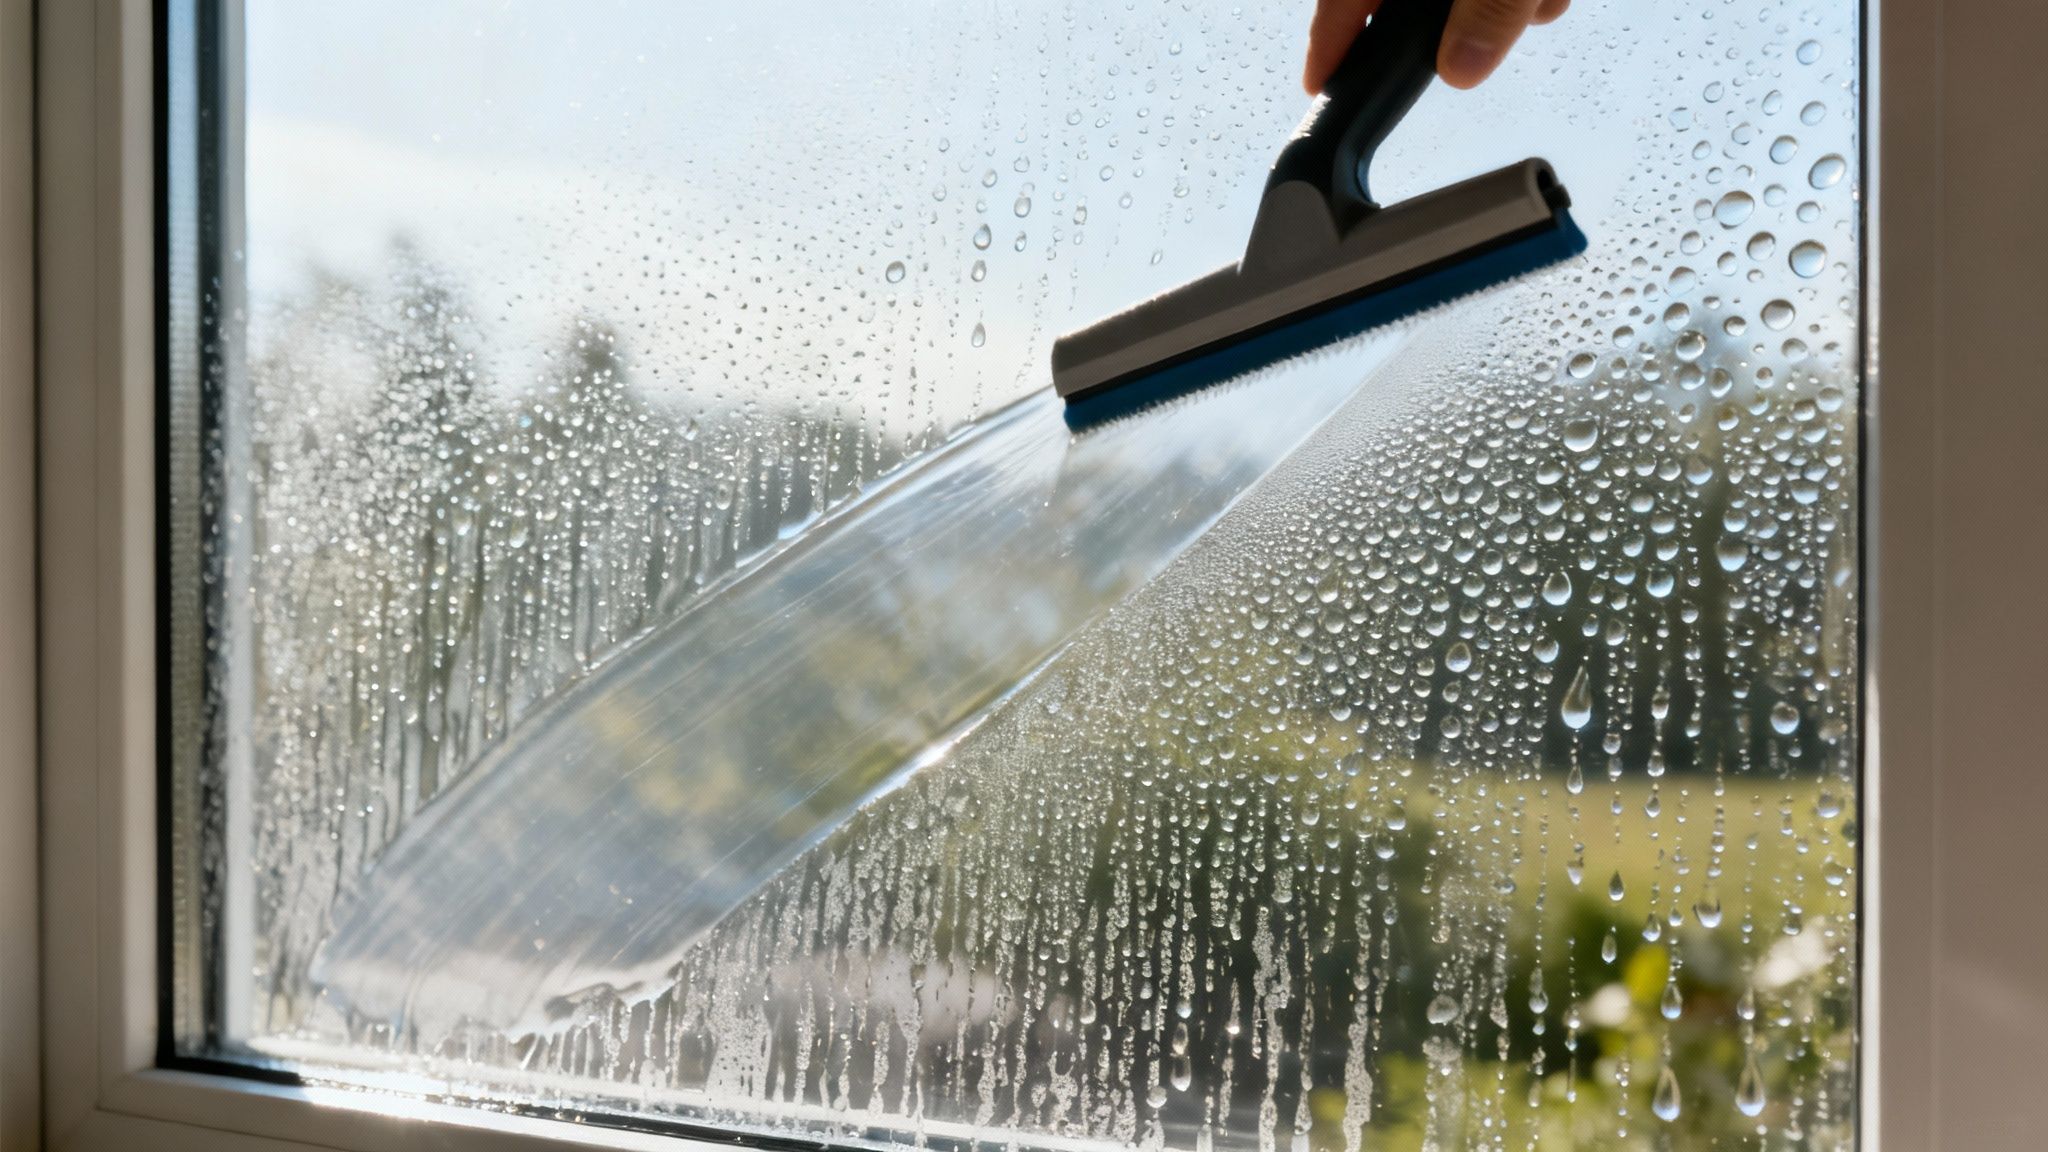
The single most important tool for preventing water spots is a high-quality squeegee. After washing, a squeegee whisks nearly all the water off the glass in seconds. No moisture is left behind to evaporate and leave those frustrating mineral deposits. This one tool is a total game-changer for getting a streak-free finish every single time.
Expert Tip: After your final rinse, always dry the glass completely. Whether you're using a squeegee or a microfiber cloth, leaving zero water behind is the golden rule. You're physically removing the minerals before they can bond to the glass.
For a more robust, long-term strategy, a water repellent is your best bet.
Apply a Hydrophobic Coating
For next-level protection, look into a hydrophobic glass treatment. These are spray-on sealants that create an invisible barrier on your windows. They're surprisingly easy to apply.
Instead of clinging to the surface and forming spots, water that hits a treated window beads up and rolls right off, taking dirt and minerals along for the ride. This "self-cleaning" effect dramatically cuts down on water stain buildup from rain. You can get into the nitty-gritty of the science behind this in our article on the difference between hydrophilic and hydrophobic glass.
These treatments are a fantastic, low-effort way to keep your windows crystal clear between regular cleanings.
Letting water spots hang around isn't just an eyesore; it can cause permanent damage over time. With an estimated 85% of U.S. households dealing with hard water, routine cleaning is non-negotiable if you want to prevent mineral buildup from etching the glass. This proactive approach not only keeps your view clear but also protects your window seals from decaying prematurely.
When Your DIY Efforts Just Aren't Cutting It
So, you’ve tried the vinegar, you’ve made the baking soda paste, and those stubborn water stains are still staring back at you. It's a frustrating spot to be in, but don't feel defeated. It simply means the mineral deposits have had a long, happy life bonding to your glass, and they've become too tough for common household solutions to handle.
Knowing when to put down the scrub brush is key. Pushing too hard with aggressive DIY methods can quickly turn a cleaning project into a repair job, leaving you with permanent scratches or hazy damage. If you've given it a good shot and the glass still looks cloudy or has those distinct, ghostly spots, it’s time to rethink your strategy.
Signs It's Time to Call in the Pros
Sometimes, the glass itself tells you when it's time for professional help. Recognizing these signs will save you a lot of time, elbow grease, and potential damage.
It's probably best to pick up the phone if you're dealing with:
- Etched or "Foggy" Glass: This is the big one. If the stain feels like it’s part of the glass rather than sitting on top of it, you're likely dealing with etching. This happens when minerals sit so long they cause a chemical reaction that physically damages the glass surface. No amount of scrubbing will fix this.
- Decades-Old Stains: Bought an older home? Those windows might have layers upon layers of mineral buildup from years of sprinkler overspray or rain. This kind of heavy deposit is well beyond what a simple cleaner can dissolve.
- Hard-to-Reach (or Scary-to-Reach) Windows: Safety first. If you’re looking at second-story windows, skylights, or anything that requires more than a step stool, just don't risk it. The pros have the ladders, safety harnesses, and experience to get the job done without a trip to the emergency room.
The Professional Advantage: Better Tools, Better Techniques
Let's be honest, professional window cleaners have an arsenal of tools and solutions that you just can’t find at the local hardware store. We're talking about more than just a fancy squeegee.
For really tough mineral staining, we often bring out specialized polishing compounds and professional-grade orbital buffers. These tools are designed to gently grind away the baked-on minerals without scratching the glass underneath—it’s a delicate process that takes a trained hand.
In the most extreme cases, we might use carefully balanced, mild acid-based solutions that can dissolve heavy calcium and magnesium deposits in minutes. These are powerful chemicals that require proper training and safety gear to be used correctly.
Trying to replicate these advanced methods with harsh abrasives (like steel wool) or the wrong chemicals can cause irreversible damage. You could end up with a window that's permanently scratched or chemically burned, turning a cleaning issue into a costly replacement.
Knowing when to call a professional window washing company like Sparkle Tech isn't giving up; it’s making a smart call to protect your property. If you're on the fence, check out our guide on knowing when to call a professional window washing company. An expert can quickly diagnose how severe the staining is and use the right technique to safely restore your view.
Common Questions About Window Water Stains
Even after you've put in the elbow grease, a few questions can pop up, especially with something as stubborn as hard water stains. Getting these details right can save you a lot of time and frustration on your next go-around. Let's clear up some of the common things people ask.
It's easy to assume that more power or a tougher scrubber is the answer, but that approach can often backfire, leading to permanent damage. Knowing what not to do is just as important as knowing what to do.
Can I Use Steel Wool on Tough Stains?
This is a big one, and the answer is a very cautious "no" for most homeowners. You might see a professional window cleaner use a specific, super-fine #0000 grade steel wool, but they're trained to do it correctly. It's incredibly easy to grab the wrong grade at the hardware store and end up with deep, irreversible scratches on your glass.
Instead of taking that risk, stick with a much safer, non-abrasive option like a simple baking soda paste for those extra-tough spots.
Does a Pressure Washer Work on Water Stains?
I get why people think this would work. It seems like a power washer can blast away anything, right? Unfortunately, when it comes to mineral stains, it’s more likely to create new problems. The high-pressure spray won't actually dissolve the baked-on minerals.
Worse, it can force hard water into the tiny pores of the glass and, more critically, destroy your window seals. A broken seal leads to that foggy condensation between the panes, which is a much bigger and more expensive fix. A pressure washer is great for siding, not for delicate window glass.
Important Takeaway: The right tool is everything. Aggressive methods like pressure washing or using the wrong grade of steel wool will almost always cause more harm than good on window glass.
Does the Cleaning Water Type Matter?
Yes, it absolutely does! This is probably the most overlooked secret to getting a truly professional, spot-free finish. If you live in an area with hard water (and most of us do), rinsing your windows with regular tap water just re-applies a fresh layer of minerals. As the water evaporates, those spots come right back.
For that final, crucial rinse, always use distilled water. It has zero mineral content, which means nothing is left behind to create new stains or streaks. It’s the key to a perfectly clear view.
And don't forget, a clean window looks its best when its surroundings are just as tidy. For a truly complete job, learning how to clean blinds for sparkling windows can make a huge difference in the overall look and feel of your room.
If you've tried all the tricks and are still looking at frustrating, etched-in stains, it might be time to call in the pros. For jobs that require specialized tools and expertise, Sparkle Tech Window Washing is ready to help. Our insured team can safely restore your view. Contact us today for a free estimate at https://sparkletechwindowwashing.com.