




If you've ever scrubbed at those milky, ghost-like smudges on your windows, you know how maddening they can be. You clean, you wipe, you polish… and they’re still there. What you're fighting isn't just dirt; it's the mineral residue—mostly calcium and magnesium—left behind when hard water evaporates.
These aren't just a minor annoyance. The global market for water spot removers has hit USD 1.14 billion for a reason: over 85% of households deal with hard water. A whopping 62% of people say water spots are their number one glass cleaning headache.
When you're dealing with these stubborn spots, the first thing to figure out is whether they're just sitting on the surface or have actually damaged the glass.
Stage I: Surface Spots vs. Stage II: Permanent Etching
Before you start spraying and scrubbing, it's critical to know what you're up against. Water spots generally fall into two camps:
- Stage I Corrosion (Surface Deposits): These are fresh mineral deposits resting on top of the glass. They look cloudy and feel slightly rough, but they haven't bonded with the glass itself. Good news—these are the ones you can almost always remove yourself.
- Stage II Corrosion (Etching): This is what happens when mineral deposits sit on glass for too long. The high alkalinity of the deposits can actually corrode the surface, creating tiny pits. The spot literally becomes part of the glass. At this point, no amount of cleaning will fix it; the glass itself is damaged and needs professional polishing or restoration to look clear again.
So, how can you tell the difference? Run your fingernail gently over the spot. If you can feel a raised, crusty deposit, you're likely dealing with Stage I. If the glass feels smooth but the spot is still visible, or if it feels slightly pitted, you've probably got Stage II etching.
This decision tree gives you a quick visual to help diagnose the problem.
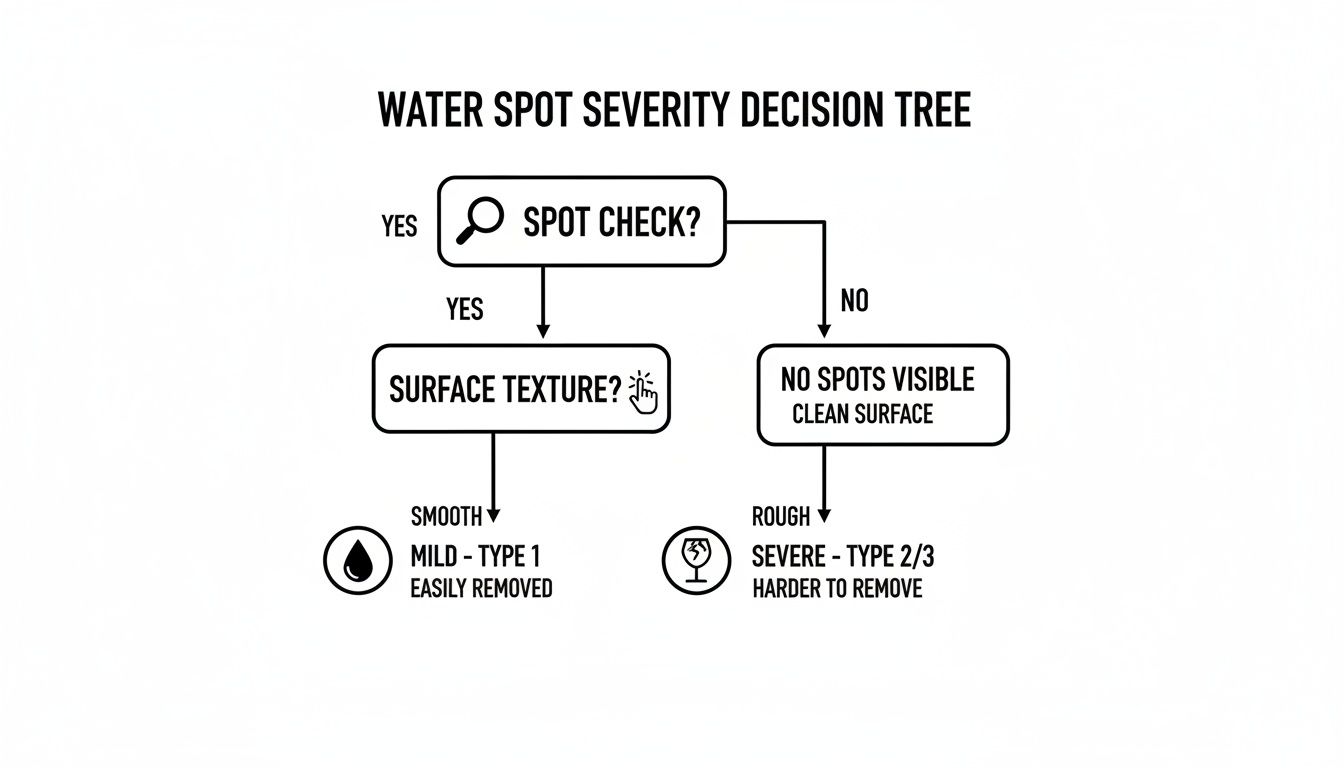
Use this to figure out if you're dealing with a simple cleaning job or a more serious issue that might need a different approach.
Where Do These Spots Come From?
The main culprit is hard water. Whether it’s from a misaligned sprinkler, a quick hose-down of the house, or even rain that picks up minerals from siding or frames, the higher the mineral content, the more severe the spotting will be. When the water evaporates, those minerals get left behind.
To help you quickly find the right solution for your specific problem, we've put together this handy table summarizing the methods we'll cover.
Quick Guide to Water Spot Removal Methods
| Severity of Water Spot | Recommended DIY Solution | Recommended Commercial Product | Best For |
|---|---|---|---|
| Mild / Recent Spots | 50/50 white vinegar & distilled water solution | Glass-specific cleaner with mild acid (e.g., Windex Outdoor) | Light, fresh spots from sprinklers or rain on residential windows. |
| Moderate / Stubborn Spots | Baking soda or lemon juice paste | Specialized hard water spot remover (e.g., Bio-Clean) | Older, built-up deposits on glass railings or shower doors. |
| Severe / Etched Glass | N/A – Cleaning will not work | Glass polishing compound (used with a polisher) | When spots are etched into the glass; requires professional skill. |
| Mineral Stains on Solar Panels | Deionized or distilled water with a soft brush | Professional-grade solar panel cleaner | Preventing mineral buildup that reduces energy efficiency. |
This guide is your starting point. In the next sections, we’ll dive into the specific techniques and tools needed for each type of spot.
Key Takeaway: The fight against water spots is really a fight against mineral deposits. Figuring out the source of the water and the severity of the spot is the first step toward getting that crystal-clear view back.
To really get ahead of the problem, it helps to understand what's in your water. You can find expert advice on understanding water quality to see if hard water is the root cause. Knowing your local water's hardness can make all the difference in your cleaning and prevention strategy.
Your Essential Toolkit for Spotless Window Cleaning
Before you even think about tackling those stubborn water spots, let's talk about gear. Showing up to the job without the right tools is a recipe for frustration and, honestly, a less-than-perfect finish. Having the right equipment not only makes the work a whole lot easier but also keeps you from accidentally scratching or damaging your glass.

For most day-to-day cleaning and early-stage mineral spots, your basic arsenal is pretty simple but needs to be effective. These are the absolute must-haves.
- High-Quality Microfiber Cloths: Seriously, just toss the paper towels. They leave behind a trail of lint. A good stack of clean microfiber cloths is your best bet for applying cleaners and buffing the glass to a streak-free shine.
- A Professional-Grade Squeegee: This is your secret weapon. A high-quality squeegee with a fresh, sharp rubber blade is what separates a DIY job from a professional one.
- Spray Bottles: Grab at least two. One will be for your cleaning solution, and the other should be filled with plain distilled water for a pure, spot-free rinse.
- A Sturdy Bucket: You’ll need this for mixing your cleaning concoctions or just for rinsing out your cloths and squeegee. The last thing you want is to smear dirty water back onto the glass.
If you’re curious about what we pros carry in our vans, take a look at our guide to the best window cleaning tools. It covers everything from the best squeegees to the right extension poles for those hard-to-reach windows.
Gear for More Stubborn Deposits
When you're up against hard water spots that have been sitting for a while, you’ll need to bring in some heavier hitters. These tools are fantastic for moderate to severe mineral buildup, but a word of caution: they require a gentle touch to avoid scratching the glass.
#0000 Steel Wool
I know, it sounds terrifying to take steel wool to glass. But #0000 (quadruple-ought) steel wool is an old-school pro secret for scrubbing away tough mineral deposits without leaving a scratch. It is absolutely critical that you only use this ultra-fine grade—anything coarser will ruin your window. The trick is to always use it wet with a lubricant (like soapy water or your cleaner) and apply light, consistent pressure.
Orbital Polisher
For those really nasty spots that have started to etch into the glass, an orbital polisher is your last-ditch DIY effort before calling for backup. You'll need a low-speed model fitted with a soft foam pad and a dedicated glass polishing compound. This is definitely an advanced technique. The key is to keep the polisher moving constantly; if you hold it in one spot for too long, the heat buildup can weaken or even crack the glass.
A critical pro tip when using any abrasive method: always test on a small, inconspicuous area first. This simple five-minute check can save you from a costly mistake.
Safety First: Protecting Yourself and Your Property
Getting the glass clean is the goal, but doing it safely is the priority. This is especially true when you're working outside, up on a ladder, or handling stronger cleaning solutions. Don't skip these steps.
Personal Protective Equipment (PPE)
This stuff isn't optional. Make sure you have it ready.
- Gloves: Protect your hands from acidic cleaners like vinegar or commercial removers. A good pair of nitrile or rubber gloves will do the trick.
- Eye Protection: Safety glasses or goggles are a must. The last thing you want is a splash of cleaner in your eye.
Protecting Your Surroundings
Remember, it's not just about the glass. Before you start spraying, take a second to protect your window frames, siding, and any plants below. Lay down some old towels or a plastic tarp at the base of the window to catch drips and runoff. This simple step can prevent your cleaner from stripping paint, staining your home's exterior, or damaging that flower bed you worked so hard on.
And if you’re heading up to the second story, be smart about ladder safety. Make sure it's on stable, level ground and always maintain three points of contact. That means two feet and one hand, or two hands and one foot, on the ladder at all times. With the right gear and these precautions, you're all set to tackle those water spots safely and effectively.
Mastering DIY Solutions for Everyday Water Spots
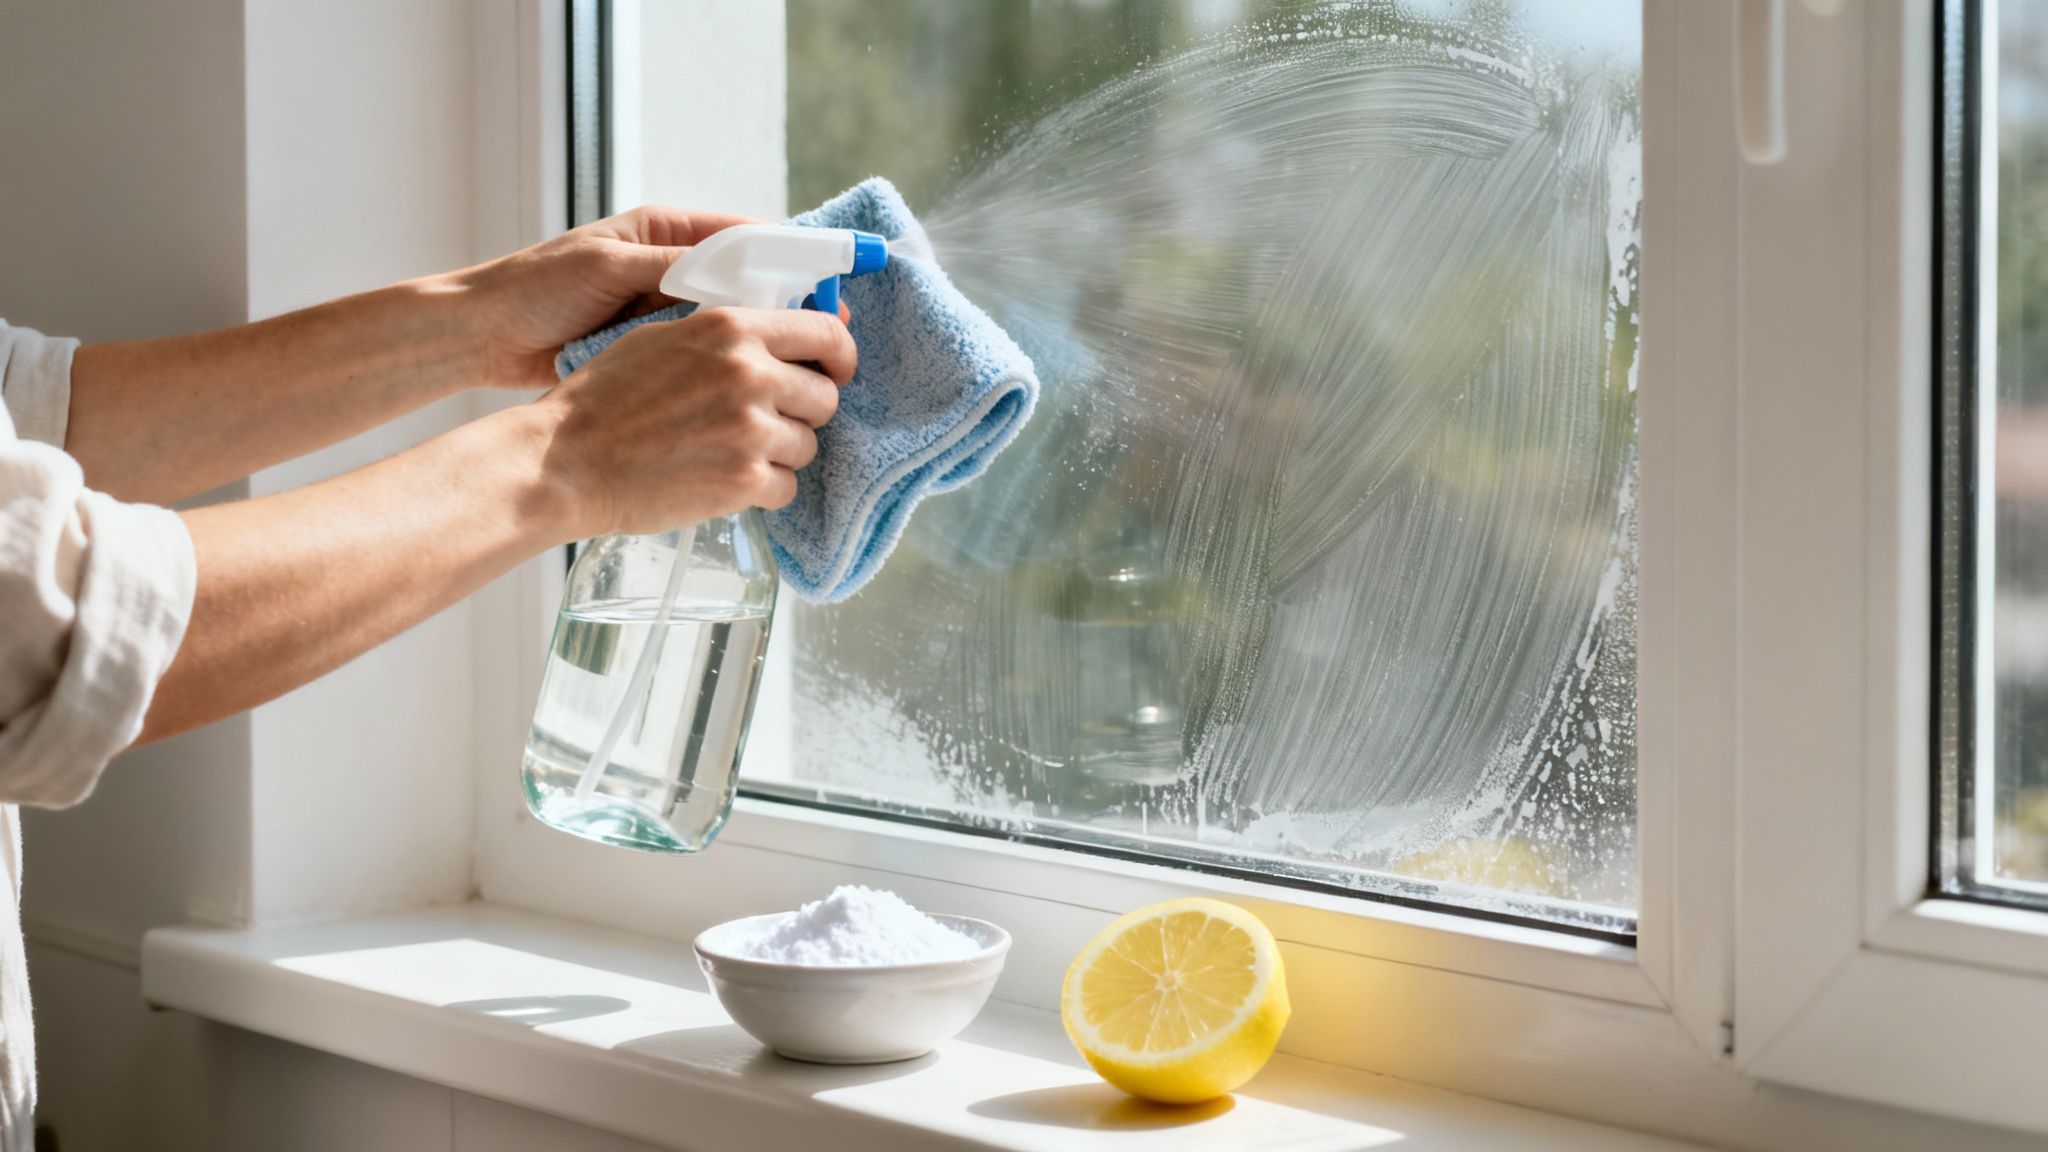
You don't always need to reach for harsh chemicals to get rid of those stubborn water spots on your windows. In fact, some of the best tools for the job are probably already sitting in your kitchen pantry. These simple, budget-friendly solutions use natural acids and mild abrasives to break down the alkaline mineral deposits that hard water leaves behind, restoring your glass to a perfect shine.
This shift toward gentler, more eco-friendly cleaning isn't just a niche trend. The global window cleaners market is expected to balloon from USD 2.68 billion in 2023 to a projected USD 5.34 billion by 2031. A huge part of that growth comes from people like you wanting greener alternatives—vinegar-based cleaners alone have seen a 25% jump in popularity since 2020. You can discover more insights about this evolving market and the big move toward sustainable cleaning.
Let’s dive into three classic, tried-and-true methods that deliver fantastic results without the chemical fumes.
The Classic Vinegar and Water Solution
This is the go-to remedy for a reason—it just plain works. The acetic acid in white vinegar is incredibly effective at dissolving the calcium and magnesium that create those chalky, cloudy spots. The trick is getting the ratio right and using the proper technique.
Mixing It Up
- In a spray bottle, combine equal parts distilled white vinegar and distilled water. It’s crucial to use distilled water because it’s free of minerals, so you won’t be adding new spots while trying to remove old ones.
- Give the bottle a good shake to mix everything together.
- For an extra boost against grime, add a few drops of dish soap. It helps the solution cling to the glass and cut through any greasy films.
Spray a section of the window generously, letting the solution sit for a minute or two. This gives the acid time to work its magic. Just don't let it dry. Now, grab a clean microfiber cloth and wipe the glass in a circular motion with a bit of gentle pressure. Finish by squeegeeing the glass clean, making sure to wipe your blade after each pass for a flawless finish.
Harnessing the Power of Lemon Juice
Just like vinegar, lemon juice packs a punch with its citric acid, another natural powerhouse against mineral buildup. This is a great alternative if you can't stand the smell of vinegar—plus, it leaves behind a really fresh, clean scent.
You’ve got a couple of options here. For lighter spotting, mix the juice of one lemon with about two cups of water in your spray bottle. Apply it just like you would the vinegar solution.
For those tougher, more set-in spots, you can apply the lemon juice directly.
- Slice a lemon in half.
- Dip the cut side into some salt or baking soda to create a gentle abrasive.
- Rub the lemon directly onto the water spots.
- Let it sit for a minute, then rinse thoroughly with distilled water and squeegee it dry.
Pro Tip: Never clean your windows in direct sunlight or on a hot day. The sun will evaporate your cleaning solution way too fast, leaving you with streaks and potentially creating new spots from the leftover minerals in your mixture.
Creating a Gentle Baking Soda Paste
When you’re up against more stubborn water spots that have been there a while, you might need a little more scrubbing power. A simple baking soda paste acts as a mild abrasive that can physically lift the mineral deposits right off the glass without scratching it. Think of it as the next level up when sprays just aren't cutting it.
How to Make and Use the Paste
- Mix: In a small bowl, add just enough water to some baking soda to create a thick paste—the consistency should be similar to toothpaste.
- Apply: Using a damp microfiber cloth or a non-abrasive sponge, dab the paste directly onto the water-spotted areas.
- Scrub: Gently rub the paste in small, circular motions. You don't need to apply a lot of force; let the fine grit of the baking soda do the work for you.
- Rinse: Once the spots are gone, rinse the window completely with distilled water. If you leave any residue behind, you'll end up with a hazy film.
- Dry: Grab your squeegee and give it a final pass for a perfectly clear, streak-free shine.
This paste method is especially good for glass that has a noticeable gritty texture from months or even years of mineral buildup. Just remember to be gentle. With these simple household ingredients, you're well-equipped to tackle most everyday water spots and keep your windows looking fantastic.
When you've tried the vinegar sprays and baking soda scrubs, but those cloudy, stubborn marks just won't budge, you've officially entered the next level of mineral buildup. These aren't fresh spots; these are stains that have been baked onto your glass by the sun for months, maybe even years. At this point, it's time to graduate from basic cleaning to more serious restoration techniques.
This isn't some niche problem, either. Hard water is a reality for over 85% of homes in the U.S., which helps explain why North America makes up a massive 40% of the global revenue for the window and glass cleaner market. When left unchecked, these mineral deposits can cause permanent etching, contributing to an estimated USD 2 billion in annual repair and replacement costs for U.S. property owners. You can read the full research about the glass cleaner market to see just how big this issue is.
So, let's get into the heavy-duty techniques for when the easy fixes have failed.
Upgrading to a Commercial Water Spot Remover
When you move up to commercial-grade products, you're tapping into some serious chemistry. These removers are formulated with specific mild acids or fine abrasives engineered to dissolve the stubborn alkaline deposits that make up hard water stains.
When you're browsing the aisle, zero in on the active ingredients:
- Mild Acids: Products with sulfamic or phosphoric acid are fantastic. They’re designed to chemically break down the calcium and magnesium bonds without being aggressive enough to harm the glass.
- Fine Abrasives: Others work like a soft scrub, using micro-abrasives to physically buff the deposits away.
A Pro's Non-Negotiable Tip: Always, always do a spot test. Find a small, out-of-the-way corner and apply the product first. This is your insurance policy against accidentally hazing or scratching an entire pane of glass.
Make sure you follow the manufacturer's directions to a T. Most will have you apply the product with a microfiber pad, work it into the stain with some light pressure, and then rinse everything thoroughly to neutralize any remaining chemicals.
Using Steel Wool (The Right Way)
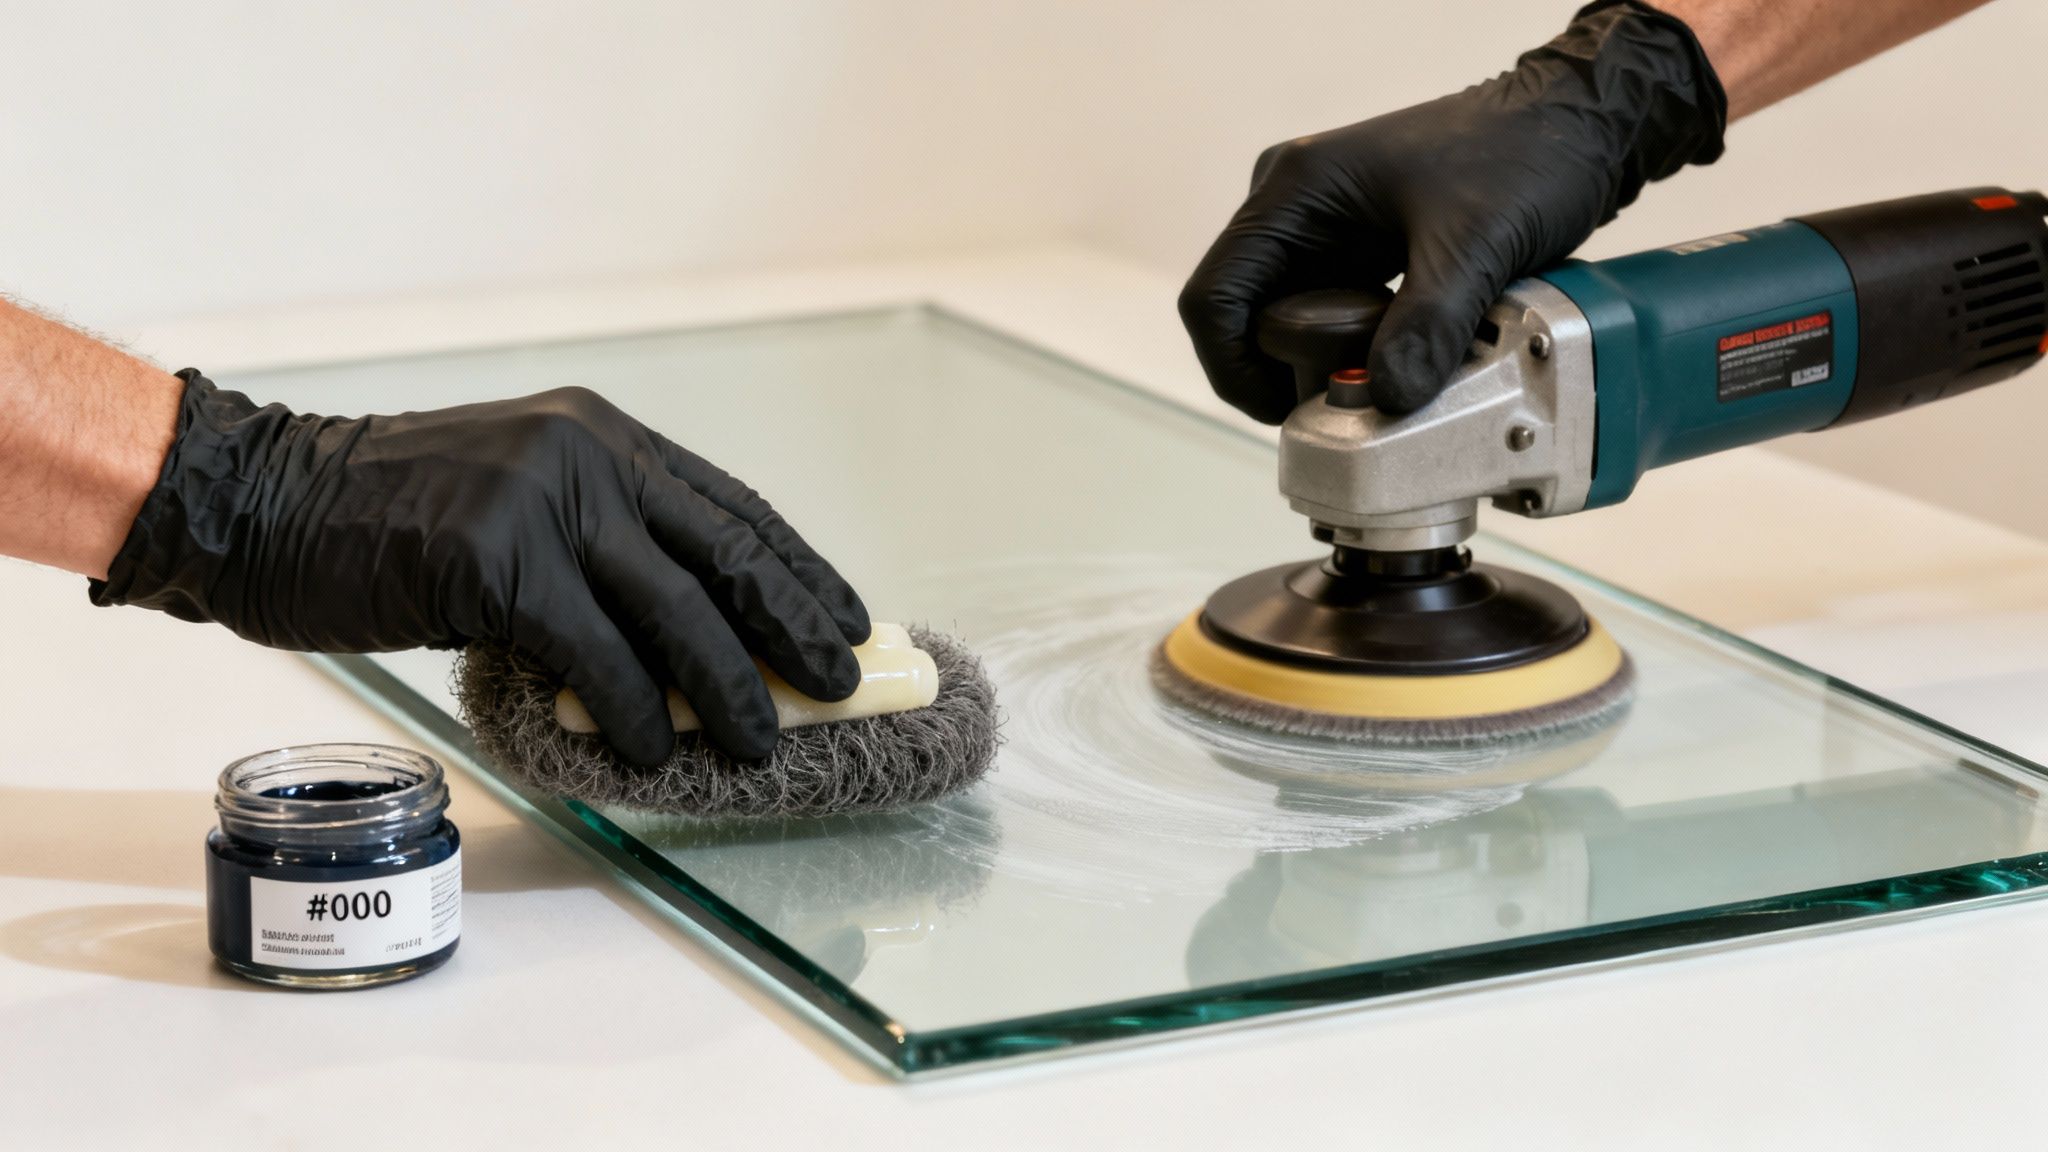
I know what you're thinking—steel wool on glass? It sounds like a recipe for disaster, but it’s a go-to trick for pros dealing with really tough, crusted-on deposits. The absolute key is using the right grade: #0000 (quadruple-ought) steel wool. It's ultra-fine and, when used properly, is perfectly safe for glass.
I can't stress this enough: Never use a coarser grade. Anything other than #0000 will absolutely leave deep, permanent scratches.
Your technique is just as crucial as the tool itself.
- Lube it Up: The glass surface must be wet. Never, ever use steel wool on dry glass. A good lubricant, like soapy water or a commercial cleaner, provides a protective slip-layer.
- Gentle Does It: Use light, even pressure and scrub in small, overlapping circles. Let the fine wool do the work for you; muscling through it isn't necessary.
- Work in Sections: Tackle one manageable area at a time, wiping and checking your progress as you go. Once an area is clear, give it a good rinse.
- The Final Pass: After you’ve treated all the spots, give the entire window a standard cleaning with your favorite glass cleaner and a squeegee to get rid of any residue and leave a perfect finish.
Restoring Etched Glass with Polishing Compounds
So, what do you do when the spot is gone, but a ghostly outline remains? That's etching. It means the minerals have physically eaten into the surface of the glass, creating microscopic pits. No amount of cleaning will fix this because the damage is now part of the glass. The only real solution is to polish the surface down.
Glass polishing is an advanced move and should be your last resort before calling in a professional. This involves a cerium oxide-based polishing compound, a low-speed rotary polisher, and a special felt or foam pad. You're essentially abrading a microscopic layer of the glass to smooth out the etching and restore clarity.
It's a delicate operation. Too much pressure or lingering in one spot for too long creates heat, which can easily distort or even crack the glass. If you're not completely comfortable taking a power tool to your windows, this is the moment to call in a pro service like Sparkle Tech Window Washing. It's the safest bet for severe etching.
Comparing Your Advanced Options
Choosing the right approach depends on the severity of the stains and your comfort level. Sometimes a homemade remedy is all you need, but for baked-on stains, you'll need to step up your game. Here's a look at how DIY solutions stack up against the more powerful options.
DIY vs. Commercial Removers for Stubborn Stains
| Feature | DIY Solutions (Vinegar, Baking Soda) | Commercial Removers | Glass Polishing Compounds |
|---|---|---|---|
| Best For | Light, recent water spots and general maintenance. | Moderate, widespread mineral stains that have set in. | Light surface etching and "phantom" spots left after cleaning. |
| Skill Level | Beginner | Beginner to Intermediate | Advanced (Requires experience with power tools). |
| Risk Factor | Very Low | Low (if spot-tested first). | High (Risk of glass damage from heat or pressure). |
| Cost | Very Low | Moderate | High (Requires special compounds and tools). |
| Time Investment | Low | Moderate | High |
Ultimately, while DIY cleaners are great for routine upkeep, they just don't have the chemical or abrasive power needed for severe buildup. When stains resist your initial efforts, a dedicated commercial remover is the logical next step before considering the more intensive (and risky) world of glass polishing.
How to Keep Water Spots From Coming Back
You've put in the hard work to get your windows crystal-clear. The last thing you want is to see those frustrating, chalky spots reappear a few weeks later. Winning the battle against mineral buildup is one thing, but winning the war means shifting your strategy from reactive cleaning to proactive prevention.
Honestly, the best way to deal with water spots is to stop them from forming in the first place. This simple shift will save you a ton of time and frustration down the road. It all comes down to creating an environment where water can't hang around long enough to leave its mineral baggage behind.
Tweak Your Surroundings and Water Source
More often than not, the problem starts right in your own yard. I can't tell you how many times I've traced stubborn mineral stains back to misaligned sprinkler heads. It's the most common culprit, by far.
Take a walk around your property while the sprinklers are running. Are they hitting your windows, siding, or glass railings? A quick adjustment to the spray pattern is a free, simple fix that solves a recurring headache. You want the water on your lawn, not your glass.
If you live in an area with notoriously hard water, the ultimate solution is to tackle it at the source. A whole-home water softener is a fantastic investment. By removing minerals like calcium and magnesium from your water, you’re not just protecting your windows—you’re also saving your pipes, appliances, and plumbing fixtures from damaging scale buildup.
Get Into a Routine of Regular Maintenance
When it comes to preventing water spots, consistency is everything. Just like any other maintenance task, a little bit of regular upkeep saves you from a massive, time-consuming job later.
- Dry Your Glass Promptly: After hosing down the house, rinsing the windows, or even after a big rainstorm, grab a squeegee. Drying the glass removes the water before it has a chance to evaporate and leave those mineral deposits behind.
- Set a Simple Cleaning Schedule: A quick wipe-down every few weeks prevents the slow accumulation of dirt and minerals. This is especially critical for glass near swimming pools, hot tubs, or sprinklers where splashing is constant.
This simple habit of drying your windows is probably the single most effective thing you can do to keep them looking perfect with minimal effort.
A professional's secret isn't just knowing how to clean, but how to maintain. Proactive drying and regular light cleaning will do 90% of the work in preventing severe, long-term mineral buildup.
Use a Hydrophobic Glass Sealant for Lasting Protection
For a more long-term, low-maintenance solution, a quality hydrophobic glass sealant is a brilliant move. These products create an invisible, ultra-smooth coating on your glass that completely changes how water interacts with the surface.
Instead of clinging and spreading out, water beads up into tight little droplets and just rolls away, taking dirt and minerals along for the ride. It creates a "self-cleaning" effect that dramatically cuts down on how often you need to clean. When you do, the job is a whole lot easier.
- Water Repellency: Stops water from sitting on the glass and evaporating.
- Easier Cleaning: Grime and dirt rinse away with almost no effort.
- Enhanced Durability: Protects your glass from the corrosive etching that hard water can cause over time.
Applying a sealant is a great proactive step that shields your windows for months, keeping them spotless with far less work from you. On a professional level, we often use advanced techniques like washing with deionized water, which leaves behind absolutely zero mineral residue. You can see how pure water window washing delivers a spot-free finish that naturally resists new deposits.
When It's Time to Call a Professional Window Cleaner
Let's be honest, DIY solutions are fantastic for handling everyday spots and general upkeep. But sometimes, you run into a problem that even the best homemade cleaner and a whole lot of elbow grease can't solve.
Knowing when to step back and call in a pro isn't giving up. It's just smart. It's about protecting your glass and getting a perfect result without the headache. The real question is, where’s the line between a tough DIY job and one that needs an expert?
Usually, it boils down to two things: safety and severity.
Safety and Accessibility
Are you looking at second-story windows that require a shaky trip up a tall ladder? That’s a major red flag. Working at heights is risky business without the right training and safety gear. A professional crew has the harnesses, specialized ladders, and experience to do the job safely, giving you peace of mind.
Stubborn, Etched-In Stains
If you're dealing with glass that looks permanently cloudy or has a rough, gritty texture, you're likely past the point of a simple cleaning. This is called etching, where years of mineral deposits have physically eaten into the glass surface. No amount of vinegar or scrubbing will fix this.
This kind of damage requires specialized tools like polishing compounds and professional-grade buffers to gently grind down the surface and restore its clarity. It's a delicate restoration process that can easily go wrong and cause permanent scratches if not done by a trained technician.
The Sheer Scale of the Job
Tackling the exterior glass on an entire home is a much bigger job than most people realize. It can take up a whole weekend, and even then, the results might not be what you hoped for.
This is where hiring a professional service like Sparkle Tech really pays off:
- Better Tools, Better Results: We use pure water systems and commercial-grade cleaning agents that cut through years of grime in a way that store-bought products simply can't match.
- The Right Experience: We know how to remove tough buildup without damaging your window frames, seals, or the landscaping below.
- Guaranteed Professional Finish: You get that perfect, streak-free shine across every single window, every time.
If you find yourself facing a job with serious safety risks or stains that just won't budge, it's a wise investment to call for help. For a deeper look into this, check out our guide on knowing when to call a professional window washing company.
Got Questions About Window Water Spots? We've Got Answers
Even when you know what you're doing, a few questions always come up in the middle of a window cleaning project. Getting the right answers can be the difference between a frustrating afternoon and a job well done. Here are some of the most common things people ask us about tackling water spots.
Can I Just Use Windex or Other Household Cleaners?
Probably not, and here’s why. Most standard glass cleaners are fantastic for everyday dust, fingerprints, and grime. But they just aren't built to break down the stubborn alkaline mineral deposits—mostly calcium and magnesium—that create hard water spots.
You might have some luck with a regular cleaner on a very fresh, light spot, but for anything that's been sitting for a while, you'll need a different approach. A simple vinegar solution or a dedicated commercial water spot remover has the right acidic punch to dissolve those minerals. This is often the reason people scrub like crazy with no results; they're simply using the wrong tool for the job.
Our Take: It's like trying to scrub a muddy floor with a feather duster. For mineral stains, your best tools are either a mild acid or a gentle abrasive specifically designed for the task.
Is Vinegar Going to Damage My Window Frames or Seals?
This is a great question, because what's safe for glass isn't always safe for everything around it. Generally, a properly diluted white vinegar solution is perfectly fine on common frame materials like vinyl and fiberglass.
However, you do need to be a little more careful with other materials.
- Aluminum Frames: Don't let vinegar solution sit on aluminum for long. Over time, it can cause some discoloration.
- Rubber Seals: Extended contact can dry out and degrade older rubber seals, making them brittle.
The best practice is just to be neat. Apply your cleaning solution directly to the glass, wipe up any drips from the frames and seals right away, and give the whole window a good rinse with clean water when you’re done.
How Can I Tell if a Spot Has Permanently Etched the Glass?
Knowing whether you're dealing with a surface deposit or permanent damage is key. Luckily, there's an easy way to check. Just run your fingernail gently across the spot.
If the glass feels perfectly smooth under your nail but you can still see the spot, you're looking at a surface-level mineral deposit. You can clean that off. But if you feel a roughness, a gritty texture, or even a tiny pit in the glass, the minerals have started to etch the surface. Etching is physical damage that requires professional polishing, not just cleaning.
When DIY just isn't cutting it for those stubborn stains or you're dealing with etched glass, it's time to bring in the pros. For a flawless finish, get in touch with Sparkle Tech Window Washing for a free estimate.