


The quickest, easiest trick for removing hard water stains from a window is usually a simple mix of white vinegar and water. Just combine equal parts in a spray bottle, spritz it on the glass, and let it sit for a few minutes. This gives the acid time to break down the minerals before you wipe it all away.
Why Hard Water Stains Form on Windows
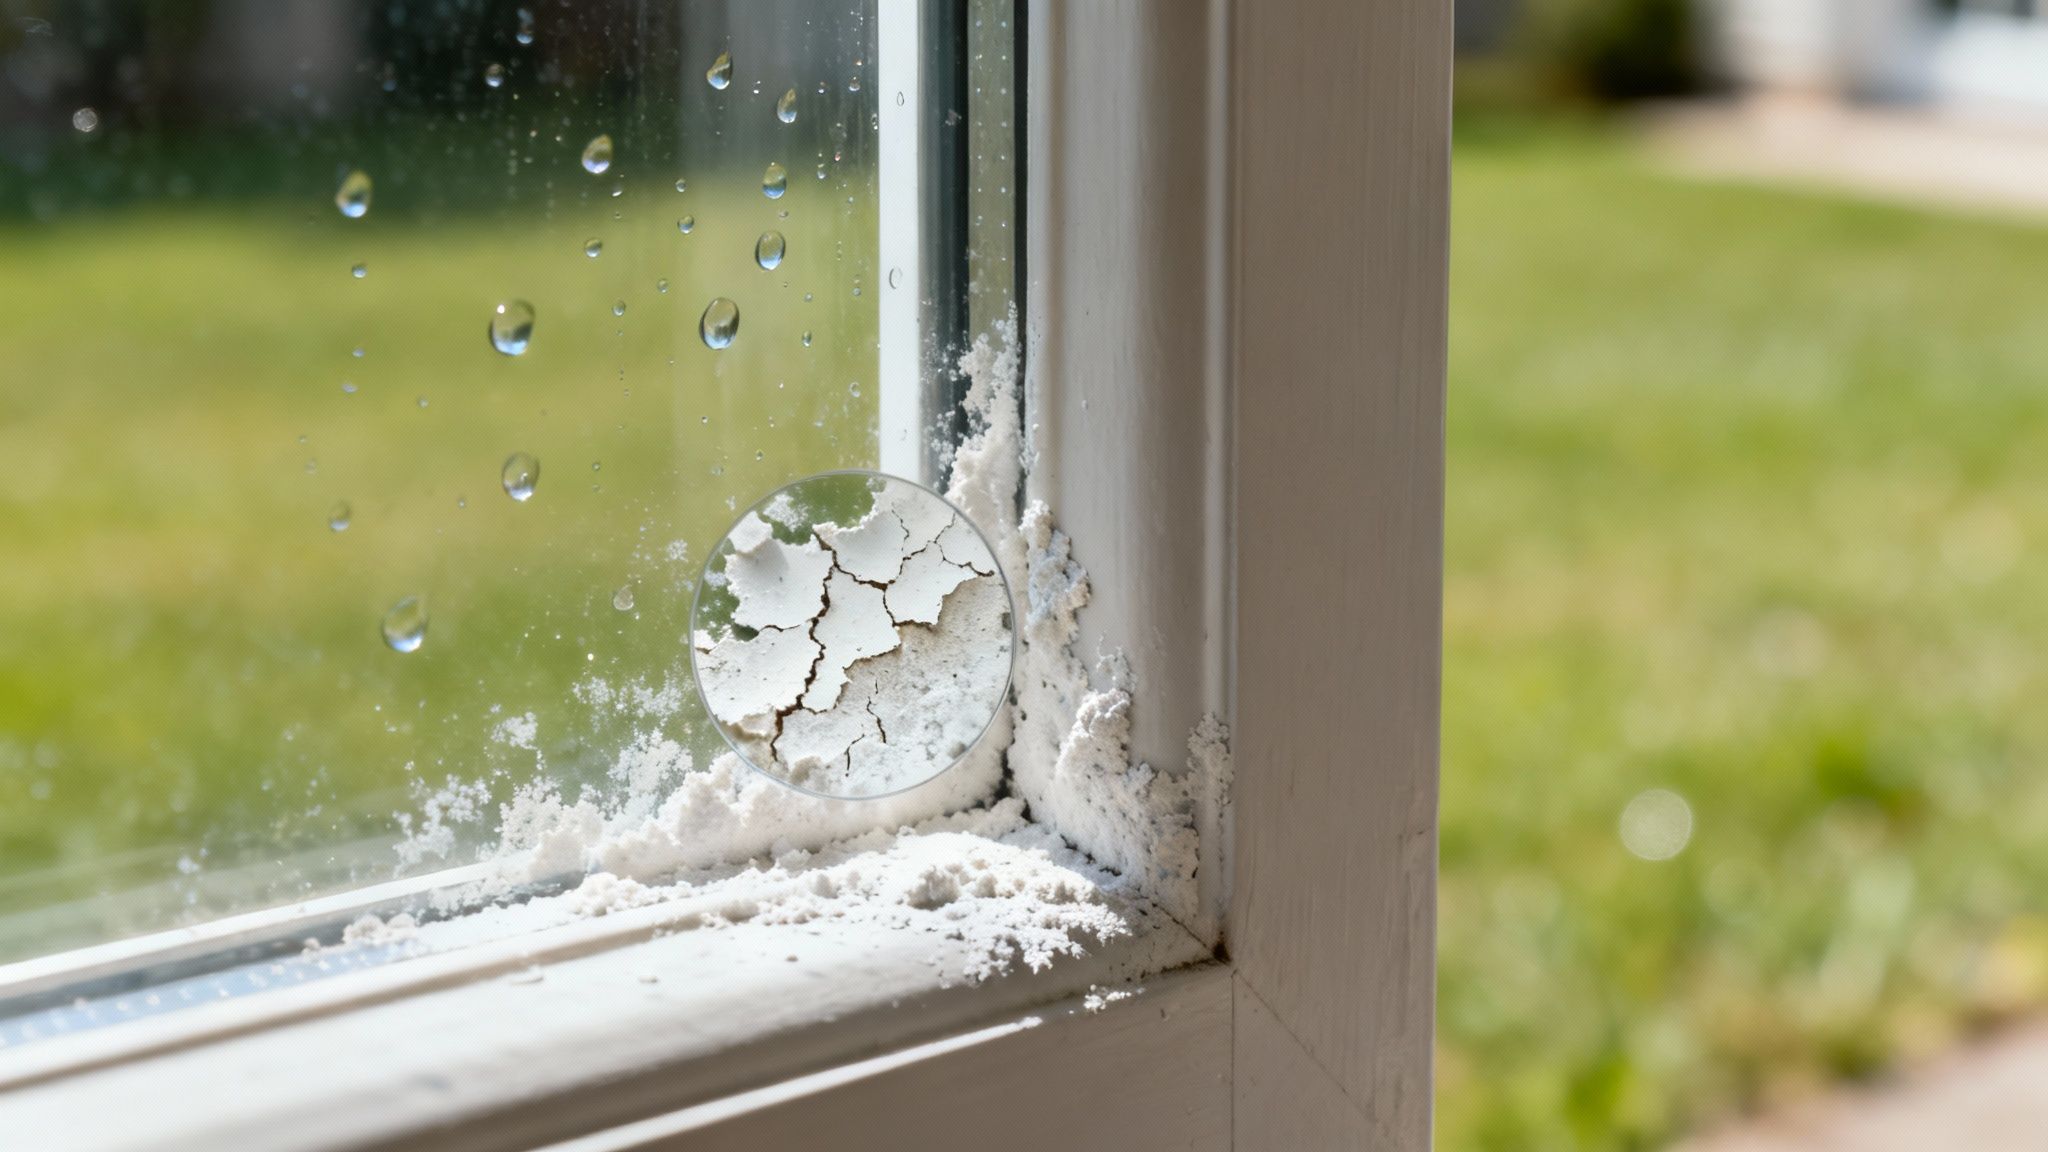
Before you reach for a razor blade or harsh chemicals, it helps to know what you’re up against. Those cloudy, white spots ruining your view aren't just dirt—they're mineral deposits, mostly calcium and magnesium, left behind when water dries. This residue doesn't just sit on the surface; it actually bonds chemically with the glass, which is why it's so tough to get off.
Glass looks perfectly smooth, but on a microscopic level, it's porous. With enough time, these mineral deposits can seep into those tiny pores, causing permanent damage known as etching. At that point, the stain is no longer just on the window; it's become part of it.
The Science Behind the Stains
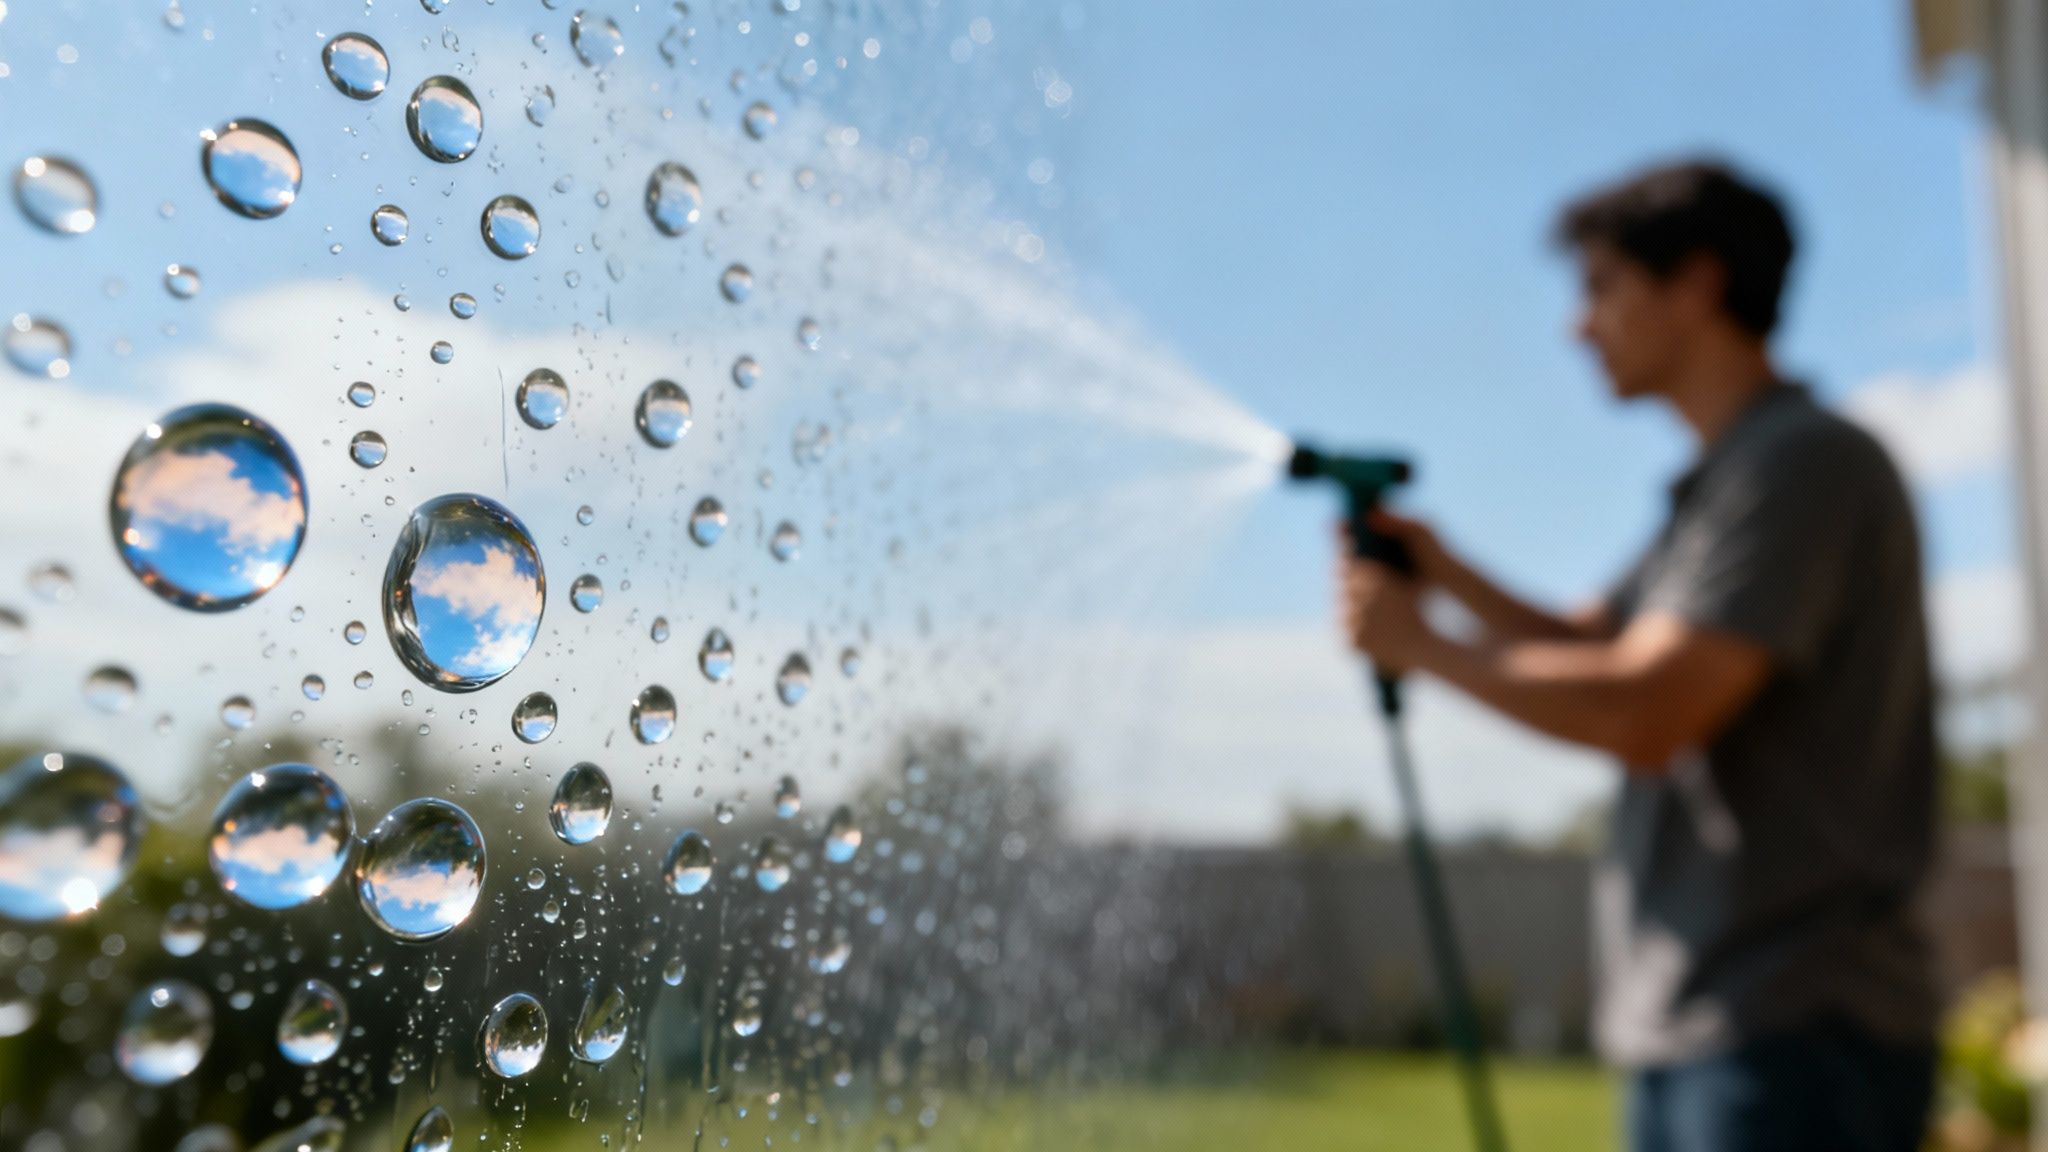
How bad these stains get often comes down to where you live. Here in Phoenix, our water supply is notoriously hard, meaning the mineral concentration is way higher than in other parts of the country.
When your windows get hit repeatedly by sprinkler overspray or even just washed without being dried properly, the problem gets worse fast. Each droplet of water evaporates and leaves behind a nearly invisible layer of minerals. Those layers build on top of each other until you've got a frustrating, hazy film blocking your view.
Breaking that chemical bond is the secret to getting your windows clean. You need something acidic to dissolve the alkaline mineral deposits.
The real challenge with hard water stains is that the minerals get embedded into the glass structure. That’s why scrubbing with soap and water rarely works. You have to break the chemical bond holding the minerals in place.
So, how do you know where to start? This simple guide can help you match the right method to the severity of your stains.
Here's a quick look at the most effective methods for tackling hard water stains, from faint spots to heavy, etched-in buildup.
Quick Guide to Removing Hard Water Stains
| Stain Severity | Recommended Method | Key Tip |
|---|---|---|
| Light & Recent | Vinegar and Water Solution | Let the solution sit for 5-10 minutes to allow the acid to work before wiping. |
| Moderate | Lemon Juice or CLR | For lemon juice, apply directly. For CLR, follow product instructions and wear gloves. |
| Heavy Buildup | Bar Keepers Friend or Fine Steel Wool | Use a non-abrasive paste (#0000 steel wool only) and gentle pressure to avoid scratching. |
| Severe & Etched | Professional Polishing or Restoration | This requires specialized compounds and equipment; it's best to call a pro. |
Choosing the right approach saves you time and prevents you from accidentally scratching your windows.
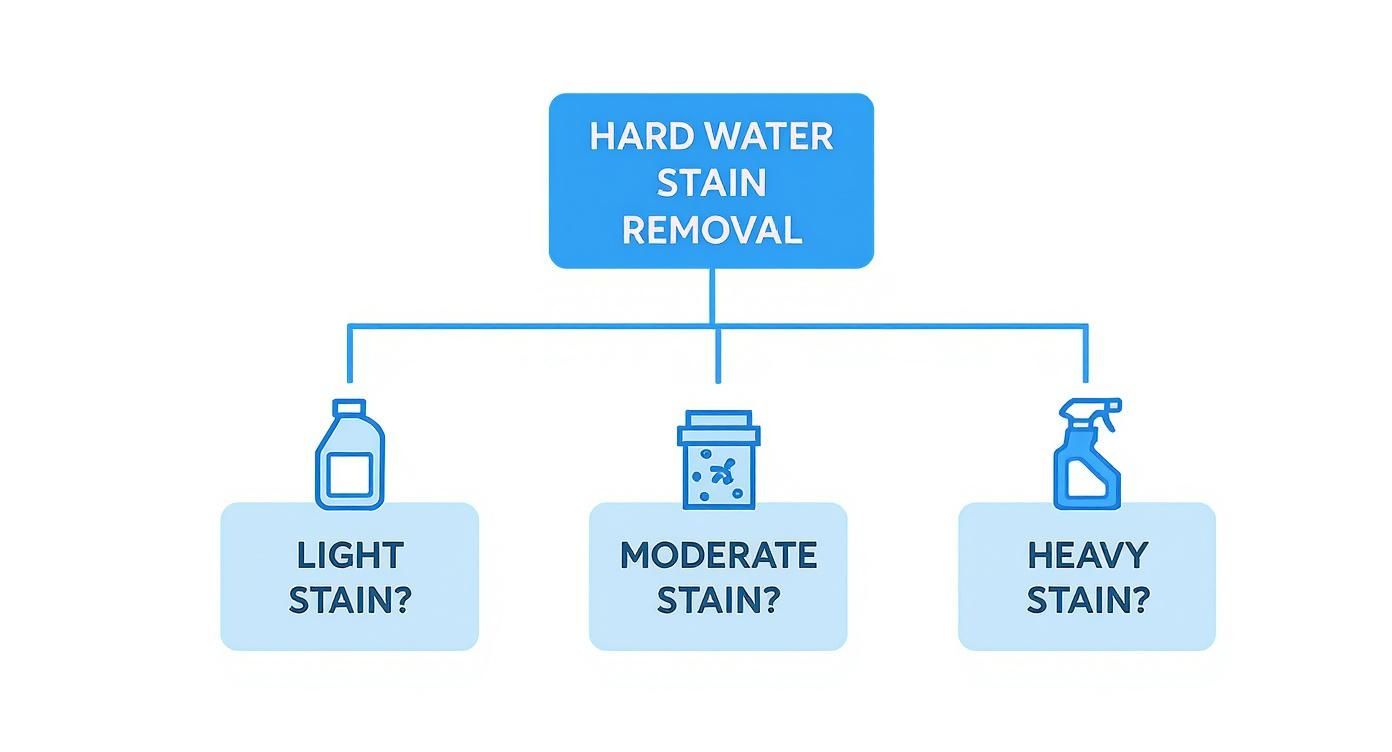
As the infographic shows, light stains are often a DIY job, but once they become severe, it’s usually time to call in a professional.
The type of glass you have can also play a role. Some newer windows have special coatings that change how water beads or sheets on the surface. If you're curious, it's worth learning about the difference between hydrophilic and hydrophobic glass to make sure you’re using the right techniques and not damaging any expensive treatments.
Your DIY Toolkit for Everyday Stains
You don't need an arsenal of harsh chemicals to tackle light or recent hard water spots. In fact, some of the most effective tools for the job are probably already sitting in your kitchen pantry. With the right technique, a few simple household ingredients can dissolve those frustrating mineral deposits and bring the clarity back to your view.
Our first line of defense is a classic for a reason: a simple solution of white vinegar and water. Vinegar's natural acidity is perfect for breaking down the alkaline mineral bonds that make hard water stains so stubborn. This approach is gentle on your glass but surprisingly tough on that chalky residue.
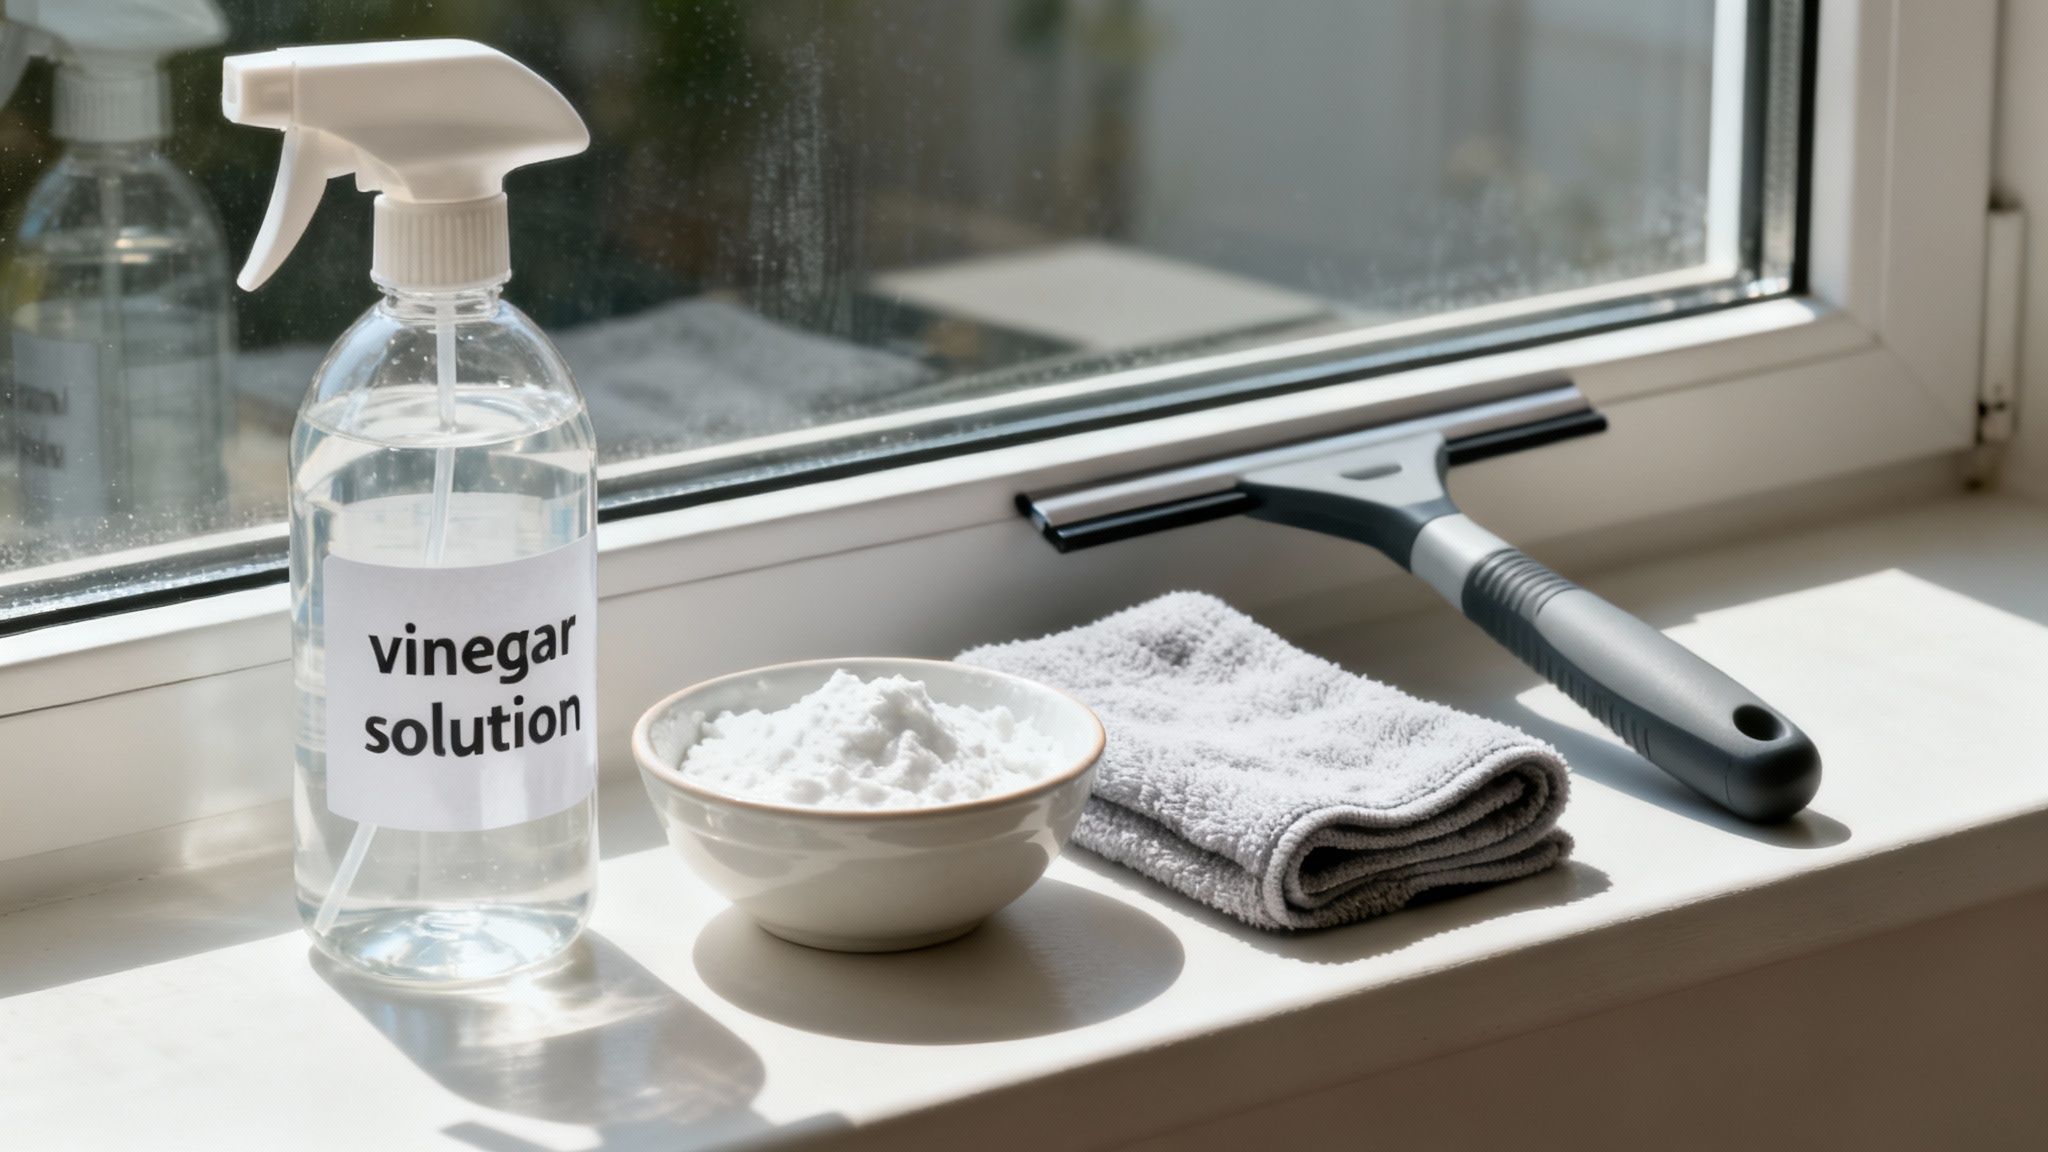
Mixing Up Your Vinegar Solution
First, grab a clean spray bottle and mix equal parts distilled white vinegar and water. I always recommend distilled water because it won't introduce new minerals to the glass while you're trying to clean it. Give the bottle a good shake, and you're ready to go.
Spray the solution generously onto the window, focusing on completely saturating the stained areas. Now for the most important part: let it sit. You need to give the solution at least 10-15 minutes of dwell time. This is when the magic happens, as the acidic vinegar actively works to dissolve the calcium and magnesium deposits.
Professional Tip: Dealing with a vertical window where the solution just runs right off? Soak a few paper towels in your vinegar mix and press them against the glass. They'll cling to the surface, keeping the solution in constant contact with the stains for a much more effective treatment.
Once the solution has had time to work, it's time to get cleaning.
- Grab the right tool. A high-quality, lint-free microfiber cloth is your best friend here. These are designed to trap dirt and particles without leaving streaks or scratches behind.
- Wipe with a plan. Always start at the top of the window and work your way down in a consistent pattern. This simple trick prevents drips from running over the areas you’ve already cleaned.
- Bring in the squeegee. For that truly professional, streak-free finish, follow up with a squeegee. Be sure to overlap each pass by about an inch and wipe the blade clean after every single stroke.
This vinegar method is incredibly effective for new or light stains. Research confirms that a 1:1 vinegar and water mix can successfully dissolve mineral buildup, especially in regions where the water isn't excessively hard. However, for places like Arizona with exceptionally hard water (where mineral content often exceeds 180 mg/L), you might need a more potent approach for older stains. If you're running into trouble, you can learn more about how to remove hard water stains from your windows by exploring other expert guides.
When You Need a Little More Power
For those slightly tougher spots that vinegar alone just can't conquer, a simple baking soda paste provides a bit more abrasive power without being harsh enough to scratch your glass.
Just mix a small amount of baking soda with a few drops of water until it forms a thick paste, about the consistency of toothpaste. Apply this paste directly to the stubborn stains with a soft cloth or sponge. Using gentle, circular motions, scrub the area for a minute or two. The mild abrasion from the baking soda will help lift those more persistent mineral deposits right off.
After scrubbing, rinse the window thoroughly with clean water to remove all the paste residue, then dry it completely with your microfiber cloth or squeegee. With these two methods in your back pocket, you have a complete toolkit for handling most of the everyday hard water situations you'll encounter.
What to Do When Stains Won't Budge
So, you’ve tried the vinegar solution. You’ve made the baking soda paste. You’ve scrubbed and squeegeed, but that stubborn, chalky outline remains, mocking your efforts. It’s a frustratingly common problem, especially with older stains that have spent years baking onto the glass under the intense Arizona sun.
When your go-to household remedies fall short, it’s time to step up your game. This doesn’t mean you have to throw in the towel and call a pro just yet. It just means you need to bring in stronger, more specialized tools designed for exactly this kind of fight.
Upgrading to a Commercial Hard Water Remover
The next logical move is to grab a commercial-grade hard water stain remover. These products are specifically formulated to dissolve the tough calcium and magnesium deposits that vinegar and baking soda just can't handle.
When you're looking at your options, search for products that list mild acids like sulfamic or oxalic acid in their ingredients. These are the chemical workhorses that excel at breaking down mineral bonds. In fact, professional window cleaners often rely on these specialized chemicals, and treating hard water damage can take up 30-40% of their time on a residential job.
Of course, with stronger products comes a greater need for caution. It’s critical to know which substances are safe for your particular windows. For a deeper dive, our guide on the dos and don'ts of window cleaning chemicals can help you make a safe choice.
Safety First: Always wear protective gloves and safety glasses when you're working with commercial cleaners. And before you go all-in, test the product on a small, out-of-the-way spot on the window to make sure it doesn’t harm the glass or the frame.
The Last Resort: Mechanical Removal
If even a potent chemical cleaner can't get the job done, you might be dealing with a thick, layered deposit that needs a more physical approach. This is where ultra-fine #0000 steel wool comes into play—but think of it as your last resort.
Using the wrong kind of steel wool will absolutely scratch your glass, so double- and triple-check that you have the #0000 grade. It’s the finest available and is what professionals use to gently abrade mineral buildup without damaging the glass itself.
Here’s the right way to use it:
- Lubricate, Lubricate, Lubricate: Never, ever use steel wool on a dry window. Keep the glass wet with your cleaning solution (or even just plain water) to minimize friction.
- Gentle Pressure is Key: Let the steel wool do the work. Use light, circular motions and apply consistent, even pressure over the stain. Don't force it.
- Tackle Small Areas: Focus on one stained section at a time. Trying to scrub the whole window at once is less effective and more tiring.
- Rinse and Check Your Work: After a few gentle passes, rinse the area and wipe it dry with a squeegee to see how it's looking.
This method can lift the most caked-on, stubborn mineral deposits. But if the stain still won't go away, the glass itself may be etched. Etching is permanent physical damage caused by the minerals, and unfortunately, no amount of cleaning can restore the window's original clarity.
How to Prevent Future Hard Water Stains
Getting those hard water stains off your windows feels great, but that victory is temporary if you don't tackle the source of the problem. The real secret to keeping your windows crystal clear without constant scrubbing is to stop the mineral buildup before it even starts. A little proactive effort now will save you a ton of time and frustration later.
The whole game is about managing how water interacts with your glass. Your goal is to keep water from sitting on the window surface long enough to evaporate, because that’s what leaves those ugly mineral deposits behind. This might mean tweaking a few habits or putting some more permanent solutions in place.
Get Into a Proactive Cleaning Rhythm
One of the easiest ways to keep hard water stains at bay is to deal with water exposure right away. This is especially important for any windows that get a regular dousing from sprinklers or patio hoses.
- Keep a Squeegee on Hand: After the sprinklers run or you finish washing down the deck, do a quick pass on the affected windows with a squeegee. It takes less than a minute and pulls the water off before it can dry and leave its mark.
- Do a Quick Weekly Wipe-Down: A quick spritz and wipe with a simple vinegar and water solution each week can lift away fresh mineral traces before they get a chance to etch into the glass. It’s far less work than battling thick, layered stains down the road.
Making these small actions a regular habit completely disrupts the cycle of buildup. It’s a tiny time investment that delivers consistently clear views.
Adjust Your Sprinklers and Landscaping
Sometimes the best defense is a good offense—stopping water from hitting your windows in the first place. A few smart adjustments around your property can make all the difference, especially here in Arizona where sprinkler systems are public enemy number one for clean windows.
The most common cause of severe hard water stains we see on residential windows is misaligned sprinkler heads. A simple adjustment can save homeowners hundreds of dollars in professional cleaning fees or even window replacement costs.
Take a few minutes to check your irrigation system. Make sure the sprinkler heads are pointed at your grass and plants, not your glass. If wind makes overspray unavoidable, try planting a few shrubs or a decorative screen near the windows. This simple landscaping trick can create a natural shield, deflecting most of the spray.
Install Long-Term Protection
For a more permanent and powerful defense, you can treat either the water itself or the glass surface. These solutions take a bit more effort upfront but provide fantastic, long-term protection against hard water damage.
Applying a hydrophobic glass sealant is a great option. These products form an invisible coating on your windows that makes water bead up and roll right off, taking all those dissolved minerals with it. It works just like a good coat of wax on your car—water just can't stick.
For the ultimate fix, you can install a water softener for your entire home. This system tackles the problem at its source by removing minerals like calcium and magnesium from your water supply. Not only will this keep your windows spotless, but it will also extend the life of your plumbing and appliances while being gentler on your skin and hair.
When to Call a Professional Window Cleaner
Let's be honest, sometimes the battle against hard water stains feels unwinnable. There comes a point where more scrubbing and stronger vinegar solutions just aren't cutting it. In fact, pushing too hard on a stubborn stain can cause permanent damage, like deep scratches or even chemical burns on the glass.
Knowing when to hang up the squeegee and call in a pro is crucial for protecting your windows.
The biggest red flag? When the glass itself is physically etched. After you’ve tried to clean a spot and dried it completely, run your fingernail across it. If you feel any roughness, a gritty texture, or tiny pits, the minerals have literally eaten into the glass. No amount of cleaning solution can reverse that kind of physical damage.
When Professional Expertise Is a Must
Calling a professional isn’t throwing in the towel; it's the smartest move you can make to protect your home. A pro has an arsenal of specialized tools, compounds, and techniques that are either too expensive or too risky for the average homeowner.
You should seriously consider making that call in these situations:
- Heavily Etched Glass: When minerals have been baking onto your windows for years, they can eat into the surface. A pro can often use special polishing compounds and buffers to meticulously restore the glass—a delicate process that can easily ruin a window if you don't know what you're doing.
- Widespread or Severe Stains: Is the entire back of your house coated in a chalky film from the sprinklers? Tackling that much buildup yourself is a massive, time-consuming job. A professional crew can knock it out in a fraction of the time.
- High or Hard-to-Reach Windows: Your safety is non-negotiable. Teetering on a wobbly ladder trying to scrub a second-story window is just asking for trouble. Professionals have the right safety gear, like harnesses and stable ladders, to handle the job without risk.
The true value of a professional is their diagnostic skill. They can immediately tell the difference between a tough surface stain and actual glass etching, which means they use the right—and safest—treatment right from the start.
Still on the fence? It often helps to weigh the costs. Thinking through whether to DIY or hire a handyman can put the expense into perspective, especially when you factor in the cost of potentially replacing a damaged window.
What Professionals Do Differently
Pros don't just scrub harder; they work smarter. They use a multi-pronged attack, combining powerful chemical treatments with mechanical polishing. This often involves using carefully buffered, mild acid solutions to dissolve the thickest layers of mineral buildup without harming the glass.
According to industry veterans, stains left untreated for four or more years can become permanently etched, making a perfect restoration almost impossible with cleaning agents alone. The process for these severe cases usually involves the chemical treatment followed by a final glass polishing stage to smooth out any lingering microscopic damage.
At the end of the day, knowing when to ask for help is a key part of smart home maintenance. For a more detailed breakdown, take a look at our guide on knowing when to call a professional window washing company.
Answering Your Top Questions About Hard Water Stains
Even with the best guide in hand, you’re bound to have a few questions pop up when you start tackling those stubborn spots. It's completely normal. Let's walk through some of the most common ones I hear from homeowners.
Can I Just Scrape the Stains Off With a Razor Blade?
I see why you'd ask this—you’ve probably seen a pro glazier or window cleaner use a blade and make it look easy. But for a DIY job, I strongly advise against it. It's a high-risk, low-reward situation.
It takes a very specific angle and a perfectly lubricated, debris-free surface to pull it off without a hitch. One tiny grain of sand or a slight slip of your hand, and you’ve just traded a mineral stain for a permanent, deep scratch in the glass. Honestly, it's just not worth the gamble.
A much safer bet for a little extra scrubbing power is ultra-fine #0000 steel wool. It’s designed specifically to be non-abrasive on glass, so you can scrub with confidence.
Is Lemon Juice as Good as Vinegar?
For very new, light mineral spots, lemon juice can definitely help. The citric acid in it works much like the acetic acid in vinegar, breaking down those initial deposits.
But for a reliable, go-to solution, white vinegar wins every time. It’s not sticky like lemon juice, it’s cheaper, and you get a more consistent acidic strength bottle after bottle. When you want clean, streak-free results without any sugary residue complicating your final wipe-down, the vinegar and water mix is the clear winner.
Expert Insight: The real difference comes down to consistency and residue. Vinegar gives you predictable cleaning power without leaving behind sticky sugars, which makes getting that final, perfectly clear finish much easier.
How Do I Know If a Stain Is Permanent?
This is the big question, and thankfully, there’s an easy way to check. Once you’ve tried cleaning the spot and the window is completely dry, run your fingernail across the affected area.
If the glass feels perfectly smooth, congratulations! The stain is gone. However, if you feel any roughness, pitting, or a gritty texture, the glass has become etched. This means the minerals have physically eaten into the surface. While the discoloration might be gone, the damage to the glass itself is permanent and can only be fixed with professional glass polishing.
Will These Cleaning Methods Work on My Car Windows?
Great question. Yes, most of these techniques, especially the vinegar solution and commercial cleaners, are perfectly safe for your car’s windows. They do a great job of removing the same kind of mineral buildup from road spray and sprinklers.
But there's one huge exception: never use steel wool or any other abrasive on automotive glass. Car windows often have delicate tints and coatings that can be scratched and ruined in an instant. For your vehicle, stick with the chemical cleaners and a soft microfiber cloth.
Are stubborn stains or etched glass still ruining your beautiful Arizona view? Don't risk damaging your windows by going it alone. The experts at Sparkle Tech Window Washing have the professional-grade tools and experience to safely restore your glass. Contact us today for a free estimate!