


You can get rid of hard water spots on your windows using common acidic solutions like vinegar or lemon juice, which are great for dissolving the mineral deposits. For more stubborn stains, you can step it up with a paste made from baking soda and water or even a specialized commercial cleaner designed to break down that stubborn buildup without scratching the glass. The trick is to dissolve the minerals, not just scrub them around.
Why Hard Water Leaves Stubborn Spots on Your Windows
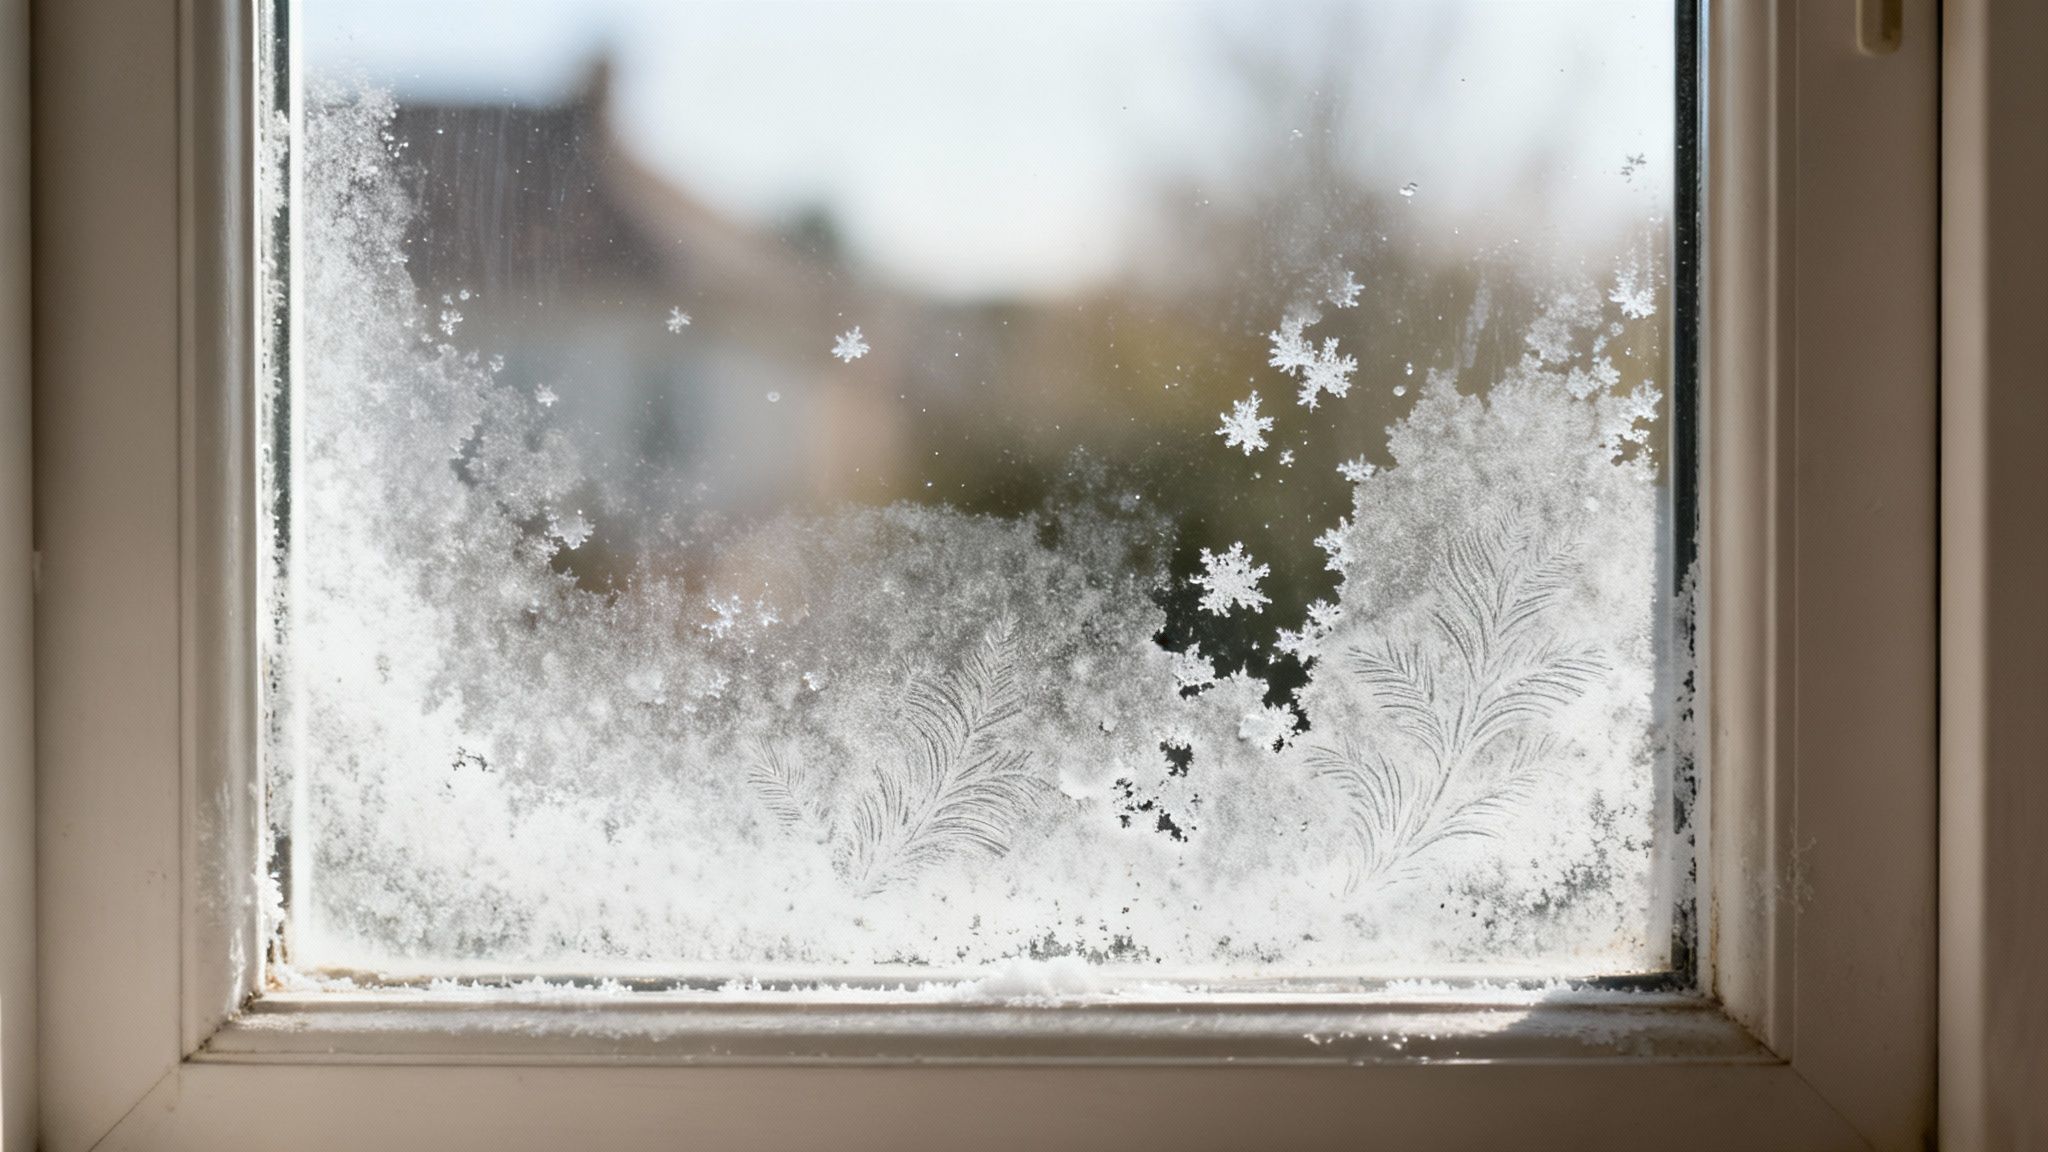
Before you grab a sponge and start scrubbing, it helps to know exactly what you’re dealing with. Those chalky, white spots aren't just dirt—they're mineral deposits left behind when water evaporates. This is an incredibly common headache for homeowners across the country, especially in regions known for having high mineral content in the water.
The Science Behind the Stains
Hard water is loaded with dissolved minerals, mostly calcium and magnesium. When a single drop of this water lands on your window from a sprinkler, a hose, or even the rain, the water eventually evaporates, but the minerals get left behind. Over time, these tiny deposits bond tightly to the glass surface.
This is exactly why your everyday window cleaner just doesn't cut it. Most soap-based solutions can't break down these tough mineral bonds. You end up just smearing the residue around, which can make the window look even worse than when you started.
It's a widespread problem, too. Over 85% of households in the United States are dealing with the effects of hard water, a direct result of the local geology and water sources.
From Annoying Spots to Permanent Damage
Here's the real kicker: if you let those mineral deposits sit for too long, they don't just stay on the surface. The alkalinity of the minerals will slowly begin to corrode and permanently etch the glass itself. This process, known as silicification, creates microscopic pits and damage that you can't just clean away.
Key Takeaway: Hard water spots are more than just an eyesore. If you ignore them, they can cause irreversible damage to your windows, turning a simple cleaning job into a much more expensive replacement project.
Getting a handle on this basic science is the first step toward picking the right cleaning strategy. It also shows why preventing the spots in the first place is so important. To really get to the root of the problem, you might want to look into the benefits of a whole house water filter.
For those interested in more advanced glass technologies, we have an article that explains the difference between https://sparkletechwindowwashing.com/the-difference-between-hydrophilic-and-hydrophobic-glass/.
Gathering Your Hard Water Cleaning Arsenal
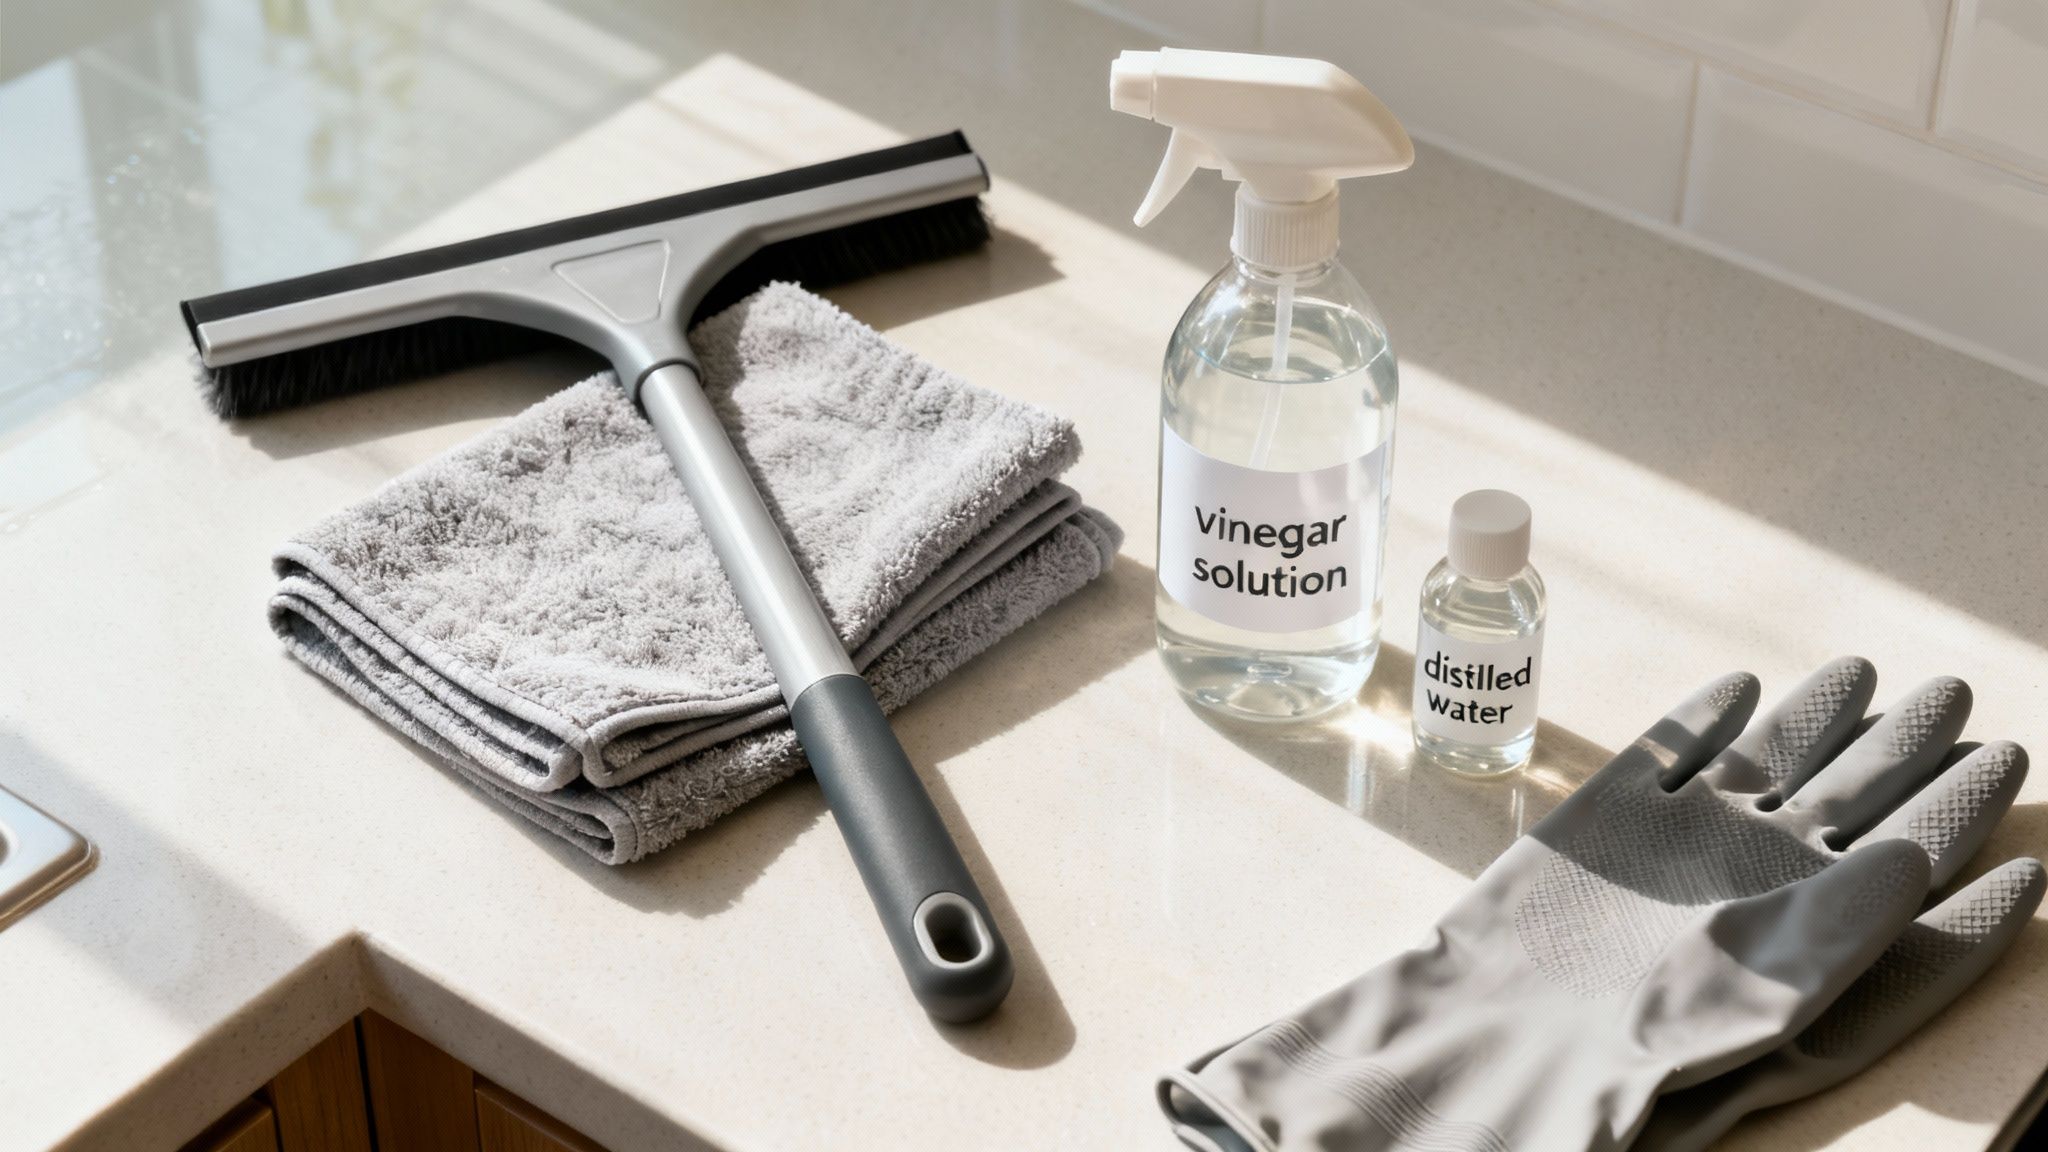
Before you even think about tackling those stubborn hard water spots, you need to get your tools in order. Trust me, showing up to the fight with just a roll of paper towels and a generic spray bottle is a recipe for frustration. A little preparation goes a long way, turning a dreaded chore into a surprisingly satisfying task.
The right gear isn't just about cleaning power; it's also about protecting your glass from accidental scratches. Let's build your go-to kit with some essentials that are easy to find but make all the difference.
Your Core Cleaning Supplies
Here’s a quick rundown of what you’ll want to have within arm's reach.
- Spray Bottles: Grab at least two. One will be for your cleaning solution, and the other is for rinsing with pure, distilled water later on.
- Microfiber Cloths: You can't have too many of these. They're gentle, super absorbent, and won't leave a trail of lint behind like old rags or paper towels.
- Non-Abrasive Scrubber: For mineral buildup that’s really baked on, a soft scrub sponge or a special non-scratch pad gives you the extra muscle you need without harming the window.
- A High-Quality Squeegee: This is the non-negotiable tool for a crystal-clear, streak-free finish. Don't skimp here.
The Finishing Touches
A couple of other items will take your results from good to great. First, distilled water. It might seem like an extra step, but using it for your final rinse is critical. Since it has zero mineral content, it dries without leaving any new deposits, which is the whole point!
And don't forget a good pair of protective gloves, especially if you're using acidic solutions like vinegar to break down those mineral stains.
Pro Tip: I can't stress this enough: a quality squeegee is a game-changer. A cheap, flimsy one will just smear water around, leaving you with a streaky mess. A professional-grade squeegee maintains even pressure across the blade, wiping the glass perfectly clean in one pass.
While DIY solutions work for most situations, it's worth knowing about the essential chemicals professional window cleaners use for those extremely tough, long-term mineral deposits.
Your Go-To DIY Methods for Tackling Hard Water Stains
Alright, you've gathered your supplies, and now it's time to get hands-on and bring back that crystal-clear view. You really don't need to reach for harsh, expensive chemicals to see fantastic results. Believe it or not, some of the best hard water fighters are probably sitting in your kitchen pantry right now.
We're going to walk through two of the most reliable DIY methods I've used over the years. The secret to making these simple solutions work isn't the ingredients themselves, but the technique. The first method is my go-to for newer, lighter stains, while the second has a bit more muscle for buildup that's been hanging around for a while.
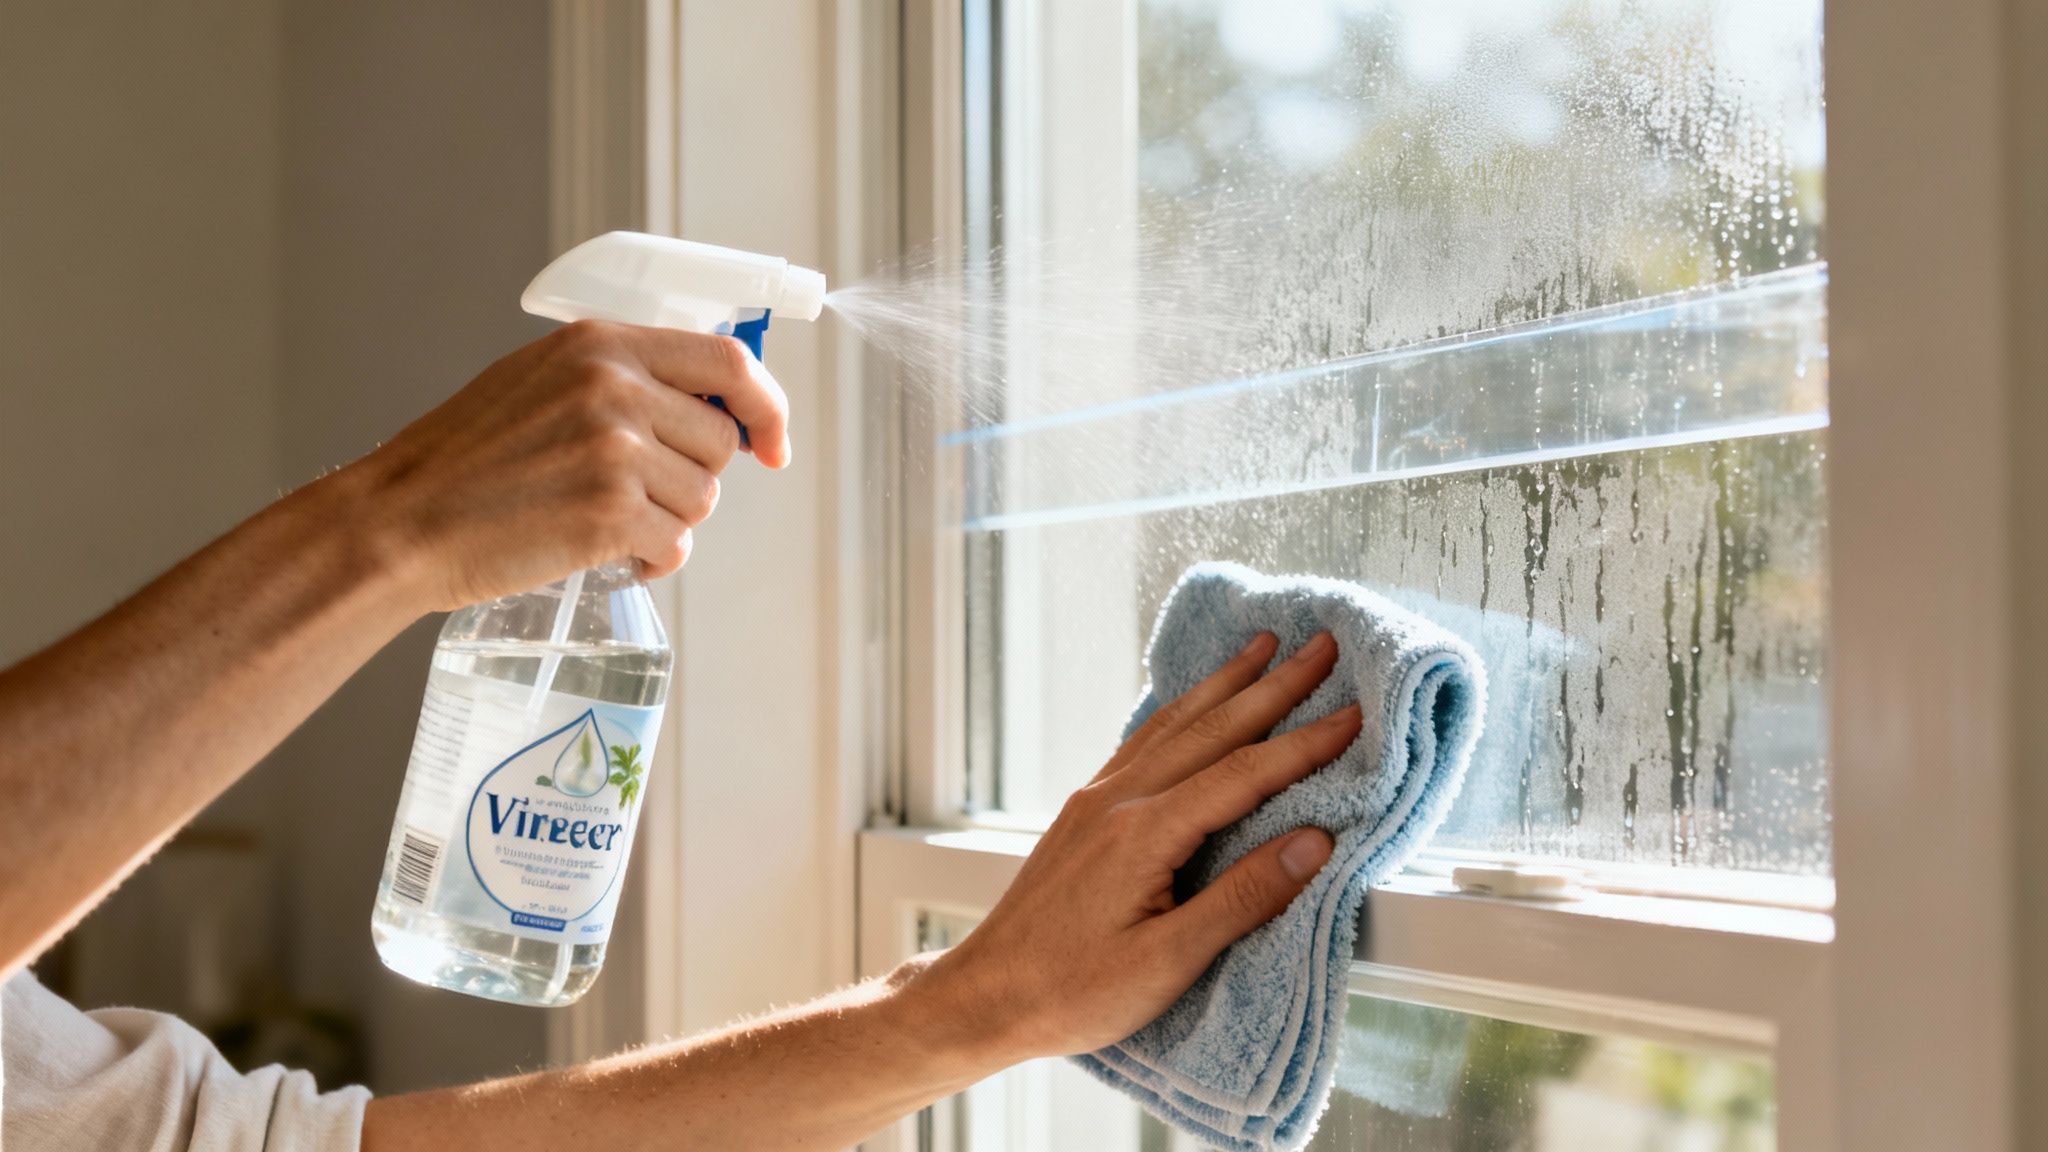
The Classic Vinegar and Water Solution
For those light to moderate hard water spots, a simple acidic solution is always the best place to start. The acetic acid in plain old white vinegar is a champ at breaking down the calcium and magnesium deposits that cause those chalky, hazy stains.
Here’s the game plan:
- Mix Your Solution: Grab a spray bottle and fill it with equal parts distilled white vinegar and distilled water. It's really important to use distilled water here—tap water will just leave fresh mineral deposits behind, and you'll be back at square one.
- Saturate the Stains: Spray the mixture generously onto the window glass. You want to completely cover every spot. Don't be shy; the surface needs to stay wet for the acid to do its job.
- Give It Time: Now, just let it sit. You need to give the solution at least 10-15 minutes to work its magic. This "dwell time" is when the vinegar is actively dissolving those mineral bonds.
- Wipe, Rinse, and Dry: Gently scrub the area with a soft, non-abrasive sponge or a microfiber cloth. Once you're done, rinse the glass with a little plain distilled water and dry it completely with your squeegee for that perfect, streak-free shine.
Pro Tip: If you're dealing with stubborn spots on a vertical window, try this trick. Soak a few paper towels in your vinegar solution and press them right onto the glass. They'll cling to the surface, keeping the cleaner concentrated on the problem area for much longer.
Creating a Powerful Cleaning Paste
Sometimes, a liquid spray just won't cut it, especially for stains that have been baked on by the sun. When that happens, you need a solution with a bit more grit and staying power. A simple paste made from baking soda and water offers a gentle abrasive action to help scrub away tough mineral buildup without scratching your glass.
I like to think of it this way: the vinegar solution dissolves the stains, while this paste helps you physically scrub them away.
To make it, just mix baking soda with a tiny bit of water until it has a thick consistency, almost like toothpaste. Apply this paste directly onto the hard water stains and let it sit for a few minutes. Then, using a damp microfiber cloth, work the paste in small, circular motions. You'll feel the gentle abrasion breaking up the deposits.
When you're done, rinse the window thoroughly with distilled water and squeegee it dry. For more great ideas on beating this common problem, check out this guide on how to remove hard water stains and keep them away for good.
Comparing DIY Hard Water Cleaning Solutions
Not sure which method to start with? This quick comparison should help you choose the right approach for your specific situation.
| Method | Best For | Ingredients | Effort Level |
|---|---|---|---|
| Vinegar & Water Spray | Light to moderate spots, newer stains | Distilled water, white vinegar | Low |
| Baking Soda Paste | Stubborn, older, or heavily built-up stains | Baking soda, a little water | Medium |
Ultimately, the best method depends on how long the stains have been there. I always suggest starting with the gentler vinegar spray first. If the spots don't budge after a couple of tries, it's time to escalate to the baking soda paste for more scrubbing power.
Advanced Tactics for Severe Mineral Buildup
Sometimes, the vinegar and baking soda paste just won't cut it. When you're dealing with spots that have been baked on by the sun for months or even years, you know you’re up against some serious mineral buildup. This is when you need to bring out the bigger guns.
Don't worry, this doesn't mean you have to resort to brute force. The trick is to escalate your methods thoughtfully. For these really stubborn jobs, I typically turn to two proven options: an ultra-fine abrasive pad or a quality commercial-grade cleaner. These are my go-to solutions for windows that look almost permanently etched.
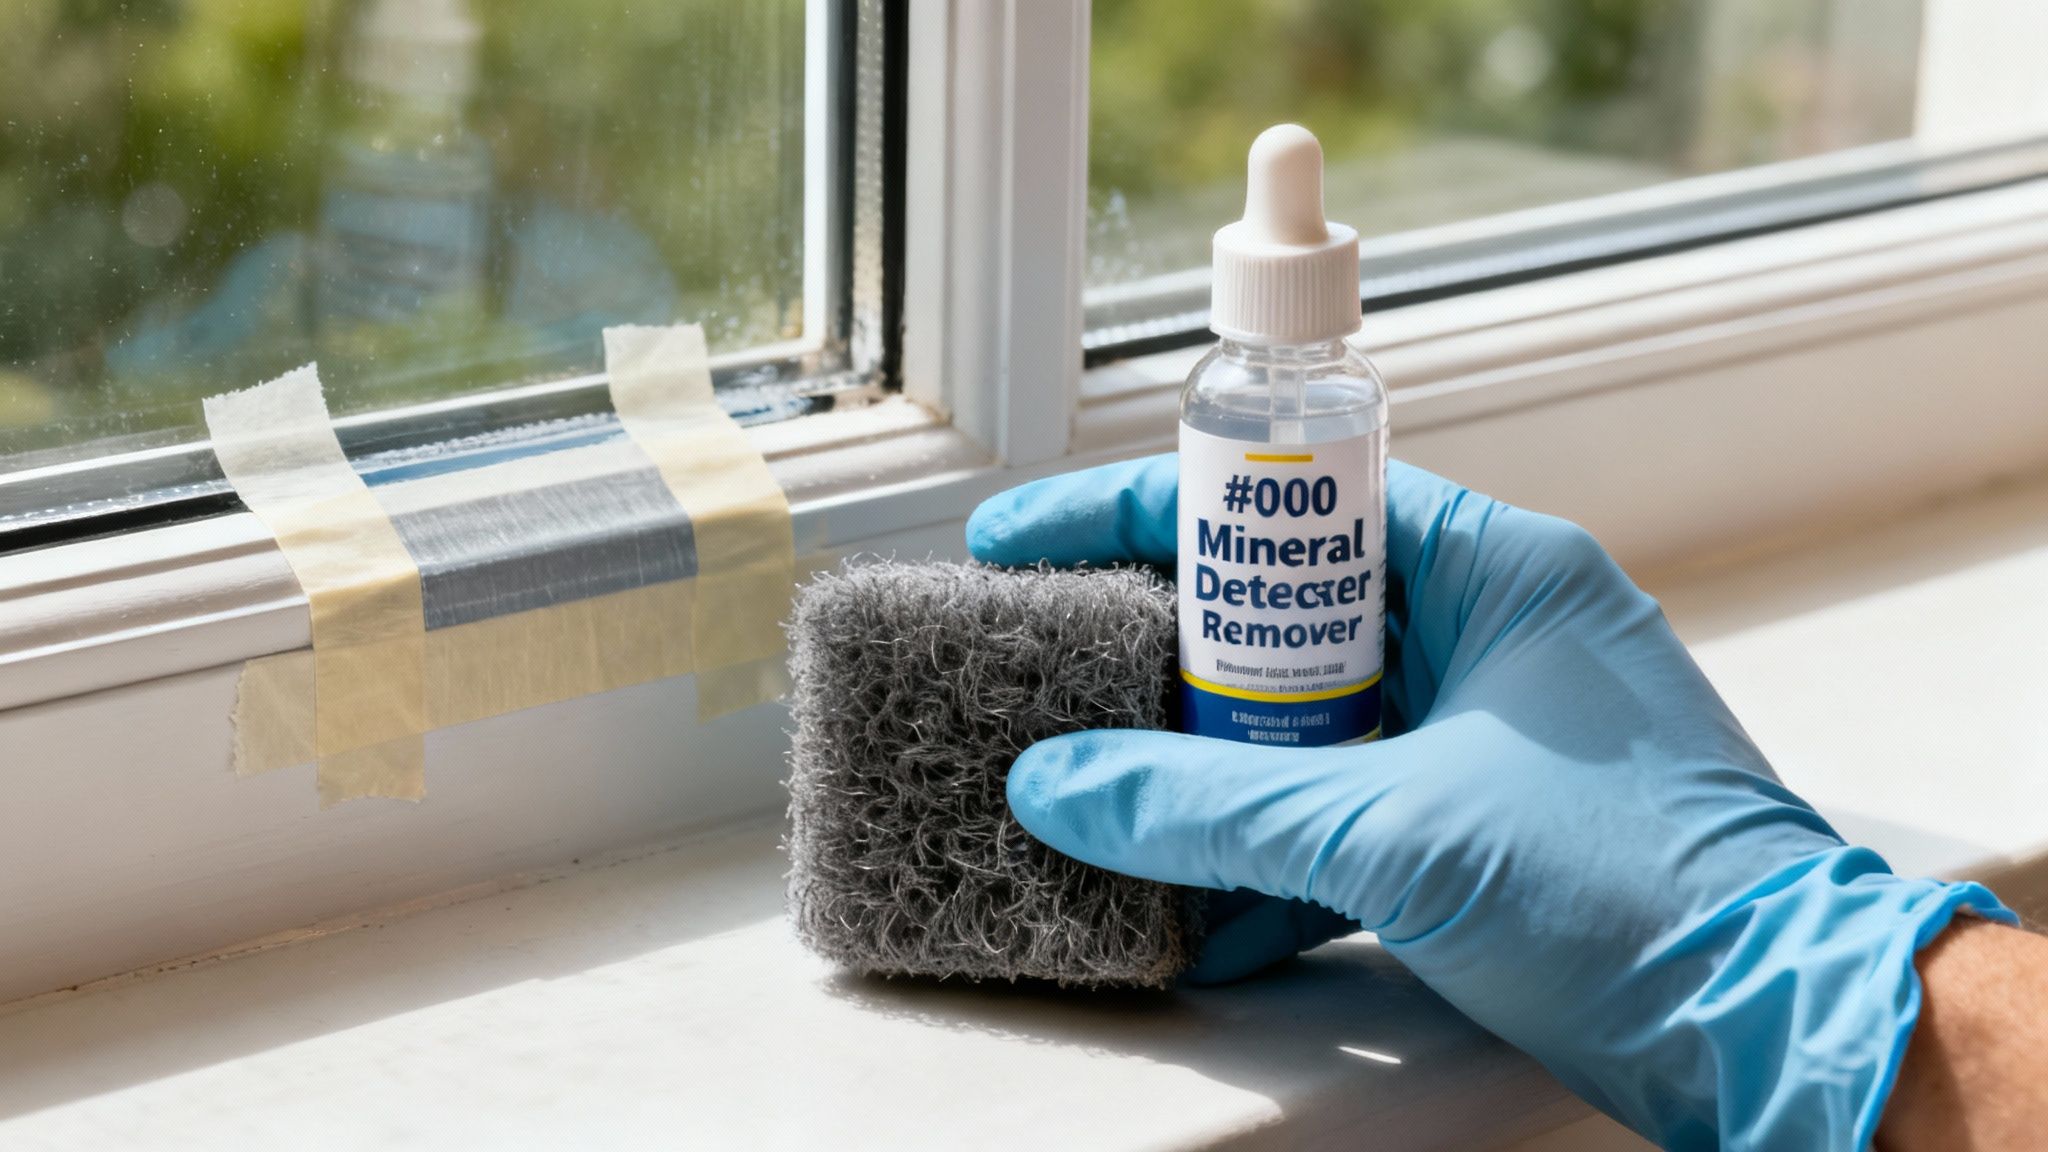
Using #0000 Steel Wool Safely
I know what you're thinking—steel wool on glass? It sounds like a recipe for disaster. But the secret is in the grade. You must use #0000 steel wool, which is the absolute finest you can get. It's actually softer than glass, so it works by gently shearing off the mineral deposits without scratching the surface.
The technique is just as important as the tool. Always keep the glass wet with a simple soap-and-water solution to act as a lubricant. Then, using light to medium pressure, work in small, circular motions. You’ll literally feel the rough, crusty buildup start to smooth out under the pad. It's pretty satisfying.
Crucial Safety Note: I can't stress this enough: always test a small, out-of-the-way spot first. Pick a bottom corner and check your work. This little step can save you from accidentally scratching a window that has a protective coating or film you didn't know about.
Selecting a Commercial Mineral Remover
If a gentle abrasive doesn’t get the job done, it's time to let chemistry do the work. There are some excellent commercial hard water removers on the market that use mild acids to dissolve the stubborn calcium and magnesium deposits right off the glass.
When you're picking a product, read the label carefully to ensure it's specifically marked as safe for glass. These cleaners are much more potent than your kitchen remedies, so following the directions is non-negotiable.
Here are a few tips from my own experience:
- Apply to a cloth, not the glass. Never spray these cleaners directly onto the window. Put a small amount on a microfiber cloth and then apply it to the glass. This gives you way more control.
- Work in small sections. If you try to do the whole window at once, the cleaner will dry before you can work it in, leaving you with a new mess. Focus on one small, manageable area at a time.
- Rinse, rinse, rinse. Once you've scrubbed an area, rinse it thoroughly with distilled water. This neutralizes the cleaner and ensures no chemical residue is left behind.
Knowing When to Call a Professional Window Cleaner
While tackling window cleaning yourself is great for regular upkeep, some jobs are just too big for a DIY approach. Knowing when to put down the squeegee and call in a pro can save you a ton of frustration, prevent expensive damage, and get you those truly flawless results.
The real tipping point is when you realize you're no longer cleaning the glass, but trying to restore it.
Sometimes, those mineral deposits have been sitting on your windows for so long they're no longer just a surface problem. They've begun to physically etch into the glass, creating tiny pits and damage that no amount of scrubbing or vinegar will ever remove. If you've tried the more advanced methods and those stubborn spots are still there, that’s a sure sign you need an expert's touch.
Assessing the Situation
Another huge consideration is simple logistics and safety. Are we talking about second-story windows, or skylights that require you to channel your inner acrobat on a wobbly ladder? That’s a serious risk.
Professionals have the right safety gear, like harnesses and stable ladders, and the training to handle these high-reach jobs without putting themselves—or your property—in danger.
When mineral deposits accumulate over extended periods, they can become deeply etched into the glass structure, making them nearly impossible to remove without professional intervention.
Letting severe hard water damage sit can also have some pretty serious financial consequences. In the worst-case scenarios I've seen, the glass is so badly stained and etched that the only option left is a full, and very costly, window replacement.
The Value of Professional Service
So, what do the pros have that you don't? It's not just about stronger chemicals. They come equipped with specialized gear like water-fed poles that can reach high windows from the ground and professional-grade polishing equipment designed to carefully buff out damage and restore the glass's clarity.
They can safely remove years of mineral buildup and, just as importantly, can often apply a high-quality sealant afterward. This protective layer acts as a barrier, making it much harder for new spots to form and saving you from having this same problem all over again in six months.
Hiring an expert isn’t admitting defeat; it’s making a smart, strategic decision to protect your home's appearance and value. If you're on the fence, you might find our guide on knowing when to call a professional window washing company helpful.
Still Have Questions About Hard Water Spots? We've Got Answers
After you've battled those stubborn white spots, you might still have a few questions rolling around. Let's tackle some of the most common ones we hear from folks trying to get their windows crystal clear for good.
Can Hard Water Stains Actually Become Permanent?
In a word, yes. It’s a bit of a scary thought, but when mineral deposits from hard water sit on glass for too long, they can actually start to corrode the surface.
This isn't just a surface-level stain anymore; the high alkalinity of the deposits creates microscopic pits and etching in the glass itself. At that point, no amount of scrubbing will remove the damage. This is exactly why regular cleaning is your best line of defense.
How Often Should I Be Cleaning My Windows to Stop This?
This really comes down to how much exposure your windows get. If your lawn sprinklers blast your windows with hard water every morning, you'll want to be more vigilant. A quick pass with a squeegee right after they turn off can work wonders.
For most homes, a thorough cleaning every 1-2 months is a great schedule to keep new spots from setting in and bonding to the glass.
The real secret is consistency. Spending a few minutes on prevention is so much easier than spending hours scrubbing away stubborn, set-in stains down the road. It's like brushing your teeth—a little daily effort prevents major problems later.
Are Professional Cleaners Better Than My Homemade Vinegar Mix?
Not always. For light to moderate spots, a simple vinegar and water solution is incredibly effective. Plus, it’s a lot safer for your family, pets, and the plants around your house.
Commercial-grade cleaners definitely have more punch and are formulated specifically for mineral removal. Save those for the really tough, older stains that your DIY solution just can't seem to cut through. My rule of thumb is to always start with the gentlest method first and only move on to the stronger stuff if you absolutely have to.
Don't let etched-in stains ruin your beautiful view. If you're dealing with years of buildup, sometimes it's best to call in the pros. At Sparkle Tech Window Washing, we have the specialized tools and know-how to safely restore your glass. Get a free quote today!