

Getting paint off window glass is usually pretty straightforward. The trick is a good, sharp razor scraper and some sort of lubricating liquid. By keeping the glass wet and holding the blade at a low angle, you can lift the paint right off without leaving a single scratch. This is my go-to method for typical paint splatters, like those dried latex drips from a weekend painting session.
Your Pre-Removal Prep for a Perfect Finish
Before you even think about picking up a scraper, a little prep work is your secret weapon. It’s what separates a frustrating, messy job from a clean, satisfying one. Doing this right not only makes the work go faster but also protects your windows from accidental damage. You want to remove the paint, not create a new problem.
Figure Out the Paint Type
First things first: you have to know what you’re up against. Are you dealing with a few stray drops of water-based latex paint, or is it a stubborn, fully cured coat of oil-based paint?
- Latex Paint: This is what you’ll find on most interior walls. It's water-based and, thankfully, the easiest to get off glass. Most of the time, a scraper and some soapy water are all you need.
- Oil-Based Paint: This stuff is built to last, which means it puts up a bigger fight. You’ll likely need something stronger, like rubbing alcohol or even a dedicated paint stripper, to dissolve its bond with the glass.
Knowing the paint type is crucial because it determines your entire plan of attack, from the tools you grab to the liquids you use.
Assemble Your Paint Removal Toolkit
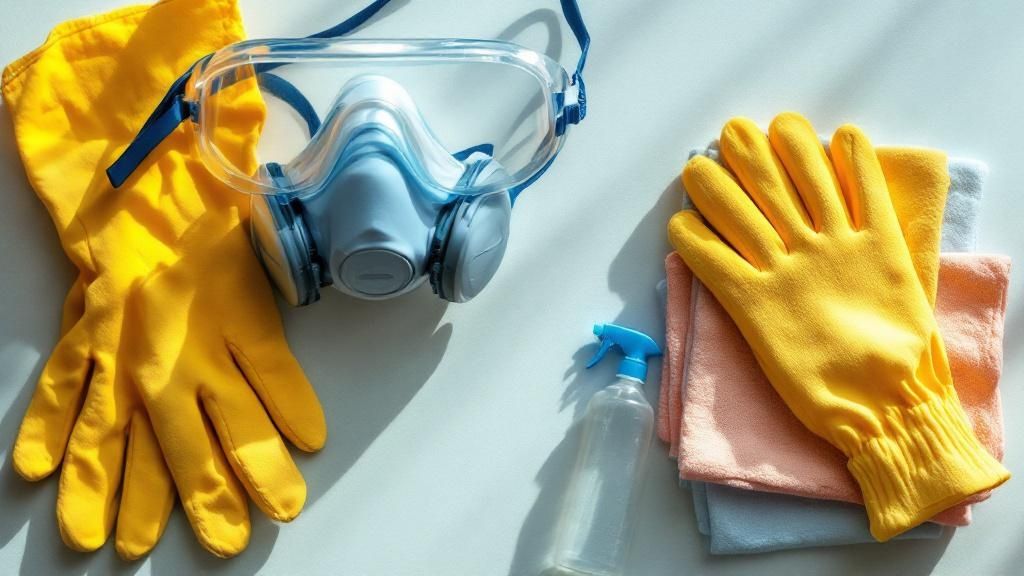
Nothing stalls a project faster than having to stop and search for a tool you forgot. Getting everything you need together beforehand means you can work smoothly and safely, which is key to avoiding scratches on the glass or dings in the frame.
Let's quickly go over the must-have items for your toolkit. Having these ready will make any paint-on-glass job manageable.
Your Paint Removal Toolkit
| Tool or Material | Primary Purpose | Best For |
|---|---|---|
| Razor Blade Scraper | Lifting and removing dried paint from the glass surface. | Small splatters and large dried-on patches of latex or oil paint. |
| Painter’s Tape | Protecting the window frame, sash, and mullions from scrapes. | Wood, vinyl, and metal frames to create a clean work boundary. |
| Spray Bottle | Applying a lubricating solution to the glass to prevent scratches. | Keeping the surface consistently wet during the scraping process. |
| Microfiber Cloths | Cleaning the glass before and polishing it after paint removal. | Achieving a final, streak-free finish without leaving lint behind. |
This simple kit covers the essentials for most situations you'll encounter.
Pro Tip: Always, and I mean always, start with a fresh, sharp razor blade. A dull blade will drag tiny bits of debris across the glass and cause scratches. A new blade, on the other hand, will glide right under the paint for a clean lift.
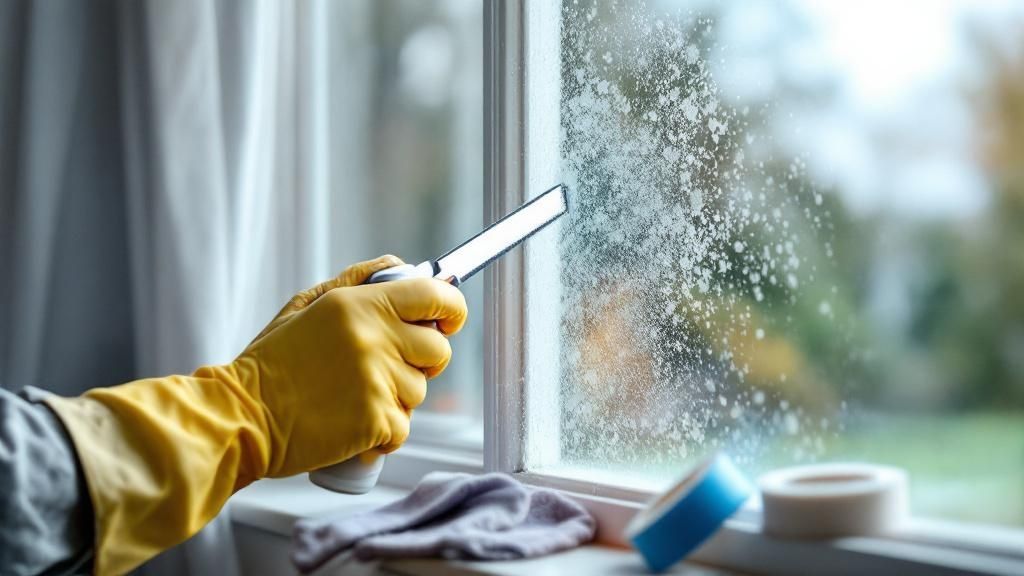
One of the most important steps is protecting the area around the glass. Take a few minutes to apply painter’s tape along the edges of the window frame where it meets the pane. This creates a simple but effective barrier, so if your scraper slips, it won't gouge the wood or vinyl. This small bit of prep can save you from a much bigger headache later on.
Mastering the Art of Scraping Glass Clean
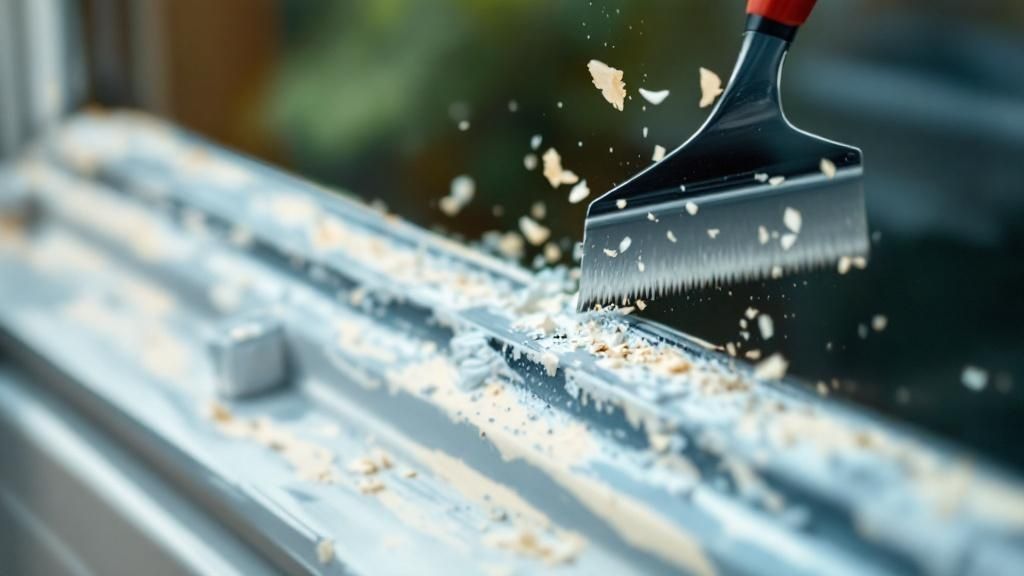
Taking a razor blade to glass might seem a little nerve-wracking at first, but it’s hands-down the most effective way to get a perfectly clear, paint-free finish. The secret isn't about using muscle; it's all about technique and a light, steady hand. Once you get the hang of it, you’ll be able to confidently clear any window without a single scratch.
The most important part of this whole process is the angle of your blade. You want to hold the scraper at a shallow 30 to 45-degree angle to the glass. This angle is the sweet spot—it lets the blade's edge get under the paint, lifting it off in clean strips instead of just pushing it around and gouging the surface. I always tell people to think of it like peeling an apple; you’re just skimming the surface.
Lubrication is Your Best Friend
Let me be clear: never dry-scrape glass. That’s the number one mistake I see, and it’s the fastest way to leave a permanent scratch on your window. You absolutely need a lubricated surface. It creates a slick, protective film for the blade to glide across, reducing friction and whisking away any tiny bits of grit that could do damage.
You don't need anything fancy. A simple spray bottle with soapy water is perfect. A few drops of standard dish soap in water are all it takes to get the job done. Before you make a single pass with the scraper, give the area a good, generous spritz.
You’ll feel the difference immediately. A wet blade glides smoothly and feels controlled. A dry blade will catch, skip, and chatter across the glass—that’s the sound of potential scratches happening.
Getting the Scraping Motion Just Right
With the glass properly lubricated, you're ready to go. The key is to use smooth, even strokes that overlap just a bit.
- Pick a starting point. I usually start at a top corner of the paint splatter or overspray.
- Push in one direction. Gently push the blade forward in one fluid motion, moving away from the window frame. Whatever you do, don't scrub back and forth like you're washing a dish.
- Overlap your passes. On your next stroke, overlap the previous one slightly. This little trick ensures you don’t leave behind thin, annoying lines of paint or miss any tiny specks.
Picture yourself cleaning up after a messy paint job. You’ll see each smooth pass reveal more of that crystal-clear glass underneath, whether you're tackling tiny flecks or a big, dried-on drip.
This image lays out the prep work that makes the scraping process go so much smoother.
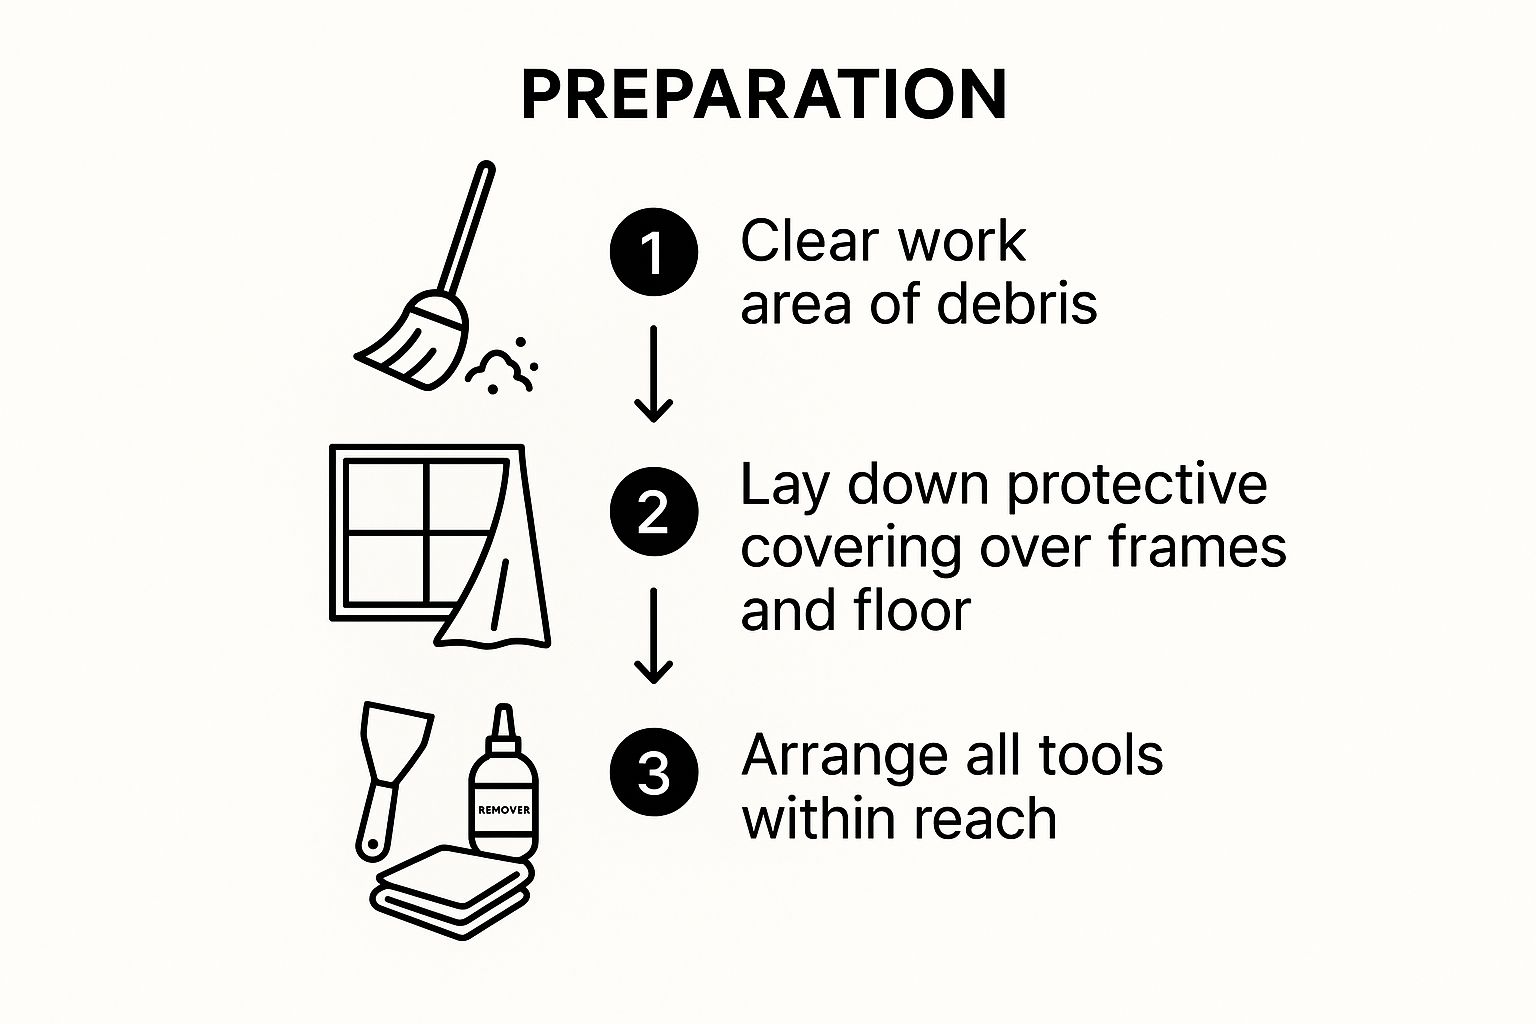
As the graphic shows, a clean workspace and protected surroundings aren't just for show—they're fundamental for doing the job safely and efficiently.
It's also interesting how the glass itself plays a role. Before the float glass process became standard in 1959, window panes often had subtle waves and imperfections that paint would really cling to. Today's float glass, which makes up about 90% of all flat glass, is incredibly smooth and uniform, which makes our job of scraping it clean much, much easier.
Of course, if you're still not comfortable with the idea of using a blade, you have other options. For anyone looking for a different approach, we have a whole guide on removing paint on glass without razors.
Of course! Please provide the section you would like me to rewrite. I'm ready to transform it into a natural, human-written guide based on your instructions.
Dealing With Old Windows and Hazardous Lead Paint
When you're working on a house built before 1978, cleaning paint off the windows becomes a whole different ballgame. This isn't just about aesthetics anymore; it’s a critical health and safety operation. Your entire approach needs to shift to account for the very real risk of lead-based paint.
If you’re in an older home, assume the window frames and sills have lead paint hiding under the surface. A classic giveaway is a distinct "alligatoring" pattern in the paint—cracks that form small squares like reptile skin. That's your sign that you're looking at layers of old, brittle paint.
Whatever you do, never dry-scrape or sand old paint on historic windows. This is the worst thing you can do. It releases a cloud of fine, toxic lead dust that can be inhaled or ingested, posing a serious danger to your family and pets. The mission here is always containment, never dispersal.
Safe Ways to Handle Suspected Lead Paint
When you're dealing with lead, your methods have to be all about safety first, preservation second. The last thing you want to do is damage the irreplaceable character of original windows while trying to make them safe. This usually means turning to specialized chemical strippers that convert the paint into a thick sludge, which keeps the dangerous dust from going airborne.
Here’s what you should be thinking about:
- Look for lead-encapsulating strippers. These aren't your average paint removers. They’re thick gels designed specifically for lead paint. You apply it, let it do its work, and then carefully scrape away the resulting paste.
- Containment is everything. Work in a well-ventilated space, but also seal off the room from the rest of your house with plastic sheeting and tape. You absolutely need to wear a respirator, gloves, and protective eyewear.
- Know when to call a pro. If you feel even slightly out of your depth, stop. The safest move is to bring in a certified lead abatement professional who has the proper training and equipment to handle it.
Restoring historic windows is a craft in itself. The pros use very specific chemical strippers to safely contain lead on wooden frames. For more complex jobs on steel frames, they might even use abrasive blasting. There's a lot of science behind doing it right.
Other Hazards to Keep on Your Radar
Lead paint isn't the only ghost hiding in the walls of older homes. Anytime you're disturbing old building materials, you need to think about other potential risks.
It's a good idea to understand what homeowners need to know about asbestos in older homes, as asbestos was sometimes used in old window glazing putty. Being aware of all the potential hazards helps you put together a truly safe plan before you even pick up a scraper.
Achieving a Crystal-Clear, Streak-Free Finish
Getting the paint off the glass is the main event, but the final cleanup is what truly separates a good job from a professional one. After all that careful scraping or chemical work, you'll almost always have some lingering residue to deal with. This could be anything from a faint, hazy film left by a solvent to the sticky adhesive from painter's tape that just didn't want to let go.
These final touches are what restore that perfect, unobstructed view you’ve worked so hard for. Don't skip them.
Tackling Leftover Residue
Even when you're careful, some stubborn spots are bound to remain. Painter's tape is a common culprit, often leaving behind a gummy residue, especially if it was left on too long or baked in the sun. For this, a little rubbing alcohol or Goo Gone on a microfiber cloth works wonders.
Just gently rub the sticky area until you feel the adhesive dissolve, then wipe it clean with a fresh part of the cloth. If a solvent left a hazy film, a simple solution of distilled water with a splash of white vinegar is usually all you need to cut right through it and bring back the clarity.
The goal is to leave nothing behind but pristine glass. Any residue, no matter how faint, will catch the light and create a distracting blemish on your otherwise perfect window.
The Professional Two-Cloth Method
Want to guarantee a spotless, streak-free surface? It's time to adopt the two-cloth method that professional window cleaners swear by. It’s a simple technique, but it delivers flawless results every single time.
- The Damp Cloth: Start with one clean microfiber cloth lightly dampened with your cleaning solution. This is your "washing" cloth. Use it to wipe away all the dirt, dust, and any remaining cleaner residue from the glass.
- The Dry Cloth: Immediately follow up with a second, completely dry microfiber cloth. This is your "polishing" cloth. Its only job is to absorb every last bit of moisture and buff the glass to a brilliant, streak-free shine.
This method is the secret to preventing the streaks that form when water and cleaner are left to air-dry on the glass. If you're looking for an even deeper dive, you can learn more professional techniques on how to achieve streak-free windows.
The Final Inspection
Alright, the last step is to check your work from every possible angle. Trust me, what looks perfect from one viewpoint might reveal faint smudges or streaks when the light hits it differently.
Step back and look at the window from various spots in the room. If you can, check it from both inside and outside. This final quality check is what ensures your window glass isn’t just paint-free, but absolutely crystal-clear.
Answering Your Top Questions About Getting Paint Off Glass
No matter how many times you’ve done it, every paint-on-glass situation is a little different. Even with a step-by-step plan, you're bound to run into a few tricky spots. Let's dig into some of the most common questions and challenges that pop up when you're trying to get those windows looking perfect again.
One of the biggest worries I hear about is scratching the glass. It’s a valid concern, but a light scratch isn’t the end of the world. If you do happen to make a faint mark with your scraper, you can often buff it right out. Grab some non-gel white toothpaste or a dedicated glass polishing compound, put a small dab on a microfiber cloth, and gently rub the scratch in a circular motion for a minute or two. More often than not, this little trick will make it disappear.
How Do I Get Paint Out of Those Annoying Corners?
Ugh, the corners. We've all been there—that impossibly thin line of paint wedged right where the glass meets the frame. Your standard scraper is too wide to get in there without gouging the wood or vinyl. This is where you need to think like a surgeon, not a construction worker.
My go-to trick for this is to use a fresh utility knife blade, held carefully with a pair of pliers or locking forceps. The sharp corner of that blade gives you a level of precision a wide scraper just can't match.
Here's the approach:
- Get a firm, safe grip on the blade.
- Dab the corner with your soapy water to lubricate it.
- Gently use the very tip of the blade to trace along the edge of the frame, lifting that stubborn paint line away.
This method gives you the control you need to clean out those tight spots and achieve a truly clean, professional finish. For more solutions to common head-scratchers, check out our guide on frequently asked questions about window cleaning.
Should I Use a Heat Gun to Soften the Paint?
Using a heat gun sounds like a great shortcut for old, baked-on paint, but I strongly advise against it. The risk is just too high. While heat definitely softens paint, it can also cause thermal shock, which is a fast way to get a cracked window.
Glass doesn't handle sudden temperature changes well. When you blast one spot with high heat, that area expands rapidly while the surrounding glass stays cool. This creates a massive amount of stress that can easily cause the pane to crack, especially on older, thinner windows or during cold weather.
For almost any project you'll face at home, a sharp blade, plenty of lubrication, and the right solvent (if needed) will get the job done much more safely. Heat guns are best left to seasoned pros who know how to manage the heat to avoid shattering the glass.
If you’re dealing with a massive paint removal job or just don't want to risk it, you can always consider professional cleaning services. They have the experience and specialty tools to handle these tough situations. In the end, a little patience and the right technique will solve most paint problems without you needing to bring out the heavy, high-risk artillery.
At Sparkle Tech Window Washing, we’re all about getting the job done safely and flawlessly. If you’re in Arizona and staring down a tough window cleaning challenge, trust our insured and bonded team to bring back that perfect, streak-free shine. https://sparkletechwindowwashing.com