


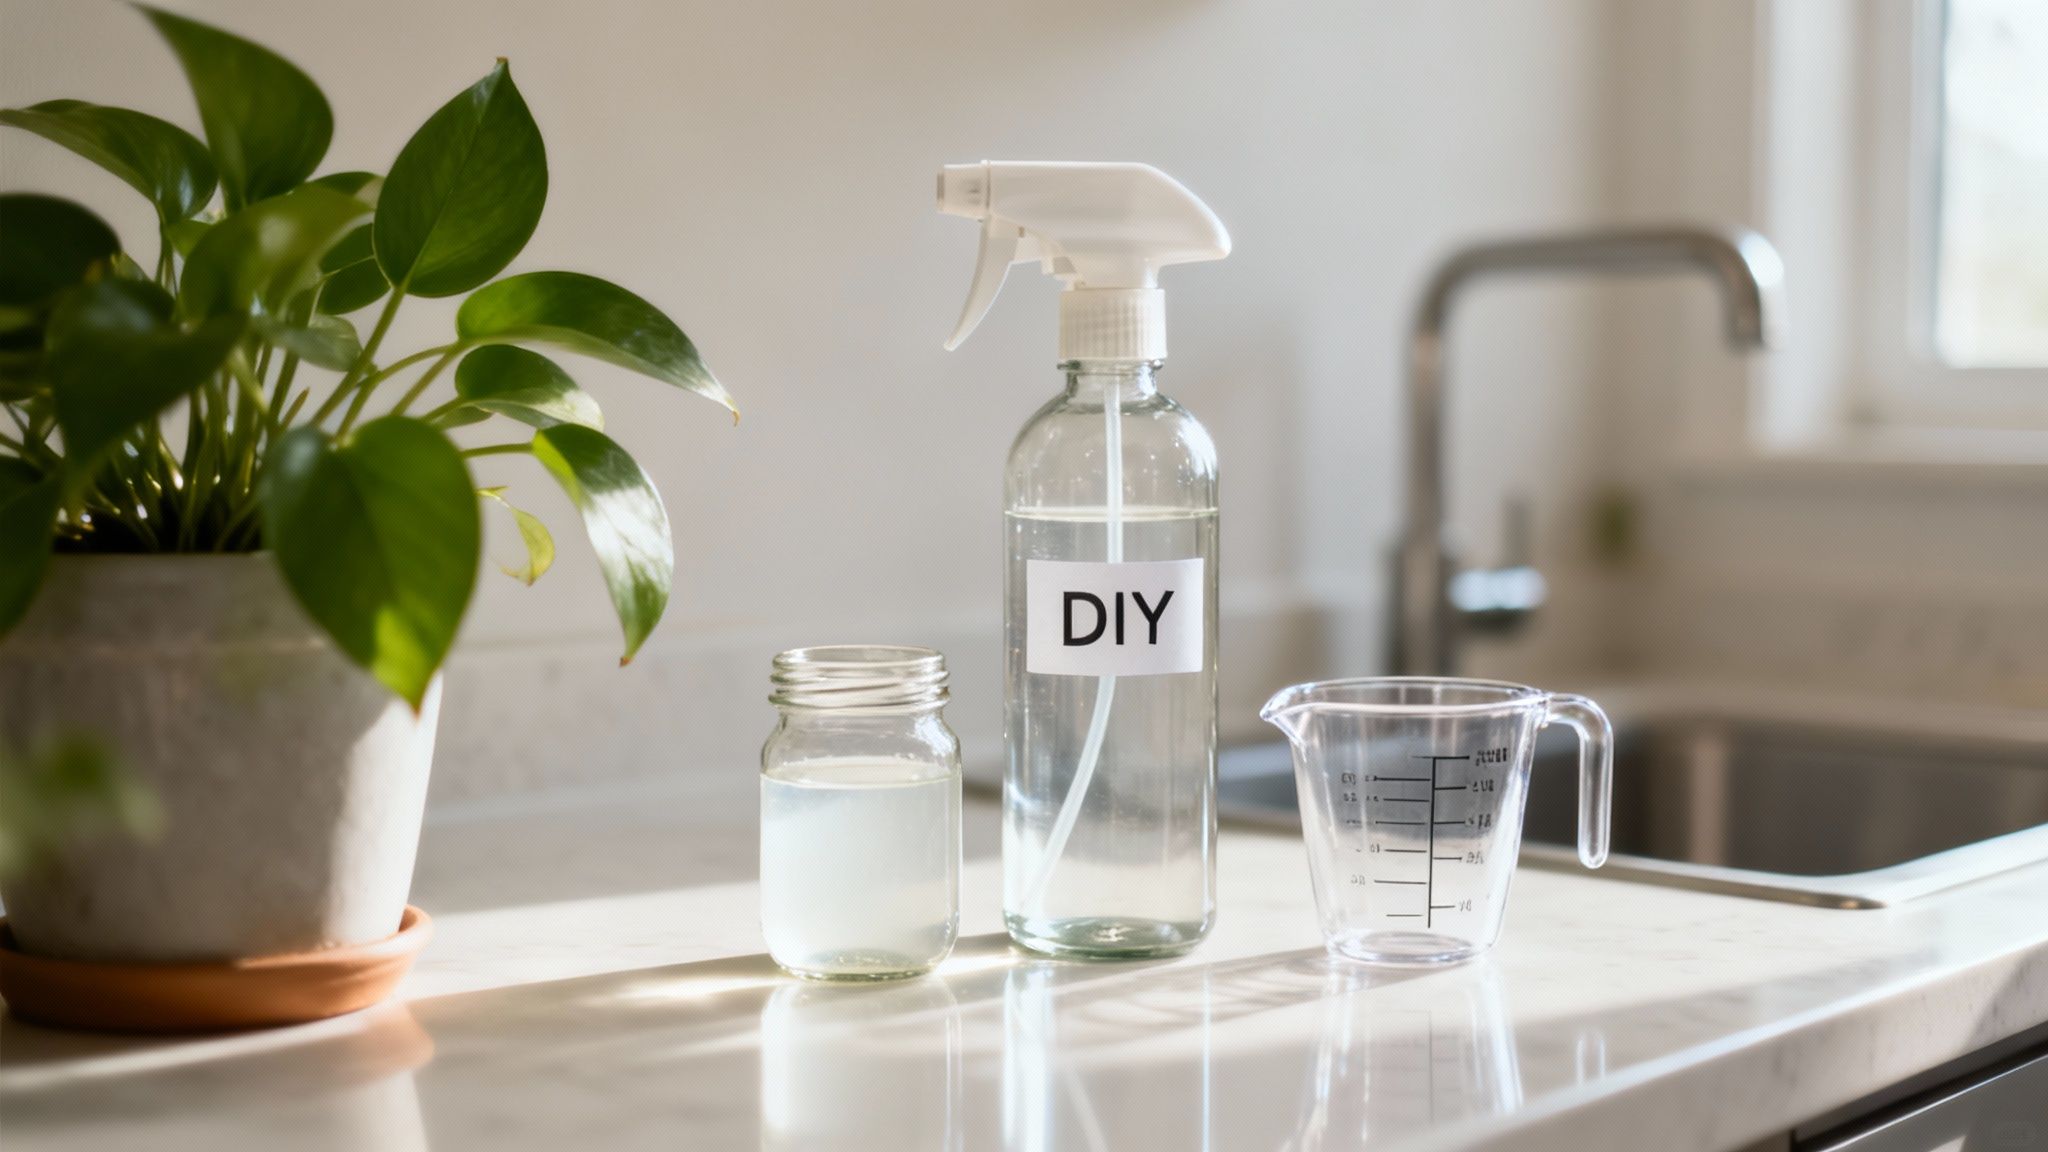
Tired of spending money on window cleaners that leave frustrating streaks? You can mix up a fantastic, budget-friendly solution right in your own kitchen using just a few simple ingredients: distilled water, white vinegar, and a tiny drop of dish soap. This classic combination is a game-changer for cutting through everyday grime and leaving a brilliant, clear finish.
So, Why Bother With a Homemade Window Cleaner?
Before you start mixing, it helps to know why so many people are ditching store-bought products. It’s not just about saving money—it’s about getting a better, safer clean. When you make your own cleaner, you know exactly what's going on your windows and into your home's air.
You get to skip the harsh chemicals like ammonia, which can be tough on your lungs and even damage window tints or frames over time. Instead, you're using ingredients that are safe for your family, pets, and the environment. This shift is a big part of the growing movement toward safer, eco-friendly window cleaning practices that contribute to a healthier home.
Getting a Streak-Free Shine is All About Simplicity
Here’s the secret: the best homemade window cleaners often outperform the commercial stuff because their formulas are incredibly simple. Many products you buy off the shelf are packed with dyes, heavy perfumes, and other additives that leave a sticky film on the glass. That residue is a magnet for dust and dirt, and it's usually the real culprit behind those stubborn streaks.
Your basic vinegar-and-water mix, however, evaporates cleanly and leaves nothing behind. You’re in the driver’s seat, too. Got a really greasy window in the kitchen? Just add a little more vinegar to boost its cutting power. That ability to tweak the recipe is how you get that perfect, flawless finish every time.
The real advantage of a DIY window cleaning solution is its simplicity. It cleans effectively without the unnecessary chemical fillers that often cause the very streaks and films you're trying to eliminate.
More and More People Are Making the Switch
This isn't just a niche trend; it's a major shift in how people approach cleaning. A recent industry report highlighted that over 60% of consumers are thinking about environmental impact when they buy cleaning supplies. Even more telling, nearly 40% are actively looking up DIY recipes to use non-toxic ingredients.
It’s clear that people want effective, sustainable cleaning options they can trust, and making it yourself is the ultimate way to achieve that.
DIY Solution vs Store-Bought Cleaner at a Glance
This quick comparison highlights the key advantages of using a homemade window cleaning solution over typical commercial options.
| Feature | DIY Window Cleaning Solution | Store-Bought Cleaners |
|---|---|---|
| Cost | Extremely low; pennies per bottle | Can be expensive, especially specialty brands |
| Ingredients | Simple, non-toxic (vinegar, water, soap) | Often contain ammonia, alcohols, and fragrances |
| Residue | No film left behind; dries streak-free | Can leave a sticky residue that attracts dust |
| Customization | Easily adjustable for different levels of grime | One-size-fits-all formula |
| Eco-Friendliness | Biodegradable and environmentally safe | Chemicals can harm waterways; plastic waste |
| Safety | Safe for use around kids and pets | Vapors can be irritating; requires ventilation |
Ultimately, the choice to go DIY offers more control and peace of mind without sacrificing performance.
The Ultimate Recipe for Your DIY Window Cleaning Solution
Forget spending money on pricey store-bought cleaners filled with chemicals you can't pronounce. The secret to a perfect, streak-free shine is probably sitting in your pantry right now. I’ve found that the best DIY window cleaning solution comes down to three simple, hardworking ingredients.
Whipping up a batch takes less than two minutes, and it performs just as well, if not better, than anything you can buy off the shelf.
The Three Essential Ingredients
This is the classic, tried-and-true formula that I always come back to. It just works.
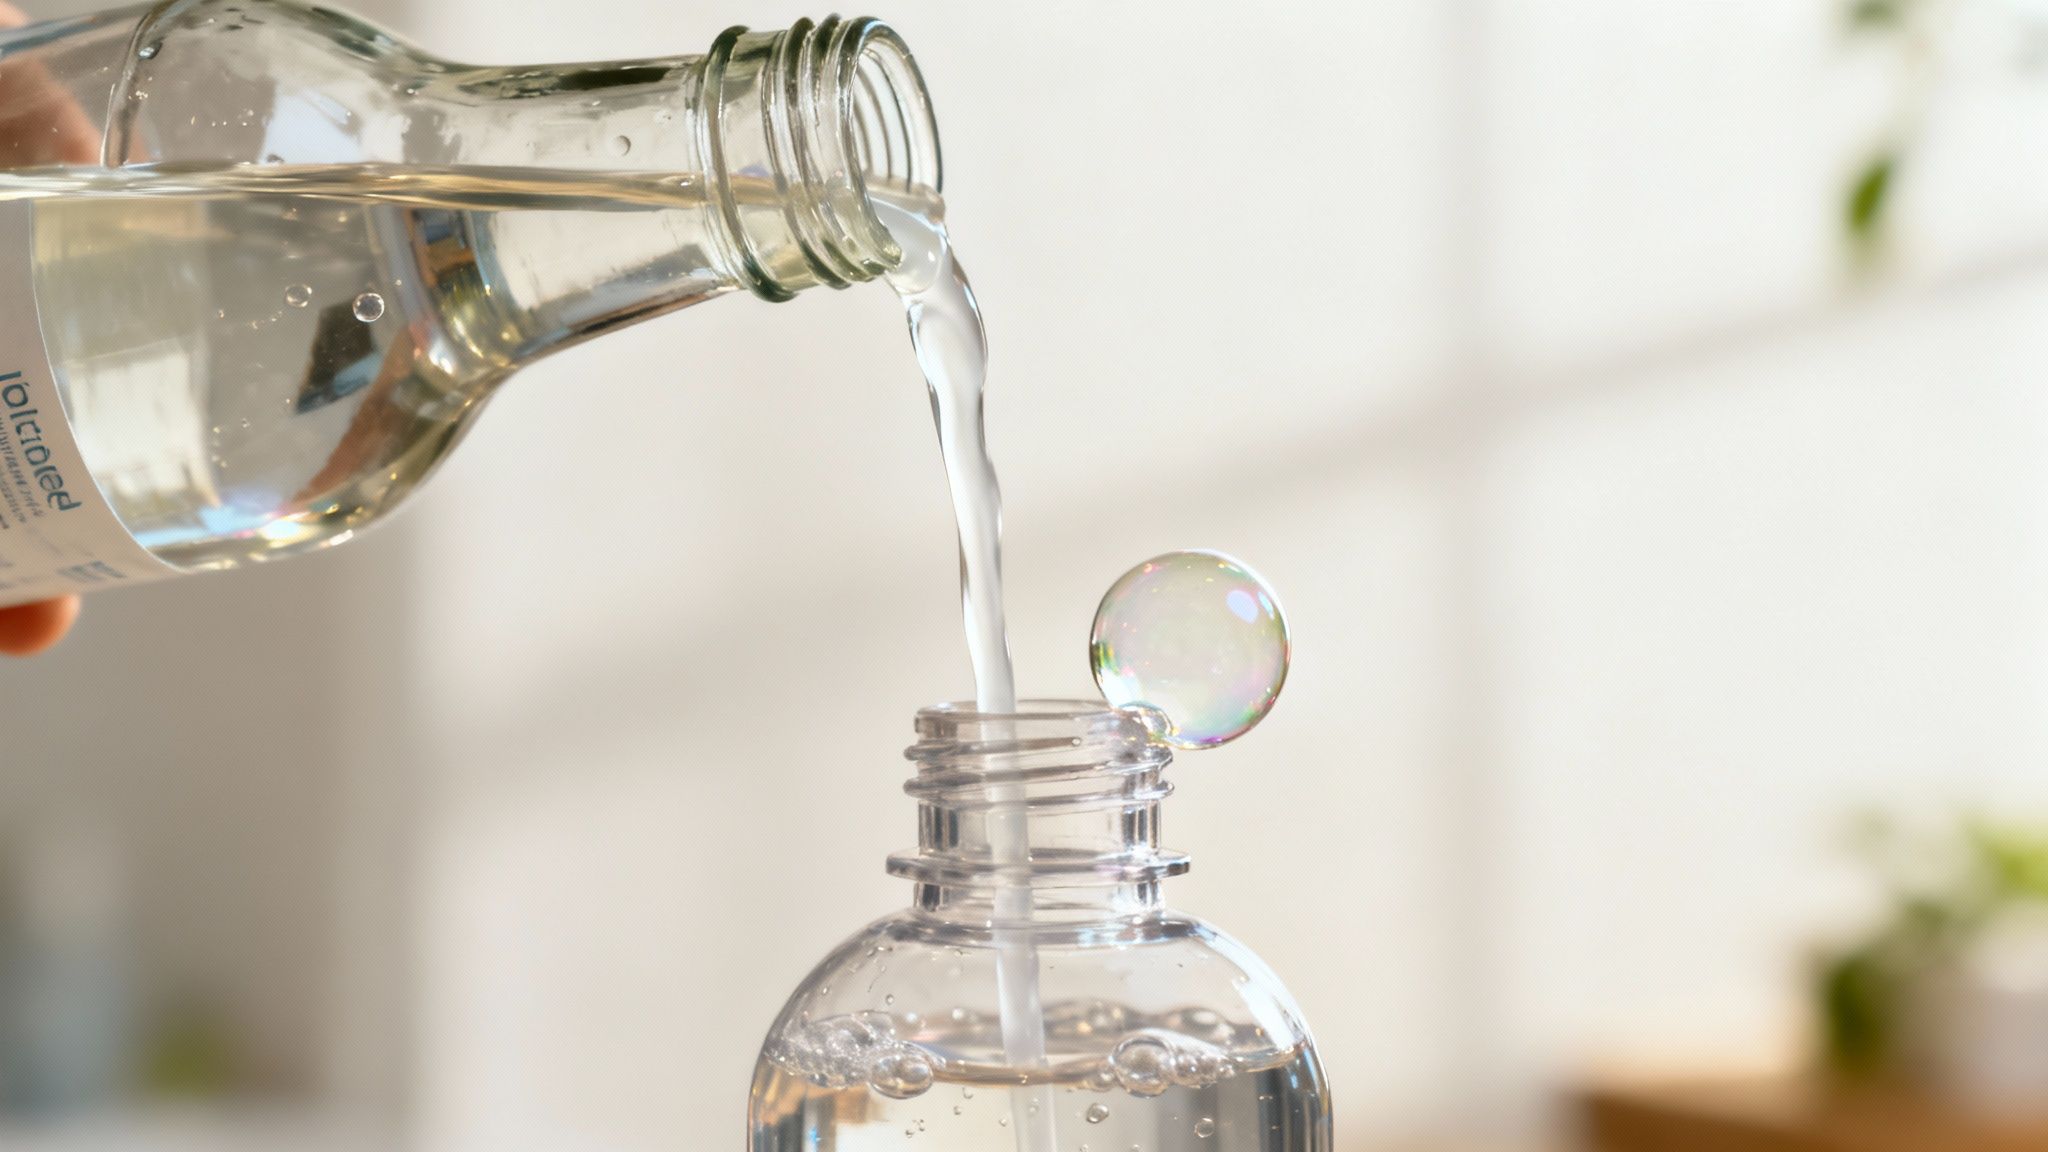
- 2 cups of distilled water: This is the non-negotiable foundation. Why distilled? Because tap water is full of minerals that leave behind those annoying chalky spots and streaks. Distilled water is pure, guaranteeing a spotless finish.
- 1/2 cup of white vinegar: Here's your heavy lifter. The natural acetic acid in vinegar is fantastic for cutting right through grime, fingerprints, and that dusty film that builds up on windows.
- 1/2 teaspoon of dish soap: You only need a tiny bit. The soap acts as a surfactant, which is just a fancy way of saying it helps break down greasy residue and lifts stubborn dirt off the glass.
Just pour everything into a clean spray bottle and give it a gentle swirl to combine. That’s it. You're ready to tackle those windows.
This simple mix is powerful precisely because it avoids the harsh additives common in commercial cleaners. It’s always a good idea to know which window cleaning chemicals to avoid, as many can be surprisingly damaging to window seals or even pose health risks.
Pro Tip: When you're choosing a dish soap, go for the most basic, clear version you can find. Avoid anything with lotions, moisturizers, or bleach additives, as those are the culprits that can leave a hazy film on your glass.
Smart Variations for an Extra Boost
While the classic recipe is my go-to 99% of the time, a couple of small tweaks can come in handy for specific situations.
- For Extra Shine: If you want a truly brilliant gleam, try adding 1 tablespoon of cornstarch. It's a very fine, mild abrasive that helps polish the glass to a sparkling finish. Just be sure to shake the bottle well before each use.
- For a Fresh Scent: The vinegar smell dissipates quickly, but if it bothers you, a few drops of essential oil work wonders. I like to add 5-10 drops of lemon or lavender oil for a clean, pleasant aroma.
It’s no surprise that more people are turning to simple, effective recipes like this one. The global glass cleaner market, valued at around USD 3.29 billion, is growing fast, largely driven by the demand for more eco-friendly and DIY-friendly options. The big brands are definitely taking notice.
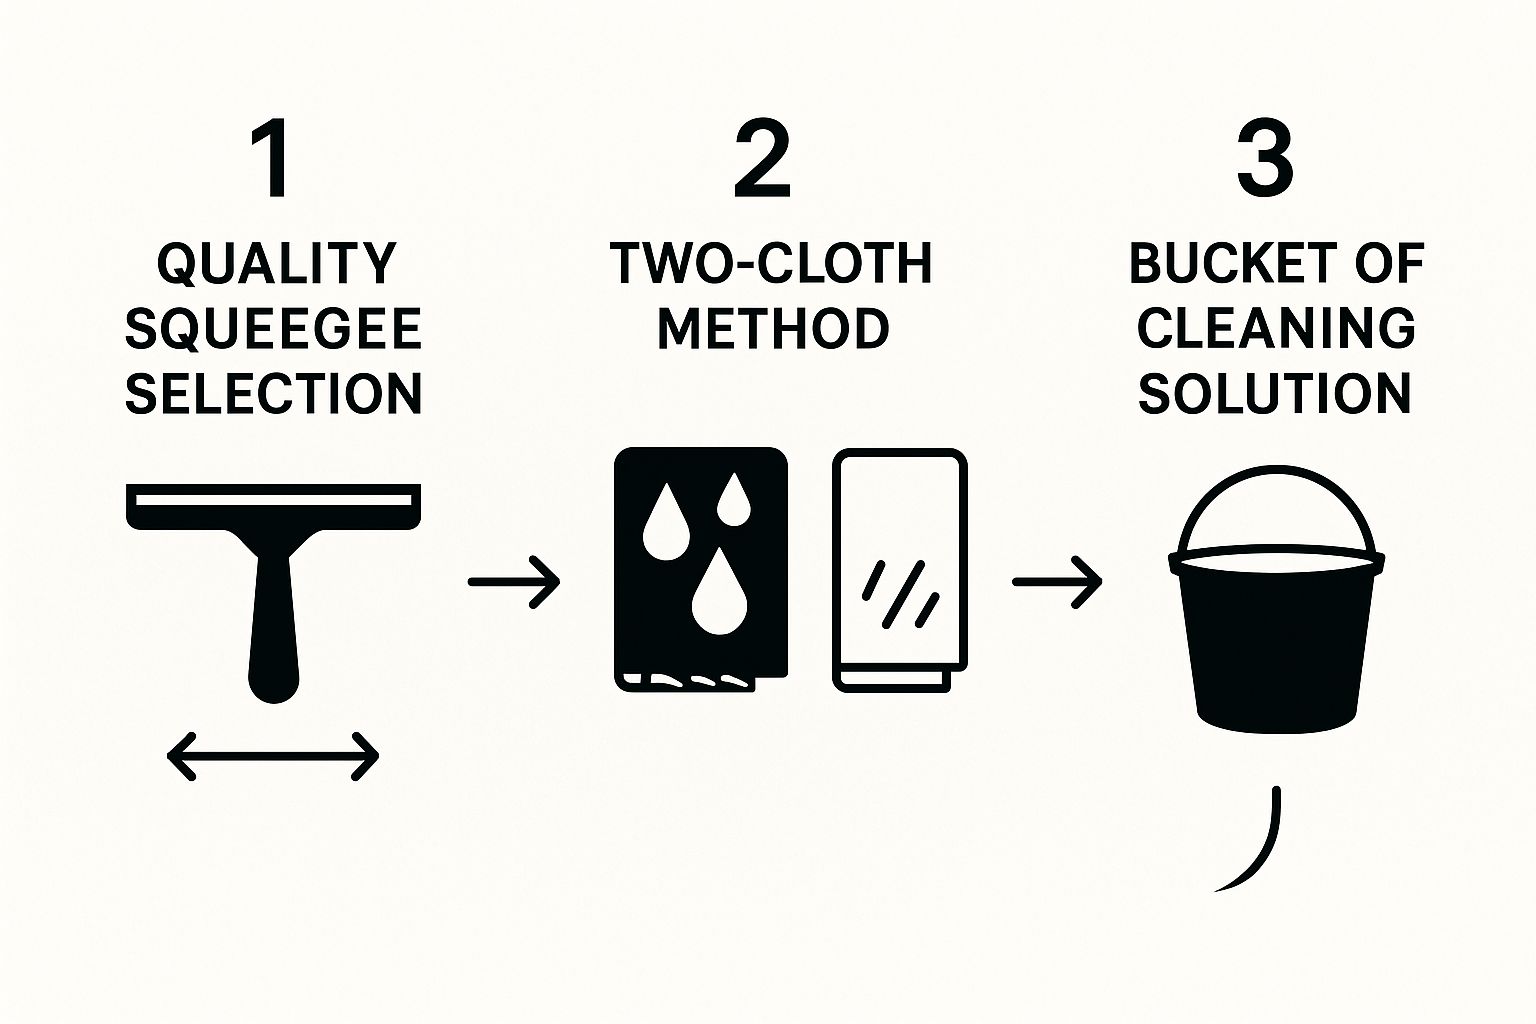
Gathering the Right Tools for a Flawless Finish
Even the most effective DIY window cleaning solution is only half the battle. To get that truly professional, streak-free shine, you need the right partners in crime. Having the proper equipment isn't just about making the job easier—it's about preventing the very smudges and lines you're trying to eliminate.
Don't worry, you don’t need a truck full of gear. But what you do choose really matters.
Your single most important tool is a high-quality squeegee. I can't stress this enough. A cheap, flimsy one will just skip and chatter across the glass, leaving a frustrating mess behind. Look for one with a firm, sharp rubber blade that feels solid in your hand. While many pros swear by heavy brass squeegees for the even pressure they provide, a good stainless steel model will serve you just as well.
The Two-Cloth System and Other Essentials
First things first: step away from the paper towels. They fall apart and leave a blizzard of lint all over your clean glass. The secret is to adopt the simple but incredibly effective two-cloth method that the pros use.
- Your Scrubbing Cloth: This is a dedicated microfiber cloth for applying your solution and tackling the initial layer of grime. Microfiber is a game-changer because it grabs onto dirt without scratching the glass.
- Your Detailing Cloth: Keep a second, bone-dry microfiber cloth at the ready. Its job is to wipe your squeegee blade clean after every single pass and to quickly swipe the edges of the window pane to catch any stray drips.
This simple workflow is the key to getting it right every time.
As you can see, the process is straightforward: squeegee, scrub, and detail. It all works together.
The biggest mistake I see people make is trying to clean windows with the wrong gear. A quality squeegee and two good microfiber cloths will do more for a streak-free finish than any "secret ingredient" ever will.
Finally, if you're tackling more than just one or two windows, grab a simple bucket. It holds plenty of your cleaning solution and gives you a place to rinse your scrubbing cloth, which makes the whole process go much faster than constantly refilling a small spray bottle.
Mastering the Technique for Streak-Free Windows
You've mixed your DIY window cleaning solution and gathered your tools, but the magic really happens in the application. How you clean is what separates a decent job from a professional, streak-free finish. It's not about speed—it's about a consistent, thoughtful approach.
Before you even think about spraying, do yourself a favor and lay a few old towels or a drop cloth along the windowsill and the floor beneath it. This one small step saves you a ton of cleanup later, so you can focus on getting the glass perfect.
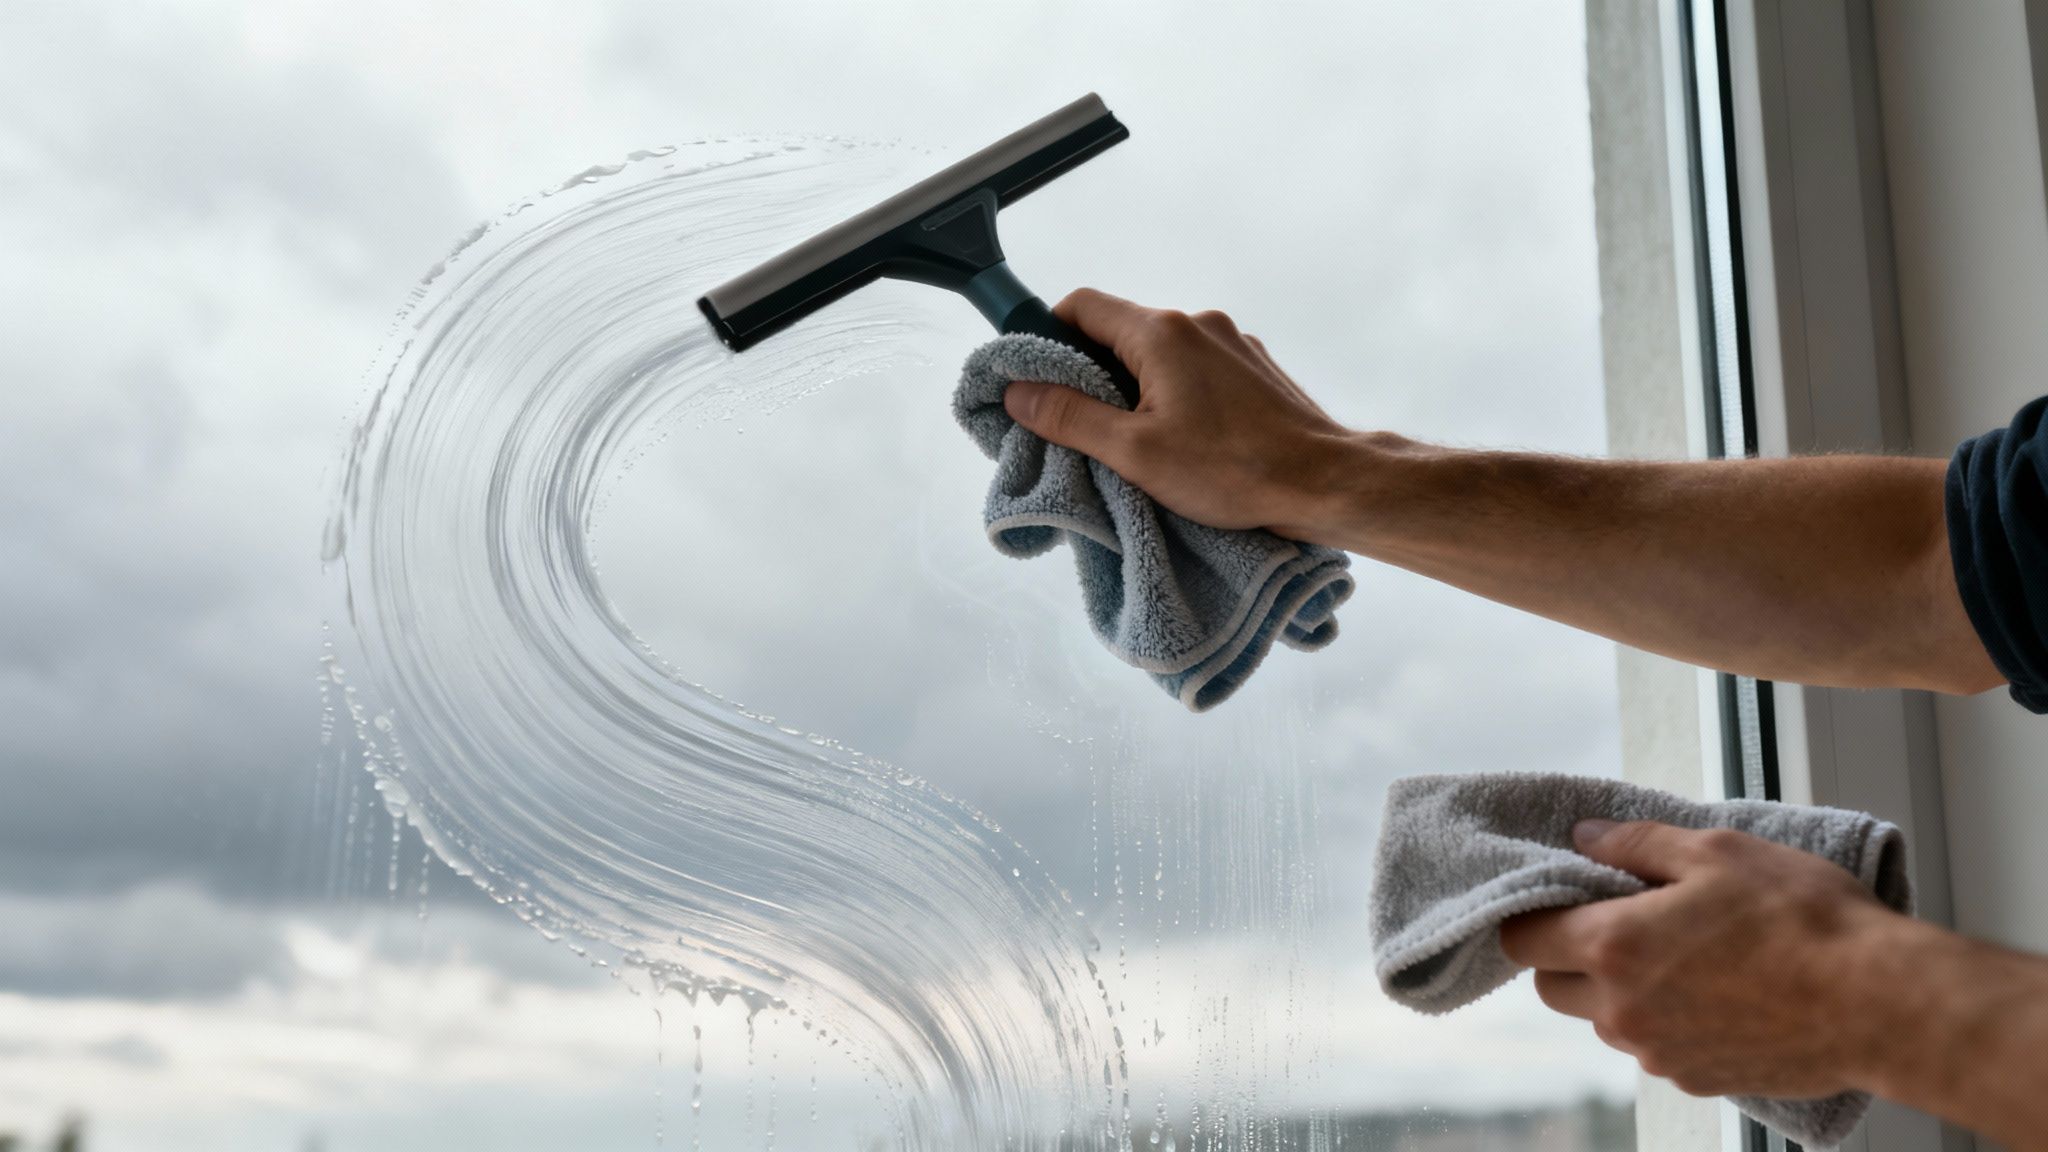
The Application and Squeegee Method
Get started by generously spritzing your solution onto the window. I always work from the top down. You're aiming for a surface that's wet enough for the squeegee to glide effortlessly but not so drenched that you have rivers running down the pane.
If you’re tackling windows that haven't been cleaned in a while, give the glass a quick pre-scrub with a microfiber cloth before reaching for the squeegee.
The secret to a flawless finish is all in the squeegee work. While pros often use the fancy "S-stroke" on massive commercial windows, a simpler approach works beautifully for most homes.
- Start at the Top: Angle your squeegee and press it into a top corner of the wet glass.
- Pull Straight Down: Using gentle, even pressure, pull the squeegee down in one continuous, smooth motion.
- Wipe the Blade: This is the part people always forget. After every single pass, wipe the rubber blade clean with a dry microfiber cloth. If you skip this, you’re just dragging dirty water back across your clean window.
- Overlap Your Strokes: On your next pull, overlap the previous stroke by about an inch. This simple trick is the key to preventing those thin, annoying lines between passes.
For a deeper dive, you can find more expert tips on achieving streak-free windows that break down different pro-level methods.
Here's a hard-earned lesson: never clean windows in direct, hot sunlight. The heat makes your cleaning solution evaporate in seconds, leaving behind baked-on soap scum and streaks before you can even get the squeegee on it. An overcast day is your best friend for this job.
Final Detailing for a Perfect View
Once the main pane is done, grab your detailing cloth and wipe away any lingering drips from the edges and corners. A final wipe of the windowsill leaves you with a perfectly clean frame and sparkling glass.
Still seeing a few streaks? Don't worry, it happens. Our guide on 3 proven ways to dry windows without leaving streaks has some great troubleshooting tips.
Working Through Common Window Cleaning Problems
https://www.youtube.com/embed/tsSRTlQ2WmM
Even with the best homemade solution and a good squeegee, sometimes you'll still run into a few annoying issues. Don't worry, it happens to everyone. Most of the time, the fix is surprisingly simple—it’s all part of getting your technique down.
Are you dealing with stubborn streaks that just won't disappear? The number one cause is usually too much dish soap. It’s easy to overdo it, but more soap doesn't mean cleaner windows; it just leaves behind a sticky film. Another common problem is a hazy, cloudy finish, which is almost always a sign that you're working in direct sunlight and the solution is evaporating before you can wipe it away.
Pinpointing the Issue
Let's get into the nitty-gritty of what's going wrong and how to fix it for good.
- Pesky Streaks: The first thing to try is cutting back on the dish soap. You really only need a drop or two for a whole spray bottle. Also, make it a habit to wipe your squeegee blade with a clean, dry cloth after every single pass. A clean blade is essential for a clean window.
- That Hazy Film: This is all about timing. The best time to clean windows is on a cool, overcast day or when they're fully in the shade. This gives you plenty of time to work before the solution dries up.
- Little White Spots: If you see white mineral deposits left behind, you're looking at the ghost of tap water. Switching to distilled water is a game-changer and the only way to guarantee a truly spot-free finish.
The quest for sparkling windows is a big deal. The global window cleaners industry was valued at USD 2.68 billion and is expected to climb to USD 5.34 billion by 2031. This just shows how much people value effective cleaning methods, whether they hire a pro or do it themselves.
Learning to troubleshoot cleaning problems is a skill that applies to more than just windows. The same logical, step-by-step thinking can help you solve all sorts of issues around the house, much like you'd find in a good general home cleaning troubleshooting guide.
Your Questions Answered
Even with a recipe this simple, it's natural to have a few questions before you start mixing. I’ve been cleaning windows for years, and I’ve heard them all. Let's tackle some of the most common ones so you can get started with confidence.
Can I Add Rubbing Alcohol to My Mix?
Absolutely. Adding rubbing alcohol is a great pro-level trick, especially for specific situations.
Tossing in about a quarter cup of isopropyl alcohol makes the solution evaporate much faster. This is a game-changer when you're cleaning in colder weather, as it helps prevent the cleaner from freezing on the glass. It also gives your solution a little extra power to cut through stubborn grime and fight off streaks.
For your typical indoor window cleaning, though, it's usually not necessary. The basic water and vinegar mix does the job perfectly well.
Is This Cleaner Safe for My Tinted Car Windows?
This is a really important question, so let's be careful here. The good news is that because this recipe is ammonia-free, it’s generally safe for most factory-installed window tints. That kind of tint is pretty tough.
Aftermarket tint films, however, are a different story—they can be much more delicate. The best rule of thumb is to always test your solution on a small, hidden corner of the window first. If you're even slightly unsure, just play it safe and grab a cleaner made specifically for tinted auto glass.
How Long Can I Keep This Homemade Solution?
For the best possible shine, I always recommend mixing a fresh batch every couple of weeks. This solution doesn't have any preservatives, so its cleaning punch can weaken over time.
You can extend its life a bit by keeping it in a clearly labeled spray bottle tucked away in a cool, dark place. But honestly, when you're aiming for that perfect, invisible-glass look, fresh is always best.
Why Do My Windows Still Look Hazy After Cleaning?
Ah, the dreaded haze. This is a super common problem, and it almost always comes down to one of two things. The first mistake is trying to clean your windows in direct, hot sunlight. The heat makes your cleaning solution evaporate before you can wipe it away, leaving all the dirt and soap behind as a filmy residue.
The second culprit? Too much soap. You only need a tiny amount. Try dialing it back to just one or two drops for your entire spray bottle. If you clean on an overcast day and use less soap, you'll be amazed at the crystal-clear difference.
For those tough jobs or windows that are just too high to reach, the pros at Sparkle Tech Window Washing are here to help. You can learn more about our residential window washing services.