

Getting a window perfectly clean, without a single streak, can feel like an impossible task. We've all been there. You think you've done a great job, but as soon as the light hits it just right, the streaks appear. The truth is, it usually comes down to a few common mistakes.
The secret isn't some magic product; it's about understanding why streaks happen in the first place. Once you know what you're up against—from hard water to cleaning on a sunny day—you can finally get that crystal-clear finish.
Uncovering the Real Causes of Window Streaks
It’s a frustratingly familiar story. You spend the better part of an afternoon washing windows, only to step back and see a network of streaks and smudges emerge as the glass dries. It’s not about how hard you worked; it’s about the small details that sabotage the result.
Most of the time, the problem starts before your squeegee even touches the glass. The water you use, the cleaning solution you mix, and even the weather can all work against you. Once you can pinpoint these culprits, you can build a simple, foolproof strategy.
The Science Behind the Smudges
In my experience, almost every streaking problem can be traced back to one of three things. Get these right, and you're 90% of the way there.
- Hard Water Minerals: If you’re using water straight from the tap, you're likely dealing with dissolved minerals like calcium and magnesium, especially here in Arizona. When the water evaporates, those minerals get left behind as a chalky, hazy film.
- Premature Evaporation: This is a classic rookie mistake. Cleaning windows in direct, hot sunlight is a recipe for disaster. The heat makes your cleaning solution evaporate in seconds, leaving behind soap and dirt residue before you can squeegee it off.
- The Wrong Cleaning Solution: Those brightly colored commercial cleaners might smell great, but they're often loaded with soaps, dyes, and fragrances. These additives leave a sticky film on the glass that actually attracts more dust, making your next cleaning job even tougher. To learn more about the right way to do it, you can find great tips on how to achieve streak free windows.
Key Takeaway: Real streak-free results are all about controlling the variables. If you use distilled water, pick a cool, overcast day, and mix a simple cleaning solution, you’ve already eliminated the main causes of streaks before you even start.
This commitment to a flawless finish is why the professional window cleaning industry is booming. The global market, valued at around USD 141 billion, is expected to skyrocket to USD 257.27 billion by 2032. That growth is all thanks to a rising demand for that perfect, spotless look in homes and businesses. By learning the same core principles the pros rely on, you can get that same level of quality yourself.
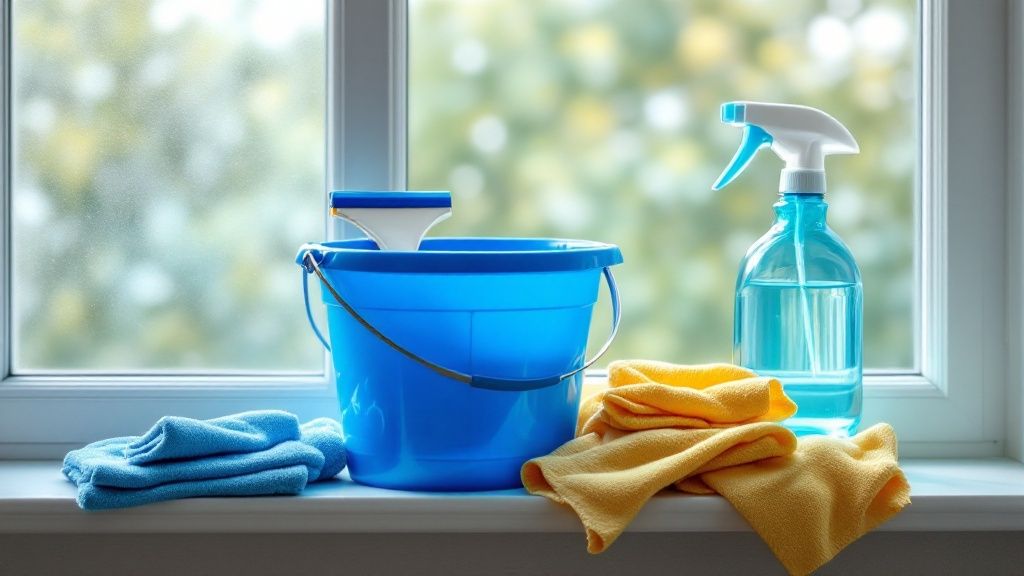
Building Your Pro-Level Window Cleaning Arsenal
Forget the spray bottle and paper towels. The real secret to a flawless, streak-free finish isn’t some magic formula—it's having the right tools for the job. Stepping up your gear is the single most important thing you can do to get professional results.
Investing in quality equipment doesn’t just make the work easier; it’s what actually prevents those frustrating streaks from ever forming. It's the difference between fighting with the glass and working with it.
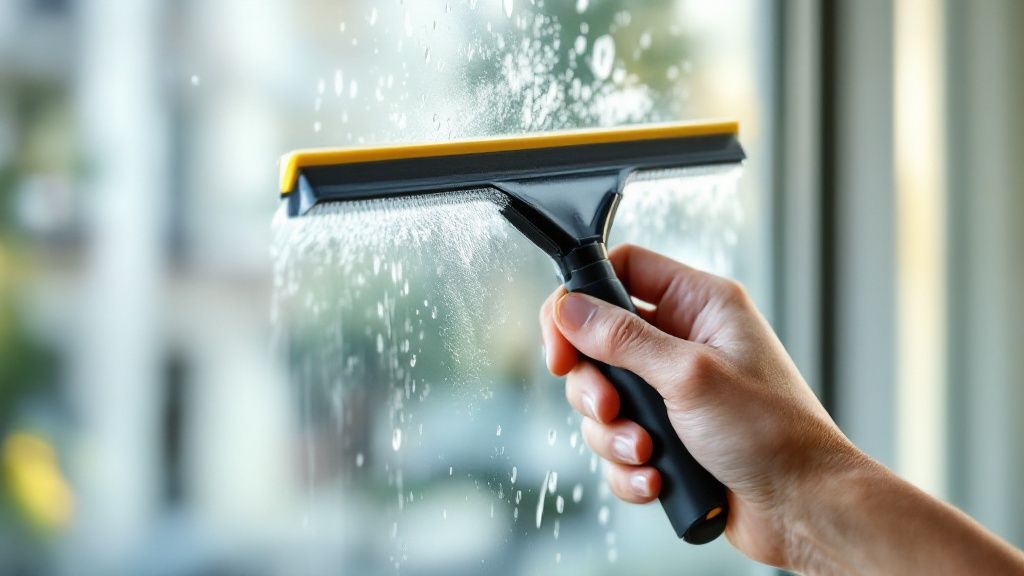
The Squeegee and Scrubber: Your Primary Weapons
Your squeegee is, without a doubt, the star of the show. A cheap one from a big-box store will skip and shudder across the glass, leaving a web of streaks in its wake. A professional squeegee, on the other hand, is built differently. It's not just the sturdy handle and channel—the real hero is the rubber blade.
A perfect blade is soft, sharp, and has a perfectly straight edge. The tiniest nick, or a blade that's gone hard with age, will leave a tell-tale line with every single pull. This is why professional window cleaners often swap out their rubber blades daily. It’s also smart to keep a couple of sizes on hand. A 12-inch or 14-inch model is a great all-rounder, but a little 6-inch squeegee is a lifesaver for those tight colonial panes or sidelights.
Paired with the squeegee is your scrubber (often called a wand or applicator). This is what you'll use to soap up the glass. You want a scrubber head with a super-absorbent microfiber cover. It needs to hold a good amount of soapy water to break down all the grime without dripping all over the floor.
Microfiber: The Unsung Hero of a Perfect Finish
It's time to retire old t-shirts and cotton rags for good. Microfiber cloths are absolutely essential, and you'll need them for two distinct jobs: scrubbing and detailing.
- For Scrubbing: The cover on your scrubber should be microfiber. Its unique texture is fantastic for grabbing and lifting dirt away from the glass without a hint of scratching.
- For Detailing: This is the pro touch. Keep at least two clean, dry microfiber cloths in your back pocket. One is for wiping your squeegee blade clean after each pull, and the other is for "detailing"—wiping the edges of the pane to catch any last little drips.
A perfect, streak-free result is so sought-after that the U.S. window cleaning industry brings in about USD 2.9 billion a year. With homeowners paying anywhere from USD 150 to USD 370 for the service, they expect perfection. You can explore more window cleaning industry statistics on GetJobber.com to see the value in getting it right.
A good set of tools is the foundation of any professional-looking window cleaning job. While you can get by with the basics, a few extra items can make the process smoother, especially for different types of jobs.
Essential vs. Optional Window Cleaning Tools
| Tool | Category | Why It's Important for a Streak-Free Finish |
|---|---|---|
| Professional Squeegee | Essential | The rubber blade is the key to removing water perfectly without leaving lines. |
| Microfiber Scrubber/Wand | Essential | Applies cleaning solution evenly and safely lifts dirt without scratching glass. |
| Microfiber Cloths (Multiple) | Essential | Crucial for wiping the squeegee blade and detailing edges to prevent drips. |
| 5-Gallon Buckets (2) | Essential | A two-bucket system keeps your cleaning solution free of contaminants. |
| High-Quality Dish Soap | Essential | Creates the "slip" needed for the squeegee to glide smoothly across the glass. |
| Extension Pole | Optional | A must-have for safely reaching high windows without a ladder. |
| Ladder | Optional | Necessary for second-story work if you don't have an extension pole. |
| Scraper with Blades | Optional | Useful for carefully removing stubborn debris like paint specks or bug residue. |
| Tool Belt/Holster | Optional | A huge convenience for keeping your squeegee and cloths handy while you work. |
Having these core items on hand ensures you’re prepared for almost any standard window cleaning task you'll encounter.
The Two-Bucket System: A Simple Pro-Level Upgrade
Finally, let’s talk buckets. This simple system is a total game-changer. You'll use two: one for your fresh, soapy water and a second one filled with clean water for rinsing.
After you scrub a particularly dirty window, dunk and swish your scrubber in the rinse bucket before putting it back in the soap bucket. This one small step prevents you from contaminating your clean solution and smearing grime from one window onto the next. It’s a tiny detail that makes a world of difference, especially on a big job.
The Best Homemade Window Cleaning Solution
Let's be honest, most store-bought window cleaners are a letdown. They often contain additives that leave behind a frustratingly thin, hazy film on the glass. That film is what causes those annoying streaks everyone hates. If you're serious about getting a truly streak-free shine, a simple DIY mix is often your best bet.
The Three-Ingredient Recipe for Success
I've tried dozens of formulas over the years, but I always come back to this simple, powerful trio. The magic is in the combination: distilled water prevents mineral deposits, white vinegar is a powerhouse against grease, and a single drop of dish soap gives your squeegee the perfect glide.
- Distilled water: This is non-negotiable. Tap water leaves behind mineral spots, which is exactly what we're trying to avoid.
- White vinegar: This is the workhorse that cuts through grime, smudges, and fingerprints.
- A drop of liquid dish soap: This tiny addition is crucial for reducing friction and helping the squeegee move smoothly across the glass.
Mixing Your Go-To Cleaner
Grab a clean, empty spray bottle. You don't want any old residue contaminating your fresh batch.
- Start by pouring in two cups of distilled water.
- Next, add a quarter cup of plain white vinegar.
- Finally, and this is important, add just one single drop of a mild dish soap.
- Screw the sprayer on tightly and give it a gentle swirl to mix. Don't shake it vigorously, or you'll end up with a bottle full of suds.
Pro Tip: After every single swipe with your squeegee, get in the habit of wiping the blade clean on a cloth. This simple action prevents you from dragging dirt from one spot to another.
How to Handle Stubborn Stains
What about those tough, baked-on hard water spots? They often need a bit more acidic muscle. Try adding two tablespoons of fresh lemon juice to your mix or bumping up the vinegar by about 50%. Just be careful—never use ammonia-based cleaners, as they can damage window seals and ruin any tinting you might have.
It's no surprise that people are turning to better solutions. The global window cleaners market is valued at USD 2.68 billion and is projected to hit USD 5.34 billion by 2031. This trend reflects a major shift toward greener, more effective cleaning. You can learn more about market trends on Verified Market Research.
| Cleaner Type | Cost | Streak Risk |
|---|---|---|
| Homemade DIY | Low | Minimal |
| Commercial Spray | High | Moderate |
This DIY solution costs just pennies to make and avoids the unnecessary fragrances and dyes found in commercial products that can actually attract more dust.
Common Pitfalls to Avoid
I see people make the same few mistakes all the time. The biggest one? Using tap water instead of distilled. You're just putting streak-causing minerals right back onto the glass you're trying to clean.
A few other things to watch out for:
- Too much soap: More is not better. Overloading the mix with dish soap is a guaranteed way to create suds that leave behind lines and residue.
- Improper storage: Don't leave your solution sitting in a warm, sunny spot. This can speed up bacterial growth.
- Forgetting to mix: Always give the bottle a gentle swirl before you start spraying to make sure the ingredients are evenly distributed.
A good rule of thumb is to label your bottle with the date you made it and toss any solution that's more than two weeks old. A fresh batch is your best guarantee for a perfect, streak-free finish every single time. Clean equipment is just as important as a good solution, so make sure you're regularly rinsing your scrubber and checking your spray nozzle for clogs.
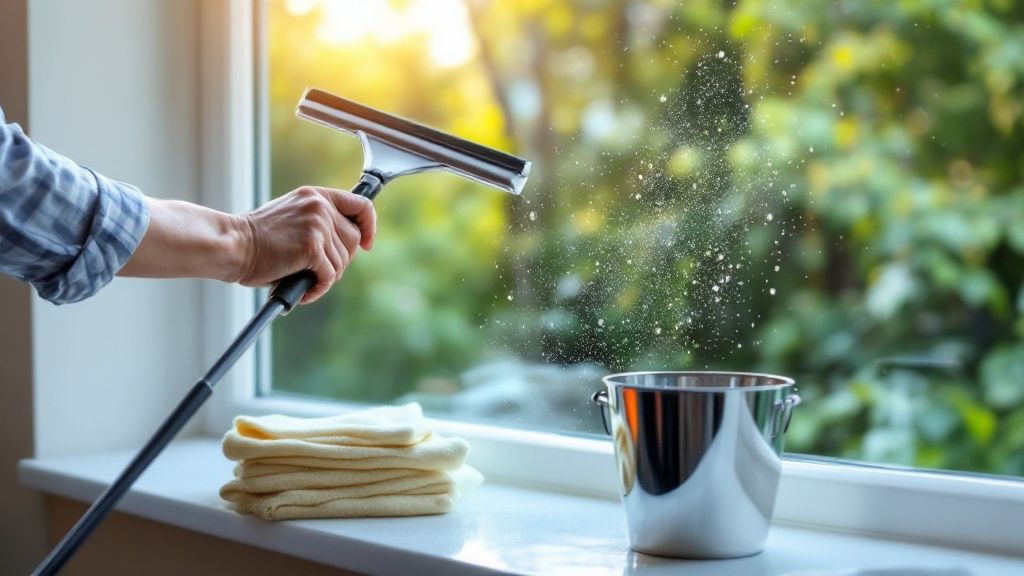
Mastering the Pro Squeegee Method
If you're ready to move beyond a simple spray-and-wipe, this is where the real magic of streak-free window cleaning happens. Professionals rely on specific squeegee techniques, not just because they look cool, but because they’re designed to control water flow and banish streaks for good. This is how you level up your cleaning game.
The goal isn't just to get the water off the glass. It's to remove it so cleanly that absolutely nothing is left behind. This takes a delicate touch—the right angle, consistent pressure, and a methodical pattern that covers every inch of the window perfectly.
This guide breaks down the essential moves for a flawless, streak-free result.
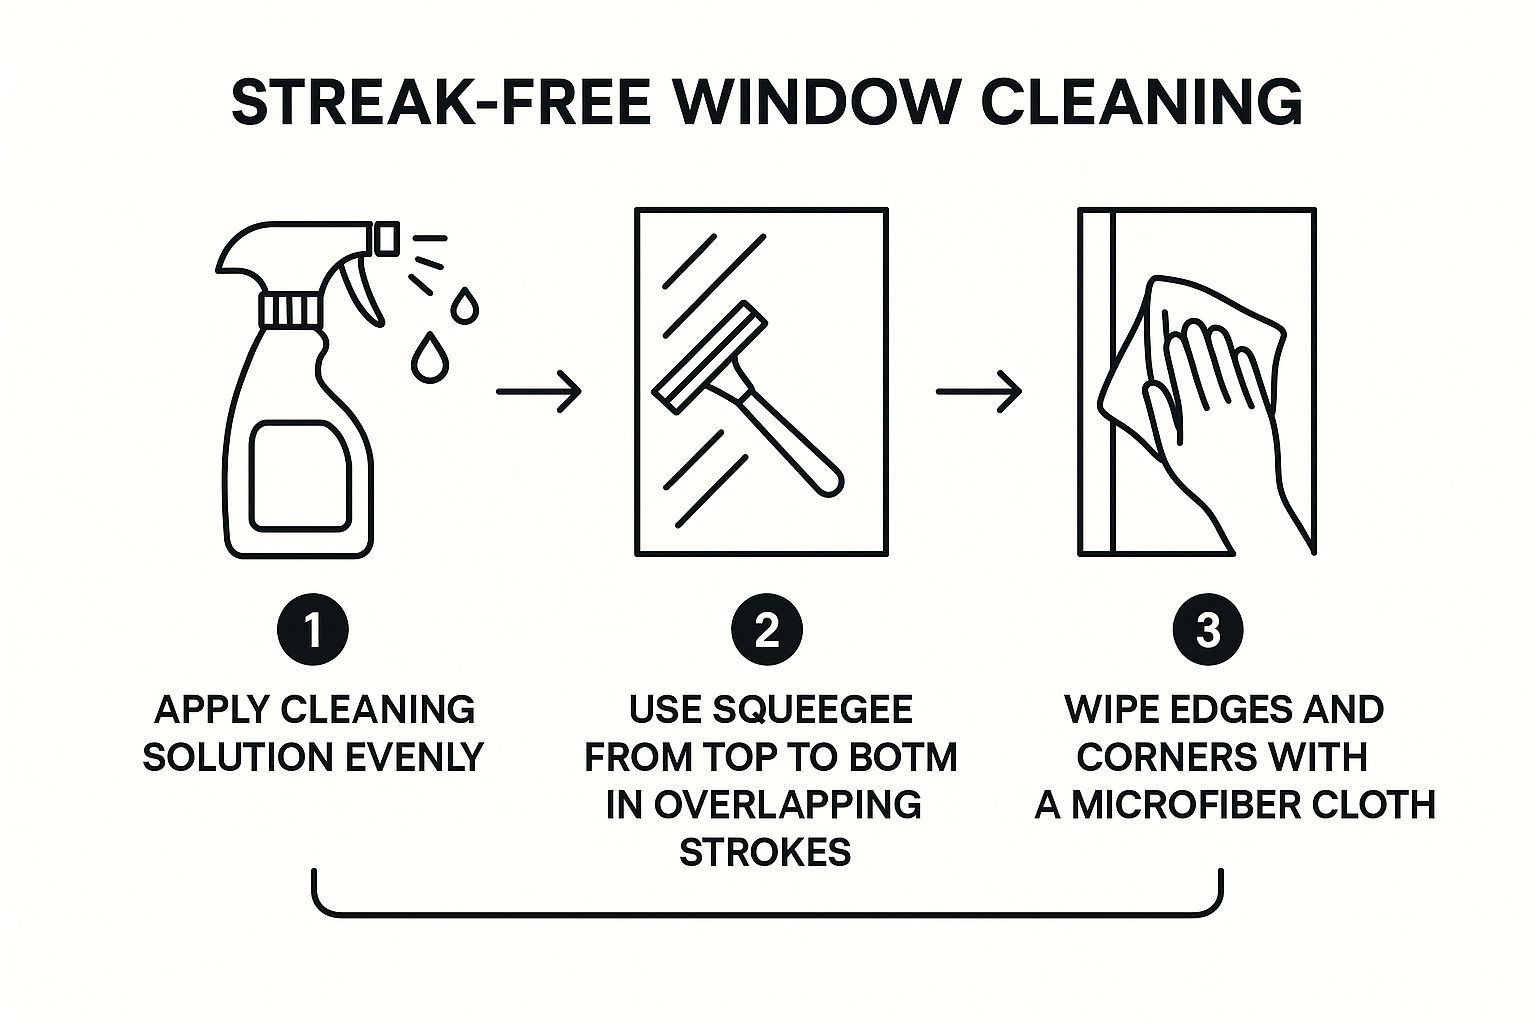
As you can see, the process is a smooth flow from wetting the glass to a controlled removal, finishing with a final detail wipe to catch any runaway drips.
Nailing the Squeegee Angle and Pressure
The single most critical part of your technique is the angle of the squeegee blade against the glass. You’re looking for a consistent 30-degree angle. Think of it this way: if the glass is straight up and down, the bottom of your handle should be angled slightly away from the window.
This specific angle lets the rubber blade act like a tiny snowplow. The leading edge pushes the bulk of the water, while the sharp trailing edge shears the last film of moisture cleanly off the surface.
- Too Steep? If your angle is too sharp (close to 90 degrees), the blade will skip and chatter across the glass, leaving a mess.
- Too Shallow? If it’s too flat, you'll just glide right over the water instead of removing it.
Just as important is the pressure. Keep it light and even. There's no need to muscle it; let the tool do the work and focus on a smooth, gliding motion.
Executing the Classic 'S-Method'
For bigger panes of glass, the "S-Method" (also called fanning) is the absolute gold standard. Instead of making several straight pulls that can leave start-and-stop lines, this technique keeps the blade on the glass from top to bottom.
First, you need a "dry zone." Grab a microfiber cloth and wipe a one-inch strip vertically down one side of the window. This gives your squeegee a clean, dry place to start its first pass without grabbing a wet edge.
Now, place the squeegee in the top corner of that dry zone, angled slightly down. Pull it horizontally across the top of the glass. When you reach the other side, pivot the squeegee downward and pull it back across the pane, making sure to overlap your first stroke by about an inch. Continue this fluid, snake-like motion all the way to the bottom.
It takes a bit of practice, but this is hands-down the fastest and most effective way to clean large windows. If you want to see other techniques, you can explore these 3 proven ways to dry windows without leaving streaks.
The One Habit for a Flawless Finish
Here it is. The single most important habit that separates the pros from the amateurs. After every single pass with the squeegee, you have to wipe the rubber blade clean with a dry cloth. Every. Single. Time.
Crucial Takeaway: If you skip wiping the blade, you're just picking up dirt from one spot and dragging it in a thin, grimy line across the next section. This tiny action is the number one secret to a truly streak-free window.
Forgetting this step is the most common reason people still see faint lines, even with a great squeegee. Make it muscle memory. Pull, wipe, repeat. It’s that simple.
Finally, use a separate, clean detailing cloth to quickly wipe around the edges and corners of the pane. This catches any last drops before they have a chance to run and ruin your perfect finish.
Troubleshooting Common Window Cleaning Headaches
Even when you have the right gear and think you’re doing everything by the book, things can still go wrong. It happens. The real mark of a pro isn't just knowing the technique; it's knowing how to troubleshoot when the windows fight back.
Let's walk through the most common hurdles that pop up and how to get past them for that perfect, streak-free shine.
The Number One Enemy: Direct Sunlight
You’ve probably seen it happen. You're working on a bright, sunny day, and the second your cleaning solution hits the glass, it starts to dry, leaving a hazy, streaky film. This is your biggest foe.
Hot, direct sunlight causes your soapy water to evaporate in seconds. This leaves all the soap and loosened dirt behind before you even get a chance to squeegee it off. It’s a recipe for frustration.
That’s why experienced window cleaners follow a golden rule: always work in the shade. Plan your attack for an overcast day if you can. If not, chase the shade around the house—tackle the east-facing windows in the afternoon and the west-facing ones in the morning. Buying yourself that extra working time is critical.
Getting Rid of Stubborn Gunk (Without Scratching the Glass)
Sometimes, you’ll run into more than just dust and grime. You might find tiny flecks of paint, baked-on bug residue, or sticky tree sap that just won't budge. Your first impulse might be to just press harder with your scrubber, but that's a quick way to put a permanent scratch in the glass.
For these tough spots, the secret weapon is a small pad of #0000 steel wool. That's "four-ought" grade—the finest you can get. It's abrasive enough to lift stuck-on gunk but soft enough that it won't scratch the glass surface itself.
Just remember a few key things:
- Always use it wet. A dry pad can cause micro-scratches. Keep it lubricated with your cleaning solution.
- Test a small spot first. Find an inconspicuous corner and make sure you're getting the result you want.
- Use gentle, circular motions. Let the steel wool do the work; you don't need a lot of muscle.
This is a much safer bet than reaching for a razor blade. One wrong move with a blade can leave a deep gouge that you can't fix.
The Mystery of Those Tiny, Hairline Streaks
This is one of the most maddening problems. You've done everything right—you’re out of the sun, your technique is on point, you’re wiping the blade after every pass—but when the light hits the glass just so, you see it. Faint, hair-thin streaks.
Nine times out of ten, the culprit is your squeegee blade. The rubber edge is the most critical and delicate part of your whole setup. The tiniest, most microscopic nick or a slightly dulled edge will fail to make a perfect seal against the glass, leaving a tell-tale line of water with every pull.
A Pro's Pre-Flight Check: Before you start any job, get in the habit of gently running your fingertip along the sharp edge of your squeegee blade. Do you feel any nicks, bumps, or rough patches? If so, it's time to either flip it over to the fresh side or pop in a new replacement blade.
Don't underestimate this step. A pristine blade is non-negotiable for a flawless finish. It’s a small detail that makes a world of difference between a good job and a perfect one.
Your Window Cleaning Questions Answered
Even after you've mastered the basics, a few questions always seem to surface. Tackling these common hang-ups is the final piece of the puzzle for getting that truly professional, streak-free shine every single time. Let's get them sorted out.
It's so easy to just grab a roll of paper towels, right? I get it, but this is probably the single biggest mistake people make. Paper towels are a one-way ticket to a streaky mess because they disintegrate when they get wet.
What you're left with is a trail of lint and fibers that are practically invisible until the sun hits the glass just right. More than that, they just can't pull water off the glass evenly, which is exactly what causes those frustrating splotches and mineral marks. If you're serious about streak free window cleaning, a quality squeegee is non-negotiable. It's the only tool that whisks away both the dirty water and the grime in one clean sweep.
When and Where to Start Cleaning
Timing really is everything. For most homes, a full interior and exterior cleaning twice a year is a great schedule. I usually recommend spring and fall to tackle the seasonal pollen and dust that builds up.
Of course, if you live near a busy street or have a house full of kids and pets, you'll probably find yourself cleaning the inside glass every month or two to keep fingerprints and smudges at bay.
The other crucial timing question is about the order of operations. You have to clean your screens and tracks before you even think about touching the glass. If you do it the other way around, all that dirt, dust, and gunk sitting in the tracks will get dragged right back onto your spotless pane the first time you open the window.
The right way to do it is to vacuum the tracks first, then give them a good scrub with a brush and your cleaning solution. Pop the screens out, wash them down, and let them dry completely before putting them back. Sticking to this order makes a huge difference.
Solving Streaks on Interior Windows
Ever notice how the outside windows can look perfect, but the inside ones are still stubbornly streaky? This is a common problem, and it's usually caused by a greasy, invisible film that builds up from cooking vapors, household dust, and even off-gassing from paints and furniture.
This grime can be surprisingly tough to cut through. The trick is to make sure you're using a fresh, clean microfiber cloth and solution specifically for the interior glass. Sometimes, it even takes two distinct passes to get them right:
- First Pass: This is your "deep clean" scrub. Your goal here is to break down and lift that oily film off the glass.
- Second Pass: Now you follow up with a careful, precise squeegee pass to pull every last bit of residue off the pane.
This two-step method is often the secret to getting that perfectly clear finish inside. For more tips and tricks, you can read through some of the most common questions about window cleaning we get from our clients.
Tired of battling streaks on your own? The professionals at Sparkle Tech Window Washing have the tools and expertise to give you a flawless finish every time. Contact us today for a free estimate and enjoy crystal-clear views without the hassle. Learn more at https://sparkletechwindowwashing.com.