



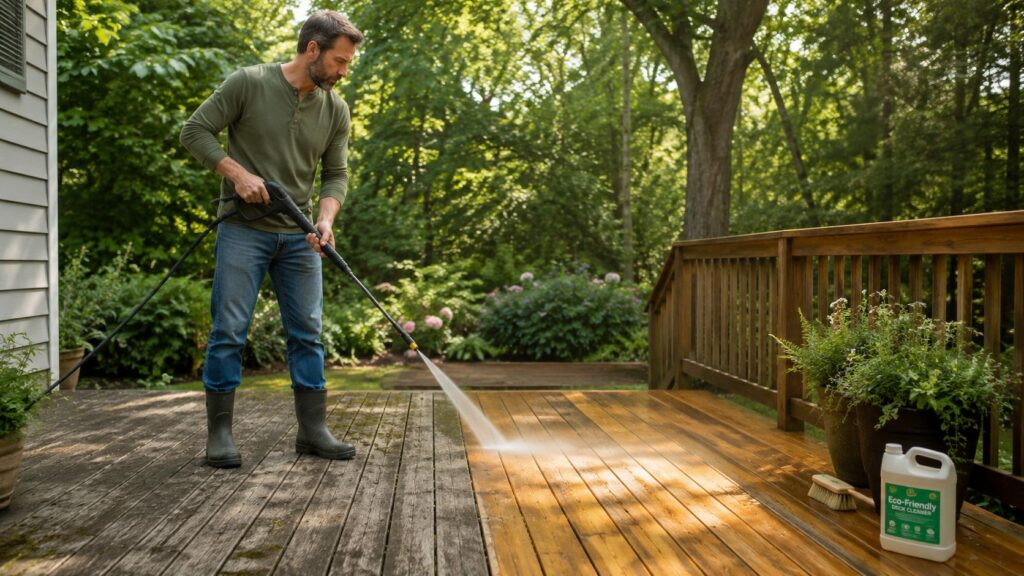
Your deck probably looks close enough to stain right now. The dirt is off, the boards don't look terrible from a distance, and you're ready to move on to the part that changes the color.
That's where most staining jobs go wrong.
A deck finish usually fails long before the stain itself is the problem. It fails because the wood was still damp inside, because the cleaner was too strong, because old residue got left in the grain, or because the surface never got opened up enough for the stain to soak in. If you want a finish that looks even and holds up, you need to clean decking before staining the way a pro does it. That means paying attention to what the wood is telling you, not just blasting it with water and hoping for the best.
If you reach the point where the prep feels bigger than the weekend you've got available, it helps to get deck painting quotes so you can compare what a proper prep-and-finish process should include.
Why Proper Deck Prep is 90% of the Job
A good stain job starts long before the first brush hits the deck. By the time stain goes on, the main work should already be done.
Most homeowners blame the product when a deck turns blotchy, peels early, or wears unevenly. In the field, the cause is usually simpler. The surface wasn't cleaned thoroughly enough, the wood fibers were damaged during washing, or moisture got trapped under the finish. Stain doesn't hide prep mistakes. It makes them obvious.
Practical rule: If the deck isn't porous, clean, sound, and dry, stain won't fix it.
That's why clean decking before staining is less about appearance and more about surface readiness. You're not just removing dirt. You're clearing out mildew, old residue, oxidized fibers, slick mill glaze, and anything else that blocks penetration. A stain that can't sink in properly sits too close to the surface, and surface-level stain doesn't last.
There's also a trade-off DIYers often miss. Being aggressive feels productive, but it can backfire. Too much pressure can scar the boards. Too much chemical strength can rough up the fibers. Too little drying time can ruin the whole job after the deck looked fine the night before.
What prep actually controls
- Adhesion: Cleaner residue, trapped moisture, and glossy wood all interfere with stain bonding.
- Appearance: Uneven absorption causes dark patches, light spots, and lap marks.
- Longevity: Proper prep gives the stain a chance to penetrate instead of forming a weak film on top.
- Texture: The wrong washing method can leave the deck rough before stain even starts.
Homeowners who take prep seriously usually get the result they expected from the stain itself. That's the difference between a deck that looks finished and one that looks freshly coated but already compromised.
Assess Your Deck and Choose the Right Cleaner
A lot of stain jobs are already in trouble before the hose comes out. The homeowner grabs the strongest cleaner on the shelf, treats every board the same, and ends up with fuzzy wood, leftover stain in patches, or a deck that still will not absorb finish evenly.

Start with a real inspection. Look for three things. What is on the wood, what shape the wood is in, and whether the surface is still able to absorb water.
Old semi-transparent stain that is peeling calls for a different product than black mildew, green algae, or plain gray weathering. Newer pressure-treated lumber creates a different problem altogether. It can have mill glaze, a slick factory-burnished surface that looks clean but resists both water and stain. A simple water test tells you a lot. If drops bead up or sit there, the surface is not ready. The wood may need scrubbing, sanding, or both before any stain goes on. If you want a good primer on choosing safe cleaning products and avoiding bad chemical combinations, this guidance on cleaning chemicals is worth reviewing.
Match the cleaner to the problem
This is how I sort it before I price or start the work:
| Deck condition | What it usually means | Better choice |
|---|---|---|
| Flaking old stain or paint | Existing coating is failing | A deck stripper made for removing old finish |
| Green or black growth | Organic contamination | An oxygen-based wood cleaner |
| Gray, weathered boards | Oxidation and ground-in dirt | A wood cleaner, often followed by a brightener |
| New pressure-treated wood | Mill glaze may still be present | Light cleaning, then sanding or firm scrubbing if water beads |
The label on the jug is not enough. “Deck cleaner” can mean a maintenance wash, a bleach-heavy cleaner, or a product that barely touches old residue. Read the use case, dilution range, and dwell time before you mix anything.
New wood is where DIYers get fooled
Fresh boards often look ready because they are clean in the everyday sense. They are not always ready in the staining sense.
Mill glaze blocks absorption. So does leftover treatment moisture in newer lumber. That combination is why a brand-new deck can reject stain, dry blotchy, or wear out early even though it looked perfect on prep day. The pro move is simple. Test absorbency in several spots, especially sunny sections and covered sections, because they do not dry at the same rate.
If water does not soak in, do not assume stronger chemistry will solve it.
Stronger cleaner is not better cleaner
This is one of the most expensive DIY mistakes I see. People mix the cleaner hot, let it sit too long, and mistake surface whitening for progress. Instead, they rough up the grain, weaken the top fibers, or leave themselves with extra neutralizing and sanding.
Use the lightest product that will solve the specific problem. Organic growth needs a cleaner meant for growth. Failing stain needs a stripper. General dirt and oxidation need a wood cleaner, not a harsher mix “just in case.” The trade-off is simple. Go too mild and you do the job twice. Go too strong and the stain highlights every prep mistake.
If your deck stays damp and slick in shaded areas, organic buildup is usually part of the problem even when it is not obvious yet. Good maintenance between staining cycles also helps with preventing green algae on decks.
A good assessment saves labor because it tells you what the wood needs. Wash, strip, scrub, sand, or some combination of those. That decision matters more than the brand name on the stain can.
The Deep Clean Pressure Washing vs Hand Scrubbing
There are two reliable ways to clean decking before staining. Pressure washing and hand scrubbing. Neither is automatically better. The right choice depends on the condition of the wood, how much buildup is present, and whether you can control the method well enough to avoid damage.

When pressure washing makes sense
Pressure washing works well when the deck has embedded grime, cleaner residue that needs flushing out, or stubborn contamination in the grain. It's fast, but only when it's done with discipline.
Professionals recommend 1200 to 1400 psi, a 45-degree tip, and keeping the nozzle 8 to 12 inches from the surface to clean effectively without tearing up the wood fibers, as noted by Westlake Ace Hardware's deck cleaning guidance. That same guidance also notes allowing cleaner to sit for about 15 minutes before scrubbing and rinsing.
If you go tighter, closer, or more aggressive, you can carve lines into the boards. Once that happens, stain exaggerates the damage.
When hand scrubbing is the smarter move
Older decks, softer species, and boards that already show wear often do better with a brush and patience. Hand scrubbing gives you control. You can work the cleaner into problem areas, lift grime without shredding the grain, and avoid the wash marks that inexperienced pressure washer users leave behind.
A long-handle brush is the right tool here. If you're comparing cleanup methods and budgeting out the labor side, this breakdown of pressure washing service cost helps show why machine cleaning isn't always the cheapest option once repair work gets added after damage.
Side-by-side trade-offs
- Pressure washing is better for large decks, heavy buildup, and rinsing cleaner thoroughly.
- Hand scrubbing is better for delicate wood, detailed spot treatment, and owners who don't trust themselves with a washer.
- Pressure washing can fail when the operator gouges the surface or raises the grain.
- Hand scrubbing can fail when the cleaner isn't worked in long enough or rinsed off thoroughly.
Here's the key rule. Pressure washers don't ruin decks. Bad technique does.
For decks in damp or shaded areas, organic growth usually comes back unless the owner changes maintenance habits too. If algae is part of the problem, this piece on preventing green algae on decks is a useful companion to the cleaning process because it focuses on what encourages regrowth after the deck looks clean.
A visual walkthrough can help if you haven't done this before:
Use the least aggressive method that gets the wood clean enough to absorb stain evenly.
That's the part many DIY guides miss. You aren't trying to make the deck look freshly milled. You're trying to make it uniformly receptive to stain.
Crucial Repairs and Sanding for a Perfect Surface
A deck can look clean and still be a bad candidate for stain.
Once the dirt is gone, underlying problems show up fast. Raised grain, loose fasteners, soft boards, old finish hanging on in patches, and hairline splits all become visible. If those issues stay in place, stain does not hide them. It usually makes them stand out harder.
Start with a slow walkover after the deck has dried enough to inspect safely. Look at the surface from more than standing height. Get down near the boards where needed, especially on stairs, around rail posts, and in traffic lanes where people pivot. Press suspect boards with your foot. Check whether screws have backed out, nails have lifted, or board ends are starting to split.
Use a simple inspection pass:
- Fasteners: Reset popped nails, and replace loose fasteners with exterior-rated deck screws if the framing and board are still sound.
- Splinters and raised grain: Mark rough areas so you sand only what needs attention.
- Damaged boards: Replace boards that are cracked through, soft, unstable, or rotted.
- Stairs, rail caps, and transitions: These are high-contact areas, so roughness and movement here get noticed first.
If a board is beyond a quick repair, this guide to deck board repair helps sort out whether it can be resecured or should be replaced.
Why sanding matters more than DIYers expect
Sanding fixes problems washing exposes but cannot solve.

After cleaning, some decks feel fuzzy underfoot. That is raised wood fiber. New boards may also have a slick, factory-milled surface that resists stain. Older decks often have stubborn spots where the previous coating did not come off evenly. A light sanding pass evens out those problem areas so the stain penetrates more consistently instead of flashing dark in one board and light in the next.
That last part matters. A lot of failed stain jobs get blamed on the product, but the actual cause was uneven prep. One section of the deck absorbed well, another was still glazed or rough, and the finish dried patchy.
How to sand without creating new problems
Use 80-grit for most deck boards. That is aggressive enough to knock down fuzzing and open up stubborn spots without polishing the surface too smooth.
Focus on:
- weathered traffic lanes
- furry areas left after washing
- shiny spots on newer lumber
- edges and board ends that catch bare feet
- patches where old finish still clings
Keep the sander moving. Stay with the grain. Do not bear down on one spot trying to make it look perfect. That creates dips and swirl marks, and those defects show up after staining.
The goal is a surface that feels uniform, not slick.
If you sand every board to a furniture finish, stain absorption can get less consistent, especially with semi-transparent products. If you skip sanding where the grain lifted, those rough fibers drink stain differently and leave the color blotchy. Good prep sits in the middle.
The same prep logic applies to other exterior wood surfaces too. This overview of cedar siding upkeep is useful if you are maintaining siding and a deck at the same time, because surface condition controls how evenly exterior finishes soak in and hold up.
One pro habit makes a big difference here. Vacuum or blow off the sanding dust, then run a hand across several boards in different parts of the deck. If the surface feels consistently clean, solid, and lightly textured, the stain has a fair chance to absorb evenly. If one area still feels glossy, furry, or loose underfoot, fix it now instead of hoping the stain will cover it.
The Final Rinse and The Critical Drying Window
The last rinse is where many DIY jobs get compromised, often unnoticed. Cleaner residue left in the grain can interfere with the stain, even if the deck looks clean from standing height.
Rinse until the surface no longer feels slick, and don't forget the board gaps, stair edges, and the lower ends of railings where product can collect. Residue tends to hide in places people don't inspect until the finish flashes oddly after staining.

Surface dry is not dry enough
This is the step people rush because the deck can look ready well before it is.
Verified guidance summarized by Lowe's deck cleaning and staining instructions says most decks need 24 to 48 hours to dry after cleaning, while new pressure-treated lumber is different and is best left 3 to 6 months after installation before cleaning and staining so the treatment can dry and mill scale can weather away. That waiting period matters because fresh pressure-treated wood often isn't ready to absorb finish well, no matter how tempting it is to get the job done early.
Why the drying window matters
Wood holds moisture below the surface after washing. If you stain too soon, that moisture blocks penetration and can push back against the finish as conditions change. The result is familiar: uneven color, soft cure, peeling, or premature failure in high-sun and high-traffic areas.
Use these checks before moving forward:
- Look beyond color: A lighter-looking deck isn't automatically dry inside.
- Check shaded areas: North-facing corners and tight board spacing hold moisture longer.
- Test absorption: Sprinkle a little water on the deck. If it soaks in, the surface is behaving like wood that's ready. If it beads, it still needs attention.
Don't stain on the schedule you hoped for. Stain on the schedule the wood allows.
That patience pays off more than any premium product upgrade. A deck can survive a modest stain applied to properly dried wood. It won't do nearly as well with a better stain locked over trapped moisture.
Common Mistakes and Pro-Level Safety Precautions
The biggest DIY mistake in deck prep is thinking that force solves everything. More pressure. More chemical. More scrubbing. More speed.
That mindset is what ruins wood before stain ever touches it.
The most common version is cleaner strength. Verified guidance from 30 SECONDS warns against using deck cleaner too strong because it can cause wood fuzzing, where wood fibers lift and fray. Once that happens, stain goes on rough and uneven, and the deck often needs sanding just to get back to a usable surface.
What works and what backfires
A short contrast makes this easier to remember:
| What works | What backfires |
|---|---|
| Following the cleaner label dilution | Mixing it hotter because the deck looks extra dirty |
| Soft washing and controlled rinsing | Blasting the boards aggressively |
| Testing a small area first | Committing to the whole deck without checking absorption |
| Protecting plants and adjacent surfaces | Letting runoff travel where it wants |
Safety steps professionals don't skip
Good prep is also controlled prep. That means protecting yourself and the property while you work.
- Wear gloves and eye protection: Deck cleaners and residue runoff can irritate skin and eyes fast.
- Move or cover nearby items: Furniture, metal fixtures, and decorative surfaces shouldn't get sprayed accidentally.
- Pre-wet and protect plants: Surrounding landscaping can be sensitive to runoff, even when the product is used correctly.
- Work in sections: This keeps dwell time and rinsing under control so cleaner doesn't dry where you don't want it.
- Use the right brush: A long-handle deck brush gives pressure without forcing you into a rushed motion. Very hard bristles can be too aggressive on softer wood.
The test spot that saves the job
Before staining the whole deck, test a small inconspicuous area. That one habit catches a lot of hidden problems.
It tells you whether the wood is accepting stain, whether the color looks right on that species and condition, and whether any glossy or contaminated areas still need more prep. A lot of full-deck failures could have been avoided by watching how one board section behaved first.
A cleaner deck is not the same as a stain-ready deck
This is the difference pros learn early. A deck can look clean and still be wrong for stain.
If the fibers are fuzzy, the pores are blocked, the moisture is still inside, or the old coating is still patchy in the grain, the stain won't reward effort. It will expose the shortcuts. Clean decking before staining isn't about making the boards look nice for a day. It's about building the conditions that let the finish soak in, cure properly, and wear evenly.
That's the pro secret, if you want to call it one. Don't chase the fastest route to “clean.” Chase the most controlled route to porous, dry, sound wood.
If you're already putting time into improving the exterior of your home, it makes sense to finish the job with the glass and screens too. Sparkle Tech Window Washing & window screens provides window washing and screen services throughout Arizona, which makes it easier to clean up the whole exterior after deck work, dust, and seasonal buildup.